
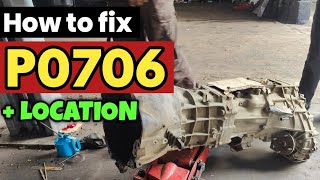
P0706 on 2012-2015 Honda Civic: Transmission Range Sensor Causes and Fixes
On a 2012-2015 Honda Civic, code P0706 is most often caused by a faulty transmission range sensor or its wiring. Before replacing the sensor, carefully inspect the wiring sub-harness between the sensor and the main harness, as it's a known failure point due to stress from engine movement caused by worn motor mounts. Repairing a single broken wire in this harness often resolves the issue.
- P0706 on a 2012-2015 Civic points to a problem with the circuit for the transmission range sensor.
- Before you buy a new sensor, ALWAYS inspect the wiring harness first. A broken wire due to engine movement is a very common cause of this code on this car.
- Symptoms can be severe, including a no-start condition or the transmission getting stuck in one gear.
- If you replace the sensor, it must be properly aligned with the transmission's shift shaft.
- Ensure your motor mounts are in good condition to prevent future wiring damage.
What's Unique About the 2012-2015 Honda Civic
For the ninth-generation Civic (2012-2015), particularly those with the CVT transmission, a notable issue is the wiring sub-harness for the transmission range sensor. Worn or failed motor mounts allow for excessive engine and transmission movement, which puts significant strain on this short wiring harness. This can cause wires to fray or break, often right at the pin inside the connector. This leads to a persistent P0706 code even if the sensor itself is perfectly fine. Many owners have replaced the sensor multiple times only to find the root cause was a broken wire in this specific harness, a common misdiagnosis.
Symptoms You May Notice
- Check Engine Light is on
- Flashing 'D' (Drive) indicator light on the dashboard
- Vehicle will not start (because the PCM doesn't see it's in Park or Neutral)
- Harsh or delayed gear engagement
- Vehicle enters 'limp mode,' often stuck in a single gear
- Inability to shift out of Park
- Reverse lights may not work
- Cruise control may become inoperative
- Replacing the transmission range sensor without first thoroughly inspecting the wiring harness. Many owners replace the sensor, even with an OEM part, only to have the code return because the actual problem is a broken wire in the sub-harness.
Most Likely Causes
- Damaged Transmission Range Sensor Wiring Harness 🔴 High Probability → Shop Transmission Assembly Worn motor mounts allow excessive engine movement, which repeatedly stresses and eventually breaks the wires in the short sub-harness for the sensor, often at the connector pin.
How to confirm: Visually inspect the wiring harness connected to the transmission range sensor, located on the driver's side of the transmission under the air filter box. Gently wiggle each wire near the connector; a broken wire may feel loose or pull out easily. Perform a continuity test on each wire from the sensor connector to the main harness connector.
Typical fix: Repair the broken wire(s) by removing the pin from the connector, soldering the wire back on, and re-inserting the pin. Using a quality butt connector is an alternative. A replacement sub-harness is not commonly available, making repair the most frequent solution.
Est. part cost: $5-$20 for wiring repair supplies - Faulty Transmission Range Sensor (Neutral Safety Switch) 🔴 High Probability → Shop Transmission Assembly The sensor is an electronic/mechanical component that can fail internally over time due to heat, vibration, and moisture. It is located externally on the transmission.
How to confirm: Using a scan tool with live data, monitor the sensor's output while moving the gear selector through each position. If the reading is erratic or doesn't correspond to the selected gear (and wiring is confirmed good), the sensor is likely faulty. A bench test can also be performed with a multimeter to check for correct continuity in each gear position according to the service manual.
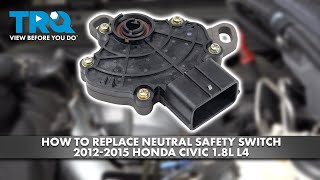
Typical fix: Replace the transmission range sensor. This requires putting the transmission in Neutral and ensuring the new sensor is installed in the Neutral position, often by using a 2.0 mm (0.08 inch) feeler gauge 🎬 Learn how to replace the sensor without using special tools. or pin for alignment.
Est. part cost: $40-$180 - Misadjusted Shift Cable or Linkage 🟡 Medium Probability
How to confirm: Check if the gear indicator on the dashboard matches the actual gear selected. If there is a mismatch or excessive play in the shifter, the cable may be out of adjustment, causing the sensor to report an incorrect position.
Typical fix: Adjust the shift linkage cable according to the factory service manual procedure. This ensures the manual valve shaft on the transmission is in the correct detent for the gear selected.
Est. part cost: $0 - Low or Dirty Transmission Fluid ⚪ Low Probability → Shop Transmission Assembly
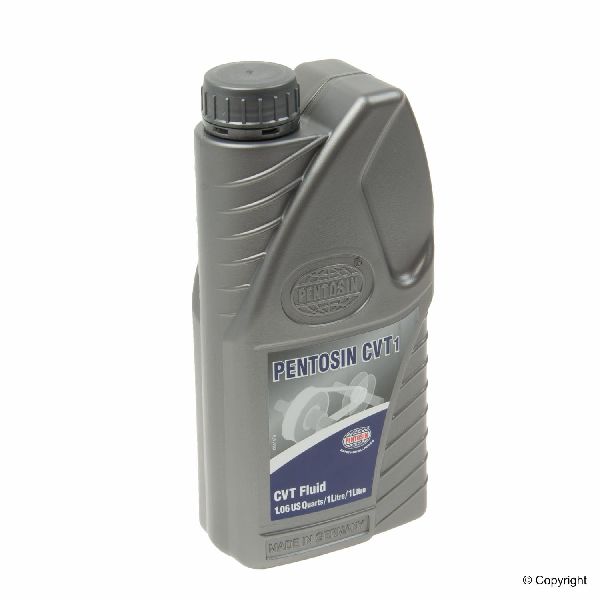
How to confirm: Check the transmission fluid level and condition. For CVT models, there is no dipstick; level is checked via a check bolt on the side of the transmission. The fluid should be the correct Honda HCF-2 CVT fluid, not brown, black, or burnt-smelling.
Typical fix: Perform a transmission fluid drain and fill with the correct Honda HCF-2 Continuously Variable Transmission Fluid. This is unlikely to fix P0706 on its own but is critical for overall transmission health and can resolve other shifting issues.
Est. part cost: $50-$100 for fluid
Rare But Worth Checking
- Faulty Powertrain Control Module (PCM): This is extremely rare and should only be considered after all other possibilities (sensor, wiring, adjustment) have been exhaustively ruled out by a professional.
Diagnosis Steps
- Read the fault codes with an OBD-II scanner. Note if P0706 is present along with P0705 or P0700.
- Check the transmission fluid level and condition. Ensure it is clean, full, and the correct type (Honda HCF-2 for CVT models).
- Using a scan tool with live data (like the Honda HDS), monitor the parameter for the Transmission Range Sensor.
- Slowly move the gear selector through P, R, N, D, etc. and verify that the sensor reading on the scan tool matches the shifter position instantly and without glitches. An incorrect reading points to the sensor, wiring, or adjustment.
- Locate the transmission range sensor on the driver's side of the transmission. It is often necessary to remove the air filter housing for access.
- Crucial Step for this vehicle: Closely inspect the sensor's electrical connector and the short sub-harness. Look for corrosion, pushed-out pins, or broken wires. Gently tug on each wire at the back of the connector to see if it has broken internally. This is the most common failure point.
- If wiring is suspect, perform a continuity test on each wire between the sensor and the main harness. Repair any open circuits.
- If the wiring is confirmed good, check the adjustment of the shift cable to ensure the sensor's position accurately reflects the shifter's position.
- If the wiring and adjustment are good, but the signal is still incorrect, the Transmission Range Sensor is the most likely culprit and should be replaced.
- When replacing the sensor, ensure the transmission is in Neutral and the new sensor is properly aligned to the Neutral position before tightening the bolts. A 2.0 mm (0.08 in) feeler gauge can be used to lock the sensor in the neutral position during installation.
- If a new sensor and known-good wiring do not resolve the issue, advanced circuit testing (voltage drop, resistance) of the harness to the PCM may be required. PCM failure is a last resort.
Parts You'll Likely Need
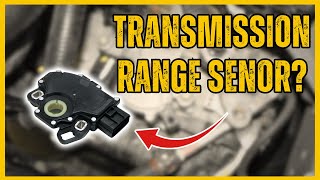
- Transmission Range Sensor
(OEM #28900-R9L-004)— This sensor is the most common part replaced for a P0706 code, though it may not always be the root cause. This part number is for models with the CVT transmission, which are most affected.
Trusted brands: Honda (Genuine), Beck/Arnley, Duralast, Rostra
OEM price range: $120-$180
Aftermarket price range: $40-$90 - Wiring Repair Supplies — Because the sub-harness wire is a very common failure point, supplies like solder, butt connectors, and heat shrink tubing are often needed for the actual fix. A dedicated sub-harness part is not readily available from Honda.
Trusted brands: N/A
OEM price range: N/A
Aftermarket price range: $5-$20
Related Codes That Often Appear With This One
- P0705 — This code for 'Transmission Range Sensor Circuit Malfunction (PRNDL Input)' is very similar and points to the same sensor and circuit, often appearing alongside P0706. 🎬 See how to diagnose the range sensor circuit for these codes.
- P0700 — This is a generic Transmission Control Module (TCM) fault code, which simply indicates that the TCM has stored a transmission-specific fault, such as P0706.
Technical Service Bulletins (TSBs) & Recalls
- While no TSB is specifically for P0706 on the Civic, Honda Service Bulletin 13-053 addresses a surge, hesitation, or judder on 2013-2014 Accords with the L4 CVT engine by updating software and hardware. This is relevant context as it shows Honda has addressed other CVT control issues from this era, though it does not directly solve the P0706 wiring problem common to the Civic.
Platform-Specific Known Issues
- A well-documented issue on 2013 Civics (and applicable to the 2012-2015 range) is that failed or worn motor mounts allow the engine/transmission assembly to move excessively. This repeated movement strains and eventually breaks the wires in the transmission range sensor's sub-harness, causing an open circuit and a P0706 code.
Mechanic-Grade Diagnostic Values
- Transmission Range Switch Continuity Test — expected: A service manual provides a table of which terminals should have continuity in each gear position (P, R, N, D, S, L). This is the definitive bench test for the sensor itself.. Failure: If continuity does not match the service manual's chart for any gear position, the sensor is faulty and should be replaced.
- Transmission Range Sensor Live Data (Scan Tool) — expected: Using a capable scanner like the Honda HDS, the displayed gear position (e.g., ATP, ATN, ATR) should switch to 'ON' and match the physical gear selector position as you move it.. Failure: If the displayed gear on the scan tool is incorrect, does not change, or shows multiple positions as 'ON' simultaneously, it indicates a fault in the sensor or its circuit.
- PCM Connector Voltage Test (Advanced) — expected: With the ignition ON, specific voltage readings should be present at the PCM connector pins corresponding to each gear position (e.g., pin C20 for Drive, C10 for Reverse).. Failure: An absence of expected voltage at a specific pin when in that gear (and wiring is confirmed good) points towards an internal PCM driver issue, though this is rare.
Scan Tool Commands That Help
- Honda Diagnostic System (HDS): Live Data Monitoring for Transmission Range Switch — This is the primary diagnostic step to see what the PCM is seeing from the sensor. It allows a technician to compare the physical shifter position to the electronic signal in real-time to confirm a discrepancy.
- Honda Diagnostic System (HDS): Clear DTCs / Reset PCM — After a repair (like fixing a wire or replacing the sensor), the PCM memory must be cleared to turn off the Check Engine Light and confirm the fix is successful.
Wiring & Ground Locations
- G101 — Located on the left rear of the engine.. This is a primary ground point for the engine and transmission components, including the PCM. A poor or corroded G101 ground can cause erratic sensor readings and various electrical faults, including P0706.
- Transmission Range Sensor Connector — On the transmission range sensor, located on the driver's side of the transmission, typically under the air intake box.. This connector and its associated sub-harness are the most common failure points. Wires often break right at the back of the connector due to stress from engine movement.
- PCM Connectors A & C — At the Powertrain Control Module (PCM).. Advanced diagnosis involves checking for continuity and voltage directly at the PCM connector pins (e.g., A23, A24 for ground; C10, C12, C20 for gear signals) to isolate a problem between the sensor and the PCM.
Real Owner Repair Stories
- Reddit user 'modessitt' (Vehicle year not specified, but user 'Confident-Kudu-122' references a 2013 Civic in the same thread with the identical problem.) — Persistent P0706 code, Check Engine Light, and cruise control became inoperative.
❌ Tried (didn't work) Replaced the transmission range sensor with an aftermarket part., Replaced the sensor a second time with a genuine OEM Honda part.
✅ What actually fixed it The user inspected the short sub-harness between the main harness and the sensor. While wiggling the wires, one broke off easily from its pin in the connector. The user pulled the pin, re-soldered the wire, and reinstalled it. This permanently fixed the P0706 code and restored cruise control function. - NHTSA ODI #10544028 — While involving a different model, a manufacturer owner report highlights that transmission failures have been reported in connection with codes P0705 and P0706, with repair costs cited as high as $4800 for a full transmission replacement.
Model Year Variations Within This Range
- 2012-2013: These model years primarily used a conventional 5-speed automatic transmission.
- 2014-2015: For the 2014 model year refresh, Honda replaced the 5-speed automatic with a Continuously Variable Transmission (CVT) for most non-Si trims. The P0706 wiring harness issue is most commonly associated with these CVT models. The range sensor part number 28900-R9L-004 is specific to the CVT.
Diagnostic Flowchart
Used vs. New Parts: Buying Guide for This Vehicle
When a used part is the smart pick: A used wiring harness pigtail from a junkyard is a very smart choice. If your connector housing is damaged or a wire has broken off too short to repair, sourcing a used pigtail allows you to splice in a factory-quality connector with ample wire length, which is often a more robust repair than trying to re-pin a single damaged wire.
Donor-vehicle mileage cap: roughly under 120000 miles for the part to have meaningful remaining life.
What to inspect on the donor part:
- For a wiring pigtail, ensure the connector is not cracked or brittle.
- Check that at least 6-8 inches of wire is attached to the connector.
- Gently tug on each wire to ensure none are already broken internally at the connector base.
- Avoid parts from vehicles with obvious signs of major front-end collision damage.
OEM-only on this vehicle (don't cheap out):
- Motor Mounts: Forum users strongly advise against using aftermarket motor mounts, reporting that they fail to absorb vibration properly, leading to a harsh ride and potentially causing the very wiring stress that leads to P0706.
Aftermarket brands forum-validated for this vehicle:
- For the sensor itself, brands like Beck/Arnley and Rostra are generally considered reliable alternatives to OEM.
Brands owners have reported issues with on this vehicle:
- While not brand-specific, some owners have reported immediate or premature failure from the cheapest available unbranded sensors found on sites like eBay or Amazon, sometimes being defective right out of the box.
Real Owner Stories
Aggregated from forums and TSBs cited above. Mileages and costs reflect what owners reported in those sources.
2013 Honda Civic
Symptoms: Check Engine Light with P0706 code and the cruise control was not working.
What fixed it: After replacing the sensor twice with no success, the actual fix was soldering a broken wire in the sensor's sub-harness right at the connector pin. The failure was caused by strain from worn motor mounts.
Source hint: Reddit r/HondaElement - P0706 - I've replaced the range sensor twice and still getting the code
Related OBD-II Codes
Frequently Asked Questions
I replaced the transmission range sensor on my 2013 Civic, but the P0706 code came back. What's the most likely cause?
What type of transmission fluid does my 2012-2015 Civic use, and can the wrong fluid cause a P0706?
Is there a special alignment procedure for the transmission range sensor on this Civic?
Where is the transmission range sensor located on a 2012-2015 Honda Civic?
Is there an official Honda TSB for the P0706 code on the 2012-2015 Civic?
My 2014 Acura ILX has a P0706 code. Is the diagnostic information for the Civic applicable?
Helpful Videos

We Have This Part in Stock


The information in this article is provided for general reference and educational purposes only. Vehicle specifications, procedures, and part compatibility can vary by production date, trim level, and region. Always consult your vehicle's factory service manual and verify part numbers before purchasing or performing repairs. Safety-critical components such as airbags, seat belts, and braking systems should be installed by a qualified professional.
- Honda Civic:
- 🧭 Diagnostic Flowchart
- 🎬 Helpful Videos
- 🛍️ Shop This Part
- What's Unique About the 2012-2015 Honda Civic
- Symptoms You May Notice
- Most Likely Causes
- Rare But Worth Checking
- Diagnosis Steps
- Parts You'll Likely Need
- Related Codes That Often Appear With This One
- Technical Service Bulletins (TSBs) & Recalls
- Platform-Specific Known Issues
- Mechanic-Grade Diagnostic Values
- Scan Tool Commands That Help
- Wiring & Ground Locations
- Real Owner Repair Stories
- Model Year Variations Within This Range
- Used vs. New Parts: Buying Guide for This Vehicle
- Real Owner Stories
- 2013 Honda Civic
- Related OBD-II Codes
- Frequently Asked Questions
- 🎟️ Get 5% Off