
OBD-II Code P0806: Clutch Position Sensor Circuit Range/Performance
What P0806 means, why it triggers, and how to fix it
- Code P0806 triggers when the Powertrain Control Module (PCM) receives an erratic or out-of-range voltage signal from the clutch position sensor.
- A faulty sensor creates a severe safety hazard by allowing the engine to start in gear without the clutch pressed, or leaving you stranded with a no-crank condition.
- Replacing the clutch position sensor resolves 80% of P0806 codes, costing between $105 and $225 for parts and labor.
- Never replace a starter motor for a no-crank symptom with an active P0806 code; the PCM is intentionally disabling the starter due to the sensor fault.
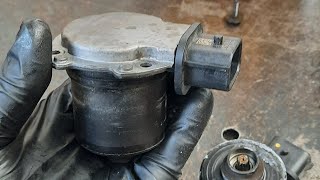
- On 2012-2018 Ford Focus models with the DPS6 automatic transmission, P0806 indicates a failed clutch actuator motor (Part AE8Z-7C604-A), not a pedal sensor.
What Does P0806 Mean?
The Powertrain Control Module (PCM) detected an illogical, erratic, or out-of-range voltage signal from the clutch position sensor. This sensor tells the computer whether the clutch pedal is pressed. When the signal doesn't match the expected voltage sweep during pedal movement, the P0806 code triggers.
Technical definition: SAE/OBD-II defines P0806 as "Clutch Position Sensor 'A' Circuit Range/Performance". The PCM or Transmission Control Module (TCM) receives a voltage signal from the clutch position sensor circuit that falls outside the manufacturer's specified range, performs erratically, or remains static when the pedal moves. The PCM relies on this critical safety input to authorize engine startup and disengage cruise control.
Can I Drive With P0806?
No — Do Not Drive. Driving is not recommended. The primary safety risk is the engine starting without the clutch being pressed, causing the vehicle to lurch unexpectedly and potentially strike an object or person. Conversely, if the sensor fails in a way that prevents the engine from starting, you will be stranded. Cruise control is also disabled.
Common Causes
- Faulty Clutch Position Sensor (CPS) (Very Common) — The sensor itself is the most frequent failure point. Internal components like potentiometers or Hall effect sensors wear out, break, or develop dead spots, sending incorrect, intermittent, or zero signal to the computer. 🎬 Watch: How to fix the clutch position sensor circuit range performance.
- Misadjusted Clutch Position Sensor or Pedal (Common) — If the sensor, pedal, or clutch master cylinder was recently replaced or adjusted, incorrect alignment causes the sensor to report a position that contradicts the pedal's actual state.
- Damaged or Corroded Wiring/Connectors (Common) — Wires leading to the sensor or the connector itself become damaged, frayed, shorted, or corroded from moisture and dirt. Internal wire breaks within the harness insulation also disrupt the signal.
- Clutch Pedal Travel Issues (Hydraulics/Spring) (Less Common) — A leaking clutch master/slave cylinder or a broken pedal return spring prevents the clutch pedal from returning to its resting position. The sensor reads partial engagement even when released, triggering the code.
- Blown Fuse or Poor Ground (Less Common) — The sensor circuit requires a stable voltage supply and a clean ground. A blown circuit fuse or a corroded, loose ground strap causes erratic voltage readings.
- Mechanical Interference or Debris (Rare) — A bunched-up floor mat or debris physically prevents the clutch pedal from moving through its full range, stopping the sensor from reporting the expected voltage sweep.
- Faulty Powertrain Control Module (PCM) (Rare) — Rarely, the PCM fails and cannot correctly interpret the sensor signal. Consider this only after exhaustively testing the wiring and sensor.
Symptoms
- Check Engine Light On — The Malfunction Indicator Lamp (MIL) illuminates on the dashboard. A transmission warning light may also appear.
- Engine Will Not Start — The clutch position sensor acts as a safety interlock. If the computer doesn't receive the correct signal confirming the clutch is pressed, it prevents the engine from cranking.
- Engine Starts Without Pressing Clutch — A faulty sensor incorrectly tells the computer the clutch is pressed when it isn't, allowing the engine to start in gear. This major safety hazard causes the vehicle to lurch unexpectedly.
- Cruise Control Inoperative — The cruise control system uses the clutch sensor's signal to disengage. If the signal is faulty or illogical, the cruise control system is disabled.
- Hard or Jerky Gear Shifts — The PCM uses clutch position data to manage engine RPMs for smoother shifts. A faulty signal contributes to rough shifting or engine stumbling between gears.
Diagnostic Flowchart
Tap your situation to follow the diagnostic path that matches what you're seeing on this code.
Common Fixes & Costs
- Replace Clutch Position Sensor — Parts: $25-$75, Labor: $80-$150, ~1.0 hr book time (DIY)
- Adjust Clutch Position Sensor/Pedal — Parts: $0, Labor: $60-$100, ~0.5 hr book time (DIY)
- Repair Wiring or Connector — Parts: $10-$50, Labor: $100-$250, ~1.5 hr book time (Intermediate)
- Replace Clutch Master Cylinder — Parts: $50-$150, Labor: $150-$300, ~2.0 hr book time (Intermediate)
- Clean Ground Connection / Replace Fuse — Parts: $1-$10, Labor: $30-$80, ~0.5 hr book time (DIY)
DIY vs Professional
- Replace Clutch Position Sensor 🟢 Beginner
Tools: Basic hand tools (socket set, screwdrivers), flashlight, trim removal tools. - Repair Wiring or Connector 🟢 Beginner
Tools: Multimeter, wire strippers, crimpers, heat shrink tubing, soldering iron, wiring diagrams. - Adjust Clutch Position Sensor/Pedal 🟢 Beginner
Tools: Basic hand tools (wrenches, socket set). - Replace Clutch Master Cylinder 🟢 Beginner
Tools: Socket set, wrenches, line wrenches, fluid catch pan, brake fluid, vacuum bleeder. - Clean Ground Connection / Replace Fuse 🟢 Beginner
Tools: Socket set/wrenches, wire brush, dielectric grease, fuse puller.
Used vs. New Parts: Buying Guide
When a used part is worth it: Buying a used clutch position sensor is not recommended. The savings ($10-$30) do not justify the risk of installing a part near the end of its service life or with an undetectable intermittent fault.
Donor-vehicle mileage cap: roughly under 50000 miles for the part to have meaningful remaining life.
Donor quality checklist:
- Verify the part number exactly; multiple versions exist for the same model.
- Avoid parts from vehicles in rust-belt states due to connector corrosion.
- Obtain the part from a complete clutch pedal assembly to ensure correct mounting hardware.
Decision logic:
- If The part is under $100 new (typical for this sensor) → Always buy new. The warranty and reliability outweigh the small savings.
- If The vehicle is very old and a new OEM or aftermarket part is discontinued → A used part from a low-mileage, accident-damaged vehicle is an acceptable last resort.
- If The sensor is integrated into a larger, expensive assembly (like a pedal box) → A used assembly is cost-effective, but you assume risk regarding the sensor's condition.
Warranty tradeoff: Salvage yard parts carry a 30-90 day warranty covering only the part. New aftermarket parts carry a 1-year to limited lifetime warranty. New OEM parts offer a 1-2 year warranty.
Worst-case if a used part fails: $150-$300 if a used sensor fails after installation, requiring repeat labor costs for diagnosis and replacement.
What Happens If You Wait — Timeline
- 0-2 Weeks: Check Engine Light illuminates and cruise control is disabled. The vehicle has an intermittent no-start or occasionally starts without the clutch pressed. (MPG impact: 0%% · Added cost: $0)
- 2 Weeks - 2 Months: The intermittent no-start condition becomes more frequent. Repeated cranking attempts put excessive strain on the starter motor and battery. (MPG impact: 0%% · Added cost: $50-$400 (Potential for premature wear on starter or battery))
- 2-6 Months: The fault becomes permanent. The vehicle will not start at all, requiring a tow, or it reliably starts without the clutch, creating a constant safety hazard. (MPG impact: 0%% · Added cost: $100-$250 (Cost of a tow if stranded away from home))
- 6+ Months: An unexpected lurch from starting the car in gear causes a low-speed collision. The cost of the P0806 repair becomes negligible compared to the cost of the accident. (MPG impact: 0%% · Added cost: $500 - $10,000+ (Cost of property damage, insurance deductible, or injury))
Cost of Not Fixing It
- Immediate: The vehicle fails to start, leaving you stranded. Alternatively, it starts in gear, causing an unexpected lurch and potential accident. Cruise control is disabled. (Added cost: $0 - $1000+)
- 1-3 months: Continued attempts to start a vehicle with an intermittent no-crank condition places excessive strain on the starter motor and battery, leading to premature failure. (Added cost: $300 - $800)
- 3+ months: Ignoring the safety risk is the biggest cost. A vehicle that starts in gear is a significant hazard. The primary costs relate to safety, inconvenience, and potential failure of starting-system components. (Added cost: Varies (potential for property damage or injury))
Diagnosis Steps
- Read Codes and Live Data
Use an OBD-II scanner to confirm P0806 and check for related codes (P0805, P0807). Watch the live data for the clutch position sensor (PID 'CPP'). Press and release the pedal slowly; the percentage must change smoothly from 0% to 100%, and voltage should sweep linearly (e.g., 0.5V to 4.5V) without dropouts.
Tools: OBD-II Scanner with Live Data (Beginner) - Visual Inspection of Pedal Assembly
Inspect the clutch pedal bracket for a broken return spring, binding linkage, or leaking master cylinder. Check the sensor for physical damage, loose mounting, or water intrusion. Ensure floor mats do not obstruct pedal travel.
Tools: Flashlight (Beginner) - Test Sensor Circuit with Multimeter
Backprobe the sensor's connector with the key on, engine off. Verify the reference voltage is exactly 5V (± 0.5V) and the ground circuit shows near 0V. Probe the signal wire; voltage must change smoothly as you press the pedal. Missing reference voltage or bad ground indicates a wiring or PCM fault.
Tools: Digital Multimeter, Vehicle-specific wiring diagram (Intermediate) - Perform a Wiggle Test
While monitoring live data or multimeter voltage, physically wiggle the sensor's wiring harness and connector. Jumping, dropping, or erratic readings confirm an intermittent connection or partially broken wire requiring repair.
Tools: OBD-II Scanner or Digital Multimeter (Intermediate) - Check Wiring for Continuity
Disconnect the battery, sensor connector, and PCM connector. Measure resistance (Ohms) on the signal, reference, and ground wires between the sensor and PCM connectors. Readings must be under 1 ohm. Check for shorts to ground or power on the signal wire (should read 'OL').
Tools: Digital Multimeter, Vehicle-specific wiring diagram (Advanced) - Test Sensor Resistance Sweep
Disconnect the sensor harness. Measure resistance between the signal and low reference terminals on the sensor. Slowly press the clutch pedal; resistance must sweep smoothly without sudden jumps or 'OL' dropouts. Erratic readings confirm internal sensor failure.
Tools: Digital Multimeter, Sensor Pinout Diagram (Advanced) - Analyze with an Oscilloscope
Connect an oscilloscope to the sensor's signal wire. A healthy sensor produces a clean, smooth ramp waveform during pedal movement. Noisy signals with glitches or sudden spikes confirm a failing sensor that a multimeter reacts too slowly to catch.
Tools: Digital Oscilloscope (Advanced)
When This Code Triggers (Freeze-Frame Conditions)
- Engine Coolant Temp: 175-210°F (The code often sets when the engine is at full operating temperature.)
- RPM: 0 or 700-800 RPM (The fault is commonly detected during the engine start-up sequence (crank or initial idle) when the PCM checks the clutch status.)
- Vehicle Speed: 0 mph (Consistent with a start-up failure, the vehicle is stationary when the fault is logged.)
- System Voltage: 11.8-12.5V (The test runs with the key on, engine off, or during cranking, so voltage is slightly lower than normal charging system voltage.)
Related Codes
- P0805 — P0805 is a general circuit malfunction indicating an open or short. P0806 specifically indicates the sensor's output is irrational or doesn't match the pedal's movement.
- P0807 — P0807 indicates the signal voltage is consistently below the expected range (stuck near 0V), often a short to ground. P0806 is for an erratic or illogical signal.
- P0808 — P0808 indicates the signal voltage is consistently above the expected range (stuck near 5V), indicating a short to power. P0806 is for a signal that sweeps incorrectly.
- P0704 — P0704 is an older, generic code for a clutch switch input circuit malfunction. P0806 is more specific, pointing to a 'Range/Performance' problem where the signal doesn't match the pedal position.
Climate & Environmental Factors
- Humidity and Moisture: High humidity or direct water intrusion causes corrosion on the sensor's electrical connector pins. This increases resistance and causes erratic signals, triggering P0806.
- Road Salt (Cold Climates): Salt spray accelerates corrosion of wiring harnesses and ground points exposed under the vehicle. A corroded ground connection causes fluctuating voltage and performance codes.
- Extreme Cold: Extreme cold causes plastic and rubber components, like wire insulation or connector seals, to become brittle and crack, exposing wires to the elements.
How to Talk to a Mechanic About This Code
Say this: "I have a P0806 code and my car is intermittently not starting. I'd like to book a diagnostic appointment. Please check the clutch position sensor's live data, its 5-volt reference, and ground connection before recommending a replacement part."
This shows you've done your research and guides the technician toward a proper diagnostic path, preventing them from jumping to conclusions like a bad starter.
Avoid saying:
- 'My car won't start, I think it's the starter.'
- 'Just replace the clutch sensor.'
- 'My check engine light is on, can you just fix it?'
Questions to ask before authorizing the repair:
- What did the live data for the clutch position sensor show when you pressed the pedal?
- Did you confirm the sensor has a good 5-volt reference and ground?
- Is a 'clutch relearn' procedure required after this repair, and is that included in the cost?
- What is the warranty on the parts and labor for this repair?
Where to Take It: Dealer vs Independent vs Chain
- Dealer:
Recommended if your vehicle is a known special case or if you want the highest assurance of a correct diagnosis and OEM parts.
Best for: Vehicles under warranty., Vehicles with known, complex TSBs for this code (e.g., Ford Focus with DPS6, C6 Corvette)., Repairs that require a manufacturer-specific 'relearn' procedure that an independent shop's scanner might not support.
Downsides: Highest labor rates., May prefer to replace a whole assembly rather than just the sensor. (Typical cost: +50% vs. baseline) - Independent Shop:
Best overall fit for most vehicles. A good independent shop easily handles a P0806 diagnosis and repair at a significant cost savings over the dealer.
Best for: Out-of-warranty vehicles where the cause is likely a straightforward sensor or wiring issue., Getting a second opinion on a dealer's expensive quote.
Downsides: Shop quality and diagnostic tool capability vary widely., May not have experience with manufacturer-specific quirks for this code. (Typical cost: +0% vs. baseline) - Chain Shop:
AVOID for initial diagnosis. A chain shop is acceptable only if you have confirmed the sensor itself is bad and it's a simple swap not requiring a relearn procedure.
Best for: Simple, pre-diagnosed repairs like replacing an easily accessible sensor.
Downsides: Technician skill varies dramatically., Often lack the advanced diagnostic tools for electrical troubleshooting or relearn procedures., High pressure to upsell leads to unnecessary repairs. (Typical cost: -10% vs. baseline)
When to Walk Away From the Repair
If the estimated repair cost exceeds 40-50% of the car's Kelley Blue Book (KBB) private-party value, consider selling or trading it in instead of repairing.
- Car worth $4000, fix is $300: Fix it. This is a relatively minor cost to keep a functional vehicle on the road.
- Car worth $8000, fix is $1200: Fix it. The repair cost is only 15% of the vehicle's value, well below the threshold.
- Car worth $3000, fix is $1500: Walk away. The repair cost is 50% of the car's value. It's not economically sensible to proceed.
What Scan Tool You Need for This Code
Minimum: A scanner that reads and graphs live data for the clutch position sensor PID.
A basic $20 code reader only shows the P0806 code, not the live sensor data. Without seeing if the sensor's voltage changes smoothly as you press the pedal, you are guessing at the problem.
Budget: BlueDriver Pro (~$100) — Connects to your smartphone and graphs live data for the clutch position sensor. This is the minimum required to properly diagnose if the sensor signal is erratic.
Mid-range: Foxwell NT604 Elite / NT624 Elite (~$120) — Provides live data graphing in a robust handheld unit that doesn't rely on a phone and offers wider system diagnostics.
Professional: Autel MaxiCOM MK808S / MK808BT (~$450-550) — Offers full bidirectional control. This is critical for vehicles like GM that require a 'Clutch Pedal Position Learn' procedure after sensor replacement.
Rent vs buy: Buying a budget scanner with live data is a smart investment. If your vehicle requires a 'relearn' procedure, the cost of a mid-range bidirectional tool is often less than one hour of diagnostic labor at a dealership.
How to Clear the Code After You Fix It
- Reconnect the battery if disconnected for the repair.
- Use a compatible OBD-II scan tool to erase the diagnostic trouble codes.
- Perform the 'Clutch Pedal Position Learn' procedure with a bidirectional scan tool (mandatory on most GM vehicles).
- Perform a complete drive cycle to allow the vehicle's readiness monitors to run.
Drive cycle (~20 minutes): Start the engine from a cold start and let it idle for 2-3 minutes. Drive in mixed city/highway conditions, including several slow-to-moderate accelerations and decelerations, allowing the clutch to be used through its full range of motion. Include 5 minutes of steady-speed driving at 55 mph. Allow the vehicle to cool down completely.
Readiness monitors affected: Comprehensive Component Monitor (CCM)
Before emissions retest: drive at least 50 miles to fully set monitors.
Watch out for:
- Disconnecting the battery does not clear the code from the PCM's permanent memory and resets all readiness monitors, guaranteeing an emissions test failure.
- The code returns immediately on the next start-up attempt if the root cause remains unfixed.
- Forgetting to perform a manufacturer-specific relearn procedure after sensor replacement causes the code to persist.
Will This Fail Emissions / State Inspection?
Yes — this code typically fails an OBD-II emissions inspection.
- California: An active Check Engine Light for any code, including P0806, results in an automatic smog inspection failure. All readiness monitors must be 'Ready'.
- New York: The NYS vehicle inspection includes an OBD-II scan. A P0806 code causes an automatic emissions failure.
- Texas: In counties requiring emissions testing, an illuminated Check Engine Light for P0806 is an automatic failure.
Most Commonly Affected Vehicles
- Ford Focus (2012-2018) — On models with the DPS6 PowerShift automatic transmission, P0806 is caused by a faulty clutch actuator motor, not a traditional clutch sensor. Swap the upper and lower actuators to see if the code changes to P0809. The OEM part number is AE8Z-7C604-A.
- Chevrolet Corvette (2005-2013) — Prone to issues with the clutch master cylinder leaking or failing, preventing the pedal from fully returning. A broken pedal return spring is also a known issue. The entire clutch pedal assembly may require replacement.
- Chevrolet Cruze (2011-2016) — Commonly affected by sensor failure or wiring issues in the circuit. If the code returns after sensor replacement, it indicates a wiring problem or a missed relearn procedure.
- Hyundai Veloster (2012-2017) — Issues with the clutch position sensor are common, sometimes related to broader engine wiring harness issues subject to service campaigns.
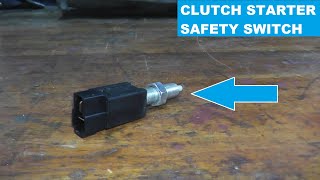
- Subaru WRX / Impreza (2008-2014) — The clutch switch, often called a neutral safety switch, is a common failure point. The part number for many models is 32008AA151.
- Jeep Wrangler (2007-2018) — The sensor is exposed to dirt, mud, and water during off-roading, leading to premature failure of the sensor or its wiring.
- Dodge Ram (2006-2012) — Failures are linked to the clutch master cylinder and the attached sensor, which fail as a unit. A leak in the master cylinder is a common root cause.
- Honda Civic (2016-2021) — Owners of the 10th generation Civic with manual transmissions report intermittent P0806 codes, resolved by replacing the clutch pedal position switch assembly.
Manufacturer-Specific Notes
- General Motors (Chevrolet, GMC): After replacing the sensor, a 'Clutch Pedal Position Learn' procedure must be performed using a capable scan tool. Failure to do this causes the code to persist even with a new part.
- Ford: For Focus and Fiesta models with the automatic DPS6 transmission, P0806 points to a failed clutch actuator motor, not a manual transmission sensor. Swap the upper and lower actuators to see if the code changes to P0809.
- Subaru: The P0806 fault often points to the 'Neutral Safety Switch' located on the transmission housing, not a sensor on the clutch pedal itself.
- Various: Always search for Technical Service Bulletins (TSBs) related to the transmission, wiring harness, or PCM for the specific vehicle model, as they contain relevant diagnostic information or updated parts.
Real Owner Stories
2010 Chevrolet Corvette C6 with intermittent no-start and P0806.
Owner experienced an intermittent no-start condition, disabled cruise control, and a P0806 code. Topping off low clutch fluid provided a temporary fix.
What they tried:
- Topped off clutch fluid reservoir.
- Cleared code with a scan tool.
Outcome: A dealership diagnosed a failing clutch master cylinder. The final repair involved replacing the master cylinder and the entire clutch pedal assembly. The total repair cost was around $800.
Lesson: On a C6 Corvette, P0806 is often caused by a failing clutch master cylinder or a broken pedal return spring, not just the sensor itself. Check for a spongy pedal or low fluid.
2014 Ford Focus with automatic transmission and P0806.
Car showed a 'Transmission Overheating' message, had erratic shifting, and logged codes P0806 and P0809.
What they tried:
- Owner scanned the codes and researched the DPS6 automatic transmission's clutch actuators.
Outcome: The owner replaced both the upper ('A') and lower ('B') clutch actuator motors (OEM Part AE8Z-7C604-A), resolving the codes and symptoms.
Lesson: On a Ford Focus with a DPS6 automatic transmission, P0806 points to a failed clutch actuator motor. Swap the upper and lower actuators; if the code changes to P0809, the actuator is bad.
2011 Chevrolet Cruze with persistent P0806 after sensor replacement.
A P0806 code appeared. The owner replaced the clutch position sensor, but the check engine light and code remained.
What they tried:
- Replaced the clutch position sensor.
Outcome: The problem was not resolved. The owner needed to perform the 'Clutch Pedal Position Learn' procedure with a GM-compatible scan tool to calibrate the new sensor.
Lesson: If replacing the sensor doesn't fix P0806 on a GM vehicle, the cause is a missed, mandatory 'relearn' procedure or a wiring issue.
How to Prevent This Code From Triggering
- Change clutch hydraulic fluid every 2-3 years. (Every 24-36 months or 30,000 miles.) — Clutch fluid absorbs moisture, leading to internal corrosion of the master/slave cylinders. This causes leaks that affect pedal travel and trigger a P0806 code.
- Apply dielectric grease to the sensor connector. (Whenever the sensor is exposed or replaced.) — Dielectric grease seals electrical connectors from moisture and dirt, preventing pin corrosion that causes erratic signals.
- Periodically inspect and clean chassis ground points. (During regular maintenance like oil changes.) — Corrosion on the main chassis or transmission ground straps increases resistance, causing unstable voltage readings that the PCM interprets as a sensor fault.
- Avoid resting your foot on the clutch pedal. (Daily driving habit.) — Constantly 'riding' the clutch prevents the pedal from fully returning to its top position, causing the sensor to report a voltage that is not 0%.
- Ensure floor mats are properly secured. (Every time the vehicle is cleaned.) — A bunched-up floor mat physically obstructs the clutch pedal's travel, preventing the sensor from reporting its full range of motion.
Frequently Asked Questions
What is the most common misdiagnosis for a P0806 code?
A common mistake is replacing the starter motor because the primary symptom is a no-crank condition. Technicians assume the starting system failed without realizing the PCM is intentionally preventing the start due to an incorrect clutch position signal.
I replaced the clutch position sensor, but the P0806 code came back. What should I check next?
If a new sensor doesn't fix the code, check if your vehicle requires a 'Clutch Pedal Position Learn' procedure using a scan tool. Next, inspect the wiring harness for breaks or corrosion between the sensor and the PCM. Finally, verify the sensor receives a stable 5V reference and a solid ground.
Can a bad clutch cause a P0806 code?
Not directly; a worn-out clutch disc or pressure plate will not cause this code. However, a leaking clutch master cylinder prevents the pedal from moving correctly, indirectly triggering the code by causing the sensor to report an illogical position.
Is it safe to drive with a P0806 code?
Driving is dangerous and highly discouraged. The primary risk is the engine starting while in gear, causing the car to lurch unexpectedly and strike an object or person. It also risks leaving you stranded with a no-start condition.
How much does it cost to fix a P0806 code?
Replacing the sensor is the most common fix, costing between $105 and $225 for parts and labor. A simple sensor adjustment costs $60-$100 in labor. Repairing a damaged wire ranges from $110 to $300 depending on the damage location.
Can I bypass the clutch position sensor to start my car?
While you can temporarily bypass the sensor by jumping the connector pins to start the car in an emergency, this is highly dangerous. Doing so defeats a critical safety feature and allows the car to start in gear. Only use this method to move the vehicle to a safe location for immediate repair.
Where is the clutch position sensor located?
The clutch position sensor mounts on the clutch pedal support bracket under the dashboard. You need a flashlight and must remove a lower dash panel to access it.
Will clearing the code fix the problem?
No, clearing the code only turns off the check engine light temporarily. The code returns immediately on the next drive cycle when the PCM runs its self-test and detects the fault again.
Key Takeaways
- Code P0806 triggers when the Powertrain Control Module (PCM) receives an erratic or out-of-range voltage signal from the clutch position sensor.
- A faulty sensor creates a severe safety hazard by allowing the engine to start in gear without the clutch pressed, or leaving you stranded with a no-crank condition.
- Replacing the clutch position sensor resolves 80% of P0806 codes, costing between $105 and $225 for parts and labor.
- Never replace a starter motor for a no-crank symptom with an active P0806 code; the PCM is intentionally disabling the starter due to the sensor fault.
- On 2012-2018 Ford Focus models with the DPS6 automatic transmission, P0806 indicates a failed clutch actuator motor (Part AE8Z-7C604-A), not a pedal sensor.
Helpful Videos


Shop the Parts Behind P0806
Below are the parts most often responsible for code P0806, ranked by how frequently each one is the actual culprit (per the diagnosis above). Tap any to see what we have for your vehicle.


The information in this article is provided for general reference and educational purposes only. Vehicle specifications, procedures, and part compatibility can vary by production date, trim level, and region. Always consult your vehicle's factory service manual and verify part numbers before purchasing or performing repairs. Safety-critical components such as airbags, seat belts, and braking systems should be installed by a qualified professional.
- 🧭 Diagnostic Flowchart
- 🎬 Helpful Videos
- 🛍️ Shop This Part
- What Does P0806 Mean?
- Can I Drive With P0806?
- Common Causes
- Symptoms
- Common Fixes & Costs
- DIY vs Professional
- Used vs. New Parts: Buying Guide
- What Happens If You Wait — Timeline
- Cost of Not Fixing It
- Diagnosis Steps
- When This Code Triggers (Freeze-Frame Conditions)
- Related Codes
- Climate & Environmental Factors
- How to Talk to a Mechanic About This Code
- Where to Take It: Dealer vs Independent vs Chain
- When to Walk Away From the Repair
- What Scan Tool You Need for This Code
- How to Clear the Code After You Fix It
- Will This Fail Emissions / State Inspection?
- Most Commonly Affected Vehicles
- Manufacturer-Specific Notes
- Real Owner Stories
- 2010 Chevrolet Corvette C6 with intermittent no-start and P0806.
- 2014 Ford Focus with automatic transmission and P0806.
- 2011 Chevrolet Cruze with persistent P0806 after sensor replacement.
- How to Prevent This Code From Triggering
- Frequently Asked Questions
- What is the most common misdiagnosis for a P0806 code?
- I replaced the clutch position sensor, but the P0806 code came back. What should I check next?
- Can a bad clutch cause a P0806 code?
- Is it safe to drive with a P0806 code?
- How much does it cost to fix a P0806 code?
- Can I bypass the clutch position sensor to start my car?
- Where is the clutch position sensor located?
- Will clearing the code fix the problem?
- Key Takeaways
- 🎟️ Get 5% Off