
OBD-II Code P0812: Reverse Input Circuit Malfunction
The Ultimate Guide to What P0812 Means, Why It Triggers, and How to Fix It
- Code P0812 triggers when the transmission control module detects an electrical fault in the reverse gear circuit, disabling your backup lights and camera.
- A faulty transmission range sensor causes over 60% of P0812 codes, costing between $130 and $450 to replace at a repair shop.
- Check the 10-amp to 15-amp backup lamp fuse first; a blown fuse immediately cuts power to the circuit and triggers the code.
- Do not drive long-term with P0812; if the sensor also acts as the neutral safety switch, the vehicle will eventually fail to start, leaving you stranded.
What Does P0812 Mean?
Code P0812 means the Powertrain Control Module (PCM) or Transmission Control Module (TCM) is not receiving the correct signal from the reverse switch. The computer detects a voltage or resistance level from the reverse input circuit outside the manufacturer's normal range. This circuit turns on your backup lights, activates the backup camera, and alerts parking sensors that the car is in reverse.
Technical definition: The official SAE/ISO definition for P0812 is "Reverse Input Circuit." This indicates the PCM or TCM detects a malfunction in the electrical circuit monitoring the gear shifter's position. The fault triggers when the module sees an unexpected signal, such as the reverse switch reading ON while vehicle speed is detected in a forward gear, or the switch signal missing when the transmission reports it is in reverse.
Can I Drive With P0812?
Yes, But With Caution. You can drive, but your reverse lights will not work, creating a significant safety hazard and risking a traffic ticket. This increases collision risk when backing up, especially in low-light conditions. Some vehicles also experience harsh shifting or fail to start entirely if the fault affects the park/neutral position signal. Continuing to drive with an underlying electrical short damages the wiring harness or Transmission Control Module (TCM), escalating repair costs.
🎬 Learn more about common Ford TCM faults and electrical issues.Common Causes
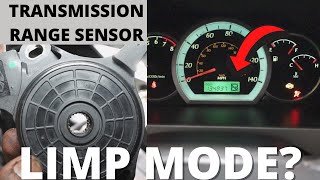
- Faulty Reverse Input Switch / Transmission Range Sensor (Very Common) — This switch, often called a neutral safety switch or transmission range sensor, is the most frequent failure point. 🎬 Watch: How to replace a transmission range sensor without special tools. It physically detects when the shifter is in reverse and sends the signal to the computer. Internal wear, corrosion, or mechanical failure causes it to send an incorrect or missing signal.
- Damaged, Shorted, or Open Wiring (Common) — The wires connecting the reverse switch to the vehicle's computer frequently sustain damage. Wires rubbing against the chassis, corrosion from moisture, or breaks from physical stress interrupt or short the signal.
- Blown Fuse (Common) — The reverse input circuit relies on a dedicated fuse. A short circuit blows this fuse, instantly cutting power to the circuit and triggering the P0812 code. On vehicles like the Chevy Silverado, this is often a transmission-specific fuse in the engine bay.
- Corroded or Loose Connectors (Common) — The electrical plugs connecting the wiring harness to the reverse switch or computer loosen or corrode from moisture and road debris. This creates high resistance, leading to an unreliable signal.
- Poor Ground Connection (Less Common) — The circuit requires a solid connection to the vehicle's metal frame (ground). A rusty, loose, or broken ground wire creates unwanted resistance and causes incorrect voltage readings.
- Misaligned Shifter or Linkage (Uncommon) — If the mechanical linkage between the gear shifter and the transmission bends or loosens, it fails to move the transmission range sensor far enough to engage the reverse contact.
- Aftermarket Accessories or Incorrect Bulb (Rare) — Improperly installed aftermarket accessories, such as remote starters tapped into the reverse light circuit, interfere with the signal. Using an incorrect LED bulb without a resistor alters the circuit's resistance and triggers the code in sensitive systems.
- Faulty Control Module (TCM/PCM) (Very Rare) — Internal driver circuits within the transmission or powertrain computer fail, causing the module to misinterpret a perfectly good signal. This requires exhaustive elimination of all other causes before replacement.
Symptoms
- Reverse lights do not work — This is the most noticeable symptom. When shifting into reverse, the white backup lamps at the rear of the car remain off.
- Check Engine Light and warning lights illuminate — The Malfunction Indicator Lamp (MIL) illuminates on the dashboard. A dedicated transmission warning light (gear icon) or traction control light also frequently appears.
- Backup camera or parking sensors fail — Modern cars use the reverse signal to activate the backup camera and parking aids. Without the signal, these features remain disabled.
- Engine fails to start — The Transmission Range Sensor tells the computer the car is in Park or Neutral, a requirement for starting. A faulty switch prevents the starter from engaging.
- Transmission shifts harshly or displays incorrect gear — Drivers experience delayed or harsh engagement when shifting into reverse. The dashboard gear display (PRNDL) flashes or shows the wrong gear, common on Toyota MMT systems. 🎬 See this walkthrough for fixing the reverse switch on Honda models.
Diagnostic Flowchart
Tap your situation to follow the diagnostic path that matches what you're seeing on this code.
Common Fixes & Costs
- Replace Blown Fuse — Parts: $1-$5, Labor: $0-$50, ~0.2 hr book time (DIY)
- Replace Transmission Range Sensor (Neutral Safety Switch) — Parts: $30-$150, Labor: $100-$300, ~2 hr book time (Intermediate)
- Repair Damaged Wiring or Connectors — Parts: $10-$50, Labor: $100-$300, ~2.5 hr book time (Intermediate)
- Clean or Replace Ground Strap/Connection — Parts: $15-$40, Labor: $50-$100, ~0.8 hr book time (DIY)
- Replace or Reprogram Powertrain/Transmission Control Module (PCM/TCM) — Parts: $400-$1200, Labor: $150-$300, ~1.5 hr book time (Advanced)
Used vs. New Parts: Buying Guide
When a used part is worth it: A used Transmission Range Sensor makes sense for older vehicles (over 150k miles) where the budget is the primary concern and the cost of a new OEM part is high relative to the vehicle's value.
Donor-vehicle mileage cap: roughly under 80000 miles for the part to have meaningful remaining life.
Donor quality checklist:
- Verify the donor vehicle was not scrapped due to flood or electrical fire.
- Match the part number exactly; visual similarities are not enough.
- Inspect the connector pins for any signs of corrosion or damage before purchase.
Decision logic:
- If Vehicle is under 8 years old OR the new part costs less than $100 → Buy a new OEM or high-quality aftermarket part for reliability and warranty.
- If Vehicle is over 10 years old AND the repair is DIY → A low-mileage used part is a reasonable gamble to save money.
- If The part requires significant labor to access → Always buy new to avoid paying for the labor twice if the used part fails.
Warranty tradeoff: Used parts from salvage yards typically offer a 30-90 day warranty. New aftermarket parts usually come with a 1-year to limited lifetime warranty. New OEM parts carry a 1-year/12,000-mile warranty.
Worst-case if a used part fails: $200-$500 (Cost of repeat labor if the used part is faulty and needs to be replaced again)
What Happens If You Wait — Timeline
- 0-2 weeks: Code is set, Check Engine Light is on. Reverse lights, backup camera, and parking sensors fail to activate. The vehicle may not start. (MPG impact: 0%% · Added cost: $100-$300 (Potential traffic ticket or tow cost))
- 1-3 months: Continued driving with an intermittent short causes momentary voltage spikes on shared circuits, creating unrelated electronic glitches. (MPG impact: 0-1%% · Added cost: $50 (Wasted diagnostic time chasing intermittent glitches))
- 3-9 months: An ignored short circuit overheats, melting adjacent wire insulation. The short overloads and damages the driver circuit within the TCM or PCM. (MPG impact: 0-2%% · Added cost: $400-$1500 (Cost to repair wiring harness or replace a fried TCM))
- 9+ months: If P0812 is a symptom of a misaligned linkage causing harsh shifts, continued operation leads to excessive mechanical wear on internal transmission components. (MPG impact: 5-15%% · Added cost: $2500-$5000+ (Transmission rebuild or replacement))
Cost of Not Fixing It
- Immediate: No reverse lights, creating a significant safety hazard and risk of a traffic ticket. Inability to start the vehicle if the neutral safety switch function fails. (Added cost: $100-$300 (Typical traffic citation or tow cost))
- 1-6 months: An ignored electrical short damages the wiring harness or overloads the driver circuit inside the Transmission Control Module (TCM). (Added cost: $550-$1500 (Wiring harness repair or TCM replacement))
- 6+ months: Ignored transmission electrical issues contribute to complete transmission failure, requiring a full rebuild or replacement. (Added cost: $2500-$5000+)
Diagnosis Steps
- Read the Trouble Codes
Use an OBD-II scanner to confirm P0812 is active. Check for related codes (e.g., P0705, U0100) that provide root cause clues. Record all codes and freeze frame data showing the vehicle's state when the fault occurred.
Tools: OBD-II Scanner (Beginner) - Check the Reverse Lights and Fuses
With the ignition on (engine off), have a helper verify the reverse lights. If they are off, locate the fuse box and inspect the backup lamp or transmission control fuse. Replace it if blown. If it blows immediately, a short circuit exists.
Tools: Owner's Manual, Fuse Puller (Beginner) - Visually Inspect Wiring and Connectors
Examine the wiring harness at the transmission range sensor. Look for burnt, chafed, or broken wires. Unplug the connector and check for corrosion, moisture, or bent pins. Inspect areas where the harness rubs against the chassis.
Tools: Flashlight, Safety Glasses (Intermediate) - Analyze Live Data with a Scan Tool
Access the live data stream from the TCM/PCM. Find the PID for the Transmission Range Sensor. Move the shifter through the gears; the display must accurately show 'P', 'R', 'N', 'D'. If it fails to register 'R', the computer is receiving bad information, pointing to the sensor or wiring.
Tools: Scan Tool with Live Data (Advanced) - Test the Reverse Input Switch Signal Voltage
Backprobe the signal wire at the sensor's connector. With the key on (engine off), check for voltage as you shift into and out of reverse. The voltage must toggle between 0V (grounded) and either 5V or 12V. If the voltage remains static, the switch is faulty.
Tools: Multimeter, Wiring Diagram, Back-probe Kit (Advanced) - Perform a Voltage Drop Test on the Ground Circuit
Place one multimeter lead on the negative battery terminal and the other on the sensor's ground pin. A reading above 0.2 volts indicates excessive resistance in the ground circuit requiring cleaning or repair.
Tools: Multimeter, Wire Brush (Intermediate) - Test the Transmission Range Sensor's Internal Resistance
Disconnect the sensor. Set the multimeter to Ohms (Ω). Measure the resistance between specific pins for the reverse position according to the service manual. Infinite resistance (OL) or an out-of-spec reading confirms a faulty sensor.
Tools: Multimeter, Vehicle-Specific Service Manual (Advanced) - Pro Tip: Advanced Sensor Testing with a Jumper Wire
Disconnect the sensor connector. Use a jumper wire to connect the signal wire terminal on the harness side directly to a chassis ground. View the live data on your scan tool. If it reads 'Reverse ON', the wiring and PCM are good, proving the sensor is dead.
Tools: Jumper Wire, Scan Tool with Live Data, Wiring Diagram (Advanced) - Check for Power and Continuity at the PCM/TCM
Perform a continuity test on the signal wire from the switch connector to the PCM/TCM connector. Resistance must be under 1 ohm. Test for a short to power or ground on that wire with the switch unplugged.
Tools: Multimeter, Vehicle-Specific Wiring Diagram (Advanced) - Pro Tip: Scope the Sensor Signal Waveform
Connect an oscilloscope to the sensor's signal wire and ground. Start the vehicle and shift in and out of reverse. The waveform must show a clean, sharp voltage transition. Glitches or rounded transitions indicate a failing switch or poor connection.
Tools: Oscilloscope, Back-probe Adapters (Professional)
When This Code Triggers (Freeze-Frame Conditions)
- Vehicle Speed: 45 mph (The code triggered due to a short circuit causing a false 'reverse' signal while driving at a steady forward speed.)
- RPM: 1800 (Engine was at a normal cruising RPM.)
- Engine Coolant Temp: 195°F (The engine was fully warmed up to normal operating temperature.)
- Engine Load: 40% (The engine was under a moderate load, consistent with highway cruising.)
Related Codes
- P0705 — Indicates a fault in the Transmission Range Sensor Circuit. Since the reverse input is part of this sensor, P0705 appears with P0812 when the entire sensor fails. If the computer shows incorrect data for multiple gear positions, the issue is the entire range sensor.
- P0813 — This is the 'Reverse Output Circuit.' P0812 relates to the input signal (switch to computer), while P0813 relates to the output signal (computer to reverse lights). With P0812, the computer doesn't know you're in reverse. With P0813, it knows but cannot activate the lights.
- U0100 — Means 'Lost Communication With ECM/PCM.' If U0100 appears with P0812, it points to a major power, ground, or network wiring issue affecting the entire module. Diagnose the U-code first; resolving the communication failure clears the P0812 code.
- P0810 — This 'Clutch Position Control Error' appears alongside P0812 on vehicles with automated manual transmissions (Toyota MMT). The presence of both codes suggests a complex fault within the MMT system, involving the clutch actuator or TCM, rather than a simple switch.
Climate & Environmental Factors
- Humidity and Moisture: High humidity or deep water accelerates corrosion on the transmission range sensor's external connector pins and internal contacts, increasing resistance and triggering P0812.
- Road Salt (Cold Climates): Road salt severely corrodes wiring, connectors, and the sensor housing itself. This is a primary cause of wiring failures for components mounted on the transmission.
- Extreme Cold: Extreme cold causes older plastic wiring insulation to crack, allowing moisture to enter. It also thickens the grease inside the switch, leading to sluggish mechanical movement.
How to Talk to a Mechanic About This Code
Say this: "I have a P0812 code and my reverse lights are not working. I'd like to schedule a diagnostic to test the transmission range sensor, its wiring, and connectors. Please check the signal from the sensor to the computer."
This tells the shop you've done your research and points them directly to the most likely causes (sensor and wiring), preventing them from starting with unrelated diagnostics like replacing bulbs.
Avoid saying:
- 'My check engine light is on, can you look at it?' (Too vague, leads to broad diagnostics).
- 'My reverse lights are out.' (Leads them to check bulbs, which do not cause P0812).
- 'Just fix whatever is wrong.'
Questions to ask before authorizing the repair:
- Did you test the sensor's voltage output when shifting into reverse?
- Did you perform a continuity test on the wiring between the sensor and the control module?
- Can you show me the damaged wire or the faulty sensor reading?
- What is the warranty on the new part and your labor?
Where to Take It: Dealer vs Independent vs Chain
- Dealer:
Best for: Vehicles under warranty., Models with known TSBs or manufacturer-specific issues (like Ford PowerShift TCMs or Honda ATPR circuits)., Complex electrical or network communication issues requiring proprietary diagnostic tools.
Downsides: Higher labor rates, typically 1.5x to 2x more than independent shops., May recommend replacing a larger assembly when a smaller component is the issue. (Typical cost: +50% vs. baseline) - Independent Shop:
Best fit for most common scenarios. A reputable independent shop easily diagnoses and repairs a faulty sensor, wiring, or connector.
Best for: Out-of-warranty vehicles., Common repairs like replacing a transmission range sensor or fixing a damaged wire., Vehicles where the cause is straightforward and not related to a complex software issue.
Downsides: Quality and diagnostic capabilities vary. Look for shops with ASE-certified technicians specializing in electrical work. (Typical cost: +0% vs. baseline) - Chain Shop:
Use with caution. Acceptable for a straightforward sensor replacement if you are confident that is the issue, but AVOID for initial diagnosis of an electrical fault.
Best for: Simple, clear-cut repairs like a fuse replacement.
Downsides: Technician skill varies widely., Lacks advanced diagnostic tools for electrical troubleshooting beyond basic sensor replacement., High pressure to upsell services. (Typical cost: -10% vs. baseline)
When to Walk Away From the Repair
If the estimated repair cost exceeds 50% of the car's private-party value, sell or trade it in rather than repairing it.
- Car worth $4000, fix is $2200: Walk away. The repair cost is over half the car's value.
- Car worth $12000, fix is $500: Fix it. This is a minor cost relative to the car's value.
- Car worth $3000, fix is $1600: Walk away. The repair cost is too high for the vehicle's worth.
What Scan Tool You Need for This Code
Minimum: A code reader that displays live data for the transmission range sensor.
A basic $20 code reader only shows the P0812 code. It lacks live data from the transmission range sensor to watch if the 'Reverse' signal changes when you shift gears. Without this, you cannot easily tell if the problem is the sensor or the wiring.
Budget: Ancel BD310 (~$60) — This hybrid corded/Bluetooth scanner reads the code, clears it, and displays a live data stream on your smartphone to see the gear position data the computer receives.
Mid-range: BlueDriver Pro (~$120) — Offers excellent live data graphing and reads manufacturer-specific transmission codes, crucial for accurate diagnosis. The app provides repair suggestions based on a database of verified fixes.
Professional: Autel MaxiCOM MK808 / Innova 5610 (~$350-500) — These full-featured diagnostic tablets offer bidirectional control, allowing you to command specific transmission functions to test circuits directly from the tool, invaluable for advanced electrical diagnosis.
Rent vs buy: For a one-time fix, auto parts stores read codes for free. However, to properly diagnose P0812 by watching live data, you need your own scanner. Buying a budget-friendly scanner is a good investment for future DIY repairs.
How to Clear the Code After You Fix It
- Use an OBD-II scan tool to erase the diagnostic trouble codes.
- Perform a complete drive cycle to allow the vehicle's readiness monitors to run.
- Rescan the vehicle to confirm P0812 has not returned and that monitors are set.
Drive cycle (~30 minutes): Start with a cold engine. Let it idle for 2-3 minutes. Drive for 10-15 minutes in mixed city traffic with several stops. Drive for 10 minutes at a steady highway speed (55-65 mph). Allow the vehicle to cool down completely.
Readiness monitors affected: Comprehensive Component Monitor, Catalyst Monitor, EVAP System Monitor
Before emissions retest: drive at least 100 miles to fully set monitors.
Watch out for:
- Clearing the code and immediately going for an emissions test results in failure due to 'Not Ready' monitors.
- Disconnecting the battery fails to clear the code from permanent memory and resets all readiness monitors.
- If the underlying electrical fault remains, the code returns during the drive cycle.
Will This Fail Emissions / State Inspection?
Yes — this code typically fails an OBD-II emissions inspection.
- California: An illuminated Check Engine Light is an automatic failure. Clearing the code resets readiness monitors, requiring 100-200 miles of driving before retesting.
- New York: Any active code that turns on the Malfunction Indicator Lamp (MIL), such as P0812, causes the vehicle to fail the emissions portion of the inspection.
- Texas: In the 17 counties requiring emissions testing, an active P0812 code with the Check Engine Light on results in an automatic failure of the OBD-II test.
Most Commonly Affected Vehicles
- Honda Pilot (2016-2022) — Prone to issues with the Transmission Range Switch, specifically the ATPR (Automatic Transmission Park/Reverse) switch circuit. Diagnosis involves checking continuity at PCM connector A (51P).
- Honda Odyssey (2011-2017) — Experiences an open in the transmission range switch (ATPR) circuit. A key diagnostic step is checking continuity between PCM connector terminal C25 and body ground.
- Honda Accord (2012-2017) — Similar to other Hondas, this model develops problems with the ATPR switch circuit, causing electrical faults rather than mechanical transmission issues.
- Honda Civic (2011-2015) — The transmission range switch (ATPR) is a known failure point. Advanced diagnosis involves checking the circuit at PCM connector B (49P), specifically pin #25.
- Toyota Corolla, Yaris, Aygo (with MMT) (2004-2009) — On Multi-Mode Manual Transmission (MMT) models, this code points directly to a backup light switch failure. The TCM sets the code if the switch remains OFF for 0.5 seconds after shift sensors report 'R'.
- Ford Focus, EcoSport (with PowerShift) (2012-2018) — Vehicles with the DPS6 PowerShift transmission log this code when the TCM detects a discrepancy between shifter position and reverse switch input, often requiring TCM software updates or replacement.
- Chevrolet Silverado (2006-2013) — Wiring issues, poor grounds near the radiator, and blown transmission fuses (#14 and #19) are common causes. It is also a symptom of a larger Class 2 network communication issue.
- Volkswagen Jetta, Golf (2005-2015) — Triggered by a faulty reverse light switch, wiring harness issues, or a fault within the engine or transmission control module itself.
- Dodge / Ram 1500, 2500 (2002-2012) — Known for issues with the neutral safety switch (transmission range sensor) located on the transmission, leading to P0812, no-start conditions, and dead reverse lights.
Manufacturer-Specific Notes
- Honda: This code specifically points to an electrical problem with the 'ATPR' (Automatic Transmission Park/Reverse) switch circuit, not a mechanical transmission problem. Diagnosis involves checking continuity at specific PCM connector pins.
- Toyota: On MMT models, the TCM uses '1-trip detection logic.' It sets P0812 if it receives the R position signal from shift sensors but the backup light switch remains OFF for just 0.5 seconds. TSB CP-0061T-0505 addresses related P0810 codes.
- Ford: For PowerShift (DPS6) transmissions, Customer Satisfaction Program 14M02 extends the TCM warranty to 10 years/150,000 miles for issues including no-start or loss of power related to this code. Always check for coverage before paying for repairs.
- GM / Chevrolet: On trucks like the Silverado, P0812 is a symptom of a broader Class 2 serial data network communication failure. Diagnosing network health by checking for 60 ohms between pins 6 & 14 on the DLC is crucial before focusing on the reverse switch.
Real Owner Stories
2008 Chevy Silverado with no-start and P0812
After hitting a pothole, the truck would not start, displayed a Check Engine Light, and the reverse lights were out.
Outcome: The root cause was a faulty Neutral Safety Switch (part of the Transmission Range Sensor). Replacing the switch resolved the no-start condition and cleared the P0812 code.
Lesson: A P0812 code combined with a no-start condition strongly points to the Neutral Safety Switch. A sudden impact damages wiring or the sensor itself.
2011 Honda Odyssey with intermittent P0812
The Check Engine Light came on intermittently with code P0812. There were no shifting problems or reverse light failures initially.
Outcome: An open was found in the ATPR circuit wire. There was no continuity between PCM connector terminal C25 and body ground. Repairing the broken wire solved the problem.
Lesson: On Hondas, P0812 is an electrical fault, not a mechanical one. An intermittent code suggests a wiring issue rather than a completely failed sensor. A wiggle test reveals the fault location.
2013 Ford Focus with PowerShift Transmission
Vehicle experienced harsh shifting, a delay engaging reverse, and the Check Engine Light with P0812 at 80,000 miles.
Outcome: The problem was a failing TCM. The repair was covered under Ford's Customer Satisfaction Program 14M02. The TCM was replaced and reprogrammed by the dealer at no cost.
Lesson: Before paying for repairs on known problematic transmissions like the Ford PowerShift, check for extended warranties. P0812 on these cars is a symptom of a failing TCM.
How to Prevent This Code From Triggering
- Regularly wash the vehicle's undercarriage (Monthly, or more often in winter) — Washing away road salt and grime prevents accumulation on the transmission housing and sensor connectors, a primary cause of corrosion leading to electrical failures.
- Apply dielectric grease to electrical connectors (Whenever a relevant connector is disconnected for service) — Dielectric grease blocks moisture and oxygen from reaching metal pins inside a connector, preventing corrosion and ensuring a reliable connection.
- Inspect and clean major ground connections (Every 30,000 miles or during battery replacement) — The reverse input circuit relies on a solid ground. Cleaning the main battery-to-chassis and engine-to-chassis ground straps prevents high resistance that triggers fault codes.
- Use heat-shrink connectors for any wiring repairs (During any under-vehicle wiring repair) — Standard crimp connectors allow moisture to enter and corrode wires. Heat-shrink connectors create a weatherproof seal, preventing future failures.
- Avoid driving through deep standing water (Daily habit) — Submerging the transmission forces water past the seals of the transmission range sensor, leading to immediate or future failure due to internal corrosion.
Frequently Asked Questions
Can I fix P0812 myself?
Yes, replacing a blown fuse or cleaning a dirty ground connection is an easy DIY fix. Replacing the transmission range sensor requires intermediate skills, a multimeter, and a vehicle-specific wiring diagram. Stop DIY and consult a shop if the issue traces back to the PCM or complex wiring harnesses.
Is it safe to drive with a P0812 code?
You can physically drive the car, but lacking reverse lights is a major safety hazard and illegal in most jurisdictions. Fix this promptly to avoid parking lot collisions and traffic tickets.
Why didn't my reverse lights work but the P0812 code didn't show up right away?
Many vehicles require the computer to detect the fault during two or three separate drive cycles before illuminating the Check Engine Light. Others, like certain Toyotas, use 1-trip logic and set the code instantly.
A mechanic just replaced my reverse light bulbs, but the code is back. What happened?
This is a common misdiagnosis. The P0812 code specifically points to a problem in the electrical circuit before the bulbs, such as the switch, wiring, fuse, or computer. The bulbs themselves do not trigger this code.
My scanner shows other transmission codes with P0812. Should I just fix the reverse switch?
No. If codes like P0705 (Transmission Range Sensor Circuit) or U0100 (Lost Communication) are present, they indicate a wider failure. Diagnose all codes together to find the root cause, which is likely the entire sensor assembly or a network failure.
How do I test the reverse switch?
Use a multimeter to backprobe the signal wire at the sensor's connector. With the key on and engine off, the voltage should toggle between 0V and either 5V or 12V when shifting into reverse. If the voltage doesn't change, the switch is faulty.
How much does it cost to fix P0812?
A simple fuse replacement costs under $10. Replacing the transmission range sensor, the most common repair, ranges from $130 to $450 for parts and labor. Complex wiring repairs cost between $100 and $300 depending on the damage severity.
Can a bad battery cause a P0812 code?
Yes, a weak battery causes low system voltage, leading to a wide range of electrical gremlins and fault codes. Always ensure your battery and charging system are healthy before diving into complex diagnostics.
What is the difference between a reverse input switch and a transmission range sensor?
A Transmission Range Sensor (TRS) monitors all gear positions (P, R, N, D, L), with the reverse input being just one of its signals. Older vehicles or manual transmissions use a simpler, dedicated two-wire switch that only detects the reverse gear.
My car won't start and shows P0812, are they related?
Yes. The Transmission Range Sensor that triggers P0812 often includes the Neutral Safety Switch function. If the sensor fails to send the Park or Neutral signal to the computer, the engine will not crank.
Key Takeaways
- Code P0812 triggers when the transmission control module detects an electrical fault in the reverse gear circuit, disabling your backup lights and camera.
- A faulty transmission range sensor causes over 60% of P0812 codes, costing between $130 and $450 to replace at a repair shop.
- Check the 10-amp to 15-amp backup lamp fuse first; a blown fuse immediately cuts power to the circuit and triggers the code.
- Do not drive long-term with P0812; if the sensor also acts as the neutral safety switch, the vehicle will eventually fail to start, leaving you stranded.
Helpful Videos


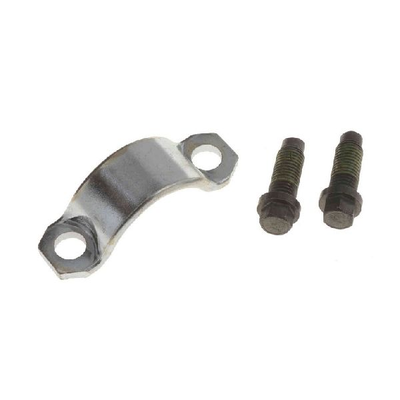
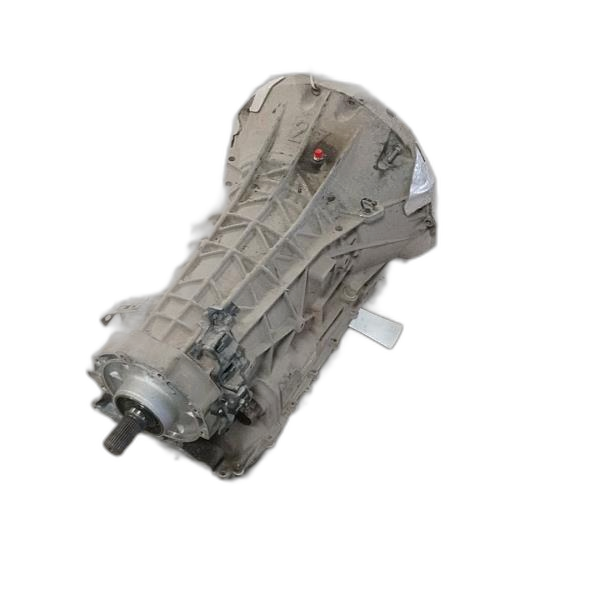
Shop the Parts Behind P0812
Below are the parts most often responsible for code P0812, ranked by how frequently each one is the actual culprit (per the diagnosis above). Tap any to see what we have for your vehicle.


The information in this article is provided for general reference and educational purposes only. Vehicle specifications, procedures, and part compatibility can vary by production date, trim level, and region. Always consult your vehicle's factory service manual and verify part numbers before purchasing or performing repairs. Safety-critical components such as airbags, seat belts, and braking systems should be installed by a qualified professional.
- 🧭 Diagnostic Flowchart
- 🎬 Helpful Videos
- 🛍️ Shop This Part
- What Does P0812 Mean?
- Can I Drive With P0812?
- Common Causes
- Symptoms
- Common Fixes & Costs
- Used vs. New Parts: Buying Guide
- What Happens If You Wait — Timeline
- Cost of Not Fixing It
- Diagnosis Steps
- When This Code Triggers (Freeze-Frame Conditions)
- Related Codes
- Climate & Environmental Factors
- How to Talk to a Mechanic About This Code
- Where to Take It: Dealer vs Independent vs Chain
- When to Walk Away From the Repair
- What Scan Tool You Need for This Code
- How to Clear the Code After You Fix It
- Will This Fail Emissions / State Inspection?
- Most Commonly Affected Vehicles
- Manufacturer-Specific Notes
- Real Owner Stories
- 2008 Chevy Silverado with no-start and P0812
- 2011 Honda Odyssey with intermittent P0812
- 2013 Ford Focus with PowerShift Transmission
- How to Prevent This Code From Triggering
- Frequently Asked Questions
- Can I fix P0812 myself?
- Is it safe to drive with a P0812 code?
- Why didn't my reverse lights work but the P0812 code didn't show up right away?
- A mechanic just replaced my reverse light bulbs, but the code is back. What happened?
- My scanner shows other transmission codes with P0812. Should I just fix the reverse switch?
- How do I test the reverse switch?
- How much does it cost to fix P0812?
- Can a bad battery cause a P0812 code?
- What is the difference between a reverse input switch and a transmission range sensor?
- My car won't start and shows P0812, are they related?
- Key Takeaways
- 🎟️ Get 5% Off