
OBD-II Code P1062: Variable Valve Lift Control Malfunction
What P1062 means, why it triggers, and how to fix it
- Code P1062 indicates a failure in the variable valve lift system (Valvetronic or MultiAir), forcing the engine into a reduced-power limp mode.
- Check your engine oil level and viscosity immediately; low or thick oil in freezing temperatures is the number one cause of this code.
- Inspect the eccentric shaft sensor connector for oil contamination; finding oil inside the plug guarantees the $250+ sensor has failed internally.
- Stop driving the vehicle within 100 miles to prevent unburnt fuel from destroying your catalytic converter, which adds $1,200 to $2,500 to your repair bill.
- You must use a bidirectional scan tool to perform a mandatory 'limit stop relearn' procedure after replacing any Valvetronic parts, or the P1062 code will return instantly.
What Does P1062 Mean?

P1062 indicates a failure in the variable valve lift system, which controls how far the engine's intake valves open. The engine's computer triggers this code when the actuator motor fails to reach its commanded position, instantly forcing the vehicle into a fail-safe limp mode.
Technical definition: While P1062 is a manufacturer-specific code, its most common definition for BMW and MINI is 'Valvetronic (VVT) Limp Home Request, Full Stroke Position Not Reached (Bank 1)'. For Fiat-Chrysler vehicles using the MultiAir system, it means 'Cylinder Oil Supply Solenoid Valve Stuck'. For Honda diesel models, it means 'Fuel Rail Pressure (FRP) Sensor Circuit High Voltage'.
Can I Drive With P1062?

Yes, But With Caution. Yes, but your car is in a reduced-power 'limp mode.' Drive only a short distance to a repair shop. Continuing to drive for over 100 miles dumps unburnt fuel into the exhaust, which destroys the catalytic converter and adds $1,200 to $2,500 to your repair bill.
Common Causes

- Low or Dirty Engine Oil (Very Common) — The variable valve lift system is hydraulic and relies entirely on oil pressure. Low, sludgy, or incorrect viscosity oil prevents the system from operating, making this the leading cause of P1062.
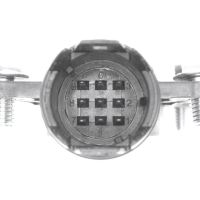
- Failed Eccentric Shaft Sensor (Very Common) — This sensor reports the precise position of the valve lift mechanism. Engine oil frequently leaks into the sensor's electrical connector, shorting it out and sending corrupt data to the computer.
- Failed Valvetronic Motor (Servomotor) (Common) — This electric motor physically moves the valve lift mechanism. The motor burns out electronically or its internal gears strip, causing it to ignore the computer's commands.
- Extreme Cold Weather / Thick Oil (Common) — During freezing starts, engine oil thickens. This high viscosity prevents VVT or MultiAir solenoids from operating correctly, triggering a temporary P1062 code that clears once the engine warms up.
- Worn Valvetronic Mechanical Parts (Less Common) — The gears on the eccentric shaft wear down over time, creating flat spots. This mechanical resistance prevents the motor from moving the shaft to its required position.
- Wiring Harness or Connector Faults (Less Common) — Engine heat and vibration damage the wiring harness for the Valvetronic motor and sensor. A broken wire or corroded pin causes an open circuit, mimicking a component failure.
- Clogged VVT Solenoids (VANOS) (Less Common) — Oil control solenoids get clogged with sludge from dirty oil. This restricts oil flow to the broader timing system, contributing to a P1062 code alongside other timing faults.
- Low Battery Voltage (Rare) — A failing battery starves the Valvetronic system of power during startup self-tests, leading the ECU to incorrectly flag a P1062 fault.
- Faulty Engine Control Module (DME/ECU) (Very Rare) — The driver circuit inside the engine computer that controls the Valvetronic motor burns out, permanently preventing the motor from receiving commands.
Symptoms

- Check Engine Light / Limp Mode — An illuminated Check Engine Light accompanied by a half-engine symbol or 'Drivetrain Malfunction' message indicating reduced power mode.
- Reduced Engine Power — The car feels sluggish and refuses to accelerate properly. This is a deliberate safety measure by the ECU.
- Rough or Unstable Idle — The engine shakes or idles erratically because the valves are opening to the wrong height. The engine stalls in severe cases.
- Rattling or Clicking Noise — A rapid clicking or binding sound from the top of the engine when unlocking the car or at idle, caused by the Valvetronic motor failing to adjust the shaft.
- No-Start or Long Crank Condition — If the Valvetronic system fails in a mechanically closed position, the engine cranks for an extended period or fails to start entirely.
- Increased Emissions / Failed Smog Test (scan-tool only — no driver-felt sign) — Incorrect valve lift ruins the air-fuel mixture, spiking tailpipe emissions and causing an automatic emissions test failure.
Diagnostic Flowchart
Tap your situation to follow the diagnostic path that matches what you're seeing on this code.
Common Fixes & Costs
- Engine Oil and Filter Change — Parts: $50-$120, Labor: $50-$100, ~0.8 hr book time (DIY)
- Replace Eccentric Shaft Sensor
— Parts: $225-$400, Labor: $400-$900, ~5.5 hr book time
(Professional)
BMW 3-Series (E90, N52 Engine): OEM 11377524879 (Alt: {"brand": "VDO (OEM)", "part_number": "S119564001Z"})
MINI Cooper (R56, N12/N16 Engine): OEM 11377541677 (Alt: {"brand": "Genuine MINI", "part_number": "11377541677"}) - Replace Valvetronic Motor (Servomotor)
— Parts: $250-$500, Labor: $300-$800, ~2.5 hr book time
(Professional)
BMW 3-Series (E90, N52 Engine): OEM 11377548388 (Alt: {"brand": "VDO (OEM)", "part_number": "A2C59515105"})
BMW X5 (E70, N55 Engine): OEM 11377603979 (Alt: {"brand": "VDO (OEM)", "part_number": "A2C5328032080"}) - Wiring Harness / Connector Repair — Parts: $20-$100, Labor: $150-$400, ~2 hr book time (Intermediate)
- Replace Eccentric Shaft and Motor
— Parts: $1000-$2000, Labor: $1000-$2500, ~12 hr book time
(Expert)
BMW (N55 Engine): OEM 11377589883 (Alt: {"brand": "Febi", "part_number": "11377589883F"})
Used vs. New Parts: Buying Guide
When a used part is worth it: A used Valvetronic motor from a low-mileage donor vehicle is a cost-effective option. Never buy a used eccentric shaft sensor, as its primary failure mode is an internal oil leak related to age and heat cycles.
Donor-vehicle mileage cap: roughly under 60000 miles for the part to have meaningful remaining life.
Donor quality checklist:
- Verify the part number exactly; VDO is the Original Equipment Manufacturer (OEM).
- Ask for the VIN of the donor car to verify mileage and check for accident history.
- Avoid parts from engines known to have sludge problems.
Decision logic:
- If The failed part is the eccentric shaft sensor. → Buy new from an OEM supplier like VDO. The labor cost to replace it makes a used sensor too risky.
- If The failed part is the Valvetronic motor and budget is tight. → Buy a used motor from a donor with under 60,000 miles.
- If The part is the eccentric shaft itself. → Buy new. This part is too critical and labor-intensive to risk using a worn component.
Warranty tradeoff: Used parts offer a 30-90 day warranty. New aftermarket parts offer a 1-year to limited lifetime warranty. New OEM parts offer a 1-2 year warranty.
Worst-case if a used part fails: 800-1500 if a used part fails after installation, as you must pay the labor a second time.
What Happens If You Wait — Timeline
- 0-1 month: Intermittent fault on cold starts. Check engine light turns on and off. Slight hesitation or rough idle is noticeable before the engine is fully warm. (MPG impact: 0-5%% · Added cost: $0-50 in wasted fuel)
- 1-3 months: Fault becomes permanent. Check engine light stays on and the car enters limp mode on every startup. Reduced power is obvious and fuel economy drops. (MPG impact: 10-25%% · Added cost: $50-150 in wasted fuel)
- 3-6 months: Secondary damage begins. Driving in limp mode sends unburnt fuel into the exhaust, overheating and degrading the catalytic converter substrate. (MPG impact: 15-30%% · Added cost: $1,200-2,800 (risk of needing a new catalytic converter))
- 6+ months: Catastrophic system failure. A mechanically worn eccentric shaft completely binds, destroying the Valvetronic motor's gears and potentially the engine computer (DME). (MPG impact: 20-40%% · Added cost: $3,000-6,000+ (cost of a new eccentric shaft, motor, catalytic converter, and DME))
Cost of Not Fixing It
- 0-1 month: Poor fuel economy (10-25% reduction), sluggish performance, and rough idle. (Added cost: 50-150)
- 1-6 months: Driving in limp mode sends unburnt fuel into the exhaust, overheating and destroying the catalytic converter. (Added cost: 1200-2800)
- 6+ months: A mechanically binding eccentric shaft puts extreme stress on the Valvetronic motor, causing it to burn out and potentially send a voltage spike that destroys the engine computer (DME). (Added cost: 3000-6000)
Diagnosis Steps
- Check Engine Oil
Check the oil level and condition. If the oil is dark, sludgy, or below the minimum level, change it immediately. Verify the correct oil viscosity is used, especially in cold climates.
Tools: Dipstick and clean rag (Beginner) - Scan for All Trouble Codes
Read all codes. P1062 is often accompanied by P1050, 2DBC, or misfire codes (P030x). Note any undervoltage faults, which point to a battery issue rather than a mechanical failure.
Tools: OBD-II Scanner (Beginner) - Inspect Valvetronic Connectors
Unplug the electrical connectors for the Valvetronic motor and the eccentric shaft sensor on the valve cover. Oil inside the eccentric shaft sensor connector guarantees the sensor has failed internally and requires replacement.
Tools: Small flathead screwdriver (Beginner) - Listen for Noises
With the engine off, unlock the car and listen for a rapid clicking or grinding from the valve cover as the system self-tests. A rhythmic ticking with the engine running points to worn gears or a failing motor.
Tools: Mechanic's stethoscope (Intermediate) - Perform a Valvetronic Relearn
Command the 'Valvetronic limit stop relearn' procedure. A failure strongly indicates a mechanical jam, a worn eccentric shaft, or a failed motor/sensor.
Tools: Advanced Bi-Directional Scan Tool (Advanced) - Test Valvetronic Motor Resistance
Disconnect the Valvetronic motor. Measure the resistance between the two pins. It should read between 0.5 and 5.0 Ohms. A reading of 'OL' (Open Loop) indicates a failed motor winding.
Tools: Multimeter (Advanced) - Bench Test the Valvetronic Motor
Remove the Valvetronic motor. Apply 12V from a car battery to the two pins. The worm gear must spin quickly. Reverse the polarity to spin it backward. If it doesn't spin or feels weak, replace the motor.
Tools: Socket set, 12V battery, alligator clips (Advanced) - Test Eccentric Shaft Sensor Circuit
With the sensor unplugged and ignition on, test the harness terminals. Pin 1 requires a 5V reference voltage. Pin 2 requires ground (<1 Ohm). If power and ground are good but the sensor fails other tests, replace the sensor.
Tools: Multimeter, wiring diagrams (Advanced) - Inspect Internal Components
Remove the valve cover to visually inspect the eccentric shaft and motor gears for sharpened or worn teeth. Check for excessive resistance when turning the eccentric shaft manually with an Allen key. Binding confirms mechanical failure.
Tools: Socket set, torque wrench, screwdrivers, specialty spring compressor tool (Expert) - Honda Diesel: Check Fuel Rail Pressure
For Honda 2.2L i-CDTi engines ONLY. Connect a scan tool and monitor live Fuel Rail Pressure (FRP). At idle, it should be 4,000-5,000 PSI. Significantly higher pressure indicates a faulty FRP sensor or regulator.
Tools: OBD-II Scanner with Live Data (Advanced)
When This Code Triggers (Freeze-Frame Conditions)
- Engine Coolant Temp: 40-100°F (4-38°C) (During warm-up or after a cold start, when oil is thickest.)
- RPM: 700-1200 (At idle or low-speed driving, when the system makes fine adjustments.)
- Engine Load: 15-40% (Light to moderate throttle, where precise valve lift is critical for efficiency.)
- System Voltage: 11.5-13.0V (Triggered by low voltage during engine cranking, starving the motor of power.)
Related Codes
- P1050 — Indicates a 'VVT Control Circuit Malfunction'. Seeing P1050 alongside P1062 strongly confirms an electrical control problem within the Valvetronic circuit.
- P0300-P0308 — Cylinder misfire codes are a direct symptom of P1062. Incorrect valve lift leads to improper combustion. Fixing the P1062 fault resolves the misfire codes.
- P1030 — A precursor to P1062 indicating 'Valvetronics Monitoring Sluggish Movement'. P1030 suggests high resistance from thick oil or mechanical wear, while P1062 indicates a hard failure.
- 2DBC, 2DCE (BMW) — Manufacturer-specific codes translating to 'Valvetronic servomotor, sluggish' or 'activation'. They point directly to a problem with the Valvetronic motor's performance.
Climate & Environmental Factors
- Extreme Cold: At temperatures below freezing, engine oil thickens significantly. This high viscosity prevents the hydraulic Valvetronic or MultiAir systems from operating, causing the motor to fail its target position on a cold start. The code clears once the engine warms up.
- High Humidity / Heavy Rain: Moisture penetrates weathered connector seals for the Valvetronic motor or sensor, causing a temporary short circuit that triggers the code.
- High Altitude: Engines at high altitude produce less power. A borderline failing Valvetronic system becomes highly noticeable as the reduced power from limp mode is compounded by the altitude.
How to Talk to a Mechanic About This Code
Say this: "I have a P1062 code on my vehicle and it is in limp mode. Please start by checking the oil level and condition, and inspect the eccentric shaft sensor connector for any oil contamination before proceeding with further diagnostics."
This signals to the shop that you are informed about the common, simple causes of this code. It directs them to check the cheapest potential fixes first, preventing them from immediately quoting an expensive new motor or shaft.
Avoid saying:
- 'My check engine light is on, can you fix it?'
- 'The car is running weird, just do whatever it needs.'
- 'My friend said it's the Valvetronic motor, can you just replace it?'
Questions to ask before authorizing the repair:
- Did you find oil in the eccentric shaft sensor connector?
- If you are recommending a new Valvetronic motor, what was the resistance reading on the old one?
- Did you attempt a 'Valvetronic limit stop relearn' with a scan tool, and did the procedure fail?
- Does the quoted price include performing the mandatory relearn procedure after installation?
- What is the warranty on the parts and the labor for this repair?
Where to Take It: Dealer vs Independent vs Chain
- Dealer:
Best for: Vehicles still under powertrain or emissions warranty., Complex cases where a previous shop has failed to diagnose the issue., Owners who prioritize guaranteed OEM parts.
Downsides: Highest labor rates, often 1.5-2x an independent shop., May recommend replacing an entire assembly when only one component has failed. (Typical cost: +50% vs. baseline) - Independent Shop:
Best fit, but only if it's a European auto specialist. They are familiar with this common issue and have the right tools without the full dealer markup.
Best for: Out-of-warranty vehicles, especially BMW, MINI, or other European brands., Cost-conscious owners seeking a balance of expertise and value.
Downsides: A general mechanic lacks the specific scan tools needed for the mandatory 'relearn' procedure. (Typical cost: +0% vs. baseline) - Chain Shop:
AVOID for diagnosis or repair. Only use for an oil change if you are certain that is the problem.
Best for: The very first step: an oil and filter change if you suspect that's the cause.
Downsides: Technicians lack experience with Valvetronic systems., Will not have the brand-specific bidirectional scan tools required for proper diagnosis and repair., High risk of misdiagnosis. (Typical cost: -10% vs. baseline)
When to Walk Away From the Repair
If the estimated repair cost exceeds 50% of the car's current private-party market value, seriously consider selling or trading in the vehicle rather than repairing it.
- Car worth $8000, fix is $1500: Fix it. The repair cost is well under the 50% threshold and restores a critical engine function.
- Car worth $4000, fix is $2200: Borderline. The cost is over 50% of the car's value. Get a second opinion, and if the cost is firm, consider selling the car 'as-is'.
- Car worth $6000, fix is $5300: Walk away. The repair cost is nearly the entire value of the car. It is not economically sensible to proceed.
What Scan Tool You Need for This Code
Minimum: A bidirectional scan tool with manufacturer-specific software that performs the 'Valvetronic limit stop relearn' special function.
A basic $20-$50 code reader cannot perform the mandatory relearn procedure required after replacing a Valvetronic motor or sensor. Skipping the relearn causes the code to return immediately.
Budget: Not Recommended (~$0) — Tools in this price range are not bidirectional and cannot perform the required Valvetronic relearn.
Mid-range: Foxwell NT510 Elite / NT710 (~$180) — The sweet spot for DIYers. Offers full-system diagnostics and has the specific 'Valvetronic limit stop relearn' function needed to complete the job correctly.
Professional: Autel MaxiCOM MK808BT / MK906BT (~$450-1200) — Provides full bidirectional control, all OEM-level service functions including Valvetronic relearn, and works on a wide variety of makes and models.
Rent vs buy: You must buy. Free 'Loan-A-Tool' programs at auto parts stores only offer basic code readers, not the brand-specific bidirectional scanners needed for the Valvetronic relearn procedure.
How to Clear the Code After You Fix It
- Reconnect the battery if disconnected.
- Use a bidirectional scan tool to clear all fault codes.
- Perform the mandatory 'Valvetronic limit stop relearn' procedure using the scan tool.
- Perform a complete drive cycle to set emissions readiness monitors.
Drive cycle (~30 minutes): Cold start the vehicle and idle for 3 minutes. Drive in mixed city/highway traffic for 20 minutes, including steady-speed cruises. Idle for 5 minutes, then shut off the engine and let it cool completely.
Readiness monitors affected: Catalyst Monitor, Oxygen Sensor Monitor, Misfire Monitor
Before emissions retest: drive at least 50 miles to fully set monitors.
Watch out for:
- Clearing the code without performing the Valvetronic relearn procedure causes the code to return immediately.
- Using a generic OBD-II scanner that lacks the manufacturer-specific relearn function.
- Failing to complete a full drive cycle, resulting in a 'Not Ready' status at an emissions station.
Will This Fail Emissions / State Inspection?
Yes — this code typically fails an OBD-II emissions inspection.
- California: An active P1062 code is an automatic failure. After repair, all OBD-II readiness monitors must be 'Ready' to pass, requiring 50-100 miles of driving.
- New York: A check engine light from P1062 causes an automatic failure. The vehicle cannot be registered or renewed until fixed.
- Texas: An illuminated check engine light is an automatic failure. After repairs, the vehicle must complete a drive cycle to clear 'Not Ready' monitors.
Most Commonly Affected Vehicles
- BMW 3-Series (E90, F30) (2005-2019) — Extremely common on models with N46, N52, N55, and N20 engines.
- BMW X5 (E70, F15) (2007-2018) — The N55 engine used in xDrive35i models frequently suffers from Valvetronic motor and shaft failures.
- MINI Cooper (R56) (2007-2013) — The N12, N16, and N18 engines use BMW's Valvetronic system and trigger P1062 frequently in extreme cold weather.
- Dodge Dart (2013-2016) — Models with the 1.4L Turbo engine use the MultiAir system, where this code points to a sticking oil supply solenoid.
- Alfa Romeo Mito, Giulietta (2010-2020) — Uses the Fiat 'UniAir' system where P1062 points to a stuck oil supply solenoid, often failing during cold starts.
- Chevrolet Cruze, Sonic, Trax (2011-2020) — Models with variable valve lift technology experience actuator or sensor failures triggering this code.
- Hyundai Veloster, Elantra (2012-2018) — Gamma GDI engines trigger this code due to a clogged Oil Control Valve (OCV) or actuator failure.
- Honda Accord (Diesel) (2004-2008) — CRITICAL NOTE: On these diesel models, P1062 means 'Fuel Rail Pressure Sensor Circuit High Voltage' and is completely unrelated to valve lift.
Manufacturer-Specific Notes
- BMW / MINI: The eccentric shaft position sensor fails due to engine oil wicking through the sensor body and contaminating its electrical connector. A system 'relearn' procedure with a scan tool is mandatory after replacing the motor or sensor.
- Fiat-Chrysler (Jeep, Alfa Romeo, Dodge): On MultiAir engines, the fault often occurs only during a cold start. Thicker oil struggles to operate the cylinder's oil solenoid, but the problem disappears once the engine warms up.
- Honda: For 2.2L i-CDTi diesel engines, P1062 indicates a fuel pressure problem, not a valve lift issue. Do not diagnose Valvetronic parts on a Honda with this code.
- Hyundai / Kia: On GDI engines, technicians check the Oil Control Valve (OCV) first, as it gets clogged easily and is cheaper to replace than the main actuator assembly.
Real Owner Stories
2008 MINI Cooper (R56) at 122k miles with intermittent limp mode in extreme cold.
Car went into limp mode with a P1062 code during a -13°F morning start. The issue resolved itself after the engine warmed up, but returned on subsequent cold starts.
What they tried:
- Resetting the code, but it came back immediately on the next cold start.
- Testing the battery, which was found to be good.
- Taking the car for a long drive to fully warm up the engine and oil, which made the check engine light go out.
Outcome: The problem was caused by the engine oil being too thick at extreme cold temperatures for the Valvetronic system to operate. The owner opted to let the car warm up before driving to manage the issue.
Lesson: If P1062 appears only in very cold weather and disappears when warm, the root cause is thick oil. Verify your oil viscosity is correct for your climate before replacing parts.
2006 BMW Z4 (E85) at 96k miles with recurring P1062 and P1050 codes.
Owner experienced a sudden loss of power, rough idle, and codes P1050 and P1062. Clearing the codes restored power temporarily.
What they tried:
- Mistakenly cleaned the VANOS solenoids, which did not solve the problem as these codes relate to Valvetronic.
- Discovered the eccentric shaft sensor connector was full of oil. Cleaned the connector, providing a temporary fix.
Outcome: The root cause was a failed eccentric shaft sensor that leaked oil into its own electrical connector. The sensor was replaced to permanently fix the issue.
Lesson: Don't confuse Valvetronic (lift) and VANOS (timing). Always inspect the eccentric shaft sensor connector for oil; cleaning it is only a temporary fix for an internally failed sensor.
2011 BMW 335i (N55) with catastrophic Valvetronic failure leading to a $5,300 repair.
The car developed a loud clicking/binding noise from the engine bay, a rough idle, and a check engine light.
What they tried:
- Replaced the shorted Valvetronic actuator motor.
- After replacing the motor, the engine still ran rough and threw codes indicating the eccentric shaft was immovable.
- Confirmed the eccentric shaft itself had worn and was binding.
Outcome: The repair required replacing the Valvetronic motor, the eccentric shaft, and a wiring harness. The total cost was $5,300.
Lesson: A clicking or binding noise is a critical symptom of mechanical failure. Ignoring early symptoms leads to a cascading failure where a worn shaft destroys the motor.
2015 BMW X5 (F15) where Valvetronic relearn failed after replacing motor and shaft.
After correctly replacing a worn Valvetronic motor and eccentric shaft, the mandatory ISTA relearn procedure failed every time, throwing codes 135808 and 135B11.
What they tried:
- Swap-tested with another new Valvetronic motor.
- Verified the wiring harness and integrated supply module (ISM).
- Tested the main engine-to-chassis ground strap using jumper cables.
Outcome: With jumper cables providing a solid ground, the relearn procedure completed successfully. The root cause was a corroded engine ground strap providing insufficient voltage for the high-current relearn process.
Lesson: If a Valvetronic relearn procedure fails after replacing parts, check the main engine ground strap. A poor ground causes voltage-sensitive procedures to fail.
How to Prevent This Code From Triggering
- Use the correct OEM-spec synthetic engine oil and change it on schedule. (Every 5,000-7,500 miles or 1 year.) — Clean, correct-viscosity oil prevents sludge buildup that clogs solenoids and ensures actuators have proper pressure to function. This is the single most important preventive measure.
- Perform a Valvetronic 'relearn' procedure with a scan tool periodically. (Every 30,000 miles or every few years.) — Recalibrates the motor's knowledge of the eccentric shaft's end stops, helping the system adapt to minor wear over time.
- Regularly inspect Valvetronic motor and eccentric shaft sensor connectors for oil. (During every oil change or valve cover inspection.) — Catching an oil leak from the sensor into its connector early prevents intermittent electrical shorts and confusing symptoms.
- Maintain a healthy battery and charging system. (Test battery annually after 3 years of age.) — The Valvetronic system requires stable voltage during startup self-tests. A weak battery causes voltage drops that mimic a component failure.
Frequently Asked Questions
What is Valvetronic and why does it fail?
Valvetronic is BMW's system that varies intake valve lift to control engine speed, replacing a traditional throttle body. It fails due to worn electric servomotors, oil-contaminated position sensors, or dirty engine oil.
Can low or old engine oil really cause code P1062?
Yes. The system is highly dependent on clean oil at the correct pressure. Low, dirty, or incorrect viscosity oil is the most common reason for this code to appear.
What are common misdiagnosis mistakes for P1062?
A common mistake is replacing the expensive Valvetronic motor without checking simpler causes first. The actual fault is often incorrect oil viscosity in cold weather, a weak battery, or a damaged wire.
Why does my P1062 code appear and disappear?
An intermittent P1062 code is usually temperature-related. It appears on cold starts when oil is thick and clears when the engine warms up and the oil thins out.
Is fixing P1062 expensive?
It depends on the root cause. An oil change is cheap, but replacing the Valvetronic motor or eccentric shaft sensor costs $800 to $1,500 at a shop. If the eccentric shaft itself is worn, the repair exceeds $4,000.
Can I just clear the code to fix the problem?
No. Clearing the code only turns the check engine light off temporarily. The ECU will detect the physical fault on the next engine start and the code will return immediately.
What's the difference between Valvetronic and VANOS?
VANOS controls variable valve timing (when the valves open), while Valvetronic controls variable valve lift (how far the valves open). A P1062 code is a Valvetronic system fault, not a VANOS fault.
Key Takeaways
- Code P1062 indicates a failure in the variable valve lift system (Valvetronic or MultiAir), forcing the engine into a reduced-power limp mode.
- Check your engine oil level and viscosity immediately; low or thick oil in freezing temperatures is the number one cause of this code.
- Inspect the eccentric shaft sensor connector for oil contamination; finding oil inside the plug guarantees the $250+ sensor has failed internally.
- Stop driving the vehicle within 100 miles to prevent unburnt fuel from destroying your catalytic converter, which adds $1,200 to $2,500 to your repair bill.
- You must use a bidirectional scan tool to perform a mandatory 'limit stop relearn' procedure after replacing any Valvetronic parts, or the P1062 code will return instantly.
Shop the Parts Behind P1062
Below are the parts most often responsible for code P1062, ranked by how frequently each one is the actual culprit (per the diagnosis above). Tap any to see what we have for your vehicle.

The information in this article is provided for general reference and educational purposes only. Vehicle specifications, procedures, and part compatibility can vary by production date, trim level, and region. Always consult your vehicle's factory service manual and verify part numbers before purchasing or performing repairs. Safety-critical components such as airbags, seat belts, and braking systems should be installed by a qualified professional.
- 🧭 Diagnostic Flowchart
- 🛍️ Shop This Part
- What Does P1062 Mean?
- Can I Drive With P1062?
- Common Causes
- Symptoms
- Common Fixes & Costs
- Used vs. New Parts: Buying Guide
- What Happens If You Wait — Timeline
- Cost of Not Fixing It
- Diagnosis Steps
- When This Code Triggers (Freeze-Frame Conditions)
- Related Codes
- Climate & Environmental Factors
- How to Talk to a Mechanic About This Code
- Where to Take It: Dealer vs Independent vs Chain
- When to Walk Away From the Repair
- What Scan Tool You Need for This Code
- How to Clear the Code After You Fix It
- Will This Fail Emissions / State Inspection?
- Most Commonly Affected Vehicles
- Manufacturer-Specific Notes
- Real Owner Stories
- 2008 MINI Cooper (R56) at 122k miles with intermittent limp mode in extreme cold.
- 2006 BMW Z4 (E85) at 96k miles with recurring P1062 and P1050 codes.
- 2011 BMW 335i (N55) with catastrophic Valvetronic failure leading to a $5,300 repair.
- 2015 BMW X5 (F15) where Valvetronic relearn failed after replacing motor and shaft.
- How to Prevent This Code From Triggering
- Frequently Asked Questions
- What is Valvetronic and why does it fail?
- Can low or old engine oil really cause code P1062?
- What are common misdiagnosis mistakes for P1062?
- Why does my P1062 code appear and disappear?
- Is fixing P1062 expensive?
- Can I just clear the code to fix the problem?
- What's the difference between Valvetronic and VANOS?
- Key Takeaways
- 🎟️ Get 5% Off