
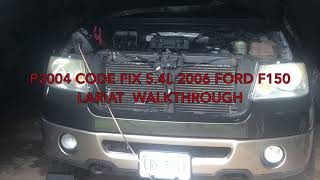
P1098 on 2007-2014 Ford Expedition 5.4L: IMRC Stuck Open Causes and Fixes
On a 5.4L 3V Expedition, P1098 almost always means the Intake Manifold Runner Control (IMRC) is stuck open, usually due to small, broken plastic linkage clips on the back of the intake manifold. The clips are cheap, but the labor to replace them is intensive due to their location against the firewall.
- P1098 on this Expedition specifically points to the Intake Manifold Runner Control (IMRC) being stuck open.
- The most likely cause is not a major component, but small plastic linkage clips on the back of the intake manifold.
- Accessing the IMRC system is labor-intensive due to its location against the firewall.
- Using genuine Motorcraft replacement clips is critical, as aftermarket versions are known to have poor fitment and lead to repeat failures.
- Always check for misrouted wiring harnesses behind the intake manifold that can physically block the linkage, especially if other engine work was recently performed.
What's Unique About the 2007-2014 Ford Expedition
The Ford 5.4L 3V Triton engine, shared between the F-150 and the Expedition, is well-known for this specific issue. The problem is almost always mechanical rather than electrical. The plastic components of the IMRC linkage, located at the back of the engine against the firewall, become brittle from constant heat cycles and eventually crack, detaching the actuator from the flaps it's supposed to control. This location makes visual inspection and repair notoriously difficult.
Symptoms You May Notice
- Reduced engine power, especially at low RPMs
- Sluggish or poor acceleration from a stop
- Decreased fuel economy
- Check Engine Light is on
- Rough or unstable idle may be present in some cases.
- Replacing the IMRC actuator when only the inexpensive plastic clips are broken.
- Replacing spark plugs or ignition coils hoping to fix the sluggish performance without first diagnosing the IMRC system.
- Replacing the IMRC linkage with aftermarket clips that have poor fitment, causing the code to return shortly after the repair.
Most Likely Causes
- Broken IMRC Linkage Clips or Bushings 🔴 High Probability The original plastic clips are situated in a high-heat area at the rear of the engine bay, causing them to become brittle and fail over time. This is the most widely documented failure point for the IMRC system on the 5.4L 3V engine.
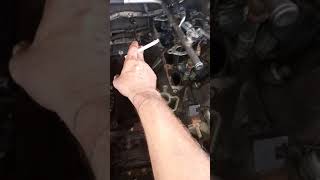
How to confirm: Visually inspect the linkage assembly on the back of the intake manifold, near the firewall. This is difficult and often requires an inspection mirror or a borescope camera. Look for disconnected rods or shattered plastic pieces. You may also be able to reach a hand back to feel if the linkage rod is disconnected from the actuator arm.
Typical fix: Replace the broken clips and bushings. It is highly recommended to use genuine Motorcraft parts, as some aftermarket versions (like certain Dorman kits) are reported by owners to have poor fitment and may not grip the linkage rod securely, leading to a repeat failure.
Est. part cost: $15-$40 - Failed IMRC Actuator 🟡 Medium Probability The actuator motor is also located in the high-heat area between the engine and firewall, which can lead to electrical failure of the internal motor windings or the integrated position sensor over time.
How to confirm: With a scan tool, monitor the IMRC PID voltage (IMRCM); it should be low at idle (<1.2V) and high above 3000 RPM (>3.3V). If the voltage is stuck high at idle, the sensor in the actuator may have failed. You can also test the motor resistance between the two motor pins, which should be between 5 and 14 ohms. An open circuit or a direct short indicates a failed motor.
Typical fix: Replace the IMRC actuator assembly. This part is located on the rear of the intake manifold and is labor-intensive to access.
Est. part cost: $70-$180 - Obstructed Linkage Path ⚪ Low Probability This typically occurs after a different repair where the intake manifold was removed, such as a cylinder head temperature (CHT) sensor replacement. Wiring harnesses (especially for the CHT sensor) or vacuum lines can be incorrectly routed behind the linkage, physically blocking its movement.
How to confirm: Using an inspection camera, check the area around the IMRC linkage for any wiring or hoses that could be interfering with the movement of the actuator arms. Ensure the harness is routed correctly to prevent binding.
Typical fix: Carefully reroute the obstructing wiring or hoses to their correct positions, ensuring they are clear of the linkage's path of travel.
Est. part cost: $0
Rare But Worth Checking
- Sticking or Seized Runner Flaps: While less common than linkage failure, heavy carbon buildup inside the intake manifold can cause the flaps themselves to stick. This usually requires replacing the entire intake manifold assembly, as the flaps are not serviced separately.
Diagnosis Steps
- Connect an OBD-II scanner to confirm the P1098 code is present and check for any other related codes like P2004.
- Using a scan tool with live data capability, monitor the 'IMRC Monitor' (IMRCM) PID. At idle, the PCM should command the flaps closed, and the voltage should read below 1.2V. Rev the engine above 3,000 RPM and confirm the voltage rises to over 3.3V.
- If the voltage is stuck high (e.g., over 3.0V) at idle, it confirms the sensor is reading the flaps as open when they should be closed.
- The most crucial step is a visual inspection. Use an inspection mirror and a bright light, or preferably a borescope/endoscope camera, to look at the back of the intake manifold where it meets the firewall.
- Carefully inspect the plastic clips that connect the actuator rods to the runner arms. This is the most common failure point. Look for broken, cracked, or missing clips.
- Check for any wiring harnesses or vacuum lines that may have fallen or been misrouted, blocking the linkage from moving. This is a known issue after other engine work has been performed.
- If the linkage is intact and unobstructed, the IMRC actuator itself is the next suspect. The actuator can be tested for resistance (5-14 ohms) or commanded on/off with a high-level scan tool to verify its operation.
- If the actuator and linkage are good, the final possibility is binding flaps inside the manifold, which usually necessitates manifold replacement.
Parts You'll Likely Need
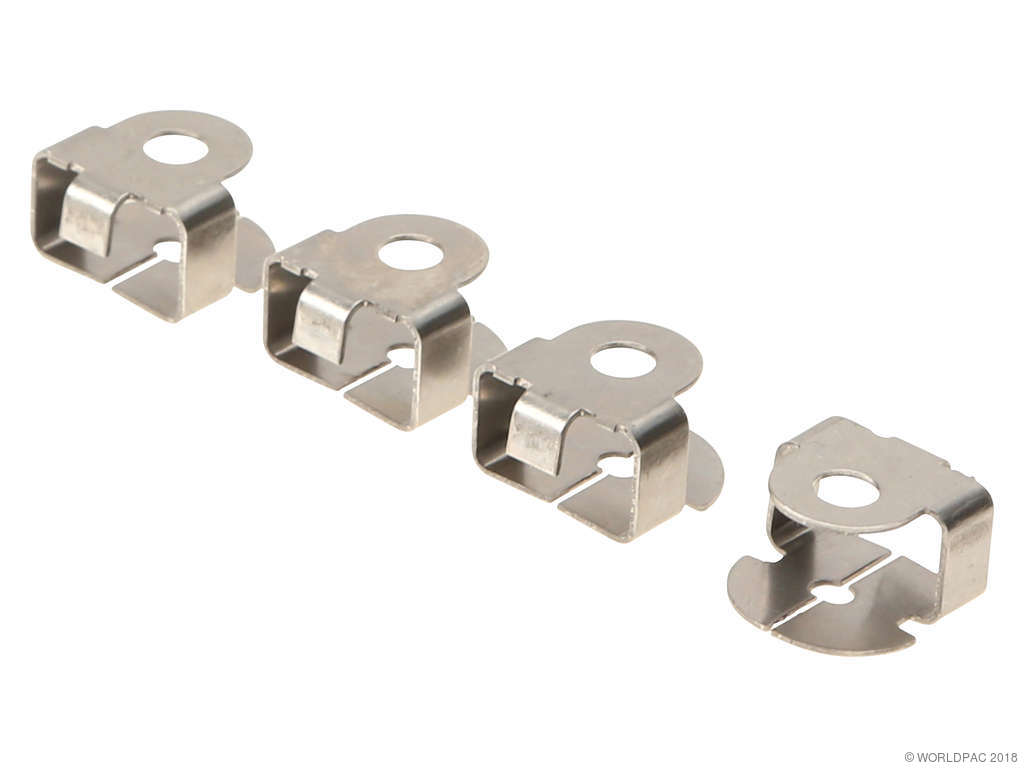
- Intake Manifold Runner Control Linkage Clips
(OEM #3L3Z-9S555-AA (Kit often includes multiple pieces))— These plastic clips are the most common failure point, becoming brittle from engine heat and breaking. Using genuine Motorcraft parts is highly recommended for proper fit.
Trusted brands: Motorcraft
OEM price range: $15-$40
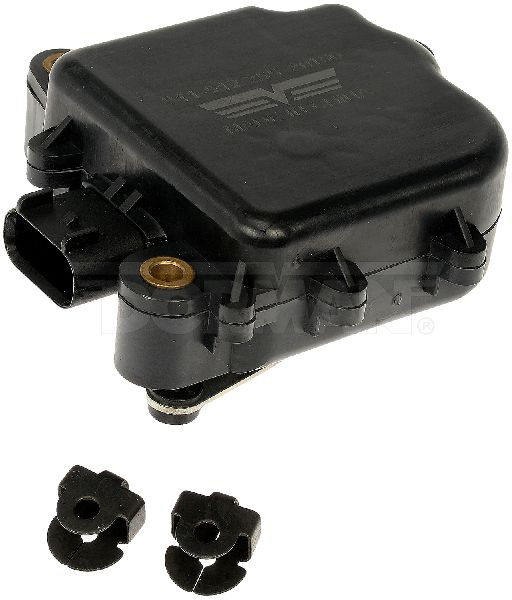
Aftermarket price range: $10-$25 - Intake Manifold Runner Control Actuator
(OEM #9L2Z-9E926-A / Motorcraft CM-5125)— This is the electric motor that moves the runners. It can fail electrically or the integrated position sensor can fail, leading to the code.
Trusted brands: Motorcraft, Dorman, Standard Motor Products
OEM price range: $100-$180
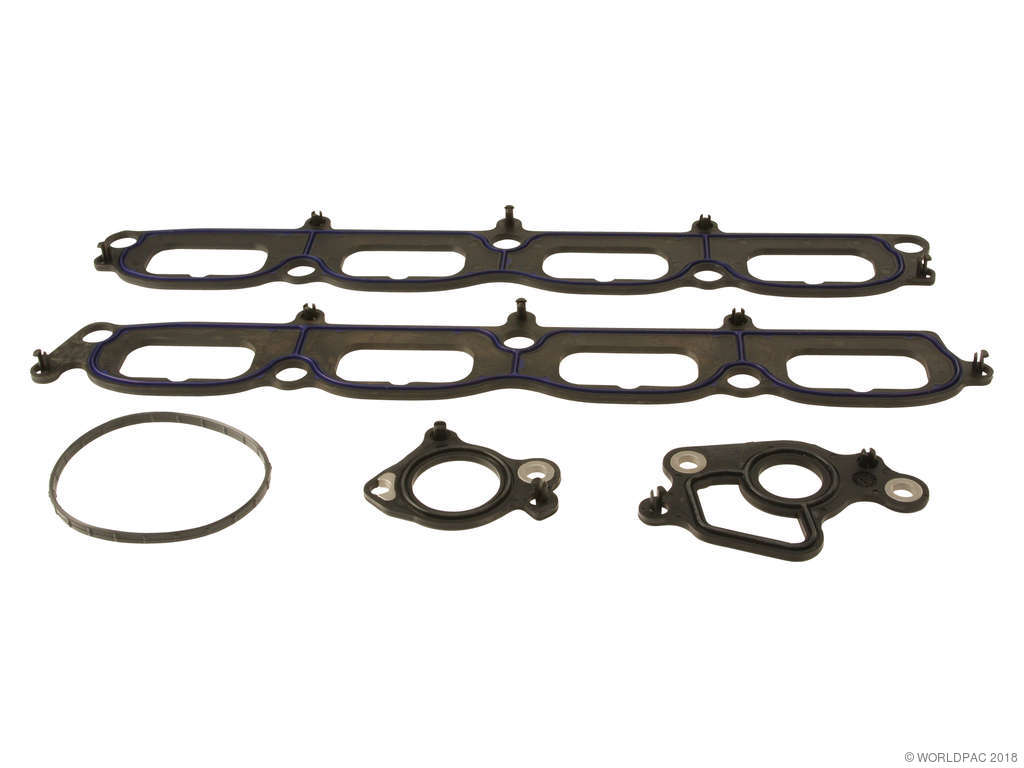
Aftermarket price range: $70-$120 - Intake Manifold Assembly
(OEM #5C2Z-9424-A (Check specific VIN))— If the internal flaps are seized or broken, or if a technician is already performing the labor-intensive job of accessing the area, replacing the entire manifold with a new actuator and gaskets is sometimes a more efficient, long-term repair.
Trusted brands: Motorcraft, Dorman
OEM price range: $400-$600
Aftermarket price range: $250-$400
Related Codes That Often Appear With This One
- P2004 — This code also means 'Intake Manifold Runner Control Stuck Open Bank 1'. It is a more generic SAE code, while P1098 is the Ford-specific equivalent. They point to the same fault and often appear together.
- P2006 — This code means 'Intake Manifold Runner Control Stuck Closed'. It can be caused by the same types of linkage and actuator problems, just failing in the opposite position.
Platform-Specific Known Issues
- The 2007-2014 Ford Expedition uses the same 5.4L 3V Triton engine as the popular F-150 of the era and suffers from the identical IMRC linkage and actuator failures. 🎬 See: How to change the IMRC on a 5.4L Expedition
- A real-world repair story from an F-150 owner with the same engine confirmed that using aftermarket Dorman clips resulted in a repeat failure, while switching to genuine Motorcraft clips provided a lasting fix.
Mechanic-Grade Diagnostic Values
- IMRC Actuator Motor Resistance — expected: 5 to 14 ohms. Failure: An open circuit (OL) or a direct short (near 0 ohms) indicates a failed motor winding.
- IMRC Monitor (IMRCM) PID Voltage at Idle — expected: Below 1.0V - 1.2V (flaps commanded closed). Failure: For P1098, the voltage will be stuck high (e.g., > 3.0V) at idle, indicating the flaps are open when they should be closed.
- IMRC Monitor (IMRCM) PID Voltage above ~3000 RPM — expected: Around 3.3V - 4.5V (flaps commanded open). Failure: Voltage does not rise when the engine is revved, indicating a failure to open.
- IMRC Actuator Connector (C168) Pin 3 Reference Voltage — expected: ~5.0V with Key On, Engine Off (KOEO). Failure: No voltage or significantly low voltage points to a wiring issue or a problem with the PCM's 5V reference circuit.
Scan Tool Commands That Help
- Ford IDS (or equivalent professional scanner): Active Command - Charge Motion Control Valve (CMCV) / IMRC Active Command — This bidirectional control is used to command the IMRC actuator open and closed while the engine is off or at idle. It allows a technician to verify the entire system's function (actuator motor, linkage, and position sensor) without having to rev the engine or remove parts. If the command is sent but the IMRCM voltage PID does not change, it confirms a fault in the system.
Wiring & Ground Locations
- C168 — The electrical connector on the IMRC actuator itself, located on the rear of the intake manifold against the firewall.. This is the primary connection point for all power, ground, and signal wires to the actuator. Testing the pinout here is essential for electrical diagnosis. The wires are prone to heat damage.
- C168 Pinout (5-pin) — At the IMRC actuator connector.. Pin 1: Motor Control (+), Pin 2: Motor Control (-), Pin 3: 5V Reference, Pin 4: Signal Return (Ground), Pin 5: IMRC Position Signal. Knowing the function of each pin is required for accurate multimeter testing.
- G101 / G104 — G101 is at the right rear of the engine compartment. G104 is on the right side of the engine compartment, near the battery or on the frame rail.. These are primary engine control grounds. A corroded or loose connection at these points can cause erratic voltage signals from various sensors, including the IMRC position sensor, potentially leading to false codes.
- CHT Sensor / IMRC Harness Path — The wiring harness that routes to the back of the intake manifold.. It is a very common mistake during reassembly to route this harness *behind* the IMRC linkage arms. The correct path is *in front of* the linkage. When misrouted, the harness physically blocks the linkage from moving to the closed position, directly causing a P1098 or P2004 code.
Real Owner Repair Stories
- Multiple Ford F-150 owner forums (2005 Ford F-150 5.4L 3V (same engine and IMRC system)) — Check Engine Light with P1098 and P2004 codes, poor low-end power.
❌ Tried (didn't work) Replacing the IMRC actuator motor., Replacing the broken plastic linkage clips with aftermarket Dorman clips, which fell off shortly after installation.
✅ What actually fixed it The owner performed the repair a second time using genuine Motorcraft linkage clips (CM-5125), which resolved the clip issue. The final, critical discovery was that the wiring harness for the IMRC and CHT sensor had been incorrectly routed *behind* the linkage arm during a previous repair, physically preventing it from moving. Correctly routing the harness in front of the linkage was the ultimate fix that cleared the codes.
OEM Part Supersession History
3L3Z-9J559-CA→9L2Z-9E926-A / Motorcraft CM-5125— Standard part revision and update by Ford for the IMRC actuator.
Diagnostic Flowchart
Other Known Issues on This Vehicle
Issues unrelated to this code that are worth knowing about as an owner of this generation:
- Two-Piece Spark Plug Breakage 🔴 High — Extremely common on engines built before 10/9/07. Carbon seizes the plug's lower shield in the head, causing it to break during removal. (Ref: TSB 08-7-6 provides a special removal procedure and notes the affected engine build dates.)
- Cam Phaser / VCT Solenoid Failure 🔴 High — Very common, often starting after 80,000 miles. Causes a characteristic 'diesel-like' ticking or knocking sound at hot idle due to worn phasers, clogged solenoids, or low oil pressure from failed tensioner seals. (Ref: TSB 06-19-8 and others address diagnosis of VCT-related noises.)
- Timing Chain Tensioner & Guide Failure 🔴 High — Widespread issue where plastic timing chain guides break apart and tensioner seals fail, leading to low oil pressure, chain rattle on startup, and potential catastrophic engine failure.
- Fuel Pump Driver Module (FPDM) Corrosion 🟠 Medium — Common, especially in rust-belt regions. The module, often mounted to the frame near the spare tire, corrodes due to dissimilar metals, causing crank-no-start, stalling, or hesitation. (Ref: No recall, but updated replacement kits include standoffs to prevent direct frame contact.)
- Cracked Plastic Heater Hose T-Connector 🟡 Low — A plastic 'T' in the heater hose assembly near the firewall is a common failure point, leading to coolant leaks.
Used vs. New Parts: Buying Guide for This Vehicle
When a used part is the smart pick: A complete intake manifold from a verified low-mileage (under 80k miles) donor vehicle can be a good value, as it includes the manifold, flaps, linkage, and actuator. However, it MUST be inspected.
Donor-vehicle mileage cap: roughly under 80000 miles for the part to have meaningful remaining life.
What to inspect on the donor part:
- Manually operate the linkage arms on the manifold. They should move smoothly with no binding or gritty feeling.
- Inspect the plastic linkage clips for any signs of cracking or stress marks. If they look original and are from a high-mileage vehicle, assume they need to be replaced.
- Check the area around the actuator for signs of oil leaks from the donor vehicle's valve cover.
- Ensure no pieces of the linkage or actuator are broken or missing.
OEM-only on this vehicle (don't cheap out):
- IMRC Linkage Clips (Motorcraft P/N 3L3Z-9S555-AA or kit CM-5125): This is the most critical OEM-only part. Forum consensus is overwhelming that aftermarket clips, particularly from Dorman (P/N 47099), do not have the correct internal teeth to grip the rod securely and will fall off, causing a repeat failure.
Aftermarket brands forum-validated for this vehicle:
- Dorman (Intake Manifold Assembly): While their clips are to be avoided, some users have reported the complete Dorman intake manifold assembly is a viable, lower-cost alternative to OEM, with some noting it uses stainless steel components for the IMRC attachments where the original used rust-prone parts.
Brands owners have reported issues with on this vehicle:
- Dorman (Linkage Clips P/N 47099): Widely reported by owners to have a poor fit and fail quickly compared to OEM Motorcraft clips.
Real Owner Stories
Aggregated from forums and TSBs cited above. Mileages and costs reflect what owners reported in those sources.
2004-2010 Ford F-150 (5.4L 3V V8)
Symptoms: The owner experienced a repeat failure of the IMRC system after an initial repair attempt.
What fixed it: Switching from aftermarket Dorman clips to genuine Motorcraft clips provided a lasting fix, as the aftermarket clips did not grip the linkage rod securely.
Source hint: vehicle_specific_issues citing F-150 owner report
2004-2010 Ford F-150 (5.4L 3V V8)
Symptoms: P1098/P2004 codes appeared following other engine repairs.
What fixed it: Correcting a misrouted wiring harness that was causing a physical linkage obstruction.
Source hint: f150forum.com thread
Related OBD-II Codes
Frequently Asked Questions
I'm seeing P1098 on my 2008 Expedition; should I use the Dorman IMRC clips from the local parts store?
Does TSB 08-7-6 relate to my P1098 code on a 2007 Expedition?
Can a recent Cylinder Head Temperature (CHT) sensor replacement cause a P1098 code?
How can I check the IMRC linkage on my Expedition without removing the intake manifold?
My 2010 Expedition has a coolant leak near the firewall; is this related to the IMRC code?
What voltage should I see for the IMRC Monitor (IMRCM) PID at idle?
Helpful Videos
We Have This Part in Stock


The information in this article is provided for general reference and educational purposes only. Vehicle specifications, procedures, and part compatibility can vary by production date, trim level, and region. Always consult your vehicle's factory service manual and verify part numbers before purchasing or performing repairs. Safety-critical components such as airbags, seat belts, and braking systems should be installed by a qualified professional.
- Ford Expedition:
- 🧭 Diagnostic Flowchart
- 🎬 Helpful Videos
- 🛍️ Shop This Part
- What's Unique About the 2007-2014 Ford Expedition
- Symptoms You May Notice
- Most Likely Causes
- Rare But Worth Checking
- Diagnosis Steps
- Parts You'll Likely Need
- Related Codes That Often Appear With This One
- Platform-Specific Known Issues
- Mechanic-Grade Diagnostic Values
- Scan Tool Commands That Help
- Wiring & Ground Locations
- Real Owner Repair Stories
- OEM Part Supersession History
- Other Known Issues on This Vehicle
- Used vs. New Parts: Buying Guide for This Vehicle
- Real Owner Stories
- 2004-2010 Ford F-150 (5.4L 3V V8)
- 2004-2010 Ford F-150 (5.4L 3V V8)
- Related OBD-II Codes
- Frequently Asked Questions
- 🎟️ Get 5% Off