
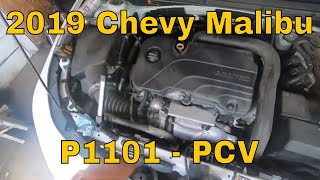
P1101 on 2016-2019 Chevrolet Volt: Intake Air Flow System Causes and Fixes
On a 2016-2019 Volt, code P1101 is almost always caused by a clogged PCV orifice inside the camshaft cover, a known issue covered by GM TSB #20-NA-047. This blockage creates high crankcase pressure, which can also cause oil leaks. The fix is to replace the small orifice (Part #12641875), which costs about $15-$25, but the labor is extensive (3.5+ hours) as the fuel rail must be removed.
- For a 2016-2019 Volt, P1101 is almost certainly caused by a clogged PCV orifice in the camshaft cover, not a bad MAF sensor. This is confirmed by GM TSB 20-NA-047.
- Check for positive crankcase pressure by lifting the oil dipstick at idle or using a manometer before buying any parts. Puffing air or a pressure reading above 0 inH2O is a strong indicator of the problem.
- The correct fix is to replace the small PCV orifice (ACDelco #12641875) and the inner/outer camshaft cover gaskets.
- This repair is labor-intensive (3.5+ hours) and requires removing the fuel rail and injectors, making it a difficult and time-consuming DIY job.
What's Unique About the 2016-2019 Chevrolet Volt
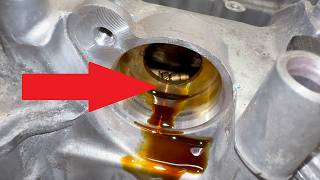
While P1101 on many vehicles points to a vacuum leak or dirty MAF sensor, on the second-generation Chevrolet Volt it has a very specific and well-documented cause. General Motors issued Technical Service Bulletin #20-NA-047 that identifies a clogged Positive Crankcase Ventilation (PCV) orifice inside the camshaft cover as the primary culprit. This blockage creates excessive positive pressure inside the engine's crankcase, which disrupts airflow readings and can even force oil out of the front and rear crankshaft seals. Ignoring this platform-specific issue and simply cleaning or replacing the MAF sensor will not fix the problem.
Symptoms You May Notice
- Check Engine Light is on
- Reduced engine power or sluggish performance
- Rough or unstable idle
- Engine oil leaks, particularly from the front or rear crankshaft seals
- Increased oil consumption
- Poor fuel efficiency
- Visible oil or oil vapor in the air intake ducting
- Replacing the Mass Airflow (MAF) sensor. The P1101 code indicates an airflow *performance* issue. On the 2016-2019 Volt, the MAF sensor is usually functioning correctly and reporting the abnormal airflow caused by the PCV system problem. Replacing the sensor will not fix the root cause.
Most Likely Causes
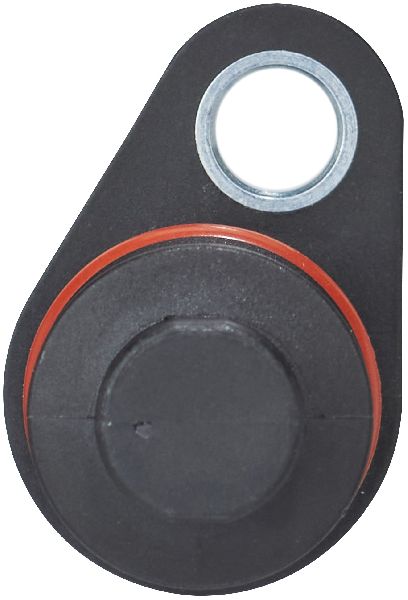
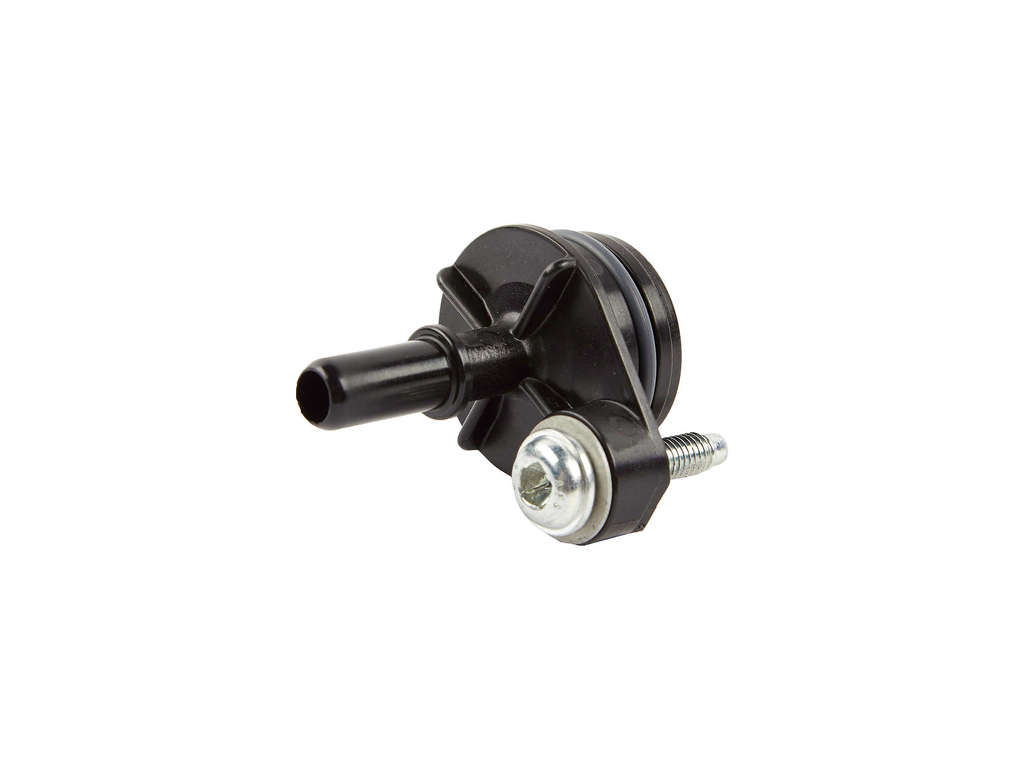
- Clogged PCV Orifice in Camshaft Cover 🔴 High Probability → Shop PCV Valve This is a known design issue with the 1.5L L3A engine, as documented by GM in Technical Service Bulletin #20-NA-047. The small plastic orifice can become blocked by carbon and oil deposits over time.
How to confirm: The definitive method is to test crankcase pressure with a manometer 🎬 Watch: How to perform a crankcase pressure test on the 1.5L engine. at hot idle. Normal readings are a slight vacuum, between -1 and -5 inches of water. A reading above 0 inches of water indicates a blockage and confirms the issue. A simple DIY check is to run the engine and slightly lift the oil dipstick or loosen the oil filler cap; puffing air or smoke indicates positive pressure, pointing to a clog.
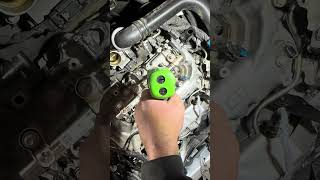
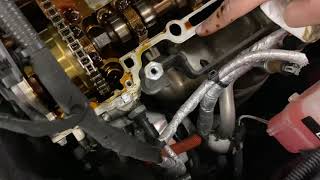
Typical fix: Remove the camshaft cover and replace the small PCV orifice. The GM part number for the orifice is 12641875. 🎬 See this video for a quick guide on replacing the PCV orifice. It is also required to replace the camshaft cover gaskets at the same time. This is a labor-intensive job (3.5 hours per the TSB) as it requires removing the high-pressure fuel rail and injectors.
Est. part cost: $15-$25 for the orifice
Rare But Worth Checking
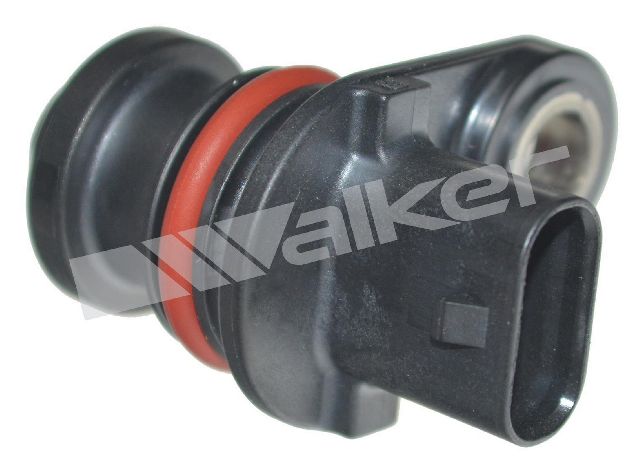
- Dirty or Contaminated Mass Airflow (MAF) Sensor: → Shop Fuel Injection Air Flow Meter While the PCV issue is the most likely cause, oil vapor drawn into the intake from high crankcase pressure can contaminate the MAF sensor, causing it to read incorrectly. Cleaning the MAF sensor is a good idea while performing the PCV orifice repair, but it is unlikely to be the sole cause.
- Clogged Engine Air Filter: → Shop Air Cleaner Assembly A severely restricted air filter can reduce airflow enough to cause a discrepancy between measured and expected values. This is a simple and inexpensive check to perform first.
- Vacuum Leak in Intake System: A cracked intake hose or a leaking gasket can allow unmetered air to enter the engine after the MAF sensor, which can trigger P1101. However, on this vehicle, this is much less common than the PCV issue.
- Cracked Piston / Worn Piston Rings: In rare cases, excessive blow-by from a damaged piston or stuck rings can also cause high crankcase pressure, mimicking the symptoms of a clogged PCV. This is mentioned as a possibility in related GM service bulletins and is often accompanied by other codes like P0300 (Random Misfire).
Diagnosis Steps
- Check for Technical Service Bulletins (TSBs). A search will reveal TSB #20-NA-047, which points directly to the PCV system as the likely cause.
- Perform a crankcase pressure check. With the engine at a hot idle, carefully loosen the oil filler cap or lift the oil dipstick. Listen and feel for puffing air, which indicates positive crankcase pressure. For a definitive test, use a manometer to measure pressure at the dipstick tube; a reading above 0 inches of water confirms the fault.
- If positive pressure is confirmed, the cause is almost certainly the clogged PCV orifice. Proceed with the replacement of the orifice (Part #12641875) and camshaft cover gaskets.
- If crankcase pressure is normal (negative, between -1 and -5 inH2O), inspect the engine air filter for dirt or blockages and replace if necessary.
- Inspect the full air intake path from the air filter housing to the throttle body for any cracks, loose connections, or signs of unmetered air leaks.
- Remove and inspect the MAF sensor. If it appears contaminated with dirt or oil, clean it carefully with a dedicated MAF sensor cleaner. Do not touch the sensor elements.
Parts You'll Likely Need
- PCV Valve Orifice
(OEM #12641875)— This is the direct cause of the P1101 code on this vehicle in most cases, as identified by GM TSB #20-NA-047. It becomes clogged, causing high crankcase pressure.
Trusted brands: ACDelco
OEM price range: $15-$25
Aftermarket price range: $10-$20 - Camshaft Cover Gasket (Outer)
(OEM #12636177)— The camshaft cover must be removed to access the PCV orifice. The gaskets are single-use and must be replaced 🎬 Watch: Step-by-step walkthrough for replacing the Volt valve cover gasket. to prevent oil leaks. This is the main, outer gasket.
Trusted brands: ACDelco, Fel-Pro
OEM price range: $10-$15
Aftermarket price range: $8-$12 - Camshaft Cover Gasket (Inner)
(OEM #12636384)— This is the smaller, inner gasket for the camshaft cover that also must be replaced during the service.
Trusted brands: ACDelco
OEM price range: $5-$8
Aftermarket price range: $4-$7
Technical Service Bulletins (TSBs) & Recalls
- 20-NA-047: Front or Rear Crankshaft Oil Leak, Malfunction Indicator Lamp (MIL) Illuminated - DTC P1101 Set. This TSB confirms the cause is high crankcase pressure from a plugged PCV orifice and gives the official repair procedure. It has been revised multiple times to update parts and labor info.
- PIP5603: A related TSB for code P0106 on the same engine, which also points to the plugged PCV orifice in the valve cover as a primary cause.
- PIP5417C: The predecessor to 20-NA-047, which also detailed the crankcase pressure issue and oil leaks.
Platform-Specific Known Issues
- GM Technical Service Bulletin #20-NA-047 (and its revisions) was issued specifically to address P1101 and associated oil leaks on the 1.5L L3A engine, among others. It confirms the cause is a plugged PCV orifice and provides the diagnostic and repair procedure.
- Early repair attempts sometimes involved replacing the entire camshaft cover assembly (Part #12691020), but the TSB was later updated to specify replacing only the small, inexpensive orifice.
Mechanic-Grade Diagnostic Values
- Crankcase Pressure at Hot Idle — expected: -1 to -5 inches of water (a slight vacuum). Failure: Any positive pressure (greater than 0 inches of water) indicates a blockage.
- Mass Airflow (MAF) Sensor at Hot Idle — expected: Approximately 1.5 g/s to 2.5 g/s. Failure: A reading significantly higher than expected can be caused by unmetered air forced from the crankcase past the MAF sensor.
- Long Term Fuel Trim (LTFT) at Idle — expected: Within +/- 10%. Failure: A sustained positive value greater than +10% indicates the ECM is adding fuel to compensate for a lean condition caused by unmetered air.
- MAF Sensor Connector Voltage (Key On, Engine Off) — expected: Pink wire (Pin C) should have ~12V. Black/White wire (Pin B) should have continuity to ground.. Failure: Lack of power or ground at the sensor connector indicates a wiring issue, not a sensor failure.
Scan Tool Commands That Help
- GDS2 / Tech 2 or equivalent professional scan tool: Live Data Monitoring (MAF g/s, Long Term Fuel Trim, Calculated vs. MAF Airflow) — This is the primary use of a scan tool for this code. There are no specific bidirectional commands required for diagnosis; the key is to monitor live data to see how the PCV issue is affecting airflow and fuel compensation.
Wiring & Ground Locations
- G103 / G105 — Common engine compartment grounds. G103 is often on the cowl or left front of the engine compartment; G105 is often on the engine block or frame rail near the engine.. The ECM and its sensors rely on clean ground connections. A corroded or loose engine ground can cause incorrect sensor readings, including the MAF sensor, potentially contributing to or mimicking airflow faults.
- MAF Sensor Connector — On the air intake tube between the air filter box and the throttle body.. This is the primary connection for the MAF sensor. Verifying power (Pin C, Pink), ground (Pin B, Black/White), and signal integrity at this connector is a crucial step to rule out a wiring fault before condemning the sensor.
Real Owner Repair Stories
- Reddit user on r/AskMechanics (2017 Chevrolet Malibu 1.5L (platform mate with same engine and issue)) — Check Engine Light with code P1101.
❌ Tried (didn't work) The thread implies common checks like MAF cleaning/replacement were considered.
✅ What actually fixed it The consensus from multiple technicians in the thread was to stop other diagnostics and immediately check crankcase pressure, as the clogged PCV orifice described in TSB 20-NA-047 is the almost certain cause. This corroborates the established diagnostic path.
"I Checked Everything" — The Actual Cause
- A standard intake smoke test may come back clean (no leaks) for this code. This is because the issue is not unmetered air being sucked *in* from a vacuum leak, but rather unmetered air being pushed *out* of the crankcase and into the intake tract due to the blocked PCV orifice. The diagnostic confirmation is a crankcase *pressure* test with a manometer, not a smoke test.
OEM Part Supersession History
12665643, 12669418, 12677792, 12681368, 12685415→12691020— Multiple revisions and consolidations of the camshaft cover assembly. Early repairs for the P1101 issue involved replacing the entire cover.
Heads up: While the covers are physically interchangeable, later TSBs specified that only the internal PCV orifice (12641875) needed replacement, making the full cover replacement unnecessary and more expensive.
Model Year Variations Within This Range
- 2019: A more powerful 7.2 kW charging system became available as an option. This change is unrelated to the L3A engine or the P1101 fault, which affects all 2016-2019 models equally.
Diagnostic Flowchart
Other Known Issues on This Vehicle
Issues unrelated to this code that are worth knowing about as an owner of this generation:
- Battery Energy Control Module (BECM) Failure 🔴 High — Common enough to prompt an NHTSA investigation and a special warranty extension. Symptoms include sudden loss of propulsion, inability to charge, and a check engine light with 'U' series codes. (Ref: TSB 18-NA-261; Special Coverage N232432680 extends warranty to 15 years/150,000 miles.)
- Intermittent 'Shift to Park' Message 🟠 Medium — A very common complaint where the vehicle fails to recognize it is in Park, preventing it from shutting down completely and leading to a dead 12V battery. (Ref: TSB 19-NA-206 (and its revisions) provides a fix involving a new microswitch or jumper harness.)
- EGR Cooler and/or Valve Failure 🟠 Medium — Can become clogged or fail, leading to check engine lights (e.g., P0401), rough running, and reduced efficiency. Less common than BECM or Shift to Park but a known issue.
Used vs. New Parts: Buying Guide for This Vehicle
When a used part is the smart pick: For this repair, using used parts is generally not recommended due to the high labor cost. However, if the original camshaft cover is physically cracked or damaged during the repair, a used cover from a low-mileage donor vehicle could be a cost-effective replacement instead of a new one.
Donor-vehicle mileage cap: roughly under 50000 miles for the part to have meaningful remaining life.
What to inspect on the donor part:
- Inspect for any hairline cracks, especially around bolt holes.
- Check for warping by placing it on a known flat surface.
- Ensure all threaded holes are intact and not stripped.
- Most importantly, inspect the internal PCV passages to ensure they are not sludged or blocked.
OEM-only on this vehicle (don't cheap out):
- PCV Valve Orifice (12641875)
- Camshaft Cover Gaskets (12636177, 12636384)
Aftermarket brands forum-validated for this vehicle:
- Fel-Pro for camshaft cover gaskets.
Brands owners have reported issues with on this vehicle:
- No specific brands were consistently reported as problematic for this repair, but given the labor involved, using unverified, low-cost online parts is highly discouraged.
Real Owner Stories
Aggregated from forums and TSBs cited above. Mileages and costs reflect what owners reported in those sources.
2017 Chevrolet Volt
Symptoms: Check engine light with a list of codes including P1101; the owner described the car as 'bricked' with multiple codes appearing simultaneously.
What fixed it: The Battery Energy Control Module (BECM) was repaired under warranty, which resolved the P1101 and other codes that were determined to be false alarms.
Cost: $0
Source hint: Reddit r/volt thread 'Chevy volt 2017 premier bricked with P1EAB'
2016-2019 Chevrolet Volt 1.5L
Symptoms: The owner documented a journey of diagnosing P1101, confirming the need for a difficult DIY repair involving the PCV system.
What fixed it: Replacement of the PCV orifice (Part #12641875) and camshaft cover gaskets.
Source hint: gm-volt.com thread 'P1101 and the PCV Orifice Replacement Saga'
2017 Chevrolet Volt
Symptoms: Check Engine Light with code P0106, often accompanied by P00C7 or P1101. Rough idle and hesitation were also noted.
What fixed it: Cleaning the PCV orifice in the valve cover (or replacing it per TSB 20-NA-047) and cleaning the MAP sensor.
Source hint: General consensus from gm-volt.com and /r/volt subreddit
2017 Chevrolet Malibu 1.5L
Symptoms: Vehicle experienced code P1101; users advised checking for positive crankcase pressure due to the known PCV issue shared with the Volt's engine architecture.
What fixed it: Addressing the PCV system blockage as identified in the shared TSB for the 1.5L engine family.
Source hint: Reddit r/AskMechanics thread '2017 Chevrolet Malibu 1.5 i4 has code p1101'
Related OBD-II Codes
Frequently Asked Questions
Does TSB 20-NA-047 apply to my 2017 Chevrolet Volt regarding the P1101 code?
Do I need to replace the entire camshaft cover to fix the PCV issue on my 1.5L Volt?
How can I tell if my P1101 code is caused by the PCV system without special tools?
Is there a warranty extension for the BECM that might be causing my check engine light?
What is the official labor time for the PCV orifice repair on the 1.5L engine?
Could my P1101 code be related to the 'Shift to Park' message?
Helpful Videos
We Have This Part in Stock


The information in this article is provided for general reference and educational purposes only. Vehicle specifications, procedures, and part compatibility can vary by production date, trim level, and region. Always consult your vehicle's factory service manual and verify part numbers before purchasing or performing repairs. Safety-critical components such as airbags, seat belts, and braking systems should be installed by a qualified professional.
- Chevrolet Volt:
- 🧭 Diagnostic Flowchart
- 🎬 Helpful Videos
- 🛍️ Shop This Part
- What's Unique About the 2016-2019 Chevrolet Volt
- Symptoms You May Notice
- Most Likely Causes
- Rare But Worth Checking
- Diagnosis Steps
- Parts You'll Likely Need
- Technical Service Bulletins (TSBs) & Recalls
- Platform-Specific Known Issues
- Mechanic-Grade Diagnostic Values
- Scan Tool Commands That Help
- Wiring & Ground Locations
- Real Owner Repair Stories
- "I Checked Everything" — The Actual Cause
- OEM Part Supersession History
- Model Year Variations Within This Range
- Other Known Issues on This Vehicle
- Used vs. New Parts: Buying Guide for This Vehicle
- Real Owner Stories
- 2017 Chevrolet Volt
- 2016-2019 Chevrolet Volt 1.5L
- 2017 Chevrolet Volt
- 2017 Chevrolet Malibu 1.5L
- Related OBD-II Codes
- Frequently Asked Questions
- 🎟️ Get 5% Off