
OBD-II Code P1109: Intake Air System Malfunction
What P1109 means, why it triggers, and how to fix it
- P1109 is a manufacturer-specific code, meaning a fix for a Honda (internal BARO sensor) will not resolve the same code on a Volkswagen (downstream O2 sensor).
- Faulty MAP sensors, cracked vacuum hoses, and corroded wiring cause over 70% of P1109 codes across most vehicle brands.
- Volkswagen and Audi vehicles almost exclusively trigger P1109 for a failing downstream O2 sensor or exhaust leak, not an intake pressure issue.
- Ignoring P1109 for more than 1-3 months forces the engine to run rich, destroying the catalytic converter and turning a $150 sensor replacement into a $2,000 repair.
What Does P1109 Mean?
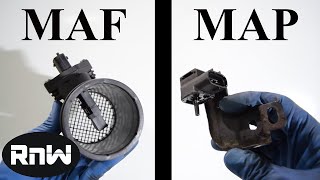
P1109 is a manufacturer-specific code, meaning its definition depends entirely on your car's brand. Most commonly, it points to a problem with a sensor measuring air pressure or temperature entering the engine, like the Manifold Absolute Pressure (MAP) or Barometric (BARO) sensor. The Powertrain Control Module (PCM) uses this data to calculate the correct air-fuel mixture. When a sensor provides an intermittent, out-of-range, or unexpected signal, the PCM triggers P1109.
Technical definition: The official SAE/OBD-II definition for P1109 varies significantly by manufacturer. Common definitions include 'BARO Sensor Circuit Out of Range High' (Honda), 'Manifold Air Pressure too High in Deceleration' (MINI), 'IAT Sensor Intermittent' (Ford/GM), 'Secondary Port Throttle System' (GM), or 'O2 Sensor Circuit Bank 2 Sensor 2 Voltage Too Low/Air Leak' (Volkswagen/Audi). In all instances, the PCM detects an electrical or performance fault from a sensor critical to managing the air/fuel mixture or exhaust monitoring.
Can I Drive With P1109?
Yes, But With Caution. You can drive for a short period, but it is not recommended. Continuing to drive with P1109 causes a rough running engine, stalling, and significantly poor fuel economy. If a bad sensor causes the engine to run rich, unburned fuel enters the exhaust and destroys the catalytic converter, a repair costing $1,200 to $2,800. Address the issue within 50 miles to prevent this expensive consequential damage.
Common Causes
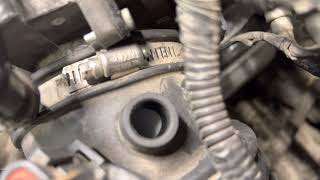
- Faulty Manifold Absolute Pressure (MAP) or Barometric (BARO) Sensor (Very Common) — These sensors measure air pressure and fail from age or heat, sending incorrect voltage signals to the PCM.
- Vacuum Leaks (Common) — Cracked or disconnected vacuum hoses allow unmetered air into the engine, causing pressure readings that conflict with PCM expectations.
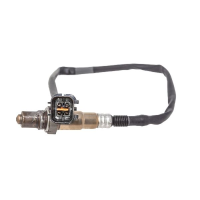
- Failing Downstream Oxygen (O2) Sensor or Exhaust Leak (VW/Audi) (Common) — For Volkswagen and Audi vehicles, P1109 points to the downstream O2 sensor reading low voltage, frequently caused by an exhaust leak upstream of the sensor or a failing sensor heater circuit.
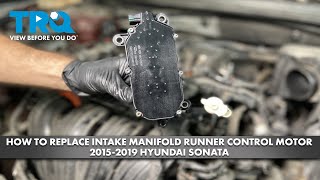
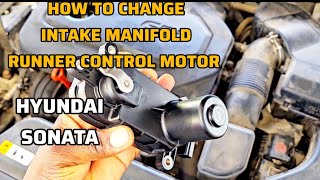
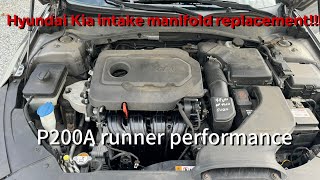
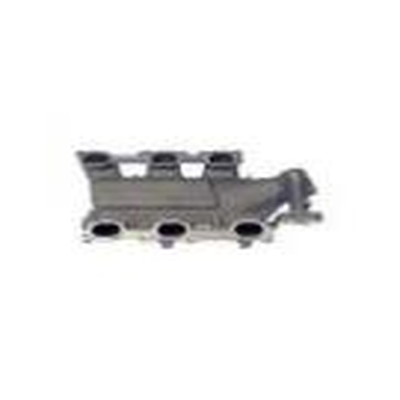
- Faulty Intake Manifold Runner Control (IMRC) (Common) — On Hyundai and Kia vehicles, intake manifold flaps stick from carbon buildup, or the actuator motor fails. This disrupts airflow and triggers the code when actual airflow mismatches expected values.
- Damaged or Corroded Wiring/Connectors (Common) — Wires and plugs connected to intake sensors suffer damage, looseness, or corrosion from moisture (especially after an engine wash), causing a poor or intermittent electrical signal.
- Faulty Secondary Port Throttle System (Common) — Specific to GM vehicles, a secondary throttle system malfunctions due to a bad actuator motor, carbon deposits causing the plate to stick, or a failed position sensor.
- Dirty or Sticking Throttle Body (Less Common) — Carbon buildup causes the throttle plate to stick or move slowly, generating unexpected pressure readings during deceleration.
- Faulty Intake Air Temperature (IAT) Sensor (Less Common) — On Ford and GM vehicles, this code points specifically to an intermittent signal from the IAT sensor, which measures the temperature of the air entering the engine.
- Faulty Supercharger Bypass Valve (MINI R53) (Less Common) — On supercharged MINI Cooper S models, a failing bypass valve causes incorrect manifold pressure readings during deceleration, triggering the P1109 code.
Symptoms
- Check Engine Light is On — The Malfunction Indicator Lamp (MIL) illuminates on your dashboard.
- Rough Idle, Hesitation, and Stalling — The engine shakes, surges, or stalls completely when stopped or accelerating as the PCM hunts for the correct air-fuel balance.
- Reduced Fuel Economy — The vehicle consumes 10-15% more gas than usual because the engine runs too rich to compensate for bad sensor data.
- Poor Acceleration and Reduced Power — The vehicle feels sluggish and has a delayed throttle response because the PCM cannot accurately calculate engine load.
- Abnormal Fuel Trim Values (scan-tool only — no driver-felt sign) — A scan tool shows fuel trims significantly positive (indicating a vacuum leak) or negative (indicating a rich condition) as the PCM compensates for bad data.
Diagnostic Flowchart
Tap your situation to follow the diagnostic path that matches what you're seeing on this code.
Common Fixes & Costs
- Repairing a Vacuum Leak — Parts: $5-$50, Labor: $100-$300, ~1.5 hr book time (DIY)
- Replacing the MAP Sensor — Parts: $50-$150, Labor: $80-$150, ~0.8 hr book time (DIY)
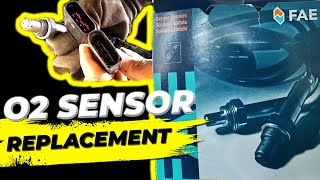
- Replacing a Downstream Oxygen Sensor (VW/Audi) — Parts: $50-$150, Labor: $150-$250, ~1.2 hr book time (Intermediate)
- Replacing Intake Manifold Runner Control (IMRC) Motor — Parts: $60-$250, Labor: $150-$350, ~2.5 hr book time (Intermediate)
- Cleaning or Replacing the Throttle Body — Parts: $10-$400, Labor: $100-$200, ~1.2 hr book time (Intermediate)
Used vs. New Parts: Buying Guide
When a used part is worth it: For high-cost electronic assemblies like an Engine Control Module (ECM/PCM) or a complete throttle body, a used part from a reputable salvage yard with a warranty offers significant savings. For common wear items like O2 sensors or MAP sensors, new aftermarket parts are strongly recommended.
Donor-vehicle mileage cap: roughly under 80000 miles for the part to have meaningful remaining life.
Donor quality checklist:
- Match the OEM part number exactly; superseded numbers are often incompatible.
- Verify the donor vehicle was not scrapped for a related engine or emissions failure.
- Obtain a part with a minimum 30-90 day warranty.
- Avoid parts from vehicles in rust-belt states or flood-damaged cars, as corrosion destroys electronics.
Decision logic:
- If The part is a simple sensor (MAP, O2, IAT) and costs less than $150 new → Always buy new. The risk and labor of replacing a faulty used sensor is not worth the minimal savings.
- If The part is an expensive assembly (e.g., ECU, IMRC assembly) and the vehicle is over 10 years old or 150,000 miles → A tested, used part from a low-mileage donor with a warranty is a reasonable, budget-conscious choice.
- If The part has a known wear-out failure mode (e.g., O2 sensor heating element) → Favor new OEM or high-quality aftermarket parts (e.g., Bosch, Denso) over used ones.
Warranty tradeoff: Used parts typically come with a 30-90 day functional warranty. New aftermarket parts usually offer a 1-year to limited lifetime warranty. New OEM parts carry a 1-2 year warranty, often only if installed by a dealer.
Worst-case if a used part fails: $200-$500, representing the cost of repeat labor to diagnose and replace the faulty used part, plus the cost of another part.
What Happens If You Wait — Timeline
- 0-2 weeks: Check Engine Light is on. You notice a slightly rougher idle or a minor dip in fuel economy, but often there are no perceivable symptoms. (MPG impact: 0-5%% · Added cost: $0)
- 2 weeks - 3 months: Noticeable hesitation during acceleration and a consistent 10-15% drop in MPG. The engine stalls occasionally when coming to a stop. The exhaust smells of unburned fuel (rotten eggs). (MPG impact: 10-15%% · Added cost: $50-$150 in wasted fuel.)
- 3-8 months: The persistent rich fuel mixture begins to overheat and melt the internal ceramic honeycomb of the catalytic converter. Power loss becomes significant, and the car struggles to accelerate. A P0420 code appears. (MPG impact: 15-25%% · Added cost: $1,200-$2,800 (catalytic converter replacement is now required).)
- 8+ months: The catalytic converter becomes completely clogged or melted, creating extreme exhaust backpressure. The engine has trouble starting or won't exceed low RPMs (limp mode). This backpressure causes further damage to exhaust valves and O2 sensors. (MPG impact: 30-50%+% · Added cost: $2,000-$4,000+ (cost of catalytic converter plus potential for additional sensor and engine damage).)
Cost of Not Fixing It
- 0-1 Month: Noticeable decrease in fuel economy (5-15%), rough idling, potential stalling, and increased emissions. (Added cost: $20-$60 in wasted fuel.)
- 1-6 Months: A persistent rich fuel mixture overheats the catalytic converter, causing its internal structure to melt and fail. This leads to a new set of codes (e.g., P0420) and a significant loss of power. (Added cost: $1,200-$2,800 for catalytic converter replacement.)
- 6+ Months: Prolonged rich running fouls spark plugs, damages upstream and downstream O2 sensors, and causes excessive carbon buildup on valves and pistons, requiring extensive engine work. (Added cost: $300-$1,000+ for additional sensor replacements and carbon cleaning, on top of the catalytic converter cost.)
Diagnosis Steps
- Scan for Codes and Analyze Freeze Frame Data
Use an OBD-II scanner to read all stored codes. P1109 often appears with codes like P0106 or P0108 that pinpoint the problem. Analyze the freeze-frame data to see the exact engine conditions (RPM, load, speed) when the fault occurred.
Tools: OBD-II Scanner (Beginner) - Perform a Thorough Visual Inspection
Check for cracked, disconnected, or swollen vacuum hoses around the intake manifold. Examine the wiring and connectors for the MAP, IAT, and O2 sensors for damage, corrosion, or loose connections. For VW/Audi, look for black soot marks near exhaust flanges indicating a leak.
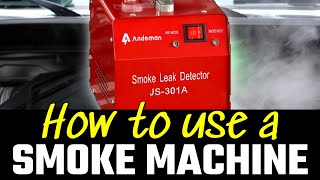
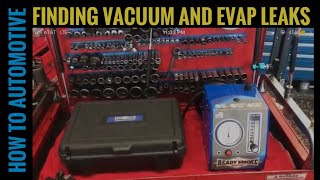
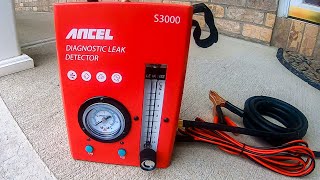
Tools: Flashlight, Inspection Mirror (Beginner) - Test for Vacuum Leaks with a Smoke Machine
Feed smoke into the intake system with the engine off and watch for smoke escaping from leaking gaskets, hoses, or seals. This professional method is far more effective and safer than spraying flammable cleaners around a running engine.
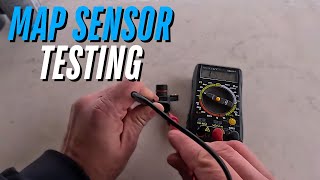
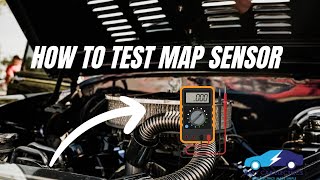
Tools: Smoke machine (Intermediate) - Test MAP Sensor Voltage and Range
Back-probe the MAP sensor's signal wire. With Key On, Engine Off (KOEO), voltage should be 4.5-5.0V. At idle, it drops to 0.85-1.3V. Snap the throttle wide-open; voltage must quickly jump back toward 4.5V. If voltage is stuck or responds slowly, replace the sensor.
Tools: Multimeter, T-pins, Vacuum Pump (Advanced) - Diagnose Downstream O2 Sensor (VW/Audi)
For VW/Audi, graph the voltage of the Bank 2, Sensor 2 O2 sensor. It must show a steady voltage (~0.6-0.7V) on a warm engine. If stuck under 0.2V, it indicates a lean condition or air leak. Rule out an exhaust leak before replacing the sensor.
Tools: OBD-II scanner with live data (Intermediate) - Test IMRC or Secondary Throttle Actuators (Hyundai/Kia/GM)
For GM, command the secondary throttle actuator open and closed with a bi-directional scanner; visually confirm movement. For Hyundai/Kia, command the IMRC actuator and watch the position sensor PID. If it fails to move, check for 12V power and ground at the motor.
Tools: Bi-directional Scan Tool, Multimeter (Advanced) - Check Wiring Integrity
If a sensor provides no signal, check its connector for a stable 5V reference and a good ground (less than 0.1V) from the PCM. Perform a continuity test on the signal wire between the sensor and the PCM to rule out a broken wire.
Tools: Multimeter, vehicle-specific wiring diagram (Advanced) - Inspect and Clean the Throttle Body
Remove the air intake tube. Check for heavy carbon buildup around the throttle plate causing it to stick. Clean it carefully with throttle body cleaner and a soft cloth. Never spray cleaner directly into an electronic throttle body while connected.
Tools: Basic hand tools, throttle body cleaner, rags (Intermediate) - Advanced Test: Live Data Analysis for MINI
For a MINI with P1109, monitor MAP sensor data in kPa. During hard deceleration (throttle closed, high RPM), the MAP value must drop below 30 kPa. If pressure remains above 50 kPa, it confirms a sticking bypass valve, vacuum leak, or faulty MAP sensor.
Tools: OBD-II Scanner with Live Data (Advanced)
When This Code Triggers (Freeze-Frame Conditions)
- Engine Coolant Temp: 180-210°F (82-99°C) (The fault typically logs when the engine is fully warmed up and in closed-loop operation.)
- RPM: 1500-3000 RPM (Occurs during steady-state cruise or light acceleration, where the PCM expects a stable pressure reading. For MINI, it triggers at high RPM during deceleration.)
- Engine Load: 20-50% (Sets under a moderate, stable engine load, such as highway cruising.)
- Vehicle Speed: 45-65 mph (72-105 kph) (Consistent with steady highway driving, where sensor readings must remain rational and stable.)
Related Codes
- P0106 — This code for 'Manifold Absolute Pressure/Barometric Pressure Circuit Range/Performance' is very common with P1109 as they both relate to the same sensor.
- P0107 — This code indicates 'MAP/BARO Circuit Low Input', suggesting a specific electrical problem where the signal voltage is too low.
- P0108 — The opposite of P0107, this code means 'MAP/BARO Circuit High Input' and often appears with P1109 when the sensor signal is stuck high.
- P2196 — For VAG models where P1109 relates to an O2 sensor, you might also see P2196 'O2 Sensor Signal Stuck Rich (Bank 1 Sensor 1)'.
Climate & Environmental Factors
- High Altitude: At higher altitudes, baseline atmospheric pressure (BARO) is lower. This triggers P1109 if the BARO sensor's reading is perceived by the PCM as out of range, especially on older vehicles. The PCM expects the MAP sensor reading at KOEO to match the BARO reading.
- Humidity and Moisture: High humidity or direct water intrusion from engine washing leads to corrosion or short circuits in sensor connectors and wiring harnesses. This causes the intermittent voltage signals that trigger P1109.
- Extreme Cold: In very cold weather, plastic and rubber components like vacuum hoses and intake gaskets become brittle and crack, leading to vacuum leaks that cause P1109.
How to Talk to a Mechanic About This Code
Say this: "I have a Check Engine Light on and my own scanner shows code P1109. I'd like to schedule an appointment for a diagnostic test to confirm the cause. Please start by checking for vacuum leaks and testing the relevant sensors based on my vehicle make, and authorize one hour of diagnostic time to start."
This signals that you have done your research, are aware that P1109 has multiple causes, and you want a diagnosis, not just a part replacement. It sets a clear budget for the initial investigation and prevents the shop from immediately replacing an expensive part without proper testing.
Avoid saying:
- 'My car is making a weird noise, can you fix it?' (Too vague).
- 'I have a P1109, please replace the MAP sensor.' (Don't diagnose the problem for the mechanic).
- 'Just fix whatever is wrong, I need the light off.' (This is an invitation for unnecessary repairs and upselling).
Questions to ask before authorizing the repair:
- What specific tests did you perform to conclude that [part] is the cause?
- Can you show me the failed part and explain why it's bad?
- Is this an OEM or aftermarket part, and what is the warranty on the part and the labor?
- Will you provide a written estimate with a full breakdown of parts and labor costs before starting the work?
Where to Take It: Dealer vs Independent vs Chain
- Dealer:
Recommended for specific, complex cases like Honda's internal BARO sensor or if the vehicle is still under an emissions or powertrain warranty. Otherwise, an independent specialist is more cost-effective.
Best for: Vehicles under warranty, Complex, manufacturer-specific issues (e.g., BARO sensor inside the ECU on a Honda), When a known Technical Service Bulletin (TSB) applies
Downsides: Significantly higher labor rates, often 1.5-2x more than independent shops., Defaults to replacing entire assemblies rather than performing a targeted, cheaper repair. (Typical cost: +40% vs. baseline) - Independent Shop:
Best fit for most P1109 scenarios. A good independent shop, especially one specializing in your car's brand, has the experience and diagnostic tools to solve the problem efficiently and affordably.
Best for: Out-of-warranty vehicles where cost is a factor., Diagnosing common failure patterns (e.g., VW/Audi O2 sensors, Hyundai IMRC)., Building a long-term relationship with a trusted mechanic.
Downsides: Diagnostic capabilities vary; a brand-specialist (e.g., German auto) is better for marques like VW, Audi, or MINI., Quality varies greatly, so vetting through reviews and certifications (like ASE) is crucial. (Typical cost: +0% vs. baseline) - Chain Shop:
Use with caution. Acceptable if you have already diagnosed a simple, external sensor failure and just need it replaced. AVOID for the initial diagnosis of an unknown P1109 cause, as they lack the expertise for manufacturer-specific quirks.
Best for: Simple, clear-cut repairs like replacing an easily accessible sensor that has already been properly diagnosed.
Downsides: Technician skill and diagnostic equipment are inconsistent., Business model pressures technicians to upsell services, which is risky for a complex diagnostic code like P1109. (Typical cost: -10% vs. baseline)
When to Walk Away From the Repair
If the estimated repair cost exceeds 40-50% of the car's private-party value, pause and seriously consider alternatives.
- Car worth $4000, fix is $2000: Borderline. The repair is 50% of the car's value. Get a second opinion and consider if the car has other pending issues before proceeding.
- Car worth $12000, fix is $1800: Fix it. The repair cost is only 15% of the vehicle's value, which is well below the threshold.
- Car worth $2500, fix is $1500: Walk away. The repair is 60% of the car's value. This money is better put toward a replacement vehicle.
What Scan Tool You Need for This Code
Minimum: A scanner that reads manufacturer-specific codes and displays live sensor data (PIDs).
A basic $20 code reader only gives you 'P1109', which is useless since the code's meaning is manufacturer-specific. You need to see live data like MAP sensor voltage, O2 sensor readings, and fuel trims to find the root cause instead of just replacing parts.
Budget: XTOOL AnyScan A30M / MUCAR BT200 MAX (~$90) — These smartphone-based tools offer full system diagnostics, live data graphing, and some service resets with lifetime free updates, providing more than enough data to diagnose most P1109 causes like a bad sensor or vacuum leak.
Mid-range: Xtool D7 / Topdon ArtiDiag Pro (~$350) — Adds bi-directional control, which is critical for diagnosing P1109 on Hyundai/Kia (to command the IMRC actuator) or GM (to test the secondary throttle). This is the sweet spot for serious DIYers.
Professional: Autel MaxiPRO MP900BT / Launch X431 Series (~$700-1200) — Offers full OEM-level diagnostics, ECU coding, and sometimes J2534 pass-through for ECU flashing. This is professional-grade equipment, necessary for complex jobs like replacing and programming a new ECU for a Honda P1109.
Rent vs buy: AutoZone's Loan-A-Tool program allows you to 'rent' a basic OBD-II scanner for free by paying a refundable deposit. This is fine for just reading the code, but if you need to diagnose P1109 properly, buying a budget pick with live data capabilities is a much better investment.
How to Clear the Code After You Fix It
- Use an OBD-II scan tool to clear the P1109 code and any other related fault codes.
- Perform a complete OBD-II drive cycle to allow the vehicle's readiness monitors to run.
- Rescan the vehicle to confirm no codes have returned.
Drive cycle (~20 minutes): A general drive cycle includes: 1) Cold start and idle for 2-3 minutes. 2) Drive in stop-and-go traffic for 5-10 minutes. 3) Drive at a steady highway speed (55-60 mph) for 10-15 minutes. 4) Allow the vehicle to cool down. Specific manufacturer procedures vary.
Readiness monitors affected: Catalyst (CAT) monitor, Oxygen (O2) Sensor monitor, Oxygen Sensor Heater monitor
Before emissions retest: drive at least 50 miles to fully set monitors.
Watch out for:
- Clearing the code and immediately going for an emissions test results in a 'Not Ready' rejection because the drive cycle has not completed.
- If the underlying fault is not properly repaired, the code returns during the drive cycle.
- Having a fuel level below 15% or above 85% prevents the EVAP monitor from running, which is required for an emissions test.
Will This Fail Emissions / State Inspection?
Yes — this code typically fails an OBD-II emissions inspection.
- California: An active Check Engine Light results in an automatic smog check failure. After repair, a complete drive cycle must be performed to set all required readiness monitors before a re-test is possible.
- New York: The NYS DMV inspection includes an OBD-II scan. An illuminated 'Check Engine' light is an automatic failure. Clearing the code requires a drive cycle to be completed before the vehicle passes.
- Texas: In the 17 counties requiring emissions testing, an active P1109 code causes the vehicle to fail the OBD portion of the annual inspection.
Most Commonly Affected Vehicles
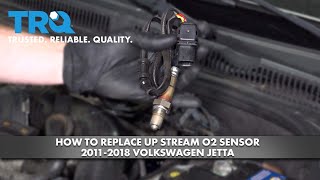
- Volkswagen Jetta, Golf, Passat (2000-2013) — On these models, P1109 almost always means 'O2 Sensor Circuit Bank 2 Sensor 2 Voltage Too Low/Air Leak'. This is most often caused by a failing downstream O2 sensor or an exhaust leak.
- Audi A4, A6, S6, S7 (2000-2016) — Similar to VW, this code points to a downstream O2 sensor fault. The B6/B7 A4 models were particularly known for this. Before replacing the sensor, carefully inspect the exhaust flex pipe for leaks.
- MINI Cooper S (R53), Cooper (R50) (2002-2006) — The code means 'Manifold Air Pressure too High in Deceleration'. Common causes are a faulty MAP sensor, a vacuum leak, or a failing supercharger bypass valve.
- Honda Accord (2008-2012) — For these Accords, P1109 is specifically 'BARO Sensor Circuit Out-of-Range High'. On many Honda models of this era, the BARO sensor is integrated directly into the PCM/ECU itself, requiring a computer replacement.
- Hyundai Sonata, Tucson, Santa Fe (2010-2020) — P1109 indicates a fault with the Intake Manifold Runner Control (IMRC) system. This is often due to carbon buildup causing the flaps to stick or failure of the electronic actuator motor.
- Kia Sorento, Optima, Sportage (2011-2020) — Like its corporate sibling Hyundai, P1109 on these Kia models points to a problem in the Intake Manifold Runner Control (IMRC) system, typically the actuator or stuck runner flaps.
- Chevrolet/GM Optra, Aveo, various Buick/Cadillac models (2004-2011) — On these GM-family vehicles, the code means 'Secondary Port Throttle System' malfunction or an intermittent fault with the Intake Air Temperature (IAT) sensor.
- Ford Focus, Fusion, Escape (2005-2015) — For many Ford vehicles, P1109 relates to an intermittent fault in the Intake Air Temperature (IAT) sensor circuit.
- Porsche 911 (996), Boxster (986/987) (2002-2008) — Often indicates 'Input Variables, Charge Measurement - Above Limit', pointing to a heavily soiled throttle body, a failing MAF sensor, or a vacuum/boost leak. On 996 Turbo models, a common culprit is a boost hose coming off the fuel pressure regulator.
Manufacturer-Specific Notes
- Volkswagen/Audi: For VAG cars, P1109 almost always refers to the heater circuit or signal from the downstream oxygen sensor (Bank 1 or 2, Sensor 2), not intake pressure sensors. The root cause is an exhaust leak or a failing sensor.
- General Motors (Chevrolet, GMC, Buick): On many GM vehicles, P1109 points to a 'Secondary Port Throttle System' fault or an intermittent fault with the Intake Air Temperature (IAT) sensor.
- MINI: On supercharged R53 models, this code is specifically for 'Manifold Air Pressure too High in Deceleration'. This is commonly linked to a failing supercharger bypass valve that isn't opening correctly when the throttle closes.
- Honda: Honda defines P1109 as 'BARO Sensor Circuit Out-of-Range High'. On many models from the 2000s, the BARO sensor is located inside the Engine Control Module (ECM), requiring replacement of the entire computer.
- Hyundai/Kia: The P1109 code frequently relates to a malfunction in the Intake Manifold Runner Control (IMRC) system. Hyundai issued TSB 21-EM-003H and extended the warranty for the VCM actuator on certain 2017-2018 models with the 2.4L GDI engine.
Real Owner Stories
2003 MINI Cooper S (R53) at 159K miles
Car suddenly started surging at idle (from stall to 2000 RPM), with a loud supercharger whine and a glowing red hot exhaust manifold. Threw codes P1109 and P1242.
What they tried:
- Initial thought was a bad bypass valve due to the symptoms.
Outcome: The issue was diagnosed as a faulty MAP sensor. Replacing the sensor resolved the surging, stalling, and cleared the codes.
Lesson: Dramatic symptoms like a glowing manifold and surging point to a simple, inexpensive sensor failure. The extreme heat was caused by a massively incorrect air/fuel mixture due to the bad MAP sensor readings.
2003 Porsche 996 Turbo
Intermittent P1109 code appearing about once a week for nearly a year with no other noticeable symptoms.
What they tried:
- Lived with the code for months, unable to find the source.
Outcome: During a boost leak test, the owner found a vacuum line had come off the fuel pressure regulator, concealed under the air pump. Securing the line with a wire tie permanently fixed the P1109 code.
Lesson: For intermittent codes with no clear symptoms, a hidden and intermittent vacuum or boost leak is a strong possibility. A thorough visual inspection and a smoke/boost leak test are critical before replacing expensive parts.
2007 Saab 9-5 1.9 TiD
Car had rough starts and white smoke when cold, with worsening fuel economy. It threw a P1109 code related to the swirl flap system.
What they tried:
- Replaced all 4 glow plugs, which only helped temporarily.
Outcome: The owner discovered the previous owner had physically removed the swirl flaps but left the actuator motor. The ECU was not properly 'chiptuned' to ignore the missing flaps, causing it to command a fuel mixture based on faulty assumptions.
Lesson: On vehicles with modified or deleted emissions/intake components, a related trouble code indicates an issue with the software 'delete' rather than a mechanical fault. The ECU is trying to control hardware that isn't there.
2003 Porsche 911 C4S
A persistent P1109 code appeared on a scan tool with no Check Engine Light on the dash. The engine idled smoothly.
What they tried:
- Cleaned the MAF sensor, but the code returned.
- Replaced the MAF sensor with a new Bosch unit, but the code still returned.
- Replaced an aftermarket 'Green Filter' with the standard air filter.
Outcome: The owner eventually found a very small air leak in the silicone hose connecting a GT3 throttle body to the airbox. Tightening the clamp properly resolved the code.
Lesson: Don't immediately trust the code's description. Even after replacing the component mentioned (MAF sensor), the problem persisted. The root cause was a simple, unmetered air leak downstream from the sensor.
How to Prevent This Code From Triggering
- Clean the intake manifold and throttle body (Every 30,000-40,000 miles) — Using an intake system cleaner removes carbon and oil deposits that cause throttle plates or IMRC flaps to stick, a common cause of P1109 on GM and Hyundai/Kia vehicles.
- Use high-quality, top-tier gasoline (Every fill-up) — Fuels with advanced detergents prevent carbon buildup on intake valves and fuel injectors. This prevents conditions that lead to a rich fuel mixture, which fouls O2 sensors and damages the catalytic converter.
- Perform regular visual inspections of vacuum lines (Every oil change) — Vacuum hoses become brittle and crack with age and heat. A quick visual check for cracks or loose fittings catches a potential vacuum leak before it triggers a code.
- Address engine misfires and oil consumption immediately (As needed) — Unburned fuel from misfires and oil burning from bad seals quickly destroys oxygen sensors and overheats the catalytic converter, leading to a cascade of expensive failures beyond the initial P1109 code.
Frequently Asked Questions
Can I fix P1109 myself?
Yes, many common causes are DIY-friendly. Replacing a vacuum hose, cleaning a throttle body, or replacing an external MAP/O2 sensor are straightforward jobs. However, diagnosing the exact cause requires careful testing, so pay for a professional diagnosis if you lack a multimeter or smoke machine.
What is the most common fix for P1109?
This completely depends on the vehicle. For a VW or Audi, it's replacing a downstream O2 sensor or fixing an exhaust leak. For a MINI Cooper S, it's frequently a MAP sensor or vacuum line.
What's the most common misdiagnosis for P1109?
A very common mistake is replacing the MAP sensor when the actual problem is a cracked vacuum line or a bad wiring connection. For VW/Audi owners, the biggest mistake is replacing intake sensors when the code actually points to the O2 sensor.
My P1109 code appeared after washing the engine. What should I check?
Engine washing forces water into electrical connectors. Carefully disconnect, inspect, and dry the connectors for the MAP, MAF, IAT, and O2 sensors. Use compressed air or electronic contact cleaner to ensure the pins are clean and dry before reconnecting.
What is an Intake Manifold Runner Control (IMRC) and how does it cause P1109?
An IMRC system uses flaps inside the intake manifold to optimize airflow at different RPMs. On Hyundai and Kia, P1109 triggers if these flaps stick from carbon buildup or if the actuator motor fails. The computer detects incorrect airflow and sets the code.
Will clearing the code fix the problem?
No. Clearing the code only turns off the Check Engine Light temporarily. The PCM runs its diagnostic tests again, and the light returns as soon as the fault is detected.
How much does a diagnostic test cost for P1109?
Most repair shops charge a diagnostic fee ranging from $95 to $165 to accurately identify the root cause. This fee often applies as a credit toward the final repair cost if you have the shop perform the work.
Can a bad gas cap cause a P1109 code?
It is extremely unlikely. A bad or loose gas cap causes codes related to the EVAP system, such as P0455 or P0457, not an intake system code like P1109.
What's the difference between P1109 and P0106?
Both often point to the MAP sensor, but P0106 is a 'Range/Performance' code meaning the reading is illogical compared to other sensors. P1109 is a specific manufacturer code pointing directly to an electrical fault or a specific condition like high pressure on deceleration.
Key Takeaways
- P1109 is a manufacturer-specific code, meaning a fix for a Honda (internal BARO sensor) will not resolve the same code on a Volkswagen (downstream O2 sensor).
- Faulty MAP sensors, cracked vacuum hoses, and corroded wiring cause over 70% of P1109 codes across most vehicle brands.
- Volkswagen and Audi vehicles almost exclusively trigger P1109 for a failing downstream O2 sensor or exhaust leak, not an intake pressure issue.
- Ignoring P1109 for more than 1-3 months forces the engine to run rich, destroying the catalytic converter and turning a $150 sensor replacement into a $2,000 repair.
Helpful Videos


Shop the Parts Behind P1109
Below are the parts most often responsible for code P1109, ranked by how frequently each one is the actual culprit (per the diagnosis above). Tap any to see what we have for your vehicle.


The information in this article is provided for general reference and educational purposes only. Vehicle specifications, procedures, and part compatibility can vary by production date, trim level, and region. Always consult your vehicle's factory service manual and verify part numbers before purchasing or performing repairs. Safety-critical components such as airbags, seat belts, and braking systems should be installed by a qualified professional.
- 🧭 Diagnostic Flowchart
- 🎬 Helpful Videos
- 🛍️ Shop This Part
- What Does P1109 Mean?
- Can I Drive With P1109?
- Common Causes
- Symptoms
- Common Fixes & Costs
- Used vs. New Parts: Buying Guide
- What Happens If You Wait — Timeline
- Cost of Not Fixing It
- Diagnosis Steps
- When This Code Triggers (Freeze-Frame Conditions)
- Related Codes
- Climate & Environmental Factors
- How to Talk to a Mechanic About This Code
- Where to Take It: Dealer vs Independent vs Chain
- When to Walk Away From the Repair
- What Scan Tool You Need for This Code
- How to Clear the Code After You Fix It
- Will This Fail Emissions / State Inspection?
- Most Commonly Affected Vehicles
- Manufacturer-Specific Notes
- Real Owner Stories
- 2003 MINI Cooper S (R53) at 159K miles
- 2003 Porsche 996 Turbo
- 2007 Saab 9-5 1.9 TiD
- 2003 Porsche 911 C4S
- How to Prevent This Code From Triggering
- Frequently Asked Questions
- Can I fix P1109 myself?
- What is the most common fix for P1109?
- What's the most common misdiagnosis for P1109?
- My P1109 code appeared after washing the engine. What should I check?
- What is an Intake Manifold Runner Control (IMRC) and how does it cause P1109?
- Will clearing the code fix the problem?
- How much does a diagnostic test cost for P1109?
- Can a bad gas cap cause a P1109 code?
- What's the difference between P1109 and P0106?
- Key Takeaways
- 🎟️ Get 5% Off