
P1128 on 2004-2009 Dodge Durango 5.7L HEMI: Causes and Fixes for Closed Loop Fueling
On a 2004-2009 Durango with the 5.7L HEMI, code P1128 is most often caused by a failing upstream oxygen (O2) sensor on Bank 1 (passenger side). A cracked PCV hose at the back of the intake manifold is another extremely common culprit. Always use an OEM-spec (NTK or Denso) O2 sensor, as these engines are sensitive to aftermarket brands. Exhaust leaks before the sensor are also a frequent cause.
- P1128 on your Durango means the passenger side of the engine isn't adjusting its fuel mixture correctly, usually due to a sensor issue.
- The most likely fix is replacing the upstream (pre-catalytic converter) oxygen sensor on the passenger side. Use an NTK or Denso brand sensor for best results.
- Before buying parts, carefully inspect the rubber PCV hose at the back of the engine for cracks, as this is a very common and inexpensive fix.
- Driving with this code will hurt your gas mileage and can cause long-term damage to your catalytic converter, a much more expensive repair.
What's Unique About the 2004-2009 Dodge Durango
For the 5.7L HEMI engine in this era, two issues stand out for causing P1128. First, these engines are notoriously sensitive to the brand of oxygen sensor used; owners and technicians frequently report that aftermarket sensors, particularly from Bosch, fail to work correctly and can even cause this code to appear right after a replacement. Second, a specific vacuum leak from a cracked PCV valve hose at the rear of the intake manifold is a very common failure point that directly leads to this code by introducing unmetered air.
Symptoms You May Notice
- Check Engine Light is on
- Decreased fuel economy
- Rough or unstable idle
- Engine hesitation or stumbling, especially during warm-up
- Engine may stall when coming to a stop, or die when shifting from Park into gear
- Failing an emissions test
- A ticking noise from the exhaust manifold area if an exhaust leak is the cause
- Replacing the O2 sensor with a cheap aftermarket or Bosch-branded sensor. Many owners report that these do not work correctly on the HEMI engine and the code returns until an OEM (NTK or Denso) sensor is installed.
- Replacing the PCM when the actual fault lies in the wiring or a different sensor, like the MAP or ECT sensor.
Most Likely Causes
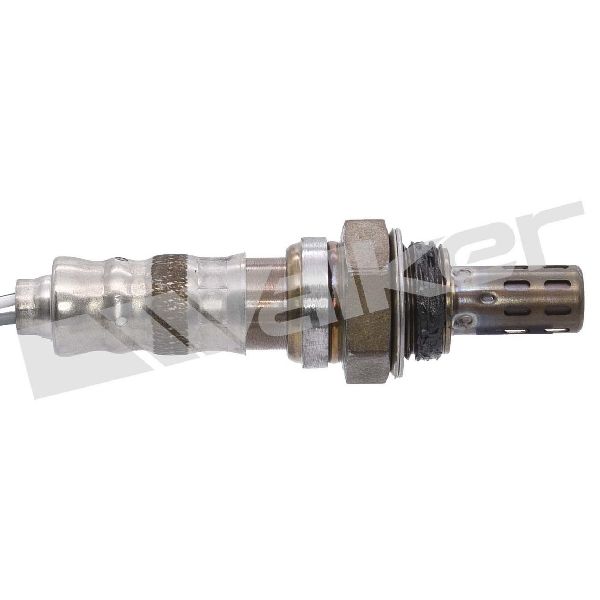
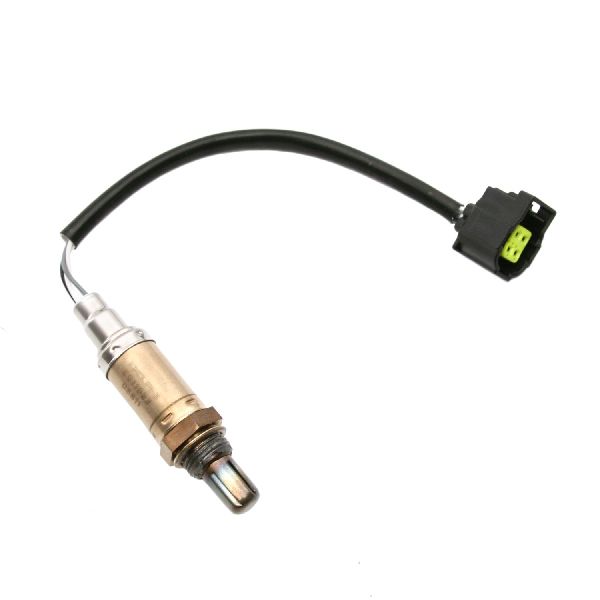
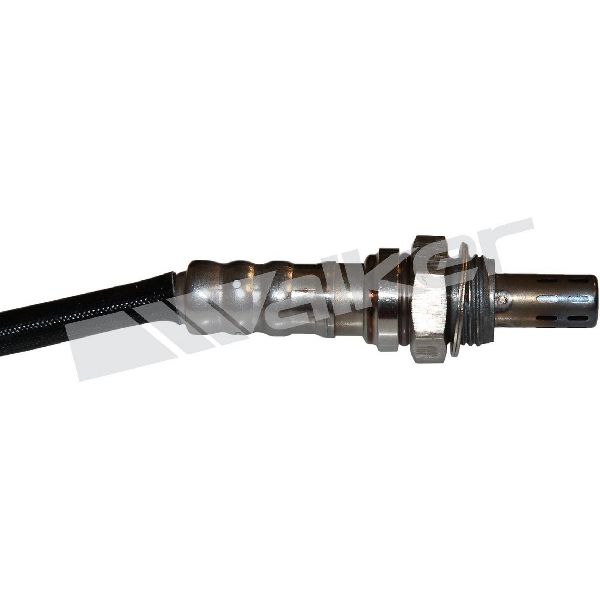
- Faulty Upstream Oxygen Sensor (Bank 1, Sensor 1) 🔴 High Probability → Shop Oxygen Sensor The sensor's internal heating element can fail or the sensor itself can become contaminated or worn out, preventing it from reaching operating temperature and sending the correct signal quickly enough after startup. These engines are also very sensitive to non-OEM sensor brands.
How to confirm: Use a scan tool to monitor the Bank 1 Sensor 1 voltage. After a cold start, it should begin switching rapidly between ~0.1V and ~0.9V as the engine warms up. If it's stuck, slow to respond, or has no voltage, it's likely bad. With the O2 sensor connector disconnected (Key On, Engine Off), the scan tool should show a reference voltage from the PCM of approximately 5.0 volts.
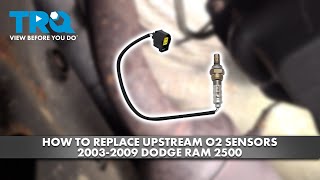
Typical fix: Replace the upstream oxygen sensor on the passenger side. 🎬 Watch: Step-by-step guide to replacing the upstream O2 sensors. It is critical to use an OEM (Mopar) or OEM-equivalent brand like NTK or Denso. The OEM part number 5149170AA is listed as fitting, but it's crucial to verify with VIN as it can be for before or after the catalyst.
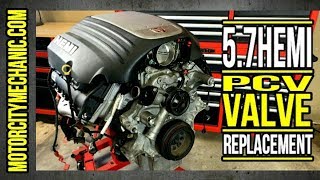
Est. part cost: $40-$80 - Cracked PCV Hose or other Vacuum Leak 🔴 High Probability The PCV hose located at the back of the intake manifold is made of rubber that becomes brittle and cracks over time due to constant engine heat and age, creating a significant unmetered air leak that the PCM cannot compensate for.
How to confirm: Visually inspect and physically bend the PCV hose at the rear of the intake manifold; cracks often hide on the underside and may not be visible without removal. A smoke test is the most definitive way to find this or any other vacuum leaks in the intake system.
Typical fix: Replace the PCV valve and the associated rubber hose. Mopar part number 53032850AD is a common replacement for the 2005 model year. 🎬 See this quick walkthrough for replacing the PCV valve.
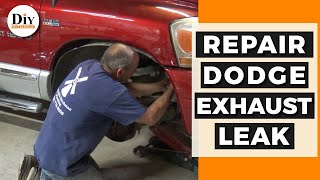
Est. part cost: $15-$40 - Exhaust Leak 🟡 Medium Probability Cracked exhaust manifolds or leaking manifold-to-head gaskets before the O2 sensor are common on the 5.7L HEMI. This allows outside oxygen into the exhaust stream, which fools the O2 sensor into thinking the engine is running lean, preventing the system from achieving closed loop.
How to confirm: Listen for a rhythmic ticking or puffing noise from the engine bay, especially on a cold start, that may quiet down as the engine warms and the metal expands. Visually inspect the exhaust manifolds for cracks or black soot trails indicating a leak.
Typical fix: Replace the leaking exhaust manifold gasket or the cracked exhaust manifold itself. This often involves replacing broken manifold bolts. 🎬 Watch: How to fix a common Hemi exhaust manifold leak.
Est. part cost: $20-$300 - Faulty Manifold Absolute Pressure (MAP) Sensor ⚪ Low Probability → Shop Manifold Absolute Pressure Sensor The MAP sensor provides engine load data to the PCM. If it sends incorrect data due to internal failure or a poor vacuum connection, the PCM's fueling calculations will be wrong, which can prevent the system from entering closed loop.
How to confirm: Use a scan tool to check the MAP sensor reading with the key on, engine off. It should match the barometric pressure. Compare the live data reading at idle to known-good values (typically 17-21 inHg). A faulty MAP can sometimes set its own codes, like P0108.
Typical fix: Replace the MAP sensor.
Est. part cost: $30-$70
Rare But Worth Checking
- Low Fuel Pressure: A weak fuel pump or clogged in-tank fuel filter (which is part of the pump module) can prevent the engine from getting enough fuel to achieve the target air-fuel ratio. Check fuel pressure with a gauge connected to the fuel rail; it should be around 59 +/- 5 PSI at idle.
- Wiring or Connector Issue: A damaged wire or a loose/corroded pin in the O2 sensor harness or even the main PCM connector can interrupt the signal. This is sometimes seen after the vehicle was shaken heavily, like on a rough road, or if moisture intrudes into connectors.
- Faulty Powertrain Control Module (PCM): This is very rare. Before condemning the PCM, all other possibilities, including sensors, wiring, and mechanical issues, must be exhaustively ruled out. Water intrusion into the fuse box (TIPM) can also cause erratic electronic issues that could mimic a PCM failure.
- Faulty Engine Coolant Temperature (ECT) Sensor: If the ECT sensor is stuck reading cold, the PCM will never receive the signal that the engine has warmed up, and therefore will not command the system to enter closed loop. This can be checked with a scan tool by watching the temperature reading rise as the engine warms up.
Diagnosis Steps
- Scan for any other trouble codes. If P1129 is also present, focus on causes common to both banks (MAP, fuel pressure, large vacuum leak). If P0339 is present, investigate TSB 18-024-10.
- Visually and physically inspect the intake system for vacuum leaks, paying close attention to the PCV hose at the rear of the intake manifold. A smoke test is the most effective method to find hidden leaks.
- Inspect the exhaust manifolds and pipes before the catalytic converter for any signs of leaks (black soot trails) or sounds (a rhythmic ticking, especially when cold).
- Using a scan tool with live data, monitor the Bank 1, Sensor 1 O2 sensor voltage. It should fluctuate rapidly between approximately 0.1V and 0.9V after warm-up. If it's lazy, stuck, or unresponsive, it has likely failed.
- Check the Engine Coolant Temperature (ECT) sensor reading on the scan tool to ensure it rises to normal operating temperature (at least 82° C / 180° F) and is not stuck reading cold.
- Test the O2 sensor's heater circuit to ensure it's warming the sensor properly. Resistance should be between 2 and 30 Ohms.
- Check fuel pressure at the fuel rail. It should hold steady at approximately 59 PSI (+/- 5 PSI). A significant drop under load indicates a fuel delivery problem.
- Test the MAP sensor signal using a scan tool to ensure it is providing plausible data at KOEO (Key On, Engine Off) and at idle.
- If all else fails, carefully inspect the wiring harness and connectors between the O2 sensor and the PCM for damage, corrosion, or pushed-out pins, paying special attention to the main engine harness connector at the fuse box.
Parts You'll Likely Need
- Upstream Oxygen Sensor (Bank 1, Sensor 1)
(OEM #5149170AA)— This is the most common component to fail and directly cause code P1128. Bank 1 is the passenger side. VIN verification is highly recommended as this part number may apply to multiple positions.
Trusted brands: NTK, Denso, Mopar
OEM price range: $60-$120
Aftermarket price range: $40-$80 - PCV Valve Hose
(OEM #53032850AD)— This rubber hose is a frequent failure point due to heat and age, causing a significant vacuum leak that triggers this code.
Trusted brands: Mopar, Dorman
OEM price range: $25-$50
Aftermarket price range: $15-$40
Related Codes That Often Appear With This One
- P1129 — This is the identical code for Bank 2 (driver's side). If both appear together, it points to a common cause affecting both banks, such as a MAP sensor, fuel pressure issue, a major vacuum leak (like the PCV hose), or a faulty ECT sensor.
- P0300 — A Random/Multiple Cylinder Misfire code can occur because the incorrect air-fuel mixture caused by the P1128 fault can lead to poor combustion and misfires.
- P0171 — System Too Lean (Bank 1). This code often accompanies P1128 because the underlying cause (like a vacuum leak or exhaust leak) creates a lean condition that the O2 sensor detects before the P1128 fault is triggered.
- P0339 — Crankshaft Position Sensor Intermittent. TSB 18-024-10 notes that P1128/P1129 can appear as secondary codes to P0339. If P0339 is present, it should be diagnosed first as a PCM software update may be required.
Technical Service Bulletins (TSBs) & Recalls
- 18-024-10: Notes that P1128 can appear secondary to code P0339 (Crankshaft Position Sensor Intermittent). The bulletin specifies that if P0339 is the primary fault, a PCM reflash may be necessary. This TSB primarily applies to 2.7L/3.5L engines but establishes the link between the codes.
Platform-Specific Known Issues
- An owner on DodgeForum.com with a 2007 Dakota 4.7L (which shares engine architecture) experienced codes P1128 and P1129 together, with symptoms of stalling when shifting into gear. The suggested starting point from other users was to check the MAP sensor.
- A Reddit user with a 2004 Durango 5.7L traced a host of electronic issues, including a flashing ETC light and no-start condition, back to water intrusion in the fuse box area after heavy rain, highlighting the platform's sensitivity to moisture in the electrical system.
Mechanic-Grade Diagnostic Values
- Fuel Pressure (at fuel rail, idle) — expected: 407 kPa +/- 34 kPa (59 psi +/- 5 psi). Failure: Pressure significantly below this range indicates a weak pump or clogged filter.
- Upstream O2 Sensor Heater Resistance — expected: 2.0 to 30.0 Ohms at room temperature. More specifically, 4-10 Ohms is a common range for OEM-style sensors.. Failure: A reading of 'OL' (infinite resistance) means an open circuit; a reading near 0 Ohms indicates a short circuit. Both mean the sensor is bad.
- O2 Sensor Signal Voltage (Harness Side, Sensor Disconnected) — expected: ~5.0 Volts (Key On, Engine Off). Failure: Low or no voltage indicates a problem in the wiring or with the PCM's reference voltage supply.
- Fuel Injector Pulse Width (at idle) — expected: 2.0 - 4.5 milliseconds (ms). Failure: A value significantly outside this range on multiple cylinders can indicate a global fuel delivery or measurement problem affecting the closed-loop status.
- O2 Sensor Heater Power Supply (Harness Side) — expected: ~12V (Battery Voltage) with Key On, Engine Off. Failure: 0V indicates a blown fuse or an open in the power supply wire from the TIPM/fuse box.
Scan Tool Commands That Help
- wiTECH or other professional scan tool: 1/1 O2 Heater Test — To actively command the Bank 1 Sensor 1 heater circuit on and monitor the sensor's voltage response. If the heater is commanded on but the sensor voltage doesn't change as expected or remains cold, it confirms a failure in the heater element or its circuit.
- wiTECH or other professional scan tool: Fuel System Test — To actuate the fuel pump without the engine running. This allows for a safe and accurate fuel pressure test at the rail to confirm if the pump can deliver the required 59 +/- 5 PSI.
Wiring & Ground Locations
- Engine Harness Connector at TIPM/Fuse Box — The main engine harness connection point at the Totally Integrated Power Module (fuse box) on the right side of the engine compartment.. A pushed-back pin at this central connector can interrupt the O2 sensor signal or power, causing P1128/P1129. This is a critical inspection point if sensors and local wiring check out.
- G114 / G305 — Ground points located in the left front of the engine compartment.. These are primary grounding points for engine bay components. A loose or corroded connection here can cause floating grounds and erratic sensor readings for multiple systems, including the O2 sensors.
- G208 — Ground point located in the driver's side (left) kick panel.. This is a major interior ground point. While less likely to be the primary cause, circuits passing through the firewall can terminate here, and a bad ground can cause difficult-to-diagnose electrical issues.
- S102 — A splice point located at the top front of the right cylinder head (Bank 1) on the 5.7L engine.. Factory splices can corrode or fail over time. Since this splice is on Bank 1, a failure here could directly impact the Bank 1 O2 sensor circuit.
- Bank 1 Sensor 1 Connector — The electrical connector for the upstream O2 sensor is located up on the passenger side of the transmission bell housing, often difficult to reach from below.. This connector is a common point for corrosion, damage, or loose connections. Its difficult-to-reach location means it can be overlooked during a visual inspection.
Real Owner Repair Stories
- DodgeForum.com user post (2007 Dodge Durango Limited 5.7L) — Engine stutters and drops to idle mode with ETC light on right when transitioning from open to closed loop. Codes P1128 and P1129 present.
❌ Tried (didn't work) The user suspected a wiring or connection issue after initial diagnosis.
✅ What actually fixed it A pushed-back pin for the green/white wire in the main engine harness connector at the fuse box (ECM connector). The pin was simply snapped back into place to resolve the issue. - DodgeForum.com user post (Dodge Durango Limited 5.7L (year not specified, but 2nd Gen)) — Codes P1128 and P1129 after a tune-up.
❌ Tried (didn't work) Replacing all four O2 sensors with Bosch brand sensors, twice.
✅ What actually fixed it The strong consensus from other forum members was that the Bosch O2 sensors were the problem and that only OEM Denso or NTK sensors would work correctly. The owner was taking it to a dealer for final diagnosis based on this advice, confirming the brand sensitivity is a well-known issue among owners.
When the Usual Fixes Don't Work
- While the vast majority of P1128/P1129 codes on this platform are caused by O2 sensors or vacuum leaks, there are documented cases where the issue was resolved by addressing other components. One owner of a 5.7L Ram with these codes reported that the final fix was cleaning the throttle body and replacing the EGR valve, after other common fixes failed. This highlights the importance of not getting tunnel vision on the O2 sensor circuit and considering overall engine breathing and performance.
OEM Part Supersession History
5149170AA→05149170AA— Standard part number update, often indicating a minor revision or change in supplier.
Heads up: This part number is notoriously confusing in catalogs. It is listed for both upstream and downstream positions on various Chrysler/Dodge/Jeep vehicles, including models outside this generation. Extreme care and VIN verification are required to ensure the correct sensor is purchased for the specific Bank 1, Sensor 1 position.
Model Year Variations Within This Range
- 2006-2009: Models from 2006 onward were equipped with the Multi-Displacement System (MDS), which deactivates four cylinders under light load. While not a direct cause, MDS operation can sometimes be affected by or mask other underlying engine performance issues related to fueling.
- 2009 only: The 5.7L HEMI engine was updated for the 2009 model year, introducing Variable Valve Timing (VVT) which increased horsepower and torque. This adds complexity to the engine management system, and diagnostics related to engine timing or performance could differ from earlier 2004-2008 models.
Diagnostic Flowchart
Other Known Issues on This Vehicle
Issues unrelated to this code that are worth knowing about as an owner of this generation:
- MDS Lifter Failure ('Hemi Tick') 🔴 High — Very common, especially on engines with over 75,000 miles, long idle times, or inconsistent oil changes. The failure often damages the camshaft, requiring a costly repair.
- Totally Integrated Power Module (TIPM) Failure 🔴 High — A widespread problem causing a variety of random electrical issues, including engine stalling, crank-no-start, horn honking, and wipers activating on their own. The internal fuel pump relay is a common failure point.
- Electronic Throttle Body (ETB) Failure 🟠 Medium → Shop Fuel Injection Throttle Body — Common failure causing the 'Red Lightning Bolt' warning light, putting the vehicle into a reduced-power 'limp mode'. Symptoms include stalling and poor acceleration.
- Cracked Exhaust Manifold Bolts 🟠 Medium — The bolts holding the exhaust manifolds to the cylinder heads are prone to breaking, causing an exhaust leak. This results in a ticking noise, especially when the engine is cold.
- Fan Clutch Failure 🟠 Medium — The fan clutch can fail, leading to engine overheating, a loud roaring fan noise, and poor A/C performance at idle.
Used vs. New Parts: Buying Guide for This Vehicle
When a used part is the smart pick: For mechanical, non-wear items like a cracked exhaust manifold, a used part from a reputable junkyard can be a cost-effective solution. Ensure the donor part is from a vehicle that was not in a front-end collision and is free of visible cracks or heavy corrosion.
Donor-vehicle mileage cap: roughly under 120000 miles for the part to have meaningful remaining life.
What to inspect on the donor part:
- For an exhaust manifold, check for flatness on the mating surfaces and ensure no bolts are broken off inside.
- For wiring harnesses or connectors, inspect for brittle plastic, cut wires, or heavy corrosion on the pins.
- Avoid any electronic sensor from a vehicle with signs of flood or fire damage.
OEM-only on this vehicle (don't cheap out):
- Upstream Oxygen Sensor: Due to the PCM's sensitivity, only Mopar, NTK, or Denso branded sensors are recommended. Using other brands, especially Bosch, is a very common cause of repeat failures for this code.
Aftermarket brands forum-validated for this vehicle:
- NTK (for Oxygen Sensors)
- Denso (for Oxygen Sensors)
Brands owners have reported issues with on this vehicle:
- Bosch (for Oxygen Sensors on this specific platform)
Real Owner Stories
Aggregated from forums and TSBs cited above. Mileages and costs reflect what owners reported in those sources.
2004 Dodge Durango 5.7L — 220000 miles
Symptoms: A cascade of electrical problems, including a flashing ETC light and a no-start condition, which began after heavy rain.
What fixed it: The owner replaced the Throttle Body, EGR, PCV, Crank Sensor, and Fuel Pump without success. The final suspicion was a deeper electrical issue, possibly with the PCM or wiring due to water intrusion in the fuse box area.
Source hint: Reddit.com - r/MechanicAdvice
2007 Dodge Dakota 4.7L
Symptoms: Engine stalling when shifting into gear, with both P1128 and P1129 codes present.
What fixed it: The suggested starting point from other forum users was to investigate the Manifold Absolute Pressure (MAP) sensor as the likely cause common to both banks.
Source hint: DodgeForum.com - Thread 'P1128 & p1129'
Related OBD-II Codes
Frequently Asked Questions
What brand of oxygen sensor should I use for my 2004-2009 Durango 5.7L to fix code P1128?
I have both P1128 and P1129 codes. What should I check first?
My Durango has a ticking noise from the engine bay. Is this related to the P1128 code?
Is there a specific PCV hose part number I should look for?
I also have a P0339 code along with P1128. What's the connection?
What is the correct OEM part number for the upstream O2 sensor?
Helpful Videos


We Have This Part in Stock


The information in this article is provided for general reference and educational purposes only. Vehicle specifications, procedures, and part compatibility can vary by production date, trim level, and region. Always consult your vehicle's factory service manual and verify part numbers before purchasing or performing repairs. Safety-critical components such as airbags, seat belts, and braking systems should be installed by a qualified professional.
- Dodge Durango:
- 🧭 Diagnostic Flowchart
- 🎬 Helpful Videos
- 🛍️ Shop This Part
- What's Unique About the 2004-2009 Dodge Durango
- Symptoms You May Notice
- Most Likely Causes
- Rare But Worth Checking
- Diagnosis Steps
- Parts You'll Likely Need
- Related Codes That Often Appear With This One
- Technical Service Bulletins (TSBs) & Recalls
- Platform-Specific Known Issues
- Mechanic-Grade Diagnostic Values
- Scan Tool Commands That Help
- Wiring & Ground Locations
- Real Owner Repair Stories
- When the Usual Fixes Don't Work
- OEM Part Supersession History
- Model Year Variations Within This Range
- Other Known Issues on This Vehicle
- Used vs. New Parts: Buying Guide for This Vehicle
- Real Owner Stories
- 2004 Dodge Durango 5.7L — 220000 miles
- 2007 Dodge Dakota 4.7L
- Related OBD-II Codes
- Frequently Asked Questions
- 🎟️ Get 5% Off