
Ultimate Guide to OBD-II Code P1135: Air-Fuel Ratio Sensor Heater Malfunction
The Most Comprehensive P1135 Resource: What it means, why it triggers, and exactly how to fix it for good.
- On Toyota and Lexus vehicles, P1135 specifically indicates a burned-out heater circuit in the Bank 1, Sensor 1 upstream air-fuel ratio sensor.
- Test the 'A/F HEATER' 20A or 25A fuse and verify 12V power at the sensor connector before spending $150+ on a replacement sensor.
- Install only an OEM Denso air-fuel ratio sensor; aftermarket brands frequently fail to sync with Toyota computers and will immediately re-trigger the code.
- Driving with an active P1135 code drops fuel economy by up to 15% and causes raw fuel to melt the catalytic converter, turning a $300 repair into a $2,000+ replacement within 12 months.
What Does P1135 Mean?
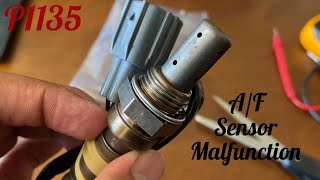
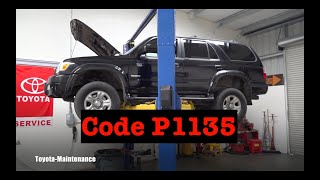
The Engine Control Module (ECM) detected a malfunction in the heater circuit of the Bank 1 Air-Fuel Ratio (A/F) sensor. 🎬 Watch: Diagnosing the P1135 code on a Toyota 4Runner This sensor must reach 1,200-1,400°F to provide accurate fuel mixture readings. When the internal heater fails, the sensor responds slowly, forcing the engine to run inefficiently.
Technical definition: Air/Fuel Sensor Heater Circuit Malfunction (Bank 1, Sensor 1). The ECM sets this code when the current draw or resistance from the A/F sensor's heater circuit falls outside the specified range. For Toyota/Lexus models, this triggers when the heater current exceeds 8 amps or drops below 0.25 amps, indicating an open circuit or high resistance.
Can I Drive With P1135?
Yes, But With Caution. You can drive your vehicle, but fix it immediately. Continuing to drive with a faulty sensor heater drops fuel economy by 5-15% and causes raw fuel to melt your catalytic converter over time. This secondary damage adds $1,200-$2,800 to your repair costs. Limit driving to essential trips under 100 miles.
Common Causes
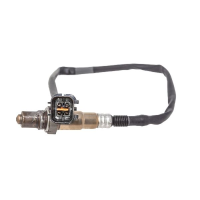
- Failed Air/Fuel Ratio (A/F) Sensor (Very Common) — The internal heating element burns out from age and thousands of heat cycles. In over 90% of Toyota/Lexus cases, replacing the sensor is the definitive fix. 🎬 See this step-by-step Air/Fuel sensor replacement walkthrough
- Blown A/F Heater Fuse or Relay (Common) — The A/F sensor heater circuit is protected by a dedicated fuse (labeled 'A/F HEATER' or 'EFI'). A blown fuse cuts power to the heater and triggers the code.
- Damaged Wiring or Connector (Common) — The sensor's wiring harness sits near the hot exhaust manifold, making it susceptible to melting, fraying, or cracking. Connectors also suffer from oil contamination or loose pins, interrupting power.
- Short Circuit in Wiring (Less Common) — If the A/F heater fuse blows repeatedly, a wire's insulation melted and is touching the engine block or exhaust, causing a direct short to ground.
- Poor Ground Connection (Less Common) — The ECM controls the heater circuit by providing a path to ground. If the main ground connection is corroded or loose, the heater cannot function.
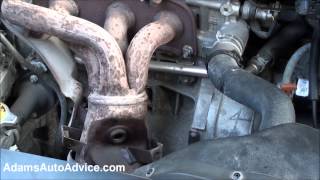
- Exhaust Leak (Less Common) — A crack in the exhaust manifold or a faulty gasket before the A/F sensor allows unmetered oxygen into the exhaust stream, skewing readings and contributing to heater codes.
- Faulty Engine Control Module (ECM) (Very Rare) — The driver circuit inside the ECM that controls the heater fails. Consider this only after exhaustively testing the sensor, wiring, fuses, and grounds.
Symptoms
- Check Engine Light is On — The Malfunction Indicator Lamp (MIL) illuminates as soon as the ECM confirms the heater circuit fault during its self-test.
- Decreased Fuel Economy — A failed heater extends the engine's 'open-loop' time, forcing it to run a pre-programmed rich fuel mixture that wastes significant amounts of gas.
- Rough Idle or Engine Hesitation — The engine idles erratically, surges, or hesitates during acceleration, particularly when cold, due to incorrect air-fuel mixture data.
- Failed Emissions Test — An active P1135 trouble code is an automatic failure for any state emissions inspection. Inefficient combustion increases harmful pollutants.
- Black Smoke from Exhaust — Prolonged rich fuel conditions caused by the faulty sensor causes visible black smoke (unburnt fuel) to exit the tailpipe.
Diagnostic Flowchart
Tap your situation to follow the diagnostic path that matches what you're seeing on this code.
Common Fixes & Costs
- Replace Air/Fuel Ratio Sensor (Bank 1, Sensor 1) — Parts: $120-$250, Labor: $150-$300, ~0.8-2.5 hr book time (DIY)
- Replace Blown A/F Heater Fuse — Parts: $2-$5, Labor: $0-$50, ~0.2 hr book time (DIY)
- Repair Damaged Wiring or Connector — Parts: $10-$50, Labor: $150-$300, ~1.5-2.5 hr book time (Intermediate)
- Replace A/F Heater Relay — Parts: $15-$40, Labor: $0-$50, ~0.2 hr book time (DIY)
- Clean or Repair Ground Connection — Parts: $0-$10, Labor: $50-$150, ~0.5-1.0 hr book time (Intermediate)
Used vs. New Parts: Buying Guide
When a used part is worth it: For an Air/Fuel Ratio sensor, buying used guarantees premature failure. It is a wear-and-tear component with a finite lifespan. The labor cost to install it outweighs any potential savings.
Donor quality checklist:
- Avoid used sensors entirely. The risk of immediate failure is extremely high.
- If considering 'New Old Stock' (NOS), ensure it was stored in a dry, climate-controlled environment.
- For Toyota/Lexus, only a new DENSO sensor guarantees compatibility.
Decision logic:
- If The part is an Air/Fuel Ratio or Oxygen Sensor. → Always buy new. Used sensors are a gamble not worth taking.
- If The vehicle is a Toyota, Lexus, or Scion. → Buy a new DENSO-branded sensor. Other brands frequently fail to sync with the factory ECU.
- If The required part is a fuse or relay. → New is inexpensive and the only logical choice.
Warranty tradeoff: Used sensors typically have no warranty. A new quality aftermarket (Denso) sensor has at least a 1-year warranty. The small savings on a used part are not worth the risk.
Worst-case if a used part fails: $200-$400 if a used or incorrect brand sensor fails after installation, requiring repeat labor and the purchase of the correct new part.
What Happens If You Wait — Timeline
- 0-2 weeks: Check Engine Light comes on. In cold weather, you notice a slightly rough idle for the first minute after starting. Otherwise, no other perceptible symptoms. (MPG impact: 0-3%% · Added cost: $0)
- 2 weeks - 3 months: A noticeable drop in fuel economy becomes apparent. The engine continues to run in open-loop for longer after every cold start, wasting fuel. The car automatically fails an emissions test. (MPG impact: 5-10%% · Added cost: $50-150 in wasted fuel)
- 3-9 months: The consistently rich fuel mixture begins to overheat the catalytic converter. The internal ceramic substrate starts to show signs of stress or minor melting. Other codes, like P0420, appear. (MPG impact: 10-15%% · Added cost: $100-250 in wasted fuel, plus potential early-stage catalyst damage.)
- 9+ months: Catastrophic failure of the catalytic converter. The internal honeycomb melts down, causing a major exhaust blockage. Symptoms include significant loss of power and a glowing red hot converter. (MPG impact: 15-25%% · Added cost: $1200-$2800 for catalytic converter and A/F sensor replacement.)
Cost of Not Fixing It
- 0-3 months: Noticeable drop in fuel economy by 5-15%. Vehicle automatically fails any emissions test. (Added cost: $50-$150 in wasted fuel.)
- 3-12 months: The consistently rich engine overheats the catalytic converter, reducing its lifespan. Causes related codes like P0171 or P0420. (Added cost: $100-$300 for minor exhaust damage and wasted fuel.)
- 12+ months: Complete failure of the catalytic converter due to unburnt fuel saturation. The internal honeycomb melts, causing a major exhaust blockage and significant power loss. (Added cost: $1,200-$2,800 for catalytic converter replacement.)
Diagnosis Steps
- Check the A/F Heater Fuse and Relay
Locate the engine bay fuse box and find the fuse labeled 'A/F HEATER' or 'EFI' (usually 20A or 25A). Pull the fuse and visually inspect if it's blown. If a new fuse blows immediately, you have a short circuit to ground in the harness.
Tools: Fuse Puller, Multimeter (Beginner) - Visually Inspect the Sensor and Wiring
Locate Bank 1, Sensor 1 (upstream, before the catalytic converter). Perform a thorough visual inspection of the sensor's wiring harness for melting, cracking, or fraying. Check that the electrical connector is securely fastened and free of oil or corrosion.
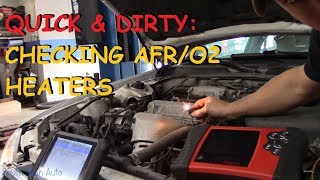
Tools: Flashlight (Beginner) - Test the Sensor's Heater Circuit Resistance
Disconnect the sensor's electrical connector. Using a multimeter set to Ohms (Ω), measure the resistance between the two heater pins on the SENSOR side (often two black wires). A good Denso sensor reads 0.8 to 1.4 Ohms at room temperature. A reading of 'OL' confirms the internal heater burned out.
Tools: Digital Multimeter (Intermediate) - Test for Power and Ground at the Harness Connector
With the sensor unplugged, turn the ignition key to 'ON' (engine off). Set your multimeter to DC Volts. On the HARNESS side, probe the pins. One pin must show battery voltage (~12V). Lack of 12V power points to a fuse or wiring issue upstream.
Tools: Digital Multimeter (Advanced) - Check Live Data for Heater Current
Using an advanced scan tool, access live data PIDs. Look for 'Heater Current B1S1'. With the engine running from a cold start, this value typically exceeds 1.0 Amps. If the current remains at 0A, it confirms an open circuit.
Tools: Advanced OBD-II Scanner (Advanced) - Check for Exhaust Leaks
Start the engine cold. Listen and feel around the exhaust manifold and the base of the A/F sensor for puffs of air indicating a cracked manifold or bad gasket. A smoke machine makes leaks easy to spot.
Tools: Smoke Machine or Soapy Water (Intermediate) - Verify the Repair by Checking Readiness Monitors
After replacing the sensor, clear the P1135 code. You must verify the ECM's internal self-test ran and passed. Follow the manufacturer's drive cycle and use your scanner to confirm the 'O2 Heater Monitor' changed from 'Incomplete' to 'Ready'.
Tools: OBD-II Scanner (Beginner)
When This Code Triggers (Freeze-Frame Conditions)
- Engine Coolant Temp: 175-210°F (Engine is fully warmed up.)
- RPM: 900-3,200 RPM (The fault is detected during idle or steady-state driving.)
- Engine Load: 20-70% (The heater circuit test runs under various load conditions after the initial warm-up phase.)
- Vehicle Speed: Any, including Idle (The ECM runs the heater circuit test based on engine run time and temperature, not vehicle speed.)
Related Codes
- P1155 — This is the identical fault—A/F Sensor Heater Circuit Malfunction—but for Bank 2, Sensor 1. If you see both P1135 and P1155 simultaneously, suspect a shared component like the A/F heater fuse or relay rather than two independently failed sensors.
- P0171 — This code means 'System Too Lean (Bank 1)'. A slow-responding A/F sensor (the cause of P1135) provides incorrect data to the ECM, causing it to believe the engine is running lean. Fix P1135 first; clearing it usually resolves P0171.
- P0125 — 'Insufficient Coolant Temperature for Closed Loop Fuel Control'. This frequently appears as a 'ghost code' alongside P1135 on Toyota/Lexus models. The ECM flags a coolant temperature issue because the failed sensor heater prevents closed-loop operation. Fixing P1135 resolves P0125.
- P1130 — On some vehicles, P1130 stands for 'Air/Fuel Sensor Circuit Range/Performance'. While P1135 points specifically to the heater circuit, P1130 indicates the sensor's signal is out of range. Fixing the P1135 heater issue often resolves P1130.
Climate & Environmental Factors
- Cold Climate: The P1135 code is more prevalent in colder climates because the A/F sensor heater's role is most critical during a cold start. The greater the temperature difference between the cold exhaust and the required 1200°F operating temperature, the more strain is placed on the heater circuit.
- High Humidity / Salt: Regions with high humidity or that use road salt in winter accelerate corrosion of electrical connectors and ground points. This corrosion increases resistance in the heater circuit, triggering a P1135 code even if the sensor's internal heater is functional.
How to Talk to a Mechanic About This Code
Say this: "I have a check engine light and my scanner shows a P1135 code, pointing to the Bank 1 Air-Fuel sensor heater circuit. I'd like to schedule a diagnostic appointment. Please confirm the cause by checking the fuse, wiring, and sensor resistance before recommending a replacement part."
This signals that you are an informed consumer. It directs the technician to perform a complete diagnosis rather than just replacing the most common part, potentially saving you money if the issue is a simple fuse or wire.
Avoid saying:
- 'Just fix whatever's wrong'
- 'My check engine light is on, can you look at it?' (too vague — invites upsell)
- 'Whatever you recommend'
Questions to ask before authorizing the repair:
- Did you test the resistance of the sensor's heater element, and what was the reading?
- Did you confirm that the sensor is receiving 12-volt power and has a good ground signal at the connector?
- If the sensor needs replacement, what brand will you be using? (For a Toyota/Lexus, it must be Denso).
- Can you provide me with the old part after the repair is complete?
- What is the warranty on the parts and labor for this specific repair?
Where to Take It: Dealer vs Independent vs Chain
- Dealer:
Best for: Vehicles still under a powertrain or emissions warranty., Complex, manufacturer-specific electrical issues after an independent shop has failed to diagnose it.
Downsides: Significantly higher labor rates (often 1.5-2x an independent shop)., May recommend replacing an entire assembly when only one component has failed. (Typical cost: +50% vs. baseline) - Independent Shop:
Best fit. P1135 is a very common and well-understood code, especially on Toyota/Lexus models. A reputable independent shop diagnoses and repairs this cost-effectively.
Best for: Out-of-warranty vehicles with common trouble codes like P1135., Building a long-term relationship with a mechanic you trust.
Downsides: Quality and diagnostic skill vary widely; vet the shop through reviews or ASE certifications. (Typical cost: +0% vs. baseline) - Chain Shop:
Use with caution. Acceptable if you have already diagnosed a bad sensor and just need a simple replacement, but AVOID for initial diagnosis.
Best for: Simple, routine maintenance like oil changes or tire rotations.
Downsides: Technician skill varies dramatically, and there is high pressure to upsell services you don't need., Lacks specific diagnostic experience for anything beyond reading the code and replacing the most obvious part. (Typical cost: -10% vs. baseline)
When to Walk Away From the Repair
If the estimated repair cost exceeds 40-50% of the car's Kelley Blue Book (KBB) private-party value, sell the car as-is or trade it in.
- Car worth $4000, fix is $600: Fix it. The repair cost is only 15% of the car's value, which is well below the walk-away threshold.
- Car worth $3000, fix is $1500: Walk away. The repair cost is 50% of the car's value. It is not financially sound to invest this much into an older vehicle unless it is in otherwise perfect condition.
- Car worth $12000, fix is $2500: Borderline - includes catalytic converter. The cost is ~21% of the value. Get a second opinion to confirm the converter has actually failed before proceeding.
What Scan Tool You Need for This Code
Minimum: A scanner that reads and clears codes, and shows freeze-frame data. This allows you to see the engine conditions when the code was set.
A basic $20 reader just gives you the code 'P1135'. It won't show you the freeze-frame data or let you view live sensor data to confirm the fix is working.
Budget: BlueDriver Pro (~$100) — Connects to your smartphone via Bluetooth. It reads the P1135 code, shows freeze-frame data, and graphs live data from the A/F sensor, which is excellent for confirming the new sensor works.
Mid-range: Foxwell NT510 Elite (~$180) — A powerful handheld scanner offering manufacturer-specific diagnostics. For P1135, it reads live sensor current and voltage, helpful for advanced diagnosis of the heater circuit.
Professional: Autel MaxiCOM MK808S (~$500) — A professional-level tablet scanner. It provides full-system diagnostics, graphs live data with great detail, and offers bidirectional controls. Overkill for a single code but a great investment for a serious DIYer.
Rent vs buy: Most auto parts stores like AutoZone and O'Reilly read your code for free in their parking lot, but they do not rent scanners for you to take home. Buying a budget pick like the BlueDriver is a smart investment.
How to Clear the Code After You Fix It
- Use an OBD-II scan tool to clear the active and pending codes.
- Perform the specific drive cycle to run the 'O2 Sensor Heater' readiness monitor.
- Verify the monitor status changes to 'Complete' or 'Ready' using the scan tool.
Drive cycle (~15 minutes): Start the engine from a cold state and let it idle for 9 minutes. Drive the vehicle at a speed over 25 mph for at least 2 minutes. This targets the O2/AF sensor heater monitor on Toyota and Lexus models.
Readiness monitors affected: Oxygen (O2) Sensor Heater Monitor, Oxygen (O2) Sensor Monitor, Catalyst (CAT) Monitor
Before emissions retest: drive at least 50 miles to fully set monitors.
Watch out for:
- Disconnecting the battery clears the Check Engine Light but resets all readiness monitors to 'Incomplete', guaranteeing an emissions test failure.
- The code returns within two drive cycles if the root cause (usually a blown fuse or non-OEM sensor) is not fixed.
- Failing to use a scan tool to verify the readiness monitor is 'Complete' before taking an emissions test.
Will This Fail Emissions / State Inspection?
Yes — this code typically fails an OBD-II emissions inspection.
- California: An active P1135 code is an automatic failure. After repair, all OBD readiness monitors must be 'Complete' before a smog check passes.
- New York: The NYS DMV inspection includes an OBD-II scan. An illuminated Check Engine Light and an active P1135 code results in immediate failure.
- Texas: In counties requiring emissions testing, a vehicle with code P1135 fails the OBD portion of the inspection.
Most Commonly Affected Vehicles
- Toyota Camry (1998-2005) — Extremely common on both 4-cylinder (2.4L) and V6 models. On the 4-cylinder, the sensor is relatively easy to access on the front of the engine.
- Toyota Tacoma (1995-2004) — A frequent code on both 4-cylinder and V6 (3.4L) engines. The Bank 1 sensor is typically located on the passenger-side exhaust manifold.
- Lexus RX300 (1999-2003) — P1135 specifically points to the Bank 1 Sensor 1 on the rear exhaust manifold against the firewall. This location is notoriously difficult to access.
- Toyota RAV4 (2000-2003) — A very common code for this generation. Using a non-OEM (Denso) sensor is a frequent cause of the code returning after a repair.
- Toyota Sienna (1999-2003) — This code is common for the first-generation Sienna, pointing to the Bank 1 A/F sensor.
- Subaru Forester, Outback, Impreza (2000-2008) — On these Subaru models, P1135 is defined as 'Front Oxygen Sensor Circuit Malfunction', directly indicating a heater circuit fault in the upstream O2 sensor.
- BMW Various models (2000-2010) — For many BMWs, P1135 is defined as 'O2 Sensor Heater Circuit Low Voltage Bank 1 Sensor 1', indicating a problem with the pre-catalyst sensor's heater or power supply.
- Volkswagen/Audi Various models (2000-2010) — On these German vehicles, P1135 indicates 'HO2S Heater Circuit Electrical Malfunction' for sensors on both banks, pointing to a wiring or sensor heater issue.
Manufacturer-Specific Notes
- Toyota/Lexus/Scion: For these brands, P1135 almost exclusively means 'A/F Sensor Heater Circuit Malfunction (Bank 1 Sensor 1)'. These vehicles are notoriously sensitive to the sensor brand; using anything other than an OEM (Denso) part causes the code to return immediately.
- Nissan/Infiniti: On these vehicles, P1135 is a completely different fault: 'Intake Valve Timing Control Performance (Bank 2)'. This relates to the variable valve timing system, often caused by a faulty VVT solenoid or low engine oil, and has nothing to do with oxygen sensors.
- Ford: For many Ford models, P1135 indicates 'Pedal Position Sensor 'A' Circuit Intermittent'. This fault is related to the electronic throttle control system (drive-by-wire) and points to an issue with the accelerator pedal's sensor.
- GM (Chevrolet/Buick/GMC): On many GM vehicles, P1135 is defined as 'HO2S Lean Mean Bank 1 Sensor 1'. This is a performance code indicating the sensor is consistently reading a lean condition, pointing to a fuel mixture problem rather than a heater electrical fault.
- Hyundai/Kia: The definition is inconsistent. On diesel models like the Terracan, P1135 refers to an 'Injection Timing Servo' malfunction. On gas models, it refers to an O2 sensor heater circuit. Verify the definition for the specific model and year before diagnosis.
Real Owner Stories
2001 Toyota Tacoma V6 with 135K miles - The Misdiagnosis Runaround
Check Engine Light was on for 3 years with code P1135. Owner ignored it until the truck started losing power and downshifting frequently on hills.
What they tried:
- Replaced the A/F sensor with a Bosch Wideband sensor. The light went off for two weeks but returned with the same P1135 code.
- Took it to a dealer, who incorrectly diagnosed it as a bad (brand new) sensor.
- On a second dealer visit, a shop foreman found the true cause.
Outcome: The actual problem was a bad ground wire attached to the intake manifold. The dealer fixed the ground connection, which resolved the P1135 code for good.
Lesson: If a new, quality sensor doesn't fix a circuit code, the problem is in the wiring, fuse, or ground. Don't assume the new part is bad; check the entire circuit.
2002 Lexus RX300 - The 'Right Part' Matters
Check Engine Light, VSC, and Trac Off lights came on. A diagnostic check showed code P1135.
What they tried:
- Replaced the Bank 1 Sensor 1 (firewall side) with a new aftermarket (Bosch) sensor.
- Cleared the codes, but the P1135 code and warning lights returned immediately.
- Owner suspected the aftermarket brand was the issue based on forum research.
Outcome: The problem was the non-OEM sensor. Replacing the aftermarket part with a genuine Denso A/F sensor is the confirmed fix for this scenario on Lexus/Toyota vehicles.
Lesson: On Toyota and Lexus vehicles, using a non-Denso A/F sensor is a very common reason for P1135 to return after a repair. Save time and money by using the OEM Denso part the first time.
2001 Lexus RX300 with 49K miles - The Easy Fix
Check Engine Light and VSC lights appeared suddenly. Owner bought a code reader and found P1135.
What they tried:
- Tested the heater circuit on the sensor by checking for continuity between the two black wires and found an open circuit, confirming the heater was burned out.
- Researched the correct Denso part number to avoid buying the expensive dealer part.
Outcome: Owner purchased the correct Denso sensor online for less than a third of the dealer price and replaced it. This was the definitive fix and the code did not return.
Lesson: A simple multimeter resistance test on the sensor's heater pins confirms the failure in minutes. This avoids guessing and ensures you replace the correct part for the right reason.
How to Prevent This Code From Triggering
- Replace upstream A/F sensors proactively. (Every 100,000 miles.) — A/F sensors are wear items. As they age, their response becomes sluggish, leading to reduced fuel economy and increased strain on the catalytic converter, even before a code is set.
- Use high-quality, top-tier gasoline. (Every fill-up.) — Top-tier fuels contain enhanced detergent packages that prevent carbon buildup on internal engine components. This ensures cleaner combustion, reducing contaminants that foul the A/F sensor.
- Address engine oil leaks and high oil consumption promptly. (As soon as noticed.) — Burning oil sends contaminants down the exhaust that coat the A/F sensor's sensing element and poison the catalytic converter, reducing their effectiveness and lifespan.
- Fix engine misfires immediately. (As soon as a flashing Check Engine Light appears.) — A misfire allows unburnt fuel to dump into the exhaust system. This raw fuel superheats and melts the internal structure of the catalytic converter and damages the A/F sensor.
Frequently Asked Questions
What does 'Bank 1, Sensor 1' actually mean?
'Bank 1' refers to the side of the engine containing the #1 cylinder. 'Sensor 1' always means the 'upstream' sensor, located in the exhaust manifold before the catalytic converter. Identifying the correct bank is critical for V6 or V8 engines.
What's the difference between an Air/Fuel Ratio Sensor and a regular Oxygen (O2) Sensor?
An Air/Fuel (A/F) Ratio Sensor is a wideband sensor that measures the precise air-to-fuel ratio across a wide range. Traditional O2 sensors only detect basic 'rich' or 'lean' conditions. They operate differently and are not interchangeable.
Why is using a Denso brand sensor so critical on my Toyota/Lexus?
Toyota engine computers are calibrated specifically to the unique resistance of original Denso sensors. Aftermarket sensors lack these exact electrical properties. This mismatch causes the computer to reject the new sensor and immediately re-trigger the P1135 code.
Can I just clean the A/F sensor instead of replacing it?
No, you cannot clean it. The P1135 code indicates an electrical failure of the internal heater circuit, which is a sealed component. Once the internal element burns out, the entire sensor requires replacement.
I replaced the sensor but the P1135 code came back. What now?
First, confirm you installed an OEM-spec Denso sensor. If the brand is correct, check the 'A/F HEATER' fuse and use a multimeter to verify 12V power and ground at the harness connector. A lack of power points to a wiring short, not a defective new sensor.
What is the most common misdiagnosis for P1135?
The most common mistake is replacing the sensor without performing basic electrical checks. Always inspect the 'A/F HEATER' fuse and confirm power at the connector before buying parts. This prevents replacing a functional sensor when the real problem is a $2 fuse.
What happens if I ignore a P1135 code?
Ignoring the code causes consistently poor fuel mileage. The resulting rich engine condition overheats and destroys the catalytic converter. What starts as a $300 repair easily becomes a $2,000+ replacement.
What tools are needed to replace an A/F sensor?
You need a set of wrenches, penetrating oil to loosen the seized sensor, and a specialized oxygen sensor socket. This socket features a slit down the side to accommodate the sensor's wire, preventing damage during removal and installation.
Key Takeaways
- On Toyota and Lexus vehicles, P1135 specifically indicates a burned-out heater circuit in the Bank 1, Sensor 1 upstream air-fuel ratio sensor.
- Test the 'A/F HEATER' 20A or 25A fuse and verify 12V power at the sensor connector before spending $150+ on a replacement sensor.
- Install only an OEM Denso air-fuel ratio sensor; aftermarket brands frequently fail to sync with Toyota computers and will immediately re-trigger the code.
- Driving with an active P1135 code drops fuel economy by up to 15% and causes raw fuel to melt the catalytic converter, turning a $300 repair into a $2,000+ replacement within 12 months.
Helpful Videos

Shop the Parts Behind P1135
Below are the parts most often responsible for code P1135, ranked by how frequently each one is the actual culprit (per the diagnosis above). Tap any to see what we have for your vehicle.


The information in this article is provided for general reference and educational purposes only. Vehicle specifications, procedures, and part compatibility can vary by production date, trim level, and region. Always consult your vehicle's factory service manual and verify part numbers before purchasing or performing repairs. Safety-critical components such as airbags, seat belts, and braking systems should be installed by a qualified professional.
- 🧭 Diagnostic Flowchart
- 🎬 Helpful Videos
- 🛍️ Shop This Part
- What Does P1135 Mean?
- Can I Drive With P1135?
- Common Causes
- Symptoms
- Common Fixes & Costs
- Used vs. New Parts: Buying Guide
- What Happens If You Wait — Timeline
- Cost of Not Fixing It
- Diagnosis Steps
- When This Code Triggers (Freeze-Frame Conditions)
- Related Codes
- Climate & Environmental Factors
- How to Talk to a Mechanic About This Code
- Where to Take It: Dealer vs Independent vs Chain
- When to Walk Away From the Repair
- What Scan Tool You Need for This Code
- How to Clear the Code After You Fix It
- Will This Fail Emissions / State Inspection?
- Most Commonly Affected Vehicles
- Manufacturer-Specific Notes
- Real Owner Stories
- 2001 Toyota Tacoma V6 with 135K miles - The Misdiagnosis Runaround
- 2002 Lexus RX300 - The 'Right Part' Matters
- 2001 Lexus RX300 with 49K miles - The Easy Fix
- How to Prevent This Code From Triggering
- Frequently Asked Questions
- What does 'Bank 1, Sensor 1' actually mean?
- What's the difference between an Air/Fuel Ratio Sensor and a regular Oxygen (O2) Sensor?
- Why is using a Denso brand sensor so critical on my Toyota/Lexus?
- Can I just clean the A/F sensor instead of replacing it?
- I replaced the sensor but the P1135 code came back. What now?
- What is the most common misdiagnosis for P1135?
- What happens if I ignore a P1135 code?
- What tools are needed to replace an A/F sensor?
- Key Takeaways
- 🎟️ Get 5% Off