
OBD-II Code P1164: Air/Fuel Ratio Sensor Performance
What P1164 means, why it triggers, and how to fix it
- On Honda and Acura vehicles, P1164 almost always indicates a failing primary air/fuel ratio sensor (Bank 1, Sensor 1) that requires replacement.
- Always use an OEM-spec Denso or NTK replacement sensor, as aftermarket brands like Bosch frequently fail to resolve the P1164 code on Hondas.
- Check the 'A/F Heater' fuse and inspect the sensor wiring for burns or corrosion before spending $150+ on a new sensor.
- Fix this code within 100 miles; ignoring it forces the engine to run rich, which destroys the catalytic converter and causes a $1,500+ repair.
What Does P1164 Mean?

The P1164 code means the Powertrain Control Module (PCM) detects a performance issue with the primary air/fuel ratio sensor (Bank 1 Sensor 1). This upstream sensor measures oxygen in the exhaust so the PCM can maintain the ideal air-fuel mixture. When the sensor's signal responds slowly, falls outside its expected voltage range, or reads incorrectly during deceleration, the PCM logs P1164 and triggers the check engine light.
Technical definition: The SAE/OBD-II definition for P1164 varies by manufacturer. For Honda/Acura, it is 'Air/Fuel Ratio (A/F) Sensor (Sensor 1) Circuit Range/Performance Problem.' Other manufacturers use it for different faults, such as 'Fuel Temperature Sensor Range/Performance' (VW/Audi) or 'Fuel pressure sensor fault' (BMW). This guide focuses on the most common Honda/Acura definition.
🎬 Watch: A quick breakdown of P1164 causes and meaningsCan I Drive With P1164?
Yes, But With Caution. You can drive safely for 50-100 miles to reach a repair shop. However, continuing to drive with a faulty A/F sensor causes poor fuel economy, higher emissions, and forces the engine to run rich. This rich mixture overheats and destroys the catalytic converter, turning a minor repair into a $1,200-$2,500 replacement.
Common Causes

- Faulty Air/Fuel Ratio Sensor (Bank 1, Sensor 1) (Very Common) — The sensor itself is the most frequent culprit. Over time, the internal heating element fails, or the sensor tip becomes contaminated by oil, coolant, or carbon deposits, leading to slow or inaccurate readings.
- Damaged or Corroded Wiring/Connectors (Common) — The wiring harness or electrical connector for the A/F sensor gets damaged from road debris, burned by hot exhaust components, or corroded by moisture. This interrupts the signal between the sensor and the PCM.
- Exhaust Leaks (Common) — A leak in the exhaust manifold or pipe before the A/F sensor allows unmetered oxygen to enter the system. This skews the sensor's readings, making the computer think the engine is running lean and triggering the performance code.
- Blown Fuse or Faulty Relay (Less Common) — The A/F sensor's heater circuit receives power through a fuse (often labeled 'A/F Heater'). If this fuse blows, the sensor cannot reach its 600°F+ operating temperature, causing it to fail the PCM's performance test.
- Vacuum Leaks or Fuel System Issues (Less Common) — A cracked intake vacuum hose, weak fuel pump, or clogged injector creates a genuine lean or rich condition. The A/F sensor reports this abnormal condition, and if it persists outside the expected range, the PCM sets P1164.
- Faulty Powertrain Control Module (PCM) (Rare) — Particularly on 1998-2002 Honda Accords, the PCM misinterprets the sensor's data and sets the code incorrectly. This requires a software update or PCM replacement per manufacturer technical service bulletins (TSBs).
Symptoms

- Check Engine Light is On — The light illuminates as soon as the PCM logs the P1164 fault.
- Decreased Fuel Economy — An incorrect air-fuel mixture forces the engine to use more fuel. The PCM defaults to a rich condition to protect the engine, dropping fuel efficiency by 5-15%.
- Rough Idle or Engine Hesitation — The engine runs unevenly, sputters, or hesitates during acceleration because the computer cannot properly regulate the air-fuel mixture.
- Failed Emissions Test — The incorrect air-fuel ratio leads to incomplete combustion, increasing harmful pollutants like hydrocarbons and causing an automatic smog check failure.
- Black Smoke or Rotten Egg Smell — If the sensor fails and causes the engine to run excessively rich, you will see black smoke or smell sulfur (rotten eggs) from the tailpipe as unburned fuel enters the catalytic converter.
Diagnostic Flowchart

Tap your situation to follow the diagnostic path that matches what you're seeing on this code.
Common Fixes & Costs
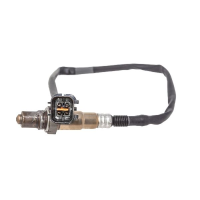
- Replace Air/Fuel Ratio Sensor (Bank 1, Sensor 1)
— Parts: $120-$200 for an OEM-spec Denso sensor., Labor: $100-$150. Total cost at an independent shop is $220-$350., ~1.0 hr book time
(DIY)
Honda Accord (1998-2002 ULEV): OEM 36531-P0A-A01 (Alt: {'Denso (OEM Supplier)': '234-9014', 'NTK': '24660'})
Honda Civic (2001-2005): OEM 36531-PLM-306 (Alt: {'Denso (OEM Supplier)': '234-9005 or 234-9017'})
Honda CR-V (2002-2004): OEM 36531-PPA-305 (Alt: {'Denso (OEM Supplier)': '234-9005'}) - Replace Blown Fuse — Parts: $1-$5, Labor: $0, ~0.1 hr book time (DIY)
- Repair Damaged Wiring or Connector — Parts: $10-$50 for a pigtail connector or wiring supplies., Labor: $100-$200 depending on damage location., ~1.5 hr book time (Intermediate)
- Repair Exhaust Leak — Parts: $20-$100 for gaskets or sealant., Labor: $150-$300 for diagnosis and repair., ~2.0 hr book time (Intermediate)
- Update or Replace Powertrain Control Module (PCM) — Parts: $0 (software update) to $800 (replacement unit)., Labor: $100-$200 for dealer programming., ~1.5 hr book time (Professional)
DIY vs Professional
- Replace Air/Fuel Ratio Sensor — Beginner: Yes, with patience.
Tools: Ratchet, penetrating oil, and a specialized slotted O2 sensor socket. - Replace Blown Fuse — Beginner: Yes.
Tools: Fuse puller or needle-nose pliers. - Repair Damaged Wiring — Beginner: No.
Tools: Multimeter, wire strippers, heat shrink tubing, soldering iron. - Repair Exhaust Leak — Beginner: No.
Tools: Smoke machine, wrenches, potentially a welder. - Update or Replace PCM — Beginner: No.
Tools: Manufacturer-specific diagnostic and programming tools.
Used vs. New Parts: Buying Guide
When a used part is worth it: It is strongly discouraged to buy a used Air/Fuel Ratio sensor. These sensors are wear-and-tear items with a finite lifespan (60,000-100,000 miles). A used sensor has an unknown history and frequently fails shortly after installation.
Donor-vehicle mileage cap: roughly under 20000 miles for the part to have meaningful remaining life.
Donor quality checklist:
- If considering used, only select one from a very low-mileage vehicle that was wrecked.
- Avoid parts from vehicles scrapped due to engine or emissions failures.
- Match the OEM part number exactly; aftermarket 'equivalents' often fail on Hondas.
Decision logic:
- If The part is an Air/Fuel Ratio Sensor. → Always buy new from an OEM supplier like Denso or NTK. The risk of premature failure with a used part is too high.
- If The cost of a new OEM-spec sensor is a major budget constraint. → A new, reputable aftermarket part is better than a used OEM part. Avoid the cheapest options.
Warranty tradeoff: Used parts typically have a 30-90 day warranty that does not cover labor. New OEM parts provide the best guarantee of compatibility and longevity.
Worst-case if a used part fails: $200-$400 if a used sensor fails after the warranty period, requiring a new part plus repeat labor costs.
What Happens If You Wait — Timeline
- 0-2 weeks: Check Engine Light illuminates. The PCM logs P1164. Often no noticeable symptoms, or a very slight increase in fuel consumption. (MPG impact: 0-5%% · Added cost: $0)
- 2 weeks - 3 months: Noticeable drop in fuel economy. The engine hesitates slightly on acceleration or runs rough when cold as the PCM defaults to a rich fuel map. (MPG impact: 5-15%% · Added cost: $30-$80 in wasted fuel)
- 3-8 months: The persistently rich fuel mixture overheats the catalytic converter, causing the internal ceramic substrate to crack or melt. The converter's efficiency drops. (MPG impact: 10-20%% · Added cost: $1,200-$2,800 (catalytic converter replacement is now required))
- 8+ months: Complete catalytic converter meltdown. The exhaust becomes physically blocked, causing severe power loss, stalling, and potential engine damage. (MPG impact: 20-40%+% · Added cost: $2,000-$3,500+ (catalytic converter, O2 sensors, spark plugs, and further engine diagnostics))
Cost of Not Fixing It
- 0-1 month: Noticeable drop in fuel economy by 5-15% and increased emissions. The vehicle runs in a default rich mode. (Added cost: $20-$60 per month in extra fuel costs.)
- 1-6 months: The rich fuel mixture continuously entering the exhaust overheats the catalytic converter, causing its internal structure to melt and fail. (Added cost: $1,200-$2,800 for catalytic converter replacement.)
- 6+ months: Sustained rich running fouls spark plugs, causes excessive carbon buildup, and damages other exhaust sensors. (Added cost: $300-$800+ for spark plug replacement and further engine diagnostics.)
Diagnosis Steps
- Read Codes and Review Freeze Frame Data
Use an OBD-II scanner to confirm P1164. Note any other codes (e.g., P1166, P1167, P0171) as they must be diagnosed first. Review freeze frame data to see the engine conditions when the code set.
Tools: OBD-II Scanner (Beginner) - Check the Sensor's Fuse
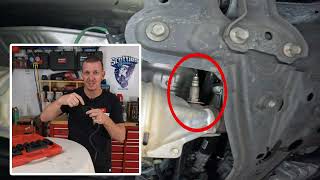
Locate the fuse for the A/F sensor heater circuit (often labeled 'A/F Heater' or 'O2 HTR') in the fuse box. Replace it if blown. A blown fuse indicates a short in the sensor's heater element or wiring.
Tools: Owner's Manual, Fuse Puller (Beginner) - Inspect the Wiring and Connector
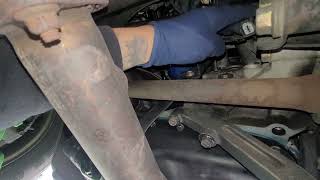
Visually inspect the entire wiring harness for the upstream (Bank 1, Sensor 1) A/F sensor. Look for burns from the exhaust manifold, chafing, or corrosion on the connector pins. Ensure the connector is plugged in securely.
Tools: Flashlight, Mirror (Beginner) - Monitor Live Sensor Data (Voltage/Lambda)
Using an advanced scanner, view the live data PID for 'B1S1'. For a Honda A/F sensor, the voltage holds steady around 2.8-3.3V at warm idle. A reading fixed outside this range, or one that responds very slowly to throttle snaps, confirms a faulty sensor.
Tools: Advanced OBD-II Scanner (Advanced) - Test Sensor Heater Circuit Resistance
Unplug the sensor and use a multimeter set to Ohms (Ω). Measure the resistance between the two heater pins on the sensor side. A good Honda/Denso sensor has 10-40 Ohms at room temperature. Infinite or near-zero resistance means the sensor must be replaced.
Tools: Multimeter, Wiring Diagram (Intermediate) - Check for Exhaust and Vacuum Leaks
Start the engine cold and listen for hissing or ticking sounds near the exhaust manifold. Use a smoke machine to definitively check for leaks in both the exhaust (pre-sensor) and intake vacuum lines.
Tools: Smoke Machine (optional), Stethoscope (Intermediate) - Analyze Fuel Trim Data
Monitor Short-Term Fuel Trim (STFT) and Long-Term Fuel Trim (LTFT). Normal values are within +/- 5%. Consistently high positive numbers (> +15%) mean the PCM is adding fuel to compensate for a lean condition, caused by a misreading A/F sensor or a vacuum leak.
Tools: Advanced OBD-II Scanner (Advanced) - Check Fuel Pressure
Connect a fuel pressure gauge to the fuel rail service port. At a stable, warm idle, fuel pressure for most Hondas is 40-50 PSI. Low pressure indicates a weak fuel pump or clogged filter, causing a lean condition the A/F sensor is correctly reporting.
Tools: Fuel Pressure Gauge, Service Manual (Advanced) - PRO TIP: Perform a Forced Rich/Lean Test
While monitoring live data, introduce a small amount of propane into the air intake to create a rich condition; the sensor voltage should rise instantly. Create a lean condition by pulling a small vacuum hose; the voltage should drop instantly. A slow reaction confirms a faulty sensor.
Tools: Advanced OBD-II Scanner, Propane Torch (unlit) (Advanced) - PRO TIP: Analyze Sensor Waveform
Connect a lab scope to the sensor's signal wire. During a throttle snap, the waveform should show a sharp drop followed by a sharp rise. A rounded, slow-to-react waveform visually confirms poor performance.
Tools: Oscilloscope (Lab Scope), Wiring Diagram (Professional)
When This Code Triggers (Freeze-Frame Conditions)
- Engine Coolant Temp: 180-200°F (82-93°C) (Engine is fully warmed up and operating in closed-loop fuel control.)
- Engine RPM: 1500-3000 RPM (During steady-state cruising or following a rapid acceleration/deceleration event.)
- Engine Load: 30-70% (Vehicle is under moderate load, such as maintaining speed on a highway.)
- Vehicle Speed: 40-60 mph (The PCM runs the sensor performance test during steady highway driving.)
Related Codes
- P1163 — Indicates a 'slow response' from the same A/F sensor. P1164 is for 'range/performance'. They are diagnostically identical; a slow sensor fails a performance test.
- P1166 — Points to an electrical fault in the A/F sensor's heater circuit. A faulty heater prevents the sensor from warming up, causing P1164. Diagnose P1166 first by checking fuses and heater resistance.
- P1167 — A severe heater circuit malfunction code. It almost guarantees a P1164 will be set alongside it. Fix the heater circuit fault (P1167) before addressing the performance code (P1164).
- P0171 — Means 'System Too Lean (Bank 1)'. A failing A/F sensor provides incorrect data causing P0171. If both are present, the faulty A/F sensor is the likely root cause.
Climate & Environmental Factors
- Cold Climates: In colder weather, the sensor's internal heater is critical for reaching its 600°F+ operating temperature quickly. A weak heater circuit fails the performance test during a cold start, triggering P1164.
- High Humidity / Road Salt: Areas using road salt accelerate corrosion. This damages the sensor's external housing, electrical connector pins, or wiring harness, leading to poor signals.
- High Altitude: A sensor that is already weak struggles to keep up with the required air density adjustments at altitude, causing it to fail the PCM's performance test.
How to Talk to a Mechanic About This Code
Say this: "I have a P1164 code on my Honda and I'd like to schedule a diagnostic. I'd like you to check the performance of the primary A/F sensor, including its live data voltage and heater circuit, and inspect for any exhaust leaks or wiring issues before recommending a part replacement."
This signals you understand the common causes. It directs the mechanic to perform a thorough diagnosis rather than just replacing the most likely part, preventing unnecessary spending if the issue is a simple fuse or wiring problem.
Avoid saying:
- 'Just fix whatever's wrong'
- 'My check engine light is on, can you look at it?' (too vague — invites upsell)
- 'Whatever you recommend'
Questions to ask before authorizing the repair:
- What did the live data for the Bank 1 Sensor 1 show at idle and during a throttle snap?
- Did you test the sensor's heater circuit resistance and check the 'A/F Heater' fuse?
- Did you inspect for exhaust leaks upstream of the sensor?
- If the sensor needs replacement, can you confirm you are using an OEM-spec Denso or NTK part?
- What is the warranty on this repair, including parts and labor?
Where to Take It: Dealer vs Independent vs Chain
- Dealer:
Recommended if your car has a known TSB or is under warranty; otherwise, an independent shop is more cost-effective.
Best for: Vehicles still under powertrain or emissions warranty., Known manufacturer-specific quirks, like the TSB for 1998-2002 Accords requiring a PCM update., Complex electrical issues where the sensor replacement did not fix the code.
Downsides: Labor rates are often 1.5-2x higher than independent shops., May recommend a wholesale fix when a more targeted repair is possible. (Typical cost: +50% vs. baseline) - Independent Shop:
Best fit for this code. P1164 on a Honda is a very common repair that competent independent shops can handle efficiently and cost-effectively.
Best for: Most out-of-warranty Honda/Acura vehicles with a P1164 code., Cost-conscious owners who want a reliable repair., Building a long-term relationship with a mechanic.
Downsides: Quality varies greatly; vet the shop through reviews and certifications (e.g., ASE)., May not have access to the latest manufacturer-specific software for PCM updates. (Typical cost: +0% vs. baseline) - Chain Shop:
Use with caution. They are less likely to perform proper diagnostic steps (checking fuses, leaks, wiring) first. There is a high risk of using an incompatible part.
Best for: Simple, routine maintenance like oil changes or tire rotations.
Downsides: High pressure from service advisors to upsell unnecessary services., Technician skill is inconsistent., More likely to use lower-quality or incompatible aftermarket parts. (Typical cost: -10% vs. baseline)
When to Walk Away From the Repair
If the estimated repair cost exceeds 40-50% of the car's private-party value, seriously consider selling the car as-is or trading it in.
- Car worth $4500, fix is $350: Fix it. This repair is well below the threshold and is critical for engine health and fuel economy.
- Car worth $3000, fix is $1400: Walk away. This repair cost is approaching half the car's value, especially if this involves a PCM replacement.
- Car worth $8000, fix is $350: Fix it. The repair cost is a small fraction of the vehicle's value.
What Scan Tool You Need for This Code
Minimum: An OBD-II reader that displays live sensor data, including graphing for the O2 sensor voltage and viewing short-term/long-term fuel trims.
A basic $20 code reader only gives you the P1164 code, but won't let you see if the sensor is actually working. Viewing live data is essential to confirm if the sensor is 'lazy' or stuck.
Budget: BlueDriver Pro (~$99) — Connects to your smartphone and provides excellent live data graphing for the A/F sensor voltage and fuel trims. Offers repair reports based on verified fixes.
Mid-range: Foxwell NT510 Elite / Innova 5610 (~$150-350) — These handheld units offer manufacturer-specific diagnostics for brands like Honda. The Innova 5610 provides bi-directional controls to test components directly.
Professional: Autel MaxiCOM MK808 / MK808S (~$400-500) — A tablet-based tool with full bidirectional control, extensive data logging, and professional-level diagnostic functions. Ideal for deep analysis.
Rent vs buy: If this is a one-time fix, auto parts stores like AutoZone have a tool loaner program where you can borrow an O2 sensor socket set and potentially a basic scanner. Buy a scanner only if you perform diagnostics regularly.
How to Clear the Code After You Fix It
- Use an OBD-II scan tool to clear the P1164 code.
- Perform the Honda-specific drive cycle to run the system's self-tests.
- Check readiness monitor status with a scan tool to confirm the repair.
Drive cycle (~40 minutes): From a cold start (engine off for 6+ hours, fuel tank 1/4 to 3/4 full), idle for 2-3 minutes. Drive for 15-20 minutes at a steady 50-60 mph on a highway, including at least one 90-second period of coasting (foot off the accelerator). Follow with 10 minutes of city driving with some coasting. Let the engine cool down for 30 minutes.
Readiness monitors affected: Catalyst (CAT) monitor, Oxygen (O2) Sensor monitor, Oxygen Sensor Heater monitor
Before emissions retest: drive at least 100 miles to fully set monitors.
Watch out for:
- Disconnecting the battery clears the code but resets all readiness monitors, causing an automatic emissions test failure.
- The code returns if the underlying issue (e.g., an exhaust leak) was not fixed, even with a new sensor.
- Failure to meet pre-conditions (cold start, proper fuel level) prevents the drive cycle from running monitor tests.
Will This Fail Emissions / State Inspection?
Yes — this code typically fails an OBD-II emissions inspection.
- California: An active P1164 code results in an automatic smog check failure. All required OBD readiness monitors must be set to 'Ready', requiring a completed drive cycle after repair.
- New York: The NYS DMV inspection includes an OBD-II scan. An illuminated Check Engine Light for P1164 is an automatic failure.
- Texas: In emissions-testing counties, an illuminated Check Engine Light is an automatic failure. Texas allows for only one or two 'Not Ready' monitors depending on vehicle age.
Most Commonly Affected Vehicles
- Honda Accord (1998-2002) — Extremely common on 4-cylinder ULEV models. TSB 00-046 addresses this, often requiring both sensor and PCM replacement for a permanent fix. The correct Denso part number (234-9014) is critical.
- Honda Civic (1996-2005) — Prevalent on HX and lean-burn engine models. Using non-OEM sensors (like Bosch) is a known cause for the code returning.
- Acura RSX (2002-2006) — The primary oxygen sensor is a common failure point over 100k miles. P1164 on this model is almost always the sensor itself.
- Honda Insight (2000-2006) — Known to have issues where the PCM is the actual cause of the P1164 code, not the sensor itself. Proper diagnosis is crucial.
- Nissan Frontier (2001-2004) — P1164 refers to the Heated Oxygen Sensor 1, indicating a rich shift monitoring issue. The diagnostic approach differs from Honda.
- Chevrolet/GM Various V6/V8 Models (2000-2009) — P1164 means 'Heated Oxygen Sensor (HO2S) Bank 2 Sensor 3 Rich or High Voltage'. This refers to a post-catalyst sensor used for catalyst monitoring, not fuel control.
- BMW Various (2000-2015) — Unrelated to oxygen sensors; typically points to a 'Fuel pressure sensor fault' or an issue with fuel adaptation at idle.
Manufacturer-Specific Notes
- Honda/Acura: Honda issued TSB 00-046 for 1998-2000 Accords, stating specific driving conditions cause the PCM to incorrectly set P1164. The fix requires replacing both the A/F sensor and the PCM.
- Honda/Acura: Using aftermarket sensors, particularly Bosch models, widely fails to resolve the code on Civic and Accord models. Using an OEM-equivalent Denso or NTK sensor is strongly recommended.
- Honda/Acura: The wire for the replacement Denso sensor is sometimes shorter than the original part. Ensure there is enough slack and the wire does not touch the hot exhaust manifold.
- Volkswagen/Audi: P1164 does not relate to the oxygen sensor. It indicates an issue with the Fuel Temperature Sensor's range or performance, requiring a completely different diagnostic path.
Real Owner Stories
2003 Honda Civic HX with 40K miles - The Misleading Aftermarket Part
Check Engine Light came on. A dealership diagnosed a bad primary O2 sensor and quoted $400 for the repair.
What they tried:
- Owner purchased a Bosch sensor for $200 and replaced it themselves.
- Cleared the code, but the light returned after 36 miles with the same P1164 code.
Outcome: The owner's gas mileage returned to normal, but the P1164 code persisted. The issue highlights a common problem where aftermarket sensors are not fully compatible with Honda's specific requirements, leading to a recurring code despite the part being new.
Lesson: On Honda/Acura vehicles, always prioritize an OEM (Denso or NTK) sensor. Using a non-specified aftermarket part fails to resolve the code and wastes money.
2000 Honda Accord EX 4-Cyl ULEV - The Problem That Wasn't the Sensor
P1164 code appeared. Owner replaced the A/F sensor with the correct Denso part (234-9025), but the Check Engine Light kept coming back on over a period of four years.
What they tried:
- Replaced the A/F sensor with the correct OEM-spec part.
- Lived with the code for years as the engine ran fine and gas mileage was normal.
- Used an OBD2 reader and found a failing test ID ($85) not documented in standard charts.
Outcome: The issue was a faulty PCM that incorrectly interprets sensor data, as pointed out by TSB 00-046 for this specific model. The code would not be resolved until the PCM itself was addressed.
Lesson: If a new, correct OEM-spec sensor doesn't fix the code, investigate wiring, connectors, and vehicle-specific Technical Service Bulletins (TSBs) before assuming the new part is defective.
1996 Honda Civic HX - A Simple and Successful DIY Fix
Check Engine Light came on, throwing code P1164. The car was running, but the owner wanted to resolve the issue.
What they tried:
- The owner was advised that the front O2 sensor is a common failure item.
- Unplugged the front O2 sensor. The car ran better with the sensor disconnected, confirming the sensor was sending bad data.
Outcome: The owner replaced the primary O2 sensor, which resolved the code and the drivability issue. This represents the most common and straightforward scenario for a P1164 code.
Lesson: In the majority of cases on Hondas, P1164 means the primary A/F sensor has failed. Replacing it is a very common and successful DIY repair.
How to Prevent This Code From Triggering
- Replace Air/Fuel Ratio Sensor as a maintenance item (Every 100,000 miles) — A/F sensors are wear items. As they age, their reaction time slows, leading to reduced fuel efficiency and increased emissions even before a code is set.
- Use Top Tier certified gasoline (Every fill-up) — Top Tier gasolines contain detergents that prevent carbon buildup on fuel injectors. This ensures a proper fuel spray pattern, reducing contaminants that foul the A/F sensor tip.
- Fix oil and coolant leaks promptly (As needed) — Internal leaks from a bad head gasket or valve seals contaminate the A/F sensor with oil or antifreeze. This contamination is a leading cause of premature sensor failure.
- Avoid aggressive driving and extended idling (Daily habit) — Extended idling and frequent, hard acceleration lead to richer fuel mixtures and higher exhaust temperatures, shortening the life of the A/F sensor and catalytic converter.
Frequently Asked Questions
Can I fix P1164 myself?
Yes, replacing the upstream air/fuel ratio sensor is a straightforward DIY repair. It typically requires basic hand tools, penetrating oil, and a specialized slotted oxygen sensor socket. Always diagnose fuses and wiring before replacing the part.
What is Bank 1, Sensor 1?
Bank 1 is the side of the engine containing cylinder #1. On 4-cylinder engines, there is only one bank. Sensor 1 is the 'upstream' sensor located in the exhaust manifold before the catalytic converter.
Will driving with P1164 damage my engine?
Short-term driving for 50-100 miles is safe. However, long-term driving forces the engine to run rich, which overheats and destroys the catalytic converter. This turns a $200 sensor replacement into a $1,500+ repair.
I replaced the sensor, but the code came back. What now?
If a new OEM-spec sensor doesn't fix it, check for damaged wiring, blown fuses, or exhaust leaks. On 1998-2002 Honda Accords, a faulty PCM causes this code per TSB 00-046. Stop DIYing and consult a specialist if basic checks pass.
What are the most common mistakes when diagnosing P1164?
The biggest mistake is replacing the sensor without checking the 'A/F Heater' fuse or inspecting for exhaust leaks. The second is using a cheap aftermarket sensor on a Honda or Acura. Always use an OEM-equivalent Denso or NTK part to prevent the code from returning.
Why is the air/fuel ratio sensor so expensive?
Air/fuel ratio sensors (wideband O2 sensors) are more technologically advanced than traditional oxygen sensors. They use precious metals like platinum to provide precise air-fuel measurements over a wider range. This complexity makes them more expensive to manufacture.
What does 'PD' mean next to my P1164 code?
'PD' stands for Pending. The vehicle's computer detected the fault on the current drive cycle, but conditions to illuminate the Check Engine Light haven't been met yet. If the fault occurs again on the next drive, the code becomes active.
Can a bad battery cause a P1164 code?
A weak battery causes various electrical gremlins, but it rarely triggers a P1164 code. This code specifically targets the A/F sensor's performance, wiring, or exhaust mixture. Ensure your battery is healthy, but focus diagnostics on the sensor circuit.
Key Takeaways
- On Honda and Acura vehicles, P1164 almost always indicates a failing primary air/fuel ratio sensor (Bank 1, Sensor 1) that requires replacement.
- Always use an OEM-spec Denso or NTK replacement sensor, as aftermarket brands like Bosch frequently fail to resolve the P1164 code on Hondas.
- Check the 'A/F Heater' fuse and inspect the sensor wiring for burns or corrosion before spending $150+ on a new sensor.
- Fix this code within 100 miles; ignoring it forces the engine to run rich, which destroys the catalytic converter and causes a $1,500+ repair.
Helpful Videos

Shop the Parts Behind P1164
Below are the parts most often responsible for code P1164, ranked by how frequently each one is the actual culprit (per the diagnosis above). Tap any to see what we have for your vehicle.


The information in this article is provided for general reference and educational purposes only. Vehicle specifications, procedures, and part compatibility can vary by production date, trim level, and region. Always consult your vehicle's factory service manual and verify part numbers before purchasing or performing repairs. Safety-critical components such as airbags, seat belts, and braking systems should be installed by a qualified professional.
- 🧭 Diagnostic Flowchart
- 🎬 Helpful Videos
- 🛍️ Shop This Part
- What Does P1164 Mean?
- Can I Drive With P1164?
- Common Causes
- Symptoms
- Common Fixes & Costs
- DIY vs Professional
- Used vs. New Parts: Buying Guide
- What Happens If You Wait — Timeline
- Cost of Not Fixing It
- Diagnosis Steps
- When This Code Triggers (Freeze-Frame Conditions)
- Related Codes
- Climate & Environmental Factors
- How to Talk to a Mechanic About This Code
- Where to Take It: Dealer vs Independent vs Chain
- When to Walk Away From the Repair
- What Scan Tool You Need for This Code
- How to Clear the Code After You Fix It
- Will This Fail Emissions / State Inspection?
- Most Commonly Affected Vehicles
- Manufacturer-Specific Notes
- Real Owner Stories
- 2003 Honda Civic HX with 40K miles - The Misleading Aftermarket Part
- 2000 Honda Accord EX 4-Cyl ULEV - The Problem That Wasn't the Sensor
- 1996 Honda Civic HX - A Simple and Successful DIY Fix
- How to Prevent This Code From Triggering
- Frequently Asked Questions
- Can I fix P1164 myself?
- What is Bank 1, Sensor 1?
- Will driving with P1164 damage my engine?
- I replaced the sensor, but the code came back. What now?
- What are the most common mistakes when diagnosing P1164?
- Why is the air/fuel ratio sensor so expensive?
- What does 'PD' mean next to my P1164 code?
- Can a bad battery cause a P1164 code?
- Key Takeaways
- 🎟️ Get 5% Off