
P1196 on 2010-2012 Audi S5 Cabriolet: O2 Sensor Heater Circuit Fault Causes and Fixes
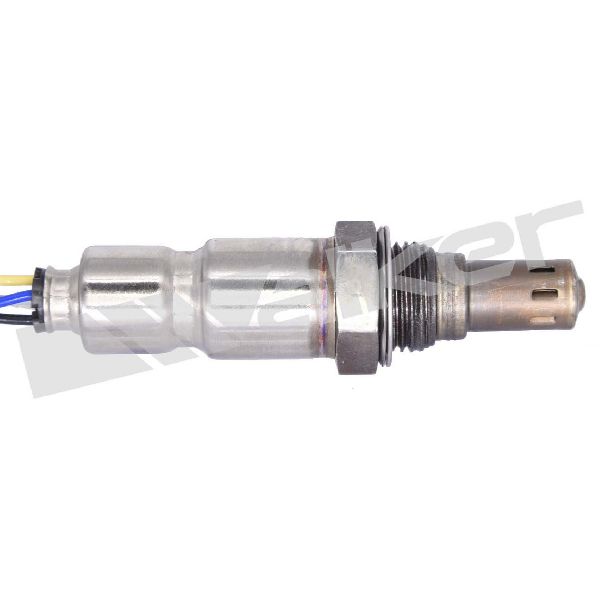
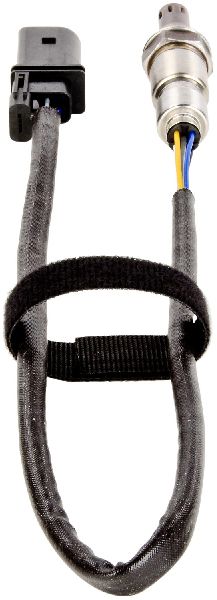
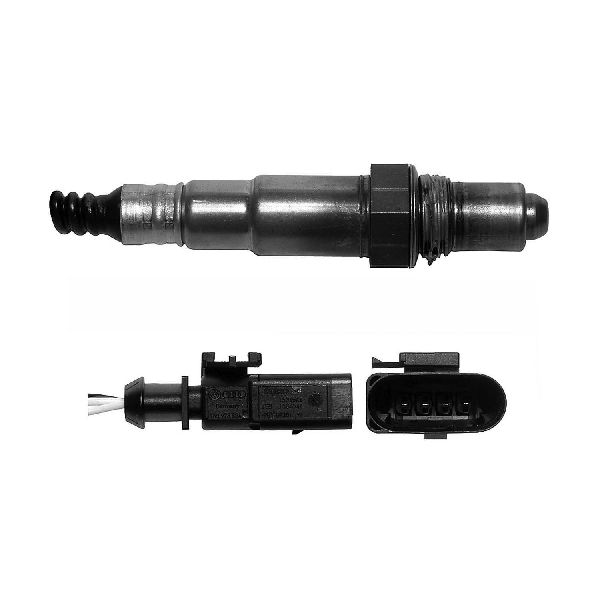
On a 2010-2012 Audi S5 Cabriolet, code P1196 indicates an electrical malfunction in the heater circuit of the Bank 1, Sensor 1 oxygen sensor. This is the upstream sensor on the passenger side. The most common fix is replacing the sensor itself, which costs around $70-$150 for an aftermarket part or $180-$250 for an OEM part. Before replacement, checking the relevant fuse in the engine bay fuse box is a critical first step.
- P1196 points directly to a problem with the heater in the upstream oxygen sensor on the passenger side (Bank 1).
- The most likely cause is a failed oxygen sensor, which is a standard maintenance item.
- Before buying a new sensor, always check the corresponding fuse first, as it's a cheap and easy potential fix, especially if you have heater codes for both banks.
What's Unique About the 2010-2012 Audi S5 CABRIOLET
For the 2010-2012 S5 Cabriolet with the 3.0L supercharged V6, this code is a relatively straightforward component failure. Unlike some platforms where wiring is a chronic issue, the primary cause is typically the O2 sensor's internal heater element failing from age and heat cycles. Audi issued a Technical Service Bulletin (TSB) for this exact issue, suggesting it was a recognized fault, though not one that prompted a recall. The key is correctly identifying Bank 1, which on this V-engine configuration is the passenger side (right side). The 3.0L TFSI engine was widely used across Audi's lineup, making this a common issue on many related models.
Diagnostic Flowchart
Tap your situation to follow the diagnostic path that matches what you're seeing on this vehicle.
Symptoms You May Notice
- Check Engine Light (MIL) is on
- Reduced fuel economy
- Rough or unstable idle, especially when the engine is cold
- Failure to pass an emissions test
- Noticeable hesitation or lag in lower RPM ranges
- Replacing the wrong oxygen sensor (e.g., the downstream sensor or the sensor on Bank 2). P1196 specifically refers to the upstream sensor on Bank 1 🎬 Watch this to avoid confusion with the downstream sensor removal process. (passenger side).
- Replacing the sensor without checking the fuse first. A quick fuse check can save the cost of an unnecessary sensor replacement, especially if other O2 heater codes are present.
- Assuming the sensor is bad when the connector is contaminated with oil or moisture, causing a short.
Most Likely Causes
- Failed Bank 1, Sensor 1 Oxygen Sensor 🔴 High Probability → Shop Oxygen Sensor Oxygen sensors are wear-and-tear items. The internal heating element is subjected to thousands of heat cycles and eventually burns out, which is the most common failure mode. This is a well-documented failure on the 3.0T engine platform.
How to confirm: Disconnect the sensor and measure the resistance between the two heater circuit wires (often the same color, e.g., two white wires on Bosch universal sensors). An infinite resistance reading (open circuit) confirms the heater has failed. A functional heater should have a low resistance, typically between 2 and 30 ohms when at ambient temperature.
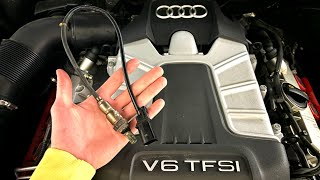
Typical fix: Replace the Bank 1, Sensor 1 (upstream, passenger side) oxygen sensor. Using an O2 sensor socket is highly recommended for removal and installation. 🎬 Watch: Step-by-step guide to replacing the upstream O2 sensor.
Est. part cost: $70-$250 - Blown Fuse for O2 Heater Circuit 🟡 Medium Probability An electrical short in the sensor or its wiring can cause the corresponding fuse to blow as a protective measure. This is a common point of failure when multiple O2 sensor heater codes appear simultaneously.
How to confirm: Locate the fuse box in the engine compartment (plenum chamber). Check the owner's manual or online diagrams for the specific fuse related to 'Oxygen Sensor Heater' or 'Lambda Sensor'. On many B8 models, this is a 15A or 20A fuse. Visually inspect the fuse and test for continuity with a multimeter.
Typical fix: Replace the blown fuse. If the new fuse blows immediately, it indicates a persistent short circuit in the wiring or the sensor itself that must be diagnosed before proceeding.
Est. part cost: $1-$5 - Damaged Wiring or Connector ⚪ Low Probability The wiring harness is located in a high-heat engine bay and near the exhaust, making it susceptible to heat damage, abrasion, or corrosion over time. The plastic connectors can also become brittle and break.
How to confirm: Visually inspect the wiring harness and connector for the Bank 1 Sensor 1 O2 sensor. Look for any signs of melting, chafing, broken wires, or corrosion on the connector pins. Check for 12V power and ground at the connector harness-side with the ignition on.
Typical fix: Repair the damaged section of the wiring harness or clean/replace the connector. Automotive-grade heat shrink and butt connectors should be used for a durable repair.
Est. part cost: $10-$100
Rare But Worth Checking
- Failed Engine Control Module (ECM): This is extremely rare. The ECM's internal driver for the heater circuit can fail, but this should only be considered after all other possibilities (sensor, fuse, wiring) have been exhaustively ruled out by a professional.
Diagnosis Steps
- Read the fault codes with an OBD-II scanner to confirm P1196 is present. Note any other codes.
- Locate the fuse for the oxygen sensor heaters. On B8 platform cars, this is typically in the fuse box in the plenum chamber (under the plastic cover near the windshield on the driver's side). Inspect and test the fuse (often a 15A or 20A fuse). Replace if blown.
- If the fuse is good, locate the Bank 1, Sensor 1 oxygen sensor. It is the upstream sensor (before the catalytic converter) on the passenger side of the engine. The connector is typically mounted on or near the firewall.
- Inspect the sensor's electrical connector and wiring for any visible signs of damage, melting, or corrosion. Ensure the connector is dry and free of contaminants.
- Disconnect the sensor. Use a multimeter set to Ohms to test the resistance of the heater circuit on the sensor side (usually between the two wires of the same color). A reading of infinite ohms (OL) means the sensor's internal heater is broken and the sensor must be replaced. A good sensor will typically read between 2-30 Ohms.
- With the sensor still disconnected and the ignition key in the 'On' position (engine off), use a multimeter set to DC Volts to check for ~12V power and a good ground on the vehicle-side of the connector. If power or ground is missing, the wiring harness or fuse circuit is faulty and needs repair.
- If the fuse, wiring, and sensor resistance all check out, the fault may be intermittent. Clear the codes, drive the vehicle, and see if the code returns. If it does, replacing the sensor is the next logical step.
- In the extremely rare case that a new sensor and verified wiring/fuse do not fix the issue, the ECM may need to be professionally tested.
Parts You'll Likely Need
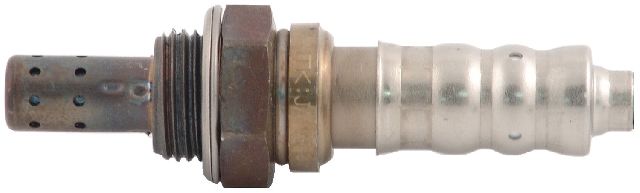
- Oxygen Sensor (Bank 1, Sensor 1)
(OEM #06E906265AJ)— This is the component that contains the heating element identified by the fault code. Its failure is the most direct and frequent cause of P1196. This is the front (pre-cat) sensor for Bank 1 (right/passenger side).
Trusted brands: Bosch (often the OEM supplier), Denso, NTK
OEM price range: $180-$250
Aftermarket price range: $70-$150
Related Codes That Often Appear With This One
- P0135 — This is the generic SAE equivalent of P1196, also indicating an O2 Sensor Heater Circuit Malfunction for Bank 1, Sensor 1. The TSB #01139020337671 explicitly groups them.
- P1197 — This code indicates a heater circuit fault for Bank 2, Sensor 1 (driver's side). It's common to see both codes together if both upstream O2 sensors are original and fail around the same time, or if the shared fuse for both heaters has blown.
- P0134 — This code means 'O2 Sensor Circuit No Activity Detected (Bank 1 Sensor 1)'. If the heater fails, the sensor may not reach operating temperature quickly enough, leading the ECM to report no signal activity, especially on a cold start.
- P0030 — This is another generic code for the Bank 1, Sensor 1 heater control circuit. It is often seen alongside P1196 depending on the scanner used.
Technical Service Bulletins (TSBs) & Recalls
- 01139020337671 / TSB-2033767: '01 MIL on (DTC P1196/P1197/P0135, heater circuit fault lambda sensor) - Repair Authorization'. This TSB confirms the fault and provides dealers with authorization for the repair, underscoring it as a recognized component failure.
Platform-Specific Known Issues
- Audi issued Technical Service Bulletin #01139020337671 which directly addresses DTC P1196 for a 'heater circuit fault lambda sensor' on 2010-2012 S5 Cabriolet models, indicating this is a known issue.
- On the 3.0T engine, both upstream O2 sensors are a common failure item around 60,000-100,000 miles. It is not uncommon for the second sensor (Bank 2, triggering P1197) to fail shortly after the first one is replaced.
Mechanic-Grade Diagnostic Values
- O2 Sensor Heater Element Resistance — expected: 2.5 - 10.2 Ohms at ambient temperature.. Failure: A reading of infinite resistance (Open Line/OL) or a reading significantly outside the expected range.
- Voltage at Sensor Connector (Harness Side) — expected: Approximately 12V (battery voltage) on the heater power supply pin (often Pin 1, Red/White wire) with Key On, Engine Off.. Failure: No voltage indicates a problem with the fuse, relay, or wiring from the power source.
- Ground at Sensor Connector (Harness Side) — expected: A ground signal on the heater ground pin (often Pin 2, Brown/Grey wire). This is typically a pulse-width modulated (PWM) ground controlled by the ECM.. Failure: A constant open or shorted ground signal points to a wiring issue or a fault in the ECM's driver circuit.
- VCDS Measuring Block 030, Field 2 — expected: Shows the status of the Bank 1 Sensor 1 heater. The value should toggle, often represented by '111' indicating the heater is active and functioning.. Failure: A static value, such as '110', can indicate the heater is not being activated or is not functional.
Hidden / Shadow Codes Worth Checking
- Fault text extension, e.g., 'Open Circuit' or 'Short to B+': While not a different code number, professional scan tools like VCDS will provide additional text with the P1196 fault that specifies the nature of the electrical failure (e.g., open wire, short to power). Generic OBD-II scanners often omit this crucial detail. (see via Ross-Tech VCDS, VAG-COM, or dealership-level diagnostic tools (ODIS).)
Scan Tool Commands That Help
- VCDS (VAG-COM): Readiness Test: [01 - Engine] -> [Readiness - 15] — After clearing codes, this function forces the ECM to run its internal self-tests. The O2 Heater test is one of the first to run. If it fails, the readiness bit will not set to 'Passed', confirming an active fault without needing a full drive cycle.
- VCDS (VAG-COM): View Measuring Blocks: [01 - Engine] -> [Meas. Blocks - 08] — Used to monitor live data. Check groups 030, 031, and 041 to observe the O2 sensor heater status, lambda values, and sensor voltage in real-time to see if the sensor is responding as expected once the engine is running.
Wiring & Ground Locations
- Fuse Holder C (ST3), Fuse #3 or #6 — In the E-box (plenum chamber) on the driver's side, under the windshield cowl.. This fuse (typically 15A) often supplies power to the heater circuits for both upstream oxygen sensors. A blown fuse here is a common cause for P1196, especially if P1197 (Bank 2) is also present.
- Ground Point 15 — On the left longitudinal member in the engine compartment.. This is a primary engine ground point. A loose or corroded connection here can cause a variety of intermittent electrical issues, including erratic behavior of sensor circuits that rely on a stable ground reference.
- Bank 1 Sensor 1 Connector (T6ae) — A 6-pin black connector, typically clipped to a bracket on the firewall, high up behind the passenger side of the engine block.. This is the primary point for electrical testing. Access is difficult and often requires unclipping the connector from the firewall bracket to disconnect it. Pins 1 (Power) and 2 (ECM Ground) are for the heater circuit.
Real Owner Repair Stories
- Audizine Forum User (Audi S4 3.0T (B8 platform)) — Check Engine Light with codes P1196 and P1197.
❌ Tried (didn't work) Initially suspected both O2 sensors had failed simultaneously.
✅ What actually fixed it Found a single blown 15A fuse in the plenum chamber fuse box that powers both upstream O2 sensor heaters. Replacing the fuse resolved both codes. - AudiWorld Forum User (Audi Q5 3.0T (B8 platform)) — Check Engine Light with code P1196.
❌ Tried (didn't work) Struggling to disconnect the sensor's electrical connector due to its location.
✅ What actually fixed it The user noted that the key was to first use a long screwdriver or pry tool to pop the entire connector assembly off its metal retaining clip on the firewall. Once it was free and could be pulled up slightly, it was possible to get hands on it to press the release tab and separate the two halves. This tip was crucial for performing the replacement. - Ross-Tech Forum User (2009 Audi S5 (V8, but connector is identical)) — Multiple engine codes including throttle position sensor faults, engine revs limited.
❌ Tried (didn't work) Replacing the throttle body and accelerator pedal.
✅ What actually fixed it A previous mechanic had swapped the identical 6-pin connectors for the throttle body and an oxygen sensor. The wiring harnesses were physically crossed. Once the connectors were plugged into their correct components, all faults were resolved. This highlights the importance of checking for incorrect repairs when connectors are identical.
OEM Part Supersession History
06E906265AJ→06E906265R, then 06E906265S, then 06E906265T— Standard part evolution for improved durability or manufacturing process changes.
Heads up: All listed revisions are considered direct replacements and are compatible with the 2010-2012 S5 Cabriolet for the Bank 1, Sensor 1 position.
Model Year Variations Within This Range
- 2010-2012: The 2010-2012 S5 Cabriolet models are all part of the B8 generation, prior to the B8.5 facelift in 2013. For the purposes of diagnosing P1196, the components (sensor, fuse locations, wiring) are consistent across this specific model year range.
Helpful Videos


We Have This Part in Stock


The information in this article is provided for general reference and educational purposes only. Vehicle specifications, procedures, and part compatibility can vary by production date, trim level, and region. Always consult your vehicle's factory service manual and verify part numbers before purchasing or performing repairs. Safety-critical components such as airbags, seat belts, and braking systems should be installed by a qualified professional.
- Audi S5 CABRIOLET:
- 🧭 Diagnostic Flowchart
- 🎬 Helpful Videos
- 🛍️ Shop This Part
- What's Unique About the 2010-2012 Audi S5 CABRIOLET
- Symptoms You May Notice
- Most Likely Causes
- Rare But Worth Checking
- Diagnosis Steps
- Parts You'll Likely Need
- Related Codes That Often Appear With This One
- Technical Service Bulletins (TSBs) & Recalls
- Platform-Specific Known Issues
- Mechanic-Grade Diagnostic Values
- Hidden / Shadow Codes Worth Checking
- Scan Tool Commands That Help
- Wiring & Ground Locations
- Real Owner Repair Stories
- OEM Part Supersession History
- Model Year Variations Within This Range
- 🎟️ Get 5% Off