
P1197 on 2010-2012 Audi S5 Cabriolet: O2 Sensor Heater Fault Causes and Fixes
This code indicates a fault in the heater circuit for the upstream oxygen sensor on Bank 2 (driver's side). The most common fix is replacing the Bank 2, Sensor 1 O2 sensor. Expect to pay $70-$150 for an aftermarket part or $180-$250 for an OEM part. It's a manageable DIY repair for those with the right tools, primarily a 22mm (7/8") O2 sensor socket.
- P1197 specifically means the heater for the O2 sensor on the driver's side, before the catalytic converter, has failed.
- The most likely cause is a bad O2 sensor that needs to be replaced, often because of a leaking oil filter housing gasket dripping oil onto its wiring.
- Before buying parts, check the relevant fuse (potentially a 15A fuse in the engine bay box) and visually inspect the sensor's wiring for obvious damage or oil saturation.
- This is a DIY-friendly repair for those with basic tools, including a special 22mm (7/8") O2 sensor socket.
- Ignoring this code will lead to poor fuel mileage and a failed emissions test.
What's Unique About the 2010-2012 Audi S5 CABRIOLET
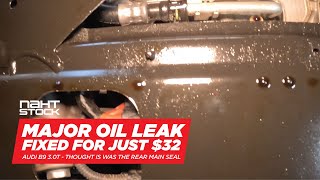
The 2010-2012 Audi S5 Cabriolet uses a 3.0L Supercharged V6 (3.0T) engine, which has two separate cylinder banks, each with its own set of oxygen sensors. P1197 specifically points to the pre-catalyst sensor on Bank 2 (driver's side in North America). Audi has issued a Technical Service Bulletin (TSB #01139020337671) that groups this code with similar heater circuit faults, indicating it's a recognized issue. The TSB's 'Repair Authorization' title suggests it's a known warranty or dealer-acknowledged problem, streamlining the diagnostic and repair process at a dealership. A common contributing factor on this platform is the oil filter housing gasket leaking oil directly onto the O2 sensor wiring, causing it to fail.
Diagnostic Flowchart
Tap your situation to follow the diagnostic path that matches what you're seeing on this vehicle.
Symptoms You May Notice
- Check Engine Light (MIL) is on
- Decreased fuel economy
- Possible rough idle or irregular engine operation
- Failure to pass an emissions test
- Slightly sluggish performance during the initial warm-up phase
- Replacing the wrong oxygen sensor (e.g., the post-catalyst sensor or the sensor on Bank 1). P1197 is specific to Bank 2, Sensor 1, which is the driver's side, pre-catalyst sensor.
- Replacing the catalytic converter. This code relates to the sensor's internal heater, not the performance of the converter itself.
- Ignoring an oil leak from the oil filter housing, which is often the root cause of the sensor's failure.
Most Likely Causes
- Failed Oxygen Sensor (Bank 2, Sensor 1) 🔴 High Probability → Shop Oxygen Sensor The internal heating element within the O2 sensor is a common failure point due to age and constant heat cycles. Additionally, oil leaks from the oil filter housing gasket are known to drip onto and saturate the sensor's wiring harness, causing premature failure.
How to confirm: Disconnect the sensor and measure the resistance between the two heater circuit pins (often the same color, e.g., white). An infinite or very high resistance reading indicates a burned-out heater element. A good sensor should have a low resistance, typically between 2 and 15 Ohms.
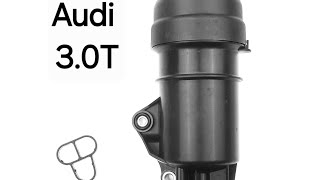
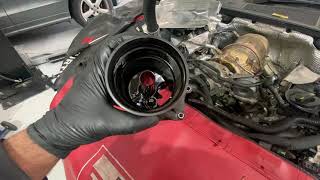
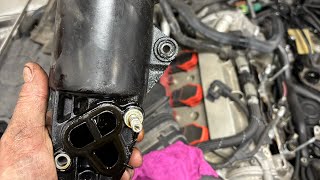
Typical fix: Replace the Bank 2, Sensor 1 oxygen sensor. It is highly recommended to inspect and replace the oil filter housing gasket 🎬 See how to replace the oil filter housing seal. if it is found to be leaking.
Est. part cost: $70-$250 - Damaged Wiring or Connector 🟡 Medium Probability The wiring harness is exposed to high heat and road debris under the vehicle. Specifically for the 3.0T engine, the oil filter housing gasket can leak oil directly onto the O2 sensor connector, degrading the insulation and pins. 🎬 Watch this pro tip for oil filter housing replacement.
How to confirm: Visually inspect the wiring harness and connector leading to the O2 sensor for any signs of melting, chafing, or oil saturation. Check for battery voltage and ground at the connector with the ignition on using a multimeter.
Typical fix: Repair the damaged section of the wiring harness or clean the oil-soaked connector with electrical contact cleaner. If the damage is severe, a new connector pigtail may be needed.
Est. part cost: $10-$50 - Blown Fuse ⚪ Low Probability A short circuit in the heater element or wiring can cause the corresponding fuse to blow as a protective measure.
How to confirm: Locate the fuse for the oxygen sensor heaters. On related platforms like the Audi A6 C7, this may be a 15A fuse in the engine bay fuse box. Check for continuity. A forum user noted checking a maxi fuse under the steering column as well.
Typical fix: Replace the blown fuse. If it blows again immediately, a short circuit is present that must be diagnosed.
Est. part cost: $1-$5
Rare But Worth Checking
- Faulty Engine Control Module (ECM): → Shop Engine Control Module (ECM) This is very rare. The ECM's internal driver for the heater circuit can fail. This should only be considered after all other possibilities, including the sensor, wiring, and fuses, have been thoroughly ruled out.
Diagnosis Steps
- Read the trouble codes with an OBD-II scanner to confirm P1197 is present and note any other codes.
- Inspect the fuse for the O2 sensor heaters. On similar models, this is often a 15A fuse in the engine compartment fuse box. Replace if blown.
- Safely raise and support the vehicle if necessary, though access may be possible from the top. Locate the Bank 2, Sensor 1 O2 sensor on the driver's side exhaust, upstream of the catalytic converter. On the 3.0T, this sensor is often accessible from the engine bay, sometimes requiring the removal of the coolant expansion tank for better access.
- Critically inspect the sensor's electrical connector and wiring for oil saturation from a leaking oil filter housing gasket, as this is a very common failure mode on this engine. Also check for melting or chafing.
- If the wiring appears intact, disconnect the sensor. Use a multimeter to check for battery voltage on the heater power pin of the harness-side connector (with the ignition on).
- With the sensor still disconnected, set the multimeter to measure resistance (Ohms). Measure the resistance between the two heater pins on the sensor itself. A good sensor will typically have a low resistance (e.g., 2-15 ohms), while a failed sensor will show infinite resistance (open circuit).
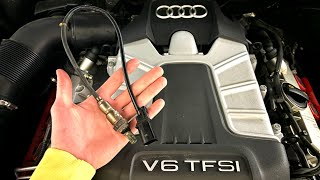
- If the sensor's heater circuit tests bad, replace the Bank 2, Sensor 1 oxygen sensor. A 22mm (or 7/8") offset oxygen sensor socket is requ 🎬 Watch: Step-by-step guide to replacing the upstream O2 sensor.ired. Apply anti-seize compound to the threads of the new sensor before installation.
- If the sensor and wiring test good, the fault may be intermittent or, in rare cases, lie with the ECM.
- After repairs, clear the trouble codes and perform a drive cycle to ensure the fault does not return.
Parts You'll Likely Need
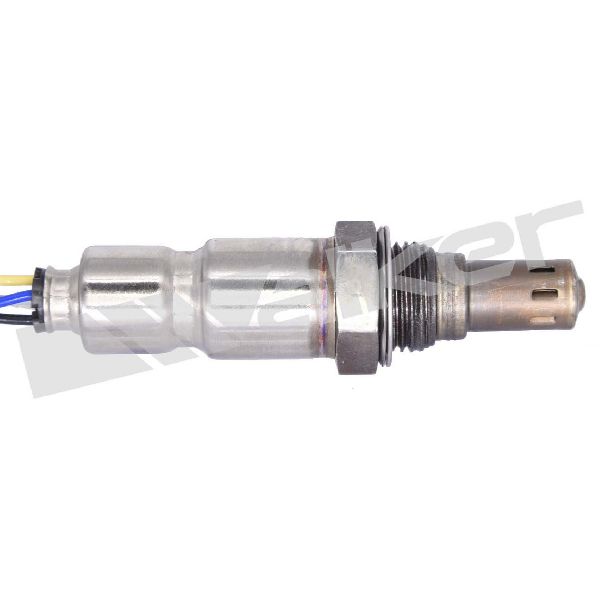
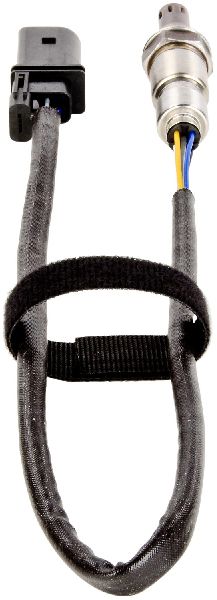
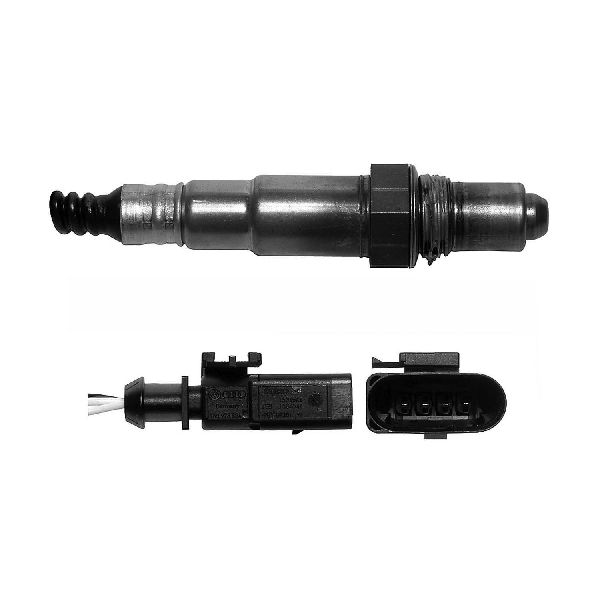
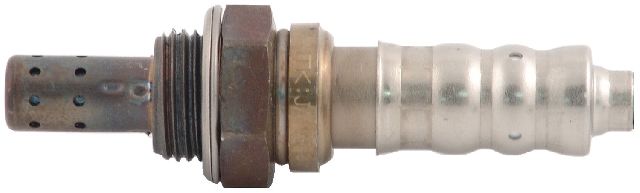
- Oxygen Sensor (Bank 2, Sensor 1)
(OEM #06E906265S (or superseding revisions))— This is the upstream (pre-catalyst) sensor for the driver's side cylinder bank. Its internal heater element is the most common failure point for code P1197.
Trusted brands: Bosch (often the OEM supplier, e.g., part #17385), Denso, NTK
OEM price range: $180-$250
Aftermarket price range: $70-$150 - Oxygen Sensor Socket — A special tool is required to remove and install the O2 sensor without damaging its wire. A 22mm or 7/8" slotted socket is needed.
Trusted brands: Lisle, OEMTOOLS, GearWrench
Aftermarket price range: $10-$30
Related Codes That Often Appear With This One
- P1196 — P1196 is the equivalent code for the Bank 1, Sensor 1 heater circuit. Sometimes the sensors fail around the same time, or a shared power/ground issue (like a blown fuse) or a widespread oil leak could affect both, causing both codes to appear together.
- P0155 — This is the generic SAE code for 'O2 Sensor Heater Circuit Malfunction (Bank 2, Sensor 1)'. It may appear alongside the manufacturer-specific P1197 code.
- P0050 — This is another generic code for the heater control circuit on Bank 2, Sensor 1. It points to the same fault.
Technical Service Bulletins (TSBs) & Recalls
- 01139020337671: MIL on (DTC P1196/P1197/P0135, heater circuit fault lambda sensor) - Repair Authorization
Platform-Specific Known Issues
- Audi issued Technical Service Bulletin #01139020337671 which mentions DTC P1197 in relation to a 'heater circuit fault lambda sensor', confirming this is a known issue requiring potential repair authorization. [⭐ MANUFACTURER TSB — highest authority]
- A prevalent issue on the 3.0T engine is a leaking oil filter housing gasket, which drips oil directly onto the Bank 2, Sensor 1 wiring harness, causing the sensor to fail and trigger P1197. A YouTube DIY video for the S4 (same engine) explicitly points this out as the primary reason for failure.
- Access to the Bank 2 (driver's side) sensor can be tight. Some owners and mechanics find it necessary to remove the coolant expansion tank to get better leverage and visibility on the sensor and its connector.
Mechanic-Grade Diagnostic Values
- O2 Sensor Heater Element Resistance — expected: 3.0 Ohms. Failure: An open circuit (infinite resistance) or a value significantly different from the specification.
- O2 Sensor Heater Circuit Voltage (at harness connector) — expected: Battery Voltage (approx. 12V) with key on, engine off.. Failure: No voltage indicates a wiring or fuse issue upstream of the connector.
- VCDS Measuring Block 041 - O2 Sensor Heater Test — expected: Resistance reading in Channel 3 should be less than 0.02 kOhm (20 Ohms).. Failure: A reading higher than the specified value indicates a fault in the heater or its circuit.
Scan Tool Commands That Help
- VCDS (VAG-COM) or equivalent: Basic Settings - Group 041 (Oxygen Sensor Heater Test) — This function actively turns the O2 sensor heaters on and monitors their resistance, providing a definitive pass/fail test of the heater circuit without having to manually probe connectors.
- VCDS (VAG-COM) or equivalent: Measuring Blocks - Group 031, Field 4 — To monitor the raw signal voltage of the Bank 2, Sensor 1 (G108) sensor itself. While not directly testing the heater, observing a flatline or inactive voltage can corroborate a sensor failure.
- VCDS (VAG-COM) or equivalent: Output Test (DTC) — Some engine controllers allow for output tests that can individually activate components like sensor heaters, allowing a technician to confirm the ECM is capable of sending the command and that the circuit is functional.
Wiring & Ground Locations
- Engine Harness Ground — On the B8 platform, a key ground wire for the engine harness is located on the frame rail on the left (driver's) side of the engine bay.. A poor or corroded main engine ground can cause a variety of intermittent electrical issues and fault codes, including sensor heater circuit problems. Ensuring this connection is clean and tight is a crucial step if direct sensor and wiring checks do not resolve the issue.
- O2 Sensor Heater Circuit Pins (at sensor) — On the 6-pin connector for the sensor, the heater circuit is typically on pins 3 and 4.. These are the specific pins to use when measuring the resistance of the sensor's internal heating element.
Real Owner Repair Stories
- AudiWorld Forums user 'jcrampton' (Vehicle year/model not specified, but had codes for both Bank 1 and Bank 2 heater circuits (P1196 & P1197).) — Check Engine Light with codes P1196, P1197, and P0134.
❌ Tried (didn't work) Replacing both pre-cat O2 sensors with universal Bosch sensors, checking/replacing a fuse in the driver's side panel, and replacing a blown maxi fuse under the steering column did not resolve the codes.
✅ What actually fixed it The user's issue was ongoing in the thread, but the critical takeaway was that using universal-fit sensors and checking multiple fuse locations did not immediately solve the problem, pointing towards a potential wiring issue, incorrect parts, or a deeper electrical fault.
OEM Part Supersession History
06E906265F→06E906265S— Standard part revision and improvement by the manufacturer.
Heads up: 06E906265S is the correct and current part number. Using the older 'F' revision is not recommended as it may have been updated for reliability.
Model Year Variations Within This Range
- 2010-2012: For the S5, the Cabriolet model received the 3.0T supercharged V6 for these model years, while the S5 Coupe retained the 4.2L V8 until the B8.5 facelift in 2013. This P1197 article is specific to the Cabriolet's 3.0T engine.
Helpful Videos
We Have This Part in Stock


The information in this article is provided for general reference and educational purposes only. Vehicle specifications, procedures, and part compatibility can vary by production date, trim level, and region. Always consult your vehicle's factory service manual and verify part numbers before purchasing or performing repairs. Safety-critical components such as airbags, seat belts, and braking systems should be installed by a qualified professional.
- Audi S5 CABRIOLET:
- 🧭 Diagnostic Flowchart
- 🎬 Helpful Videos
- 🛍️ Shop This Part
- What's Unique About the 2010-2012 Audi S5 CABRIOLET
- Symptoms You May Notice
- Most Likely Causes
- Rare But Worth Checking
- Diagnosis Steps
- Parts You'll Likely Need
- Related Codes That Often Appear With This One
- Technical Service Bulletins (TSBs) & Recalls
- Platform-Specific Known Issues
- Mechanic-Grade Diagnostic Values
- Scan Tool Commands That Help
- Wiring & Ground Locations
- Real Owner Repair Stories
- OEM Part Supersession History
- Model Year Variations Within This Range
- 🎟️ Get 5% Off