
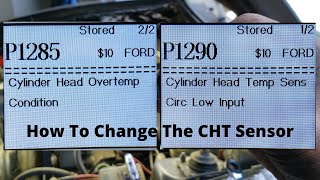
P1285 on 2002-2005 Ford Explorer 4.0L: Cylinder Head Overheat Causes and Fixes
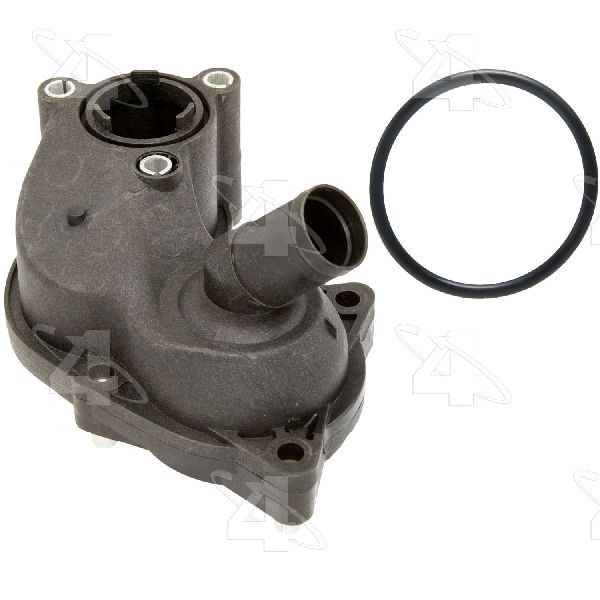
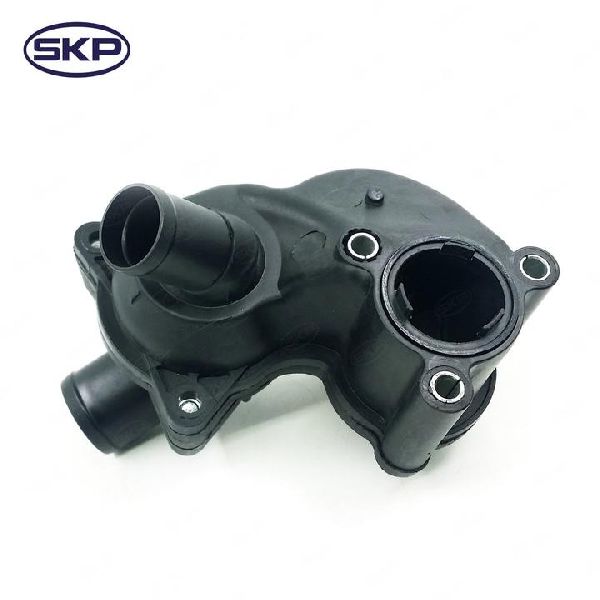
This code means the cylinder head is dangerously hot. On the 4.0L SOHC V6, this is most often caused by a real overheat due to a cracked plastic thermostat housing leaking coolant. The fix is to replace the housing (an aluminum upgrade is recommended), thermostat, and Cylinder Head Temperature (CHT) sensor. Expect to pay $150-$300 for parts.
- P1285 is a critical overheat warning. Stop driving immediately to prevent engine damage.
- The most likely cause on your Explorer is a coolant leak from the failure-prone plastic thermostat housing.
- When replacing the thermostat housing, it is highly recommended to also replace the thermostat and the Cylinder Head Temperature (CHT) sensor at the same time.
- Consider upgrading to a cast aluminum thermostat housing for long-term durability.
- If the engine is not actually hot, the CHT sensor itself has likely failed.
What's Unique About the 2002-2005 Ford Explorer
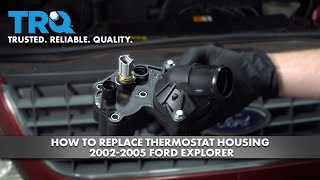
Unlike many modern Fords where P1285 can point to complex internal engine failures, on the 2002-2005 Explorer's 4.0L SOHC engine, the cause is almost always more straightforward. This engine is notorious for its plastic thermostat housing assembly, which is located at the front of the engine valley. 🎬 Watch: A quick overview of why these plastic housings leak. This housing is made of two pieces of glass-filled nylon that are welded together; the seam is prone to splitting from heat cycles and age, leading to significant coolant loss and genuine overheating. Therefore, P1285 on this truck is very frequently a direct result of this specific, well-documented part failure.
Symptoms You May Notice
- Temperature gauge suddenly goes to full HOT
- Check Engine Light is on
- "Check Gage" or similar warning light may illuminate
- Engine may enter a reduced power "limp mode"
- Steam coming from under the hood
- Smell of sweet-smelling coolant
- Visible coolant leaks, often pooling in the engine valley or dripping from below
- Sound of boiling or gurgling coolant after shutdown
- Replacing only the thermostat without replacing the cracked housing that caused the initial problem.
- Replacing the thermostat housing but reusing the old CHT sensor or its O-ring, leading to a new leak or a persistent false code.
- Mistaking a bad CHT sensor for a real overheat, leading to unnecessary replacement of other cooling system parts.
Most Likely Causes
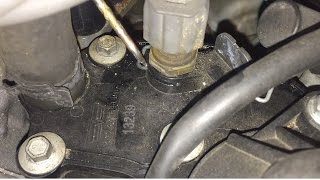
- Cracked or Leaking Thermostat Housing 🔴 High Probability → Shop Integrated Thermostat Housing Assembly The original equipment (OE) thermostat housing is made of two plastic pieces that are welded together. This seam is the primary weak point and is known to split or crack after years of heat cycles, causing a major coolant leak into the engine valley. This is the most common point of failure for the cooling system on this engine.
How to confirm: Visually inspect the thermostat housing at the front of the engine for cracks, chalky white or colored coolant residue, or active leaks. The leak often originates from the seam between the upper and lower halves. Use a cooling system pressure tester to make leaks more apparent. The engine valley may be full of coolant.
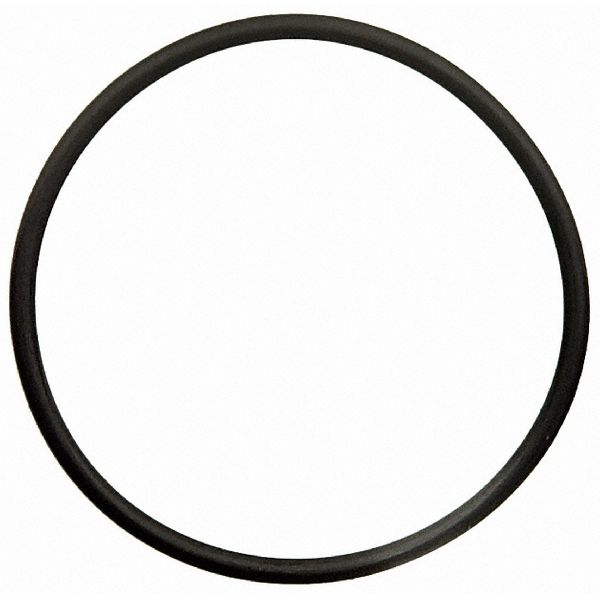
Typical fix: Replace the entire thermostat housing assembly, including the upper and lower sections, the thermostat, and all associated gaskets. 🎬 See this step-by-step walkthrough for replacing the entire housing assembly. Many owners opt for a more durable one-piece cast aluminum aftermarket housing to prevent future failures.
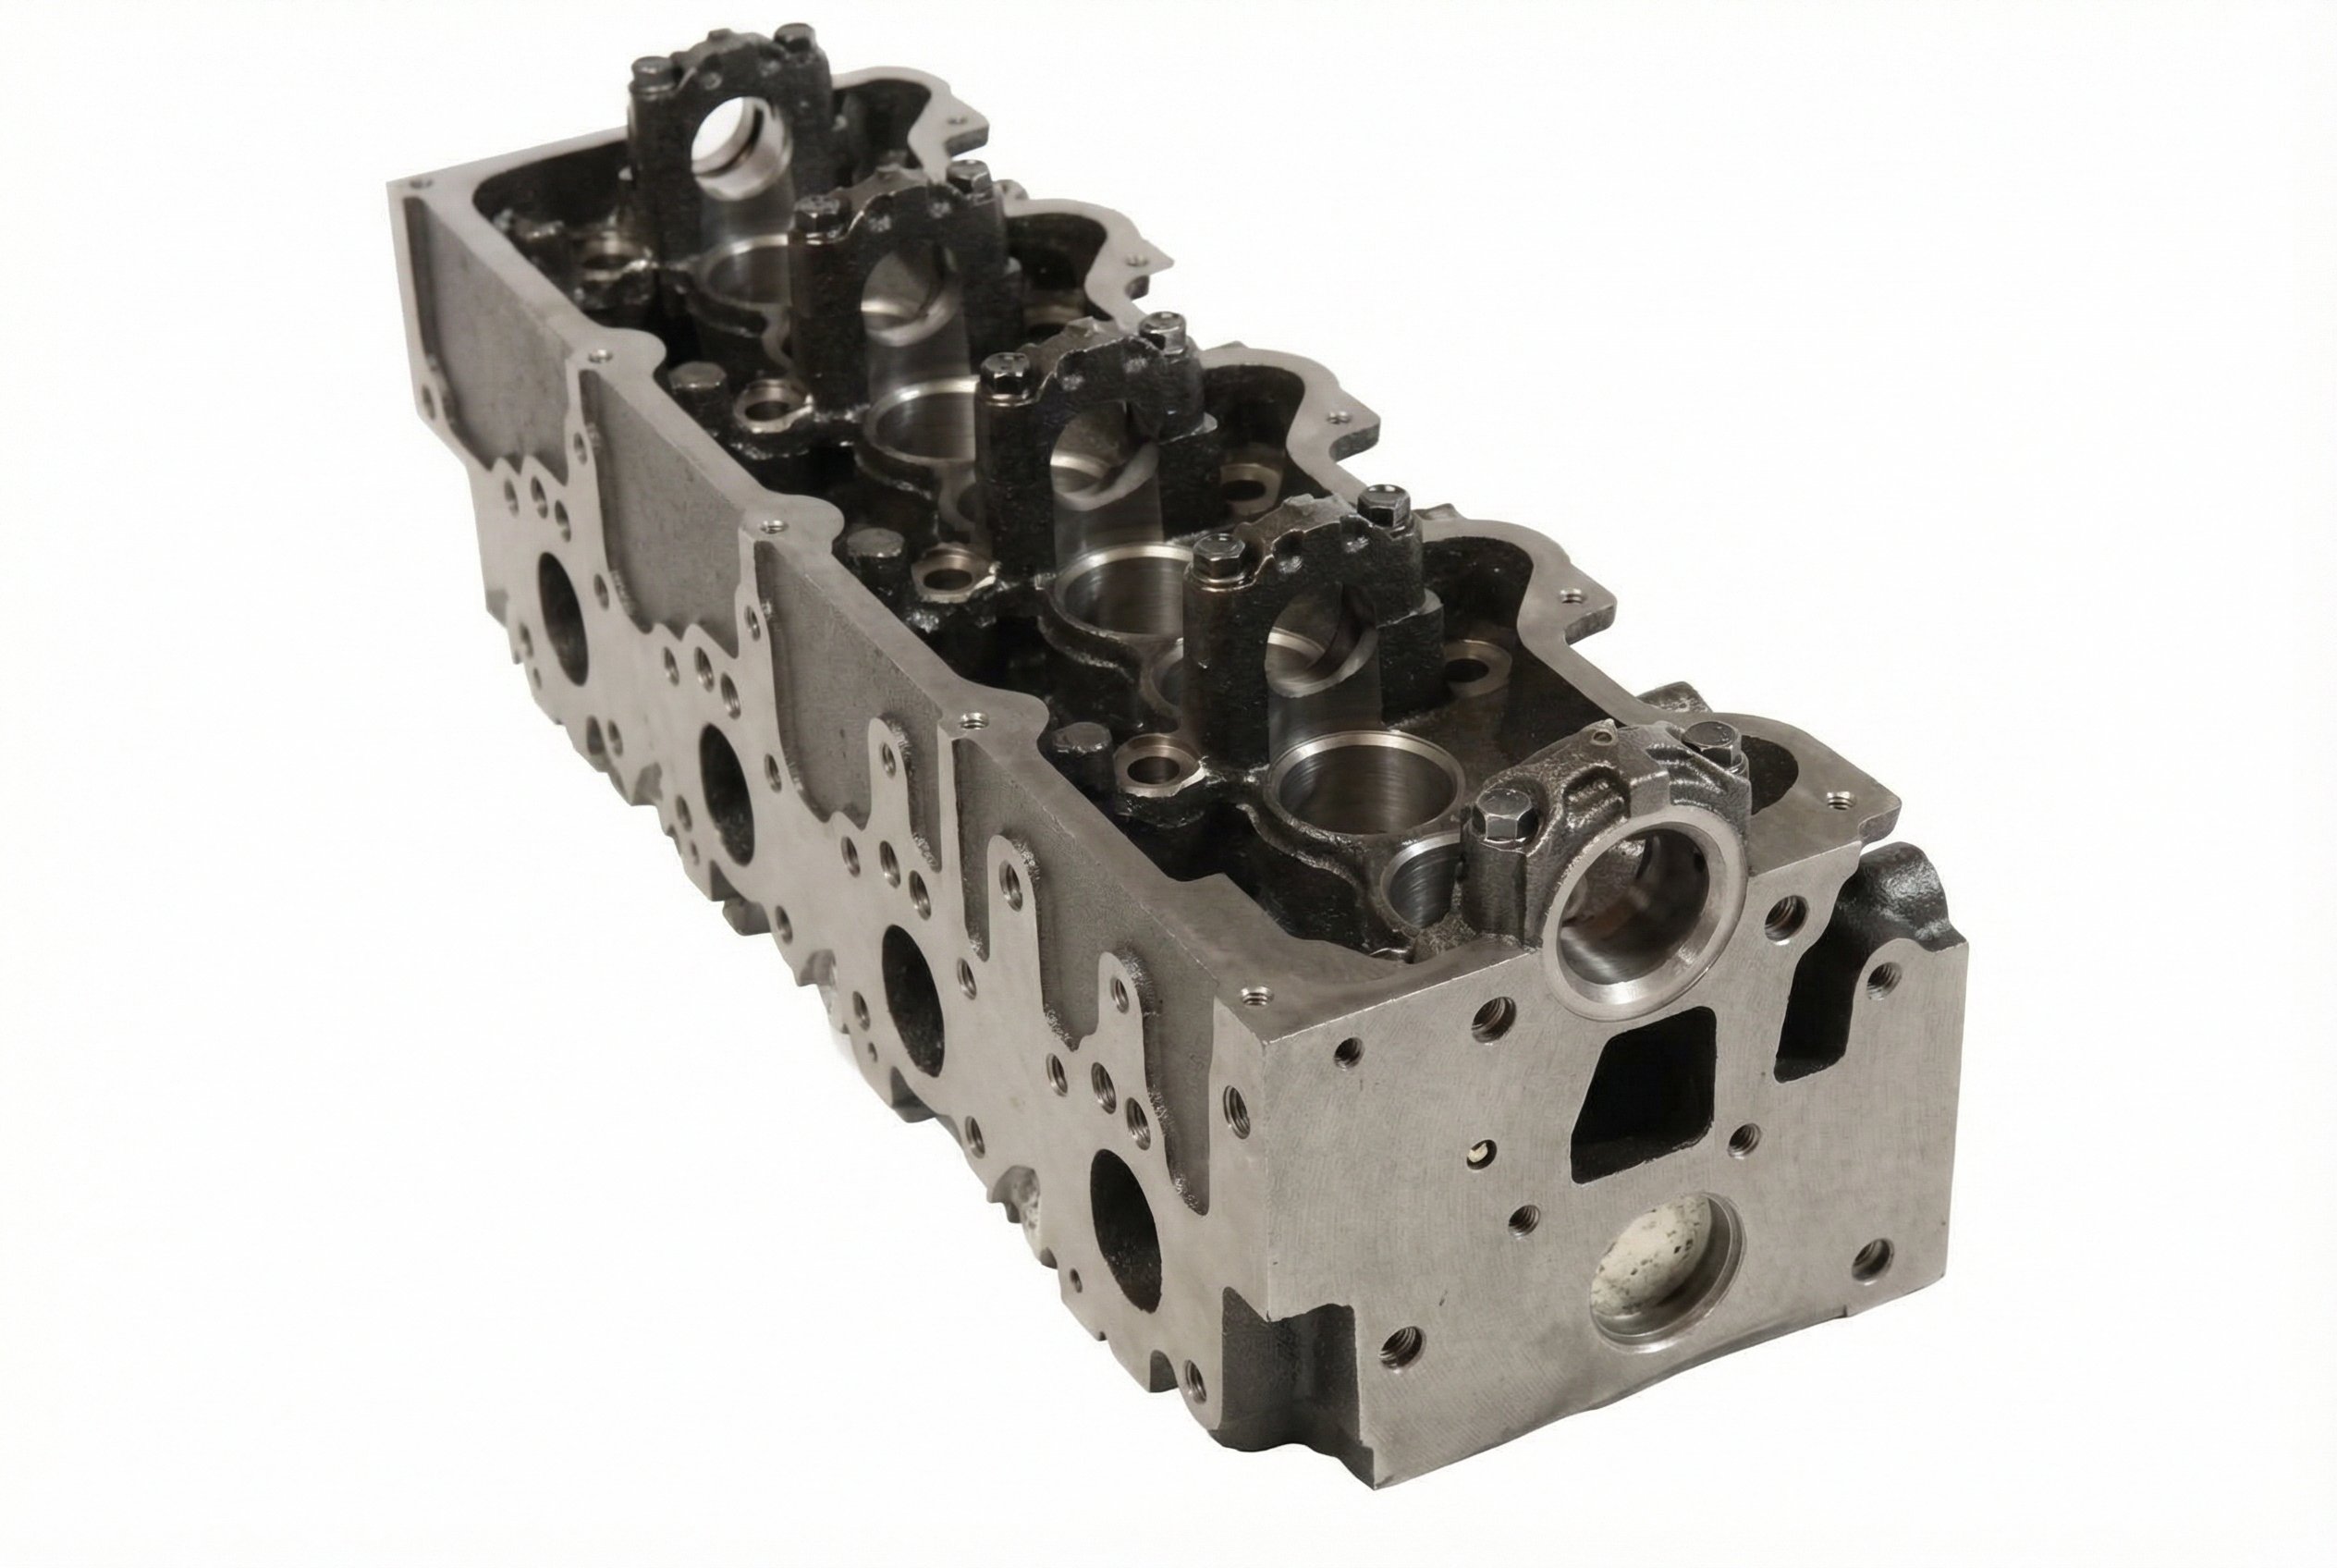
Est. part cost: $50-$150 - Failed Cylinder Head Temperature (CHT) Sensor 🟡 Medium Probability → Shop Engine Cylinder Head The CHT sensor can fail in two ways: an actual overheat event (like from a leaking housing) can damage it, or the sensor itself can fail internally, sometimes allowing coolant to seep into the electrical connector. This causes it to send false overheat signals to the PCM, triggering P1285 even if the engine is not actually hot.
How to confirm: If the engine is not physically overheating (verified with an infrared thermometer), the sensor is suspect. Unplug the sensor and inspect the connector for moisture or corrosion. A diagnostic scanner can monitor the CHT reading; erratic or illogical values point to a bad sensor. A multimeter can be used to check resistance against temperature specifications.
Typical fix: Replace the CHT sensor and its O-ring. The sensor is located in the thermostat housing assembly. It is highly recommended to replace the sensor whenever the housing is replaced.
Est. part cost: $25-$60 - Stuck-Closed Thermostat ⚪ Low Probability → Shop Integrated Thermostat Housing Assembly
How to confirm: After starting the engine cold, the upper radiator hose will remain cool while the engine gets very hot. A properly opening thermostat will allow the hose to become hot suddenly as coolant begins to circulate. This is less common than a housing leak but can cause a genuine overheat.
Typical fix: Replace the thermostat. This is typically done at the same time as the thermostat housing replacement, as new housings often include a new thermostat.
Est. part cost: $15-$30
Rare But Worth Checking
- Low Engine Coolant: While often a symptom of a leak, low coolant from neglect or a smaller, less obvious leak (e.g., radiator, water pump, hose) can also cause an overheat event that triggers P1285.
- CHT Sensor Wiring Damage: The wiring harness leading to the CHT sensor can become brittle or damaged, causing a short or open circuit that the PCM interprets as an overheat. This can trigger both P1285 and P1299.
- Seized Water Pump: → Shop Engine Water Pump In some cases, the water pump bearing can fail and seize, which stops coolant circulation entirely. This will cause a rapid and genuine overheat condition, setting P1285. This may be accompanied by a broken serpentine belt.
- Active Grille Shutter Failure: While more common on newer Ford platforms, NHTSA ODI #11703132 notes that a grille shutter failure can occur alongside P1285, potentially restricting airflow to the radiator.
Technical Service Bulletins (TSBs) & Recalls
- TSB Bulletin #TSB 26-2060: Although issued for different Ford models, this bulletin highlights a common manufacturer issue where an incorrectly indexed hose connection at the thermostat housing causes contact with the cooling fan, leading to a loss of engine coolant and triggering codes P1285 and/or P1299.
Diagnosis Steps
- Confirm Code and Check for Physical Overheating: Verify P1285 with an OBD-II scanner. Immediately and safely check for signs of a real overheat: steam, boiling sounds, or the smell of coolant. DO NOT open the coolant reservoir cap when the engine is hot.
- Inspect for Coolant Leaks: The primary suspect is the plastic thermostat housing. Use a flashlight to inspect the top-front of the engine, in the valley between the cylinder heads, for pooled coolant or white/colored residue. The leak is often at the seam where the upper and lower halves meet. Also check all radiator hoses, the water pump, and the radiator itself. Note that NHTSA ODI #11639979 describes cases where P1285 was retrieved and the leak was specifically found at the water pump weep hole.
- Verify Engine Temperature: If no leaks are obvious, use an infrared thermometer to measure the temperature at the thermostat housing and on the cylinder heads. If the temperature is normal (e.g., 190-220°F) but the gauge reads full hot, the CHT sensor or its wiring is likely faulty.
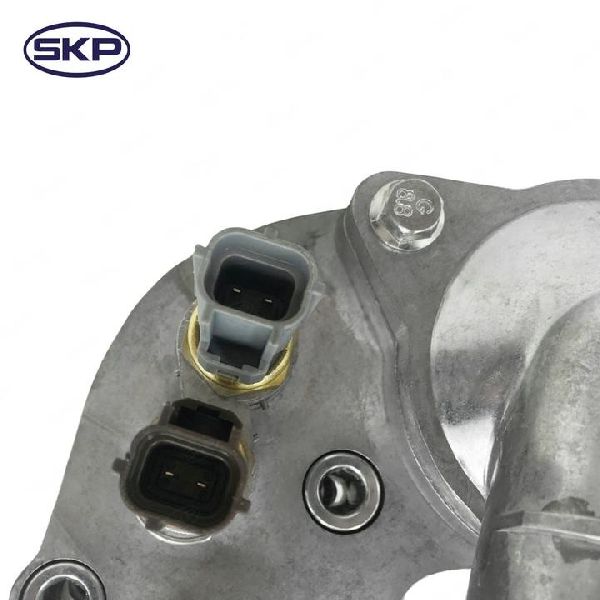
- Inspect CHT Sensor and Connector: Locate the two-wire sensor on the thermostat housing. Disconnect it and inspect the plug and sensor for corrosion or any signs of coolant intrusion, which indicates a failed sensor.
- Pressure Test the Cooling System: If a leak is suspected but not visible, use a cooling system pressure tester. This will force coolant out of any cracks or bad gaskets, making the leak source easy to identify. This is the definitive test for a cracked housing.
- Plan the Repair: Based on findings, plan to replace the failed component. It is best practice to replace the thermostat housing, thermostat, and CHT sensor with its O-ring all at once to prevent repeat failures. When reassembling, be aware that the three housing bolts may be different lengths; the short bolt must go in the correct position to avoid bottoming out and causing a new leak. 🎬 Watch: Helpful tips for reassembling the housing and bolt placement.
Parts You'll Likely Need
- Thermostat Housing Assembly
(OEM #2L2Z-8592-BB (replaces 2L2Z-8592-BA, 2L2Z-8592-AA))— This is the most common failure point on the 4.0L SOHC engine leading to coolant loss and overheating.
Trusted brands: Motorcraft (OEM Plastic), Dorman (Plastic 902-860 or Aluminum 902-210), Four Seasons
OEM price range: $100-$180
Aftermarket price range: $50-$150 - Cylinder Head Temperature (CHT) Sensor
(OEM #8L3Z-6G004-A)— Can be damaged by an overheat event or fail on its own, sending false signals. It is best practice to replace it with the thermostat housing.
Trusted brands: Motorcraft, Bosch, NTK/NGK
OEM price range: $40-$70
Aftermarket price range: $25-$50 - Thermostat
(OEM #Included in most housing kits)— A new thermostat should always be installed with a new housing to ensure proper cooling system operation. Most quality kits include one.
Trusted brands: Motorcraft, Stant
OEM price range: $20-$40
Aftermarket price range: $15-$30 - Radiator Fan — In some instances of P1285, as reported in NHTSA ODI #11062287, the radiator fan may also require replacement to restore proper cooling.
Related Codes That Often Appear With This One
- P1299 — P1299 ('Cylinder Head Overtemperature Protection Active') is the second stage of Ford's fail-safe cooling. It appears if the overheat condition reported by P1285 persists, prompting the PCM to shut off fuel injectors to cool the engine.
- P0128 — P0128 ('Coolant Thermostat (Coolant Temperature Below Thermostat Regulating Temperature)') may appear if the thermostat is stuck open, but is less common with the P1285 overheat code.
- P0302 — As noted in NHTSA ODI #11520798, a misfire code like P0302 can appear alongside P1285 if coolant has entered the cylinder due to a severe overheat or head gasket failure.
Platform-Specific Known Issues
- The plastic thermostat housing on the 4.0L SOHC V6 is a widely recognized weak point. Many owners proactively replace it with a cast aluminum version to prevent future failure.
- When replacing the thermostat housing, care must be taken with the three mounting bolts. They are different lengths, and installing a long bolt in the short hole will cause it to bottom out, feel tight, and lead to a new leak.
Mechanic-Grade Diagnostic Values
- CHT Sensor Circuit Resistance to Ground — expected: Greater than 10,000 ohms. Failure: A resistance reading less than 10,000 ohms indicates a short to ground in the CHT signal or reference voltage circuit.
- CHT Sensor Circuit Voltage Check (Key On) — expected: 0 Volts. Failure: Any voltage present on the CHT signal wire with the sensor disconnected indicates a short to voltage.
Scan Tool Commands That Help
- Ford IDS (Integrated Diagnostic System): Datalogger > PID Monitoring (CHT_V, CHT_F) — Use this to monitor the direct voltage (CHT_V) and fault status (CHT_F) from the CHT sensor. This is more precise than viewing the calculated temperature and can help distinguish a sensor/wiring fault from a genuine overheat condition.
Wiring & Ground Locations
- G101 — Left front of the engine compartment, near the battery.. This is a primary chassis ground. A poor connection here can affect the PCM and its sensor readings, potentially causing erratic CHT values.
- G105 — Right rear side of the engine compartment.. This ground point is located on the engine itself and is critical for providing a clean ground reference for sensors mounted on the engine, including the CHT.
- Engine Ground Strap — A woven steel strap running from the rear of a cylinder head to the firewall.. This strap ensures the engine block has a solid ground path to the vehicle body, where the PCM is grounded. A missing or corroded strap can create a ground offset, leading to incorrect sensor readings and false P1285 codes.
- PCM (Powertrain Control Module) — Mounted on the right side of the engine bulkhead (firewall).. Knowing the PCM location is essential for tracing the CHT sensor wiring harness and performing continuity or voltage checks at the PCM connector pins if a wiring fault is suspected.
Real Owner Repair Stories
- YouTube user 'How to change the cylinder head temperature sensor on a New Edge Mustang V6' (2002 Ford Mustang V6 (similar 4.0L engine platform and CHT sensor setup)) — A lower radiator hose came off, causing a massive coolant leak and an initial P1285 code from overheating. After fixing the leak and clearing the code, P1285 returned 40 miles later, this time accompanied by P1290 (CHT sensor circuit fault), even though the engine was not overheating.
❌ Tried (didn't work) Fixing the coolant leak and clearing the code.
NHTSA Connection: Similar to the report in NHTSA ODI #11062287, replacing the head temperature sensor was required after the initial overheat event.
✅ What actually fixed it The coolant had sprayed onto the CHT sensor and its connector, damaging the sensor. Replacing the CHT sensor resolved both the P1285 and P1290 codes. - Ford Truck Enthusiasts Forums user '98Sporty' (1998 Ford Explorer Sport 4.0L SOHC (similar engine)) — Check gauge light came on, temperature gauge pegged, and rapid coolant leak from the front of the engine.
❌ Tried (didn't work) Initial assumption was a simple leak from the water pump weep hole.
✅ What actually fixed it Upon removing the water pump, the impeller and a small metal piece fell out; the impeller had completely separated from the water pump shaft. This stopped all coolant circulation, causing the overheat. The fix was a new water pump and thermostat.
"I Checked Everything" — The Actual Cause
- In the context of a cooling system, the equivalent is a pressure test that holds steady, indicating no external leaks. If a pressure test passes but the vehicle still triggers P1285, the cause is not a leak. The problem is either a lack of coolant circulation or a false signal. The most likely causes in this scenario are a slipping water pump impeller that doesn't circulate coolant under load but doesn't leak, a severely clogged radiator preventing flow, or a faulty CHT sensor/wiring sending false overheat signals to the PCM.
OEM Part Supersession History
2L2Z-8592-AA→2L2Z-8592-BA, then 2L2Z-8592-BB— Revisions to the plastic thermostat housing to improve durability and prevent cracking, though the fundamental design remained a weak point.
Model Year Variations Within This Range
- 2002-2005: The primary cause of P1285, the failure-prone plastic thermostat housing, is consistent across all 2002-2005 4.0L SOHC engines. However, it is worth noting that Ford updated the problematic timing chain cassettes and tensioners on this engine after the 2002 model year, a critical reliability improvement unrelated to the cooling system.
Diagnostic Flowchart
Used vs. New Parts: Buying Guide for This Vehicle
When a used part is the smart pick: Almost never for this repair. The primary failure components—the thermostat housing, CHT sensor, and thermostat—are all wear-and-tear items or have known design flaws. The cost of new parts is low enough that installing used parts from a junkyard is a significant risk for a repeat failure.
What to inspect on the donor part:
- Not applicable, as used parts are not recommended for this repair.
OEM-only on this vehicle (don't cheap out):
- While not strictly 'OEM-only', the Cylinder Head Temperature (CHT) sensor is a critical electronic component. Using a high-quality OEM (Motorcraft) or top-tier OE-equivalent brand (e.g., Bosch, NTK) is strongly recommended for accuracy and longevity.
Aftermarket brands forum-validated for this vehicle:
- Dorman 902-210 (Cast Aluminum Thermostat Housing): This is widely considered the permanent upgrade and fix for the failure-prone OEM plastic housing.
- Motorcraft (OEM parts): The safest bet for fit and function if you choose to stick with a plastic housing or for the CHT sensor and thermostat.
Brands owners have reported issues with on this vehicle:
- Unbranded/white-box plastic thermostat housings: Given that the OEM plastic design is flawed, a cheaper, no-name plastic replacement is highly likely to fail prematurely.
Real Owner Stories
Aggregated from forums and TSBs cited above. Mileages and costs reflect what owners reported in those sources.
2003 Mercury Mountaineer 4.0L SOHC V6
Symptoms: The engine was not physically hot, but the owner was getting codes P1285 and P1299.
What fixed it: The mechanic diagnosed a faulty CHT sensor after finding that coolant had leaked into its electrical connector. Replacing the sensor resolved the issue.
Source hint: YouTube - 03 Mercury Mountaineer - Ford Explorer P1285 & P1299
Ford Explorer 4.0L SOHC V6
Symptoms: A user described a coolant leak originating from the seam of the plastic thermostat housing.
What fixed it: Other owners immediately identified it as the common failure and recommended replacing the original plastic housing with a more reliable cast aluminum aftermarket part.
Source hint: Reddit r/FordExplorer - thermostat housing leak
Documented NHTSA Reports
An owner reported in NHTSA ODI #11520798 that after experiencing codes P0217 and P1285, a technician found coolant in Cylinder 2, indicating a severe internal engine issue following the overheat. In another case, NHTSA ODI #11062287 describes a vehicle where the dealer pulled fault code P1285 and resolved the issue by replacing both the radiator fan and the head temperature sensor.
Related OBD-II Codes
Frequently Asked Questions
My 2003 Explorer's temperature gauge suddenly went to HOT, but the engine doesn't seem to be overheating. What's going on?
I'm replacing the cracked thermostat housing on my 4.0L Explorer. Should I get another plastic one?
Should I replace the CHT sensor at the same time as the thermostat housing?
I smell coolant but can't find the leak on my Explorer. Where should I look first?
I'm installing a new thermostat housing and one of the bolts feels tight but the housing still leaks. What did I do wrong?
Does this same thermostat housing issue affect the Ford Ranger or Mercury Mountaineer?
Helpful Videos
Used OEM Parts in Stock
New Aftermarket Parts Available


The information in this article is provided for general reference and educational purposes only. Vehicle specifications, procedures, and part compatibility can vary by production date, trim level, and region. Always consult your vehicle's factory service manual and verify part numbers before purchasing or performing repairs. Safety-critical components such as airbags, seat belts, and braking systems should be installed by a qualified professional.
- Ford Explorer:
- 🧭 Diagnostic Flowchart
- 🎬 Helpful Videos
- 🛍️ Shop This Part
- What's Unique About the 2002-2005 Ford Explorer
- Symptoms You May Notice
- Most Likely Causes
- Rare But Worth Checking
- Technical Service Bulletins (TSBs) & Recalls
- Diagnosis Steps
- Parts You'll Likely Need
- Related Codes That Often Appear With This One
- Platform-Specific Known Issues
- Mechanic-Grade Diagnostic Values
- Scan Tool Commands That Help
- Wiring & Ground Locations
- Real Owner Repair Stories
- "I Checked Everything" — The Actual Cause
- OEM Part Supersession History
- Model Year Variations Within This Range
- Used vs. New Parts: Buying Guide for This Vehicle
- Real Owner Stories
- 2003 Mercury Mountaineer 4.0L SOHC V6
- Ford Explorer 4.0L SOHC V6
- Documented NHTSA Reports
- Related OBD-II Codes
- Frequently Asked Questions
- 🎟️ Get 5% Off