
P1289 on 2001-2011 Ford Ranger 2.3L: CHT Sensor Causes and Fixes
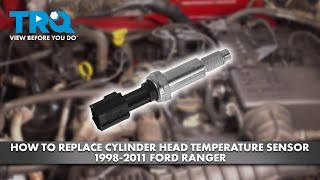
Code P1289 on a 2.3L Ranger almost always means the Cylinder Head Temperature (CHT) sensor has failed or its wiring is damaged. This is a simple DIY fix involving a ~$25 sensor located on top of the engine between the middle spark plugs.
- P1289 on your Ranger means the CHT sensor circuit is open, not that your engine is overheating.
- The most common fix is to replace the CHT sensor, which is an inexpensive part.
- The sensor is easy to access on the 2.3L engine, located on top of the cylinder head between the middle spark plugs.
- You will need a deep 19mm socket with enough internal clearance to fit over the sensor's connector to perform the replacement.
What's Unique About the 2001-2011 Ford Ranger
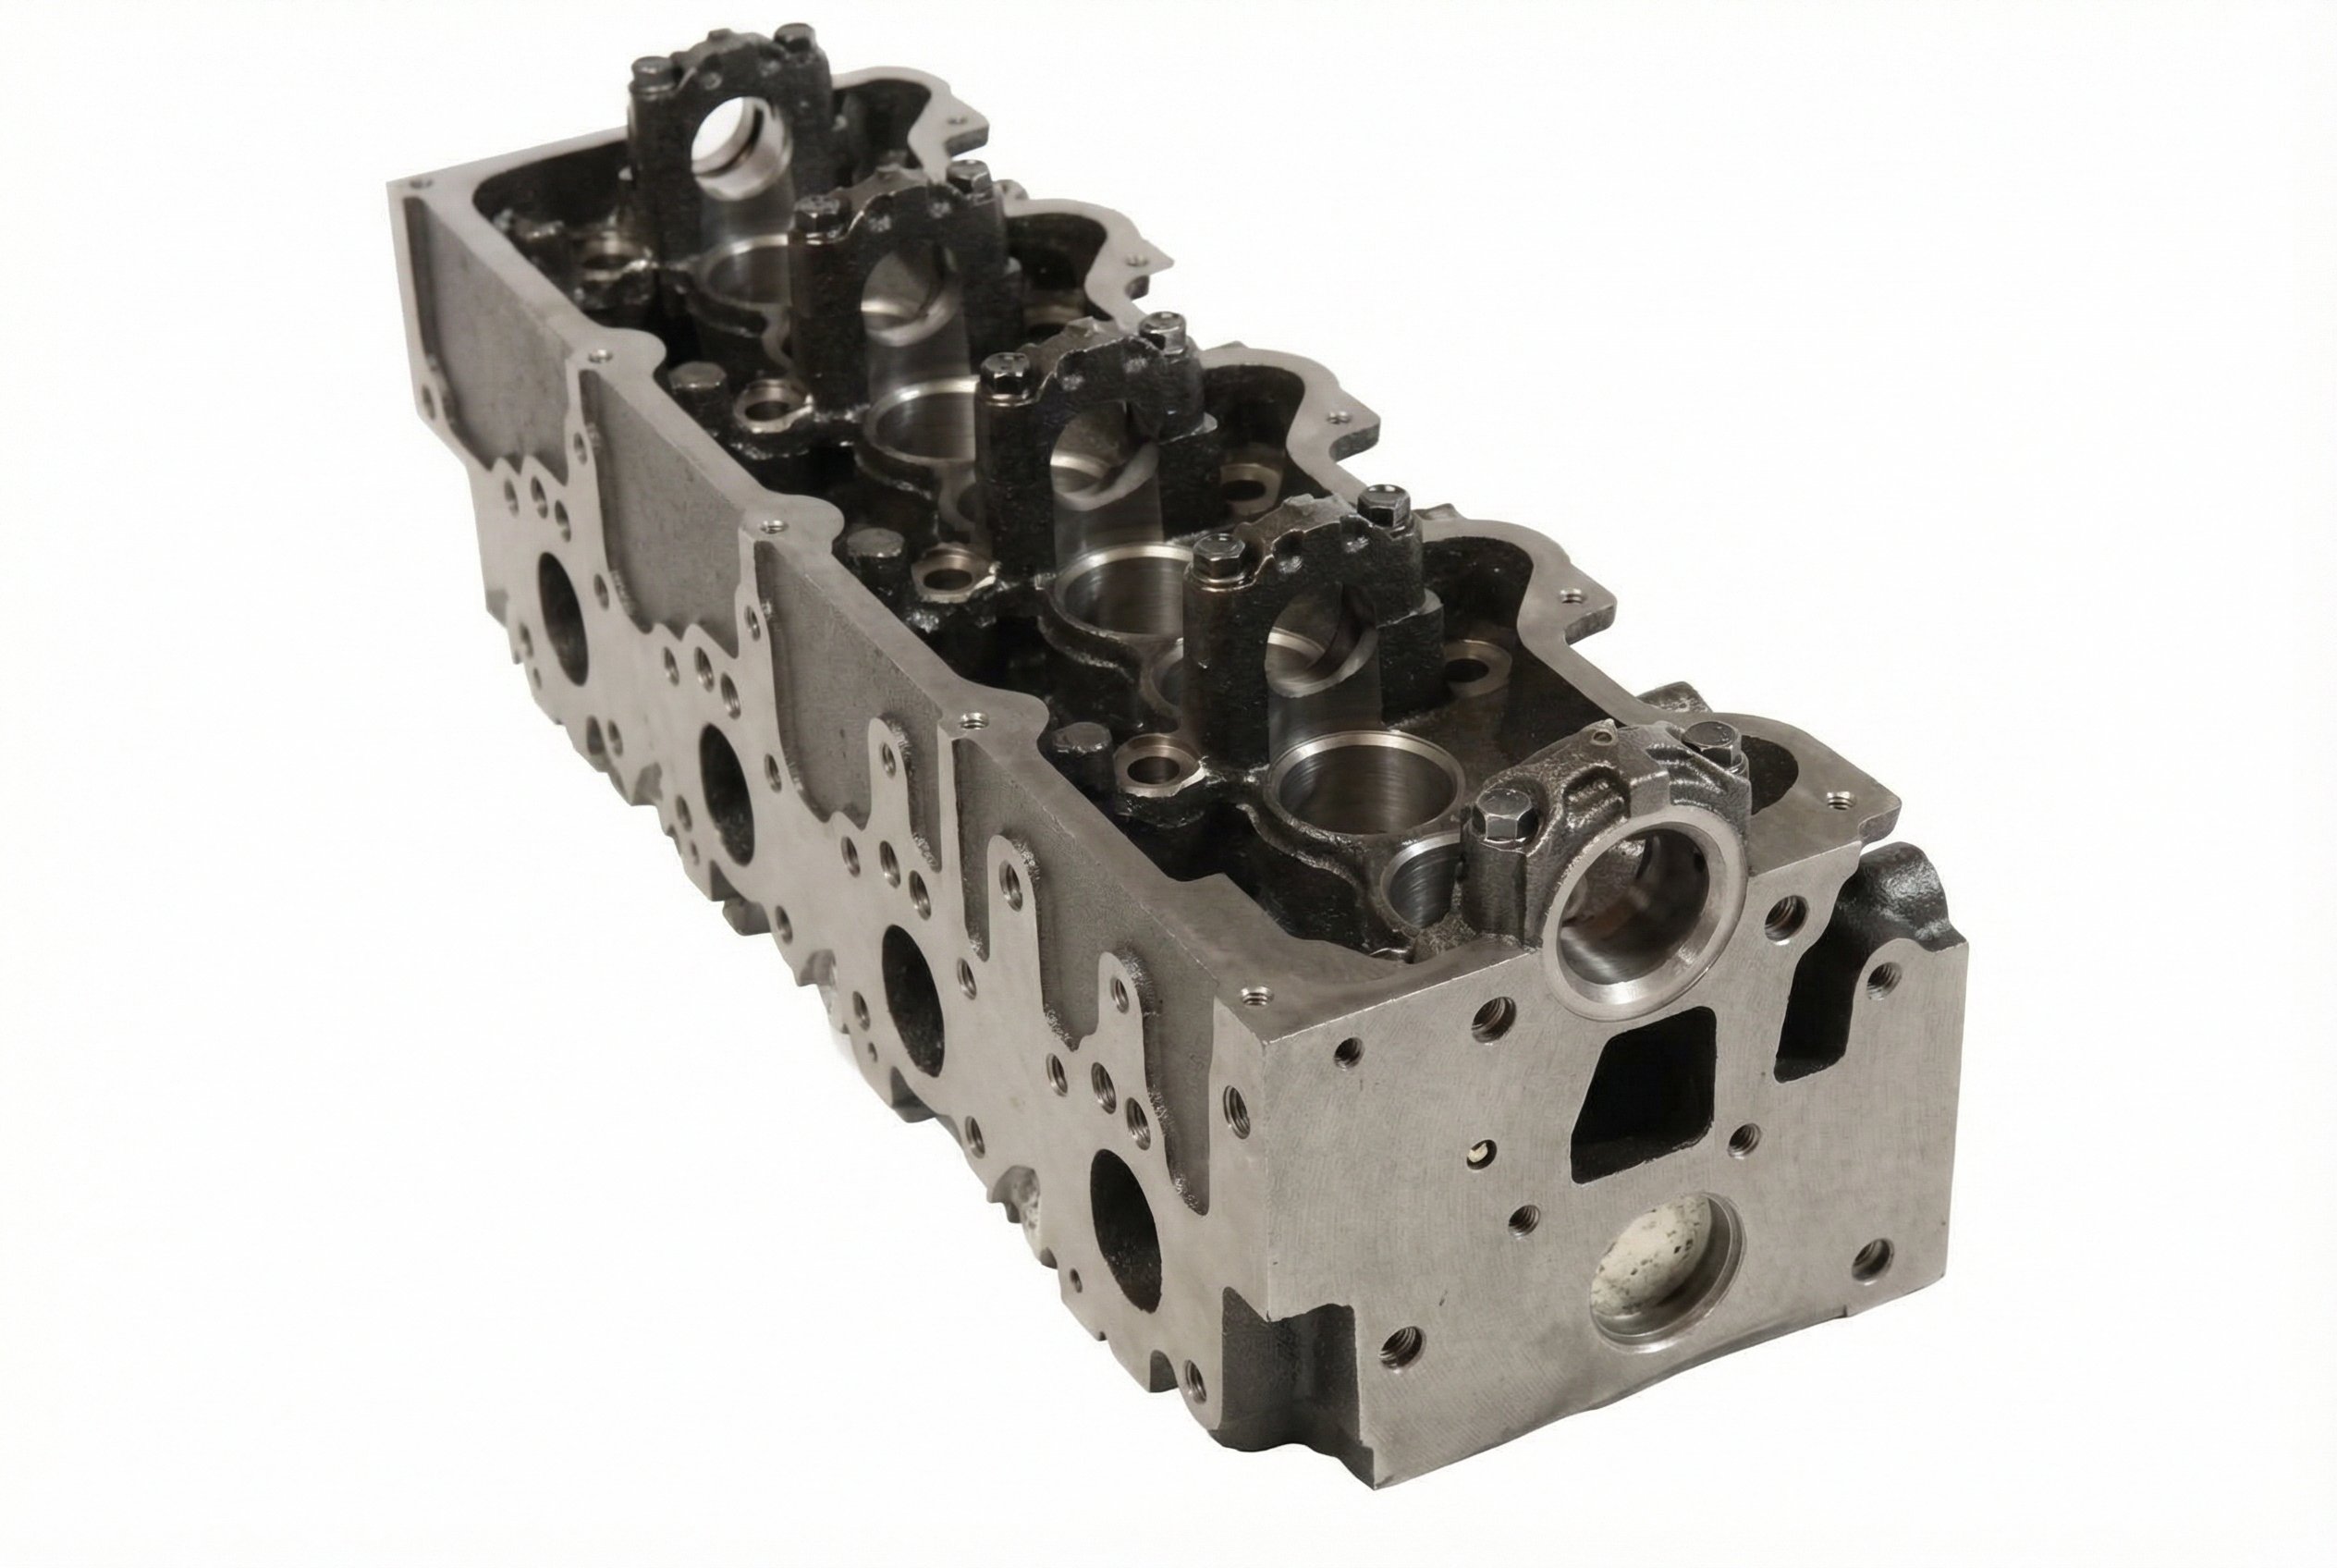
Unlike many vehicles that use a sensor to measure liquid coolant temperature (ECT), the 2.3L Duratec engine in the Ranger uses a Cylinder Head Temperature (CHT) sensor that threads directly into the cylinder head to measure the engine's metal temperature. This provides a more direct reading and can detect an overheat condition even if all the coolant has leaked out. For this P1289 code, the problem is almost always electrical (the sensor or its wiring) rather than a mechanical cooling system issue like a thermostat or water pump.
Symptoms You May Notice
- Check Engine Light is on.
- Temperature gauge on the dashboard is dead or reads cold.
- Cooling fans run constantly at high speed, even when the engine is cold.
- Air conditioning (A/C) does not work because the compressor is disabled by the PCM.
- Engine may have reduced power or feel sluggish (limp mode).
- Message on the instrument cluster may read 'engine temp data error'.
- Hard starting, as the PCM cannot determine the correct fuel mixture for a cold or warm engine.
- Replacing the thermostat. A thermostat issue will not cause a P1289 'circuit high' code; it typically causes a P0128 'thermostat rationality' code if stuck open.
- Searching for or replacing an Engine Coolant Temperature (ECT) sensor. The 2.3L Duratec engine in this Ranger does not use a traditional ECT sensor for PCM input; it relies solely on the CHT sensor.
Most Likely Causes
- Faulty Cylinder Head Temperature (CHT) Sensor 🔴 High Probability → Shop Engine Cylinder Head The sensor is subjected to extreme heat cycles which can cause its internal electronics to fail, creating an open circuit. This is the most common point of failure for this code.
How to confirm: With the sensor unplugged, the code should be present. If a new sensor is installed and the code clears and stays cleared, the old sensor was faulty. A scan tool showing a default temperature of -40°F is also a strong indicator of an open circuit.
Typical fix: Replace the CHT sensor. This is the most common and direct fix. One owner reported driving for two years with the code, and a new $11 sensor fixed the CEL and restored A/C function.
Est. part cost: $20-$50 - Damaged CHT Sensor Wiring or Connector 🟡 Medium Probability The wiring harness sits on top of the engine and is exposed to heat and vibration, which can make wires brittle and cause the connector lock to break over time. Rodents have also been known to chew through the wires. The issue can also arise after adjacent work, like replacing intake gaskets, where the harness may have been disturbed.
How to confirm: Visually inspect the wiring harness leading to the CHT sensor for any breaks, chafing, or melted sections. Wiggle the connector and harness with the engine running to see if the temperature gauge flickers or the code status changes. Using a multimeter, check for a 5-volt reference on one wire and a good ground on the other at the connector with the key on.
Typical fix: Repair the damaged section of wire or replace the connector pigtail.
Est. part cost: $10-$25 for a pigtail connector
Rare But Worth Checking
- Faulty Powertrain Control Module (PCM): → Shop Engine Control Module (ECM) This is extremely rare. Before condemning the PCM, all other possibilities, including the sensor and the entire length of the wiring harness back to the PCM (pins 66 and 91), must be exhaustively tested and ruled out.
Diagnosis Steps
- Confirm the P1289 code is present using an OBD-II scanner.
- Check the dashboard: confirm the temperature gauge is inoperative and the cooling fans are running constantly.
- Locate the CHT sensor on top of the engine, between the #2 and #3 spark plugs.
- Inspect the wiring harness and connector going to the sensor. Look for obvious signs of damage, such as brittle or broken wires, or a damaged connector.
- With the key on and engine off, unplug the sensor. Use a multimeter to test the connector terminals. One should have a ~5-volt reference signal from the PCM, and the other should show a good ground.
- If voltage and ground are correct, the wiring is likely good and the sensor is the fault. Replace the CHT sensor. This requires a deep 19mm socket. 🎬 Watch: Step-by-step walkthrough for replacing the CHT sensor. A Duralast 1/2-inch drive 19mm deep socket from AutoZone is confirmed by owners to have enough internal clearance to fit over the sensor's plastic connector.
- Torque the new sensor to 106 inch-pounds (approx. 9 ft-lbs or 12 Nm).
- Reconnect the electrical plug, clear the code with the scanner, and start the engine.
- Verify that the check engine light stays off, the temperature gauge begins to work, and the cooling fans turn off.
Parts You'll Likely Need
- Cylinder Head Temperature (CHT) Sensor
(OEM #XL3Z-6G004-AA)— This sensor is the most common failure point for code P1289. Its internal electronics fail from heat and age, causing the open circuit condition detected by the PCM.
Trusted brands: Motorcraft, NGK, Delphi, Standard Motor Products
OEM price range: $30-$50
Aftermarket price range: $15-$40
Related Codes That Often Appear With This One
- P1299 — P1299 ('Cylinder Head Over-temperature Protection Active') can sometimes appear with P1289. When the PCM loses the CHT signal, it may activate the full fail-safe mode as a precaution, which is what P1299 indicates.
Technical Service Bulletins (TSBs) & Recalls
- While no TSB is specific to the Ranger for P1289, Ford TSB 19-2049 for 2019 F-150/Mustang models with a 5.0L engine describes the exact same P1289 code, symptoms, and fix (replace CHT sensor), confirming the diagnostic logic.
- Manufacturer TSB Bulletin #TSB 16-0163 for other Ford models also lists P1289 alongside P1299 and various ignition codes, instructing technicians to follow specific service procedures to correct the condition.
Platform-Specific Known Issues
- The key to this repair is having the correct tool. Many standard deep 19mm sockets will not fit over the sensor's connector. Owners have specifically cited the individual Duralast 1/2-inch drive 19mm deep socket as one that works.
Mechanic-Grade Diagnostic Values
- CHT Sensor Voltage (KOEO, unplugged) — expected: ~5.0 Volts (VREF). Failure: P1289 triggers when voltage is > 4.6V, indicating an open circuit.
- CHT Sensor Voltage (Normal Operating Temp) — expected: 1.6V - 2.1V. Failure: Voltage significantly outside this range suggests a sensor or wiring issue.
- CHT Sensor Resistance (Cold, ~68°F / 20°C) — expected: ~2,200 - 3,000 Ohms (Ω). Failure: Very high or infinite resistance (open circuit) will cause P1289.
- CHT Sensor Resistance (Warm, ~176°F / 80°C) — expected: ~250 - 350 Ohms (Ω). Failure: Resistance that doesn't drop as the engine warms indicates a faulty sensor.
- CHT Sensor Torque Specification — expected: 106 lb-in (12 Nm). Failure: Overtightening can damage the sensor; undertightening can lead to poor thermal contact.
Wiring & Ground Locations
- PCM Pin 91 — At the Powertrain Control Module connector, located in the right rear of the engine compartment.. This is the Signal Return (SIGRTN) pin for the CHT sensor. The Gray/Red wire from the sensor terminates here, providing the ground reference for the signal.
- CHT Wire Colors — At the CHT sensor connector between spark plugs #2 and #3.. The wire colors are typically Gray/Red (Signal Return) and Yellow/Light Green (5V Reference). This is critical for correctly testing voltage and continuity.
- G104 — On the frame rail in the lower left front of the engine compartment.. This is a primary ground point for the engine controls system. A corroded or loose G104 can cause erratic sensor readings and various engine control issues, including potential CHT circuit problems.
Real Owner Repair Stories
- Ford F150 Forum user 'Dirtydan23' (2009 Ford F-150 5.4L (Similar CHT logic)) — Persistent P1289 code, temp gauge and A/C not working, limp mode.
❌ Tried (didn't work) Replaced the CHT sensor., Replaced the CHT pigtail connector., Performed a partial repair of the main harness where rats had chewed it (continuity test passed after this repair)., Replaced the sensor a second time., Wiggled all wires and connectors with no change.
✅ What actually fixed it The initial wiring repair was insufficient. The final fix was to completely replace the two CHT wires by running them all the way from the PCM connector to the CHT sensor connector, bypassing the old, intermittently faulty harness wiring.
Documented NHTSA Reports
NHTSA ODI #10484858
Symptoms: An owner reported a P1289 code (Cylinder Head Temp Sensor High Input) occurring simultaneously with P0303 (Cylinder 3 Misfire) and P0353 (Ignition Coil 'C' Primary/Secondary Circuit).
Diagnosis: The owner performed a Key-On/Engine-Off (KOEO) check with an OBDII scanner to verify the circuit fault.
Model Year Variations Within This Range
- 2004-2011: Starting in 2004, Rangers received a digital instrument cluster (HEC). This cluster is electronically 'married' to the PCM. This means you cannot simply swap a cluster or PCM from a donor vehicle without having a Ford dealer 'remarry' the components, which can be difficult or impossible between different years. This is critical information for anyone attempting a repair using junkyard electronics.
Diagnostic Flowchart
Other Known Issues on This Vehicle
Issues unrelated to this code that are worth knowing about as an owner of this generation:
- Intake Manifold Runner Control (IMRC) Failure 🟠 Medium — Common on 2001-2003 models. Can occur due to a failed solenoid, cracked vacuum lines, or broken plastic linkage on the manifold itself. (Ref: Later models (post-2003) had the IMRC system removed by Ford, indicating known issues. Codes P1537 or P2004 are common.)
- Cracked Plastic Thermostat Housing 🔴 High → Shop Integrated Thermostat Housing Assembly — Very common across all years. The plastic housing becomes brittle from heat cycles and develops cracks, leading to coolant leaks. (Ref: No TSB, but it's a widely documented failure. Upgrading to an aftermarket aluminum housing is the recommended permanent fix.)
- PCV Hose Degradation 🟠 Medium — The rubber elbow hose connecting to the PCV system can become soft, crack, or collapse, causing vacuum leaks, rough idle, and stalling. (Ref: Ford released a revised, reinforced hose to address the collapsing issue.)
- Timing Chain Reliability 🟡 Low — Unlike the 4.0L V6 Ranger, the 2.3L Duratec's timing chain is considered very reliable and typically lasts the life of the engine without issues.
Used vs. New Parts: Buying Guide for This Vehicle
When a used part is the smart pick: For this repair, a used part only makes sense for the connector pigtail. If your original connector is broken or melted, a pigtail cut from a donor vehicle's harness at a junkyard is a cost-effective and reliable option.
Donor-vehicle mileage cap: roughly under 150000 miles for the part to have meaningful remaining life.
What to inspect on the donor part:
- For a pigtail: ensure the plastic locking tab is intact and clicks firmly.
- Check for at least 4-6 inches of flexible, non-brittle wire attached.
- Inspect the metal pins inside the connector for any green or white corrosion.
- Avoid connectors from engine bays that are excessively oily or show signs of fire/melting.
OEM-only on this vehicle (don't cheap out):
- No parts for this specific repair are strictly OEM-only. However, using a Motorcraft sensor is often recommended for best fit and longevity.
Aftermarket brands forum-validated for this vehicle:
- Motorcraft
- NGK
- Delphi
- Standard Motor Products (SMP)
Brands owners have reported issues with on this vehicle:
- No specific brands are consistently reported as problematic for this part, but ultra-cheap, unbranded sensors from online marketplaces may have questionable quality control and are best avoided.
Real Owner Stories
Aggregated from forums and TSBs cited above. Mileages and costs reflect what owners reported in those sources.
2008 Ford Ranger 2.3L — 309000 miles
Symptoms: Check engine light with code P1289 and the temperature gauge stopped working immediately following other engine repairs (valve cover and intake gaskets).
What fixed it: The owner did not report a final fix, but suspected they may have damaged the wiring or sensor during the previous repair.
Source hint: The Ranger Station - 2.3L ('02-'11) - code p1289
2001-2011 Ford Ranger 2.3L
Symptoms: Check Engine Light was on and the A/C was not working for two years.
What fixed it: A new CHT sensor fixed the check engine light and restored A/C function.
Cost: $11-$11
Source hint: Reddit (r/fordranger) - Thread: 'Cylinder Head Temperature Sensor P1289. A/C'
Related OBD-II Codes
Frequently Asked Questions
I'm trying to replace the CHT sensor on my 2.3L Ranger, but my deep socket won't fit. Is there a special tool required?
Where is the Cylinder Head Temperature (CHT) sensor located on the 2.3L Duratec engine?
My A/C stopped working at the same time the P1289 code appeared. Are these issues related?
I just replaced my intake gaskets and now my truck has a P1289 code. Did I break something?
What is the proper torque specification for installing a new CHT sensor on the 2.3L Ranger?
I can't find the Engine Coolant Temperature (ECT) sensor on my 2.3L Ranger. Does it have one?
Is there a Technical Service Bulletin (TSB) from Ford for the P1289 code on my 2001-2011 Ranger?
Helpful Videos

Used OEM Parts in Stock
New Aftermarket Parts Available


The information in this article is provided for general reference and educational purposes only. Vehicle specifications, procedures, and part compatibility can vary by production date, trim level, and region. Always consult your vehicle's factory service manual and verify part numbers before purchasing or performing repairs. Safety-critical components such as airbags, seat belts, and braking systems should be installed by a qualified professional.
- Ford Ranger:
- 🧭 Diagnostic Flowchart
- 🎬 Helpful Videos
- 🛍️ Shop This Part
- What's Unique About the 2001-2011 Ford Ranger
- Symptoms You May Notice
- Most Likely Causes
- Rare But Worth Checking
- Diagnosis Steps
- Parts You'll Likely Need
- Related Codes That Often Appear With This One
- Technical Service Bulletins (TSBs) & Recalls
- Platform-Specific Known Issues
- Mechanic-Grade Diagnostic Values
- Wiring & Ground Locations
- Real Owner Repair Stories
- Documented NHTSA Reports
- NHTSA ODI #10484858
- Model Year Variations Within This Range
- Other Known Issues on This Vehicle
- Used vs. New Parts: Buying Guide for This Vehicle
- Real Owner Stories
- 2008 Ford Ranger 2.3L — 309000 miles
- 2001-2011 Ford Ranger 2.3L
- Related OBD-II Codes
- Frequently Asked Questions
- 🎟️ Get 5% Off