
P1289 on 2007-2014 Lincoln Navigator: Cylinder Head Temperature Sensor Causes and Fixes
For the 2007-2014 Lincoln Navigator, code P1289 almost always means the Cylinder Head Temperature (CHT) sensor has failed or its wiring is damaged. This is a common issue where the sensor is located under the intake manifold, making replacement a labor-intensive job. Expect to pay a professional $300-$600 for the repair.
- P1289 on your Navigator points directly to a problem with the Cylinder Head Temperature (CHT) sensor circuit.
- Symptoms are severe: your temperature gauge will not work, and the cooling fans will run constantly.
- The most common cause is a failed CHT sensor, followed by damaged wiring to the sensor.
- This is not a simple DIY fix. The sensor is buried under the intake manifold, making professional repair the recommended course of action.
- Do not confuse the CHT sensor with a traditional coolant temperature (ECT) sensor; they are different parts.
What's Unique About the 2007-2014 Lincoln Navigator
On the 5.4L 3V V8 engine used in the Lincoln Navigator and Ford Expedition, the Cylinder Head Temperature (CHT) sensor is notoriously difficult to access. It is located on the driver's side cylinder head, in the engine valley, underneath the entire intake manifold. Unlike some other Ford engines where the sensor can be reached by just removing the alternator, this platform requires significant labor to remove the manifold, turning a simple sensor replacement into a multi-hour job.
Symptoms You May Notice
- Check Engine Light is on.
- Temperature gauge on the dashboard is dead or reads cold.
- Cooling fans run constantly at high speed, even when the engine is cold.
- A/C system may be disabled by the computer.
- Message on the dash may read "Engine Temp Data Error".
- Reduced engine power or "limp mode".
- Poor fuel economy.
- Difficult or prolonged starting.
- Replacing the Engine Coolant Temperature (ECT) sensor. The 5.4L 3V engine uses a CHT sensor to infer coolant temperature; it does not have a traditional ECT sensor for the PCM. Replacing the wrong sensor will not fix the P1289 code. 🎬 Watch: A quick walkthrough of the P1289 fix on this engine.
Most Likely Causes
- Failed Cylinder Head Temperature (CHT) Sensor 🔴 High Probability → Shop Engine Cylinder Head The sensor is located in a high-heat area under the intake manifold, leading to a higher failure rate over time due to heat cycles and vibration.
How to confirm: Using a scan tool, observe the CHT sensor data. A reading of -40°F or a voltage above 4.6V with the engine at operating temperature points to a failed sensor or open circuit.
Typical fix: Replace the CHT sensor. Due to the difficult location, this requires removing the upper and lower intake manifold. 🎬 See how to replace the CHT sensor on a 5.4 Triton.
Est. part cost: $30-$60 - Damaged CHT Sensor Wiring or Connector 🟡 Medium Probability The wiring harness is routed in the hot engine valley and can become brittle, chafed, or damaged by rodents, causing an open circuit. In one documented case on a 2012 Navigator, a user found rodent damage to the CHT harness after borrowing the vehicle out to a friend.
How to confirm: Visually inspect the wiring harness leading to the CHT sensor for any signs of breaks, melting, or corrosion. Perform a "wiggle test" on the harness while monitoring sensor voltage on a scan tool. A user on an Expedition forum found the wiring had been pinched between the intake manifold and the head from a previous repair, eventually wearing through the insulation.
Typical fix: Repair the damaged section of wire or replace the connector pigtail. This also requires accessing the sensor area under the intake manifold.
Est. part cost: $15-$40
Rare But Worth Checking
- Faulty Powertrain Control Module (PCM): → Shop Engine Control Module (ECM) This is extremely rare. The sensor and wiring should be thoroughly tested and confirmed to be good before considering PCM replacement, as it is expensive and requires programming.
Diagnosis Steps
- Connect an OBD-II scanner to verify the presence of code P1289 and any other related codes.
- Using the scanner's live data function, monitor the Cylinder Head Temperature (CHT) sensor reading. A reading stuck at a very low temperature (like -40°F) or a voltage reading above 4.6V indicates an open circuit.
- If the reading is illogical, the next step is to access the sensor wiring. This is the most difficult part on the 5.4L V8. While most repairs involve removing the intake manifold, some technicians have successfully replaced the sensor by only removing the alternator and using a 19mm flex-head ratcheting wrench, though this method 🎬 Watch: This video shows the sensor replacement process in detail. is very challenging.
- Once you have access, visually inspect the CHT sensor and its wiring harness for any obvious damage, such as chewed wires, broken wires, melted insulation, or a damaged connector.
- If the wiring looks intact, disconnect the sensor and test the harness. You should find a 5-volt reference signal on one wire and a good ground on the other with the key on.
- If the reference voltage and ground are present, the sensor itself is faulty and must be replaced.
- If reference voltage or ground is missing, the wiring is damaged somewhere between the sensor and the PCM, and the open circuit must be found and repaired.
- After replacing the sensor or repairing the wiring, clear the codes with the scanner and perform a drive cycle to ensure the problem is resolved.
Parts You'll Likely Need
- Cylinder Head Temperature (CHT) Sensor
(OEM #Motorcraft DY1144 (replaces XL3Z-6G004-AA))— This sensor is the most common failure point for code P1289. Its failure causes the PCM to receive an out-of-range high voltage signal.
Trusted brands: Motorcraft, Standard Motor Products (SMP), NTK
OEM price range: $40-$60
Aftermarket price range: $25-$45 - Intake Manifold Gaskets
(OEM #Motorcraft 3L3Z-9439-AA (Set of 2))— These are required for the repair because the intake manifold must be removed to access the CHT sensor. They are single-use and must be replaced to prevent vacuum leaks.
Trusted brands: Motorcraft, Fel-Pro
OEM price range: $50-$80
Aftermarket price range: $30-$50 - CHT Sensor Connector Pigtail
(OEM #Motorcraft WPT-148)— Often needed if the original connector is brittle, cracked, or the wiring is damaged near the sensor.
Trusted brands: Motorcraft, Dorman
OEM price range: $25-$40
Aftermarket price range: $15-$30
Related Codes That Often Appear With This One
- P1299 — P1299 ('Cylinder Head Overtemperature Protection Active') is often triggered as a fail-safe response to the faulty signal from the CHT sensor that P1289 reports.
Technical Service Bulletins (TSBs) & Recalls
- TSB 06-19-8: While not directly for P1289, this TSB addresses ticking/rattling noises from the VCT system, which are common on this engine and may be diagnosed concurrently with other issues.
Platform-Specific Known Issues
- The location of the CHT sensor on the 5.4L 3V engine is under the intake manifold, making replacement a significantly more labor-intensive and costly repair than on many other engines.
Mechanic-Grade Diagnostic Values
- CHT Sensor Voltage (Key On, Engine Off) — expected: Should correlate to ambient temperature. A reading over 4.6V indicates an open circuit.. Failure: Voltage is stuck above 4.6V, which the PCM interprets as -40°F/C.
- CHT Sensor Voltage (Normal Operating Temp) — expected: ~0.70V to 1.6V (approx. 195-210°F or 90-99°C).. Failure: Voltage does not decrease as engine warms up, or stays above 4.6V.
- Ford's Dual-Range CHT Sensor Voltage Anomaly — expected: The PCM uses a dual switching resistor circuit. This means at certain temperatures, the voltage can be one of two values. For example, at 194°F (90°C), the voltage could be either ~0.60V (hot end range) or ~3.71V (cold end range). Understanding this prevents misdiagnosis when observing live data.. Failure: Not a failure, but a design characteristic. A technician unaware of this might incorrectly diagnose a sensor when seeing a sudden voltage jump as the PCM switches ranges.
- CHT Sensor Resistance vs. Temperature — expected: The sensor is a thermistor; resistance drops as temperature rises. Approx. 37 kOhms at 68°F (20°C), 2.4 kOhms at 212°F (100°C).. Failure: Infinite resistance (open circuit) or resistance that doesn't change with temperature.
- CHT Sensor Harness Test (at connector, unplugged) — expected: With key on, one pin should have a 5V reference from the PCM. The other pin (signal return) should show near 0V.. Failure: Missing 5V reference or ground indicates a wiring problem between the connector and the PCM, or a faulty PCM.
Wiring & Ground Locations
- CHT Sensor Wires at PCM — At the main Powertrain Control Module (PCM) connector, located at the right rear of the engine compartment.. For a persistent P1289 after replacing the sensor and pigtail, testing for continuity directly from the PCM pins is the final step. On similar 5.4L 3V engines, the wires are often CHT Signal (Pin 35) and Signal Return/SIGRTN (Pin 38). Verifying these pins allows you to isolate a wiring break from a PCM failure.
- Signal Return (SIGRTN) — This is a dedicated ground wire running from the sensor directly back to a specific pin on the PCM.. The CHT sensor does not use a chassis ground. A fault on this specific return wire will cause an open circuit and trigger P1289. It is not a ground point that can be cleaned on the frame or engine block.
- CAN Bus — The communication network between all vehicle modules.. The PCM sends the calculated temperature reading to the instrument cluster over the CAN bus. The temperature gauge on the dash is not directly wired to the sensor. This explains why a sensor/wiring fault (P1289) results in a dead gauge.
Real Owner Repair Stories
- MustangForums.com user (Ford Mustang with a 5.4L engine (similar to Navigator) after installing a Roush TVS supercharger.) — P1289 code immediately after intake manifold reinstallation.
✅ What actually fixed it The bottom of the new, aftermarket intake manifold was physically contacting and pinching the CHT sensor wire, causing an open/short. The fix was to replace the sensor and trim the plastic on the new sensor so it would no longer make contact with the manifold upon installation. - F150Forum.com user wjfawb0 (2010 Ford F-150 5.4L 3V) — Constant P1289 code, limp mode, fans on high, no A/C on cold starts.
❌ Tried (didn't work) Replaced the CHT sensor (accessed by removing alternator)., Replaced the sensor connector pigtail by splicing it in.
✅ What actually fixed it The user confirmed the issue was not the sensor or connector. The problem persisted, leading them to conclude the fault was further up the wiring harness toward the PCM, requiring a full intake manifold removal to trace the open circuit. The thread highlights that even after replacing the most common parts, the code can persist due to a wiring break elsewhere.
OEM Part Supersession History
XL3Z-6G004-AA→Motorcraft DY-1144— Standard service part replacement.
Heads up: None. DY-1144 is the direct, correct service replacement for XL3Z-6G004-AA for this application.
Model Year Variations Within This Range
- 2007-2014: No significant variations are documented for the CHT sensor, its location, or the P1289 fault within this specific generation of the Lincoln Navigator with the 5.4L 3V engine. The repair procedure and common causes are consistent across these model years.
Diagnostic Flowchart
Other Known Issues on This Vehicle
Issues unrelated to this code that are worth knowing about as an owner of this generation:
- Cam Phaser Rattle / Knock 🔴 High — Very common, especially on higher mileage engines or those with infrequent oil changes. Noise is often described as a diesel-like ticking or knocking at idle. (Ref: TSB 06-19-8 discusses engine ticking/rattling noises.)
- Spark Plug Breakage During Removal 🟠 Medium — Extremely common when changing spark plugs. The long, two-piece design allows carbon to build up on the lower shank, causing it to seize in the cylinder head and break upon removal.
- VCT Solenoid Failure 🟠 Medium — Common failure that can cause rough idle and contribute to cam phaser noise. The solenoids control oil flow to the phasers and can get clogged or fail electronically. (Ref: TSB 14-0114 references this issue.)
- Vacuum Leaks from Hoses and Gaskets 🟠 Medium — Common as the vehicle ages. Rubber hoses (especially PCV lines) become brittle and crack, and intake manifold gaskets can fail, leading to rough idle and lean codes.
- Timing Chain Tensioner and Guide Wear 🔴 High — The plastic timing chain guides can break, and the tensioner seals can fail, leading to low oil pressure at the top end, chain slap against the timing cover, and eventual engine failure if not addressed.
Used vs. New Parts: Buying Guide for This Vehicle
When a used part is the smart pick: For the CHT sensor itself, never; always buy new. However, if the plastic intake manifold is damaged or cracked during removal (a common issue due to age and heat), a used OEM intake manifold from a reputable salvage yard is a very smart and cost-effective alternative to a new one.
Donor-vehicle mileage cap: roughly under 150000 miles for the part to have meaningful remaining life.
What to inspect on the donor part:
- For a used intake manifold, check for cracks, especially around bolt holes and the thermostat housing.
- Ensure the plastic is not excessively chalky or brittle.
- Verify all threaded brass inserts for fuel rails and other components are present and not stripped or pulling out.
- Check the gasket surfaces for flatness with a straight edge to ensure no warping.
OEM-only on this vehicle (don't cheap out):
- Cylinder Head Temperature (CHT) Sensor. The labor to access this part is extensive. Using a cheap aftermarket sensor that may fail prematurely is a high-risk, low-reward proposition. Stick with the Motorcraft (DY-1144) part.
Aftermarket brands forum-validated for this vehicle:
- Intake Manifold Gaskets: Fel-Pro is a widely trusted brand for gaskets if not using OEM Motorcraft.
- CHT Sensor (if OEM unavailable): NTK or Standard Motor Products (SMP) are generally reputable secondary choices.
Brands owners have reported issues with on this vehicle:
- Avoid unbranded, 'white-box' electronic sensors. While no specific brand is universally cited as bad for this part, the risk of premature failure with no-name sensors is a common theme in technician forums.
Real Owner Stories
Aggregated from forums and TSBs cited above. Mileages and costs reflect what owners reported in those sources.
2012 Lincoln Navigator 5.4L 3V
Symptoms: The A/C compressor clutch would not engage, the temperature gauge on the instrument cluster was not working, and the temperature warning icon was illuminated on the dash.
What fixed it: Repairing the CHT sensor wiring harness which had been damaged by rodents under the intake manifold.
Source hint: Lincoln vs Cadillac Forums: 2012 Navigator Cylinder Head Temperature Sensor
Ford Expedition 5.4L 3V — 150000 miles
Symptoms: The owner experienced issues related to the CHT sensor circuit.
What fixed it: The owner discovered the CHT wiring had been pinched between the intake manifold and the cylinder head from a previous repair, eventually wearing through. Repairing the damaged wire resolved the issue.
Source hint: Ford Expedition Forum: Cylinder Head temperature sensor issue
Related OBD-II Codes
Frequently Asked Questions
How difficult is it to replace the Cylinder Head Temperature (CHT) sensor on my 5.4L Navigator?
Why are my cooling fans always on high and my temperature gauge dead with code P1289?
Could animals chewing the wires cause a P1289 code?
How can I confirm the CHT sensor is bad before starting the difficult replacement job?
Does the P1289 issue also affect the Ford Expedition or F-150 with the same engine?
Is TSB 06-19-8 related to the P1289 code?
Helpful Videos


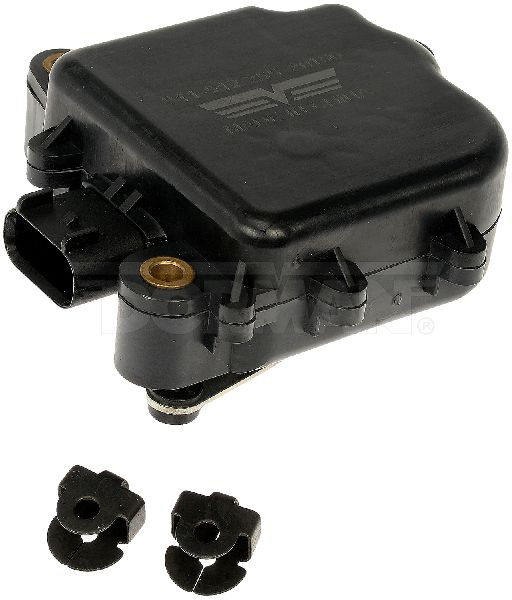
We Have This Part in Stock


The information in this article is provided for general reference and educational purposes only. Vehicle specifications, procedures, and part compatibility can vary by production date, trim level, and region. Always consult your vehicle's factory service manual and verify part numbers before purchasing or performing repairs. Safety-critical components such as airbags, seat belts, and braking systems should be installed by a qualified professional.
- Lincoln Navigator:
- 🧭 Diagnostic Flowchart
- 🎬 Helpful Videos
- 🛍️ Shop This Part
- What's Unique About the 2007-2014 Lincoln Navigator
- Symptoms You May Notice
- Most Likely Causes
- Rare But Worth Checking
- Diagnosis Steps
- Parts You'll Likely Need
- Related Codes That Often Appear With This One
- Technical Service Bulletins (TSBs) & Recalls
- Platform-Specific Known Issues
- Mechanic-Grade Diagnostic Values
- Wiring & Ground Locations
- Real Owner Repair Stories
- OEM Part Supersession History
- Model Year Variations Within This Range
- Other Known Issues on This Vehicle
- Used vs. New Parts: Buying Guide for This Vehicle
- Real Owner Stories
- 2012 Lincoln Navigator 5.4L 3V
- Ford Expedition 5.4L 3V — 150000 miles
- Related OBD-II Codes
- Frequently Asked Questions
- 🎟️ Get 5% Off