
P1296 on 1996-1999 Dodge Neon: MAP Sensor Voltage Fault Causes and Fixes
On a first-generation Dodge Neon, P1296 means the MAP sensor is not getting its 5-volt power supply from the engine computer. This is almost always caused by a bad MAP sensor or damaged wiring. Expect to pay $40-$100 for a new sensor, which is a 2/5 DIY difficulty fix.
- For a Dodge Neon, P1296 is an electrical problem with the MAP sensor circuit, NOT a cooling system issue.
- Symptoms typically include engine hesitation, stalling, and poor fuel economy.
- The most likely fix is replacing the MAP sensor itself.
- Before buying parts, use a multimeter to check for 5 volts and a good ground at the sensor connector to rule out a simple wiring problem.
What's Unique About the 1996-1999 Dodge Neon
Unlike many other manufacturers like Volkswagen or Audi where P1296 points to a cooling system problem, on Dodge, Chrysler, and Plymouth vehicles of this era, it is strictly an electrical fault related to the MAP sensor circuit. Misinterpreting this code as a cooling issue will lead to replacing the wrong parts, like the thermostat or coolant temperature sensor. The problem on the Neon is almost always the sensor itself or the wiring harness that becomes brittle from engine heat and vibration.
Symptoms You May Notice
- Check Engine Light is on
- Engine stutters or hesitates, especially under light acceleration.
- Rough idle or misfiring.
- Engine stalling, sometimes intermittently or when coming to a stop.
- Noticeable loss of engine power.
- Poor fuel economy.
- Black smoke from the exhaust (indicating a rich fuel mixture).
- Difficulty starting the engine (crank-no-start).
- Replacing the Thermostat or Engine Coolant Temperature (ECT) sensor. This is the correct diagnosis for P1296 on other car brands (like VW/Audi), but is incorrect for a Dodge Neon.
- Replacing the Throttle Position Sensor (TPS). A failing TPS can cause similar symptoms like hesitation and stalling, but it will typically set different codes (P0121, P0122, P0123). A forum member reported replacing the TPS by mistake before correctly identifying the MAP sensor as the cause.
Most Likely Causes
- Failed MAP Sensor 🔴 High Probability The sensor is subjected to constant heat cycles and vibration, leading to internal failure over its lifespan. Oil and carbon buildup from the intake can also contaminate and damage the sensor.
How to confirm: After confirming the sensor has good power (5V) and ground at its electrical connector, but the engine still runs poorly with the code present, the sensor is the likely culprit. You can also test the sensor's output signal with a multimeter and vacuum pump; the voltage should change smoothly as vacuum is applied. 🎬 See how to test sensor voltage with a multimeter With the key on and engine off, the signal wire should read around 4.5-4.8V.
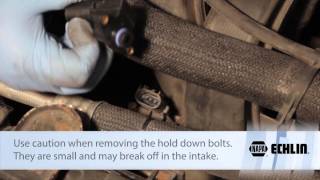
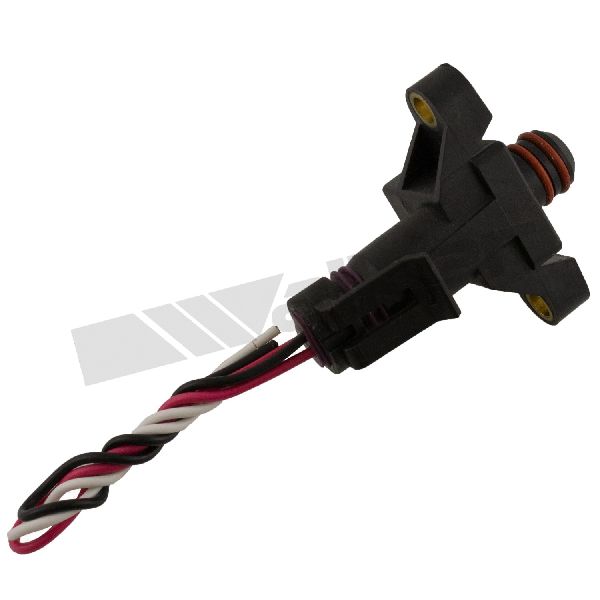
Typical fix: Replace the MAP sensor. It is located on the intake manifold, often under the upper radiator hose, and is typically held by two T15 Torx bolts.
Est. part cost: $40-$100 - Damaged Wiring or Connector 🟡 Medium Probability The engine bay layout exposes the MAP sensor wiring harness to significant heat, causing the plastic insulation and connector to become brittle and crack over time. This can lead to shorts to ground, open circuits, or poor connections at the pins.
How to confirm: Visually inspect the wiring harness leading to the MAP sensor for cracks, fraying, or signs of melting. With the key on, use a multimeter to test for 5 volts at the supply wire and for a good ground at the ground wire on the sensor's connector. Wiggle the harness while testing to check for intermittent faults. If either power or ground is missing, the wiring between the sensor and PCM is faulty.
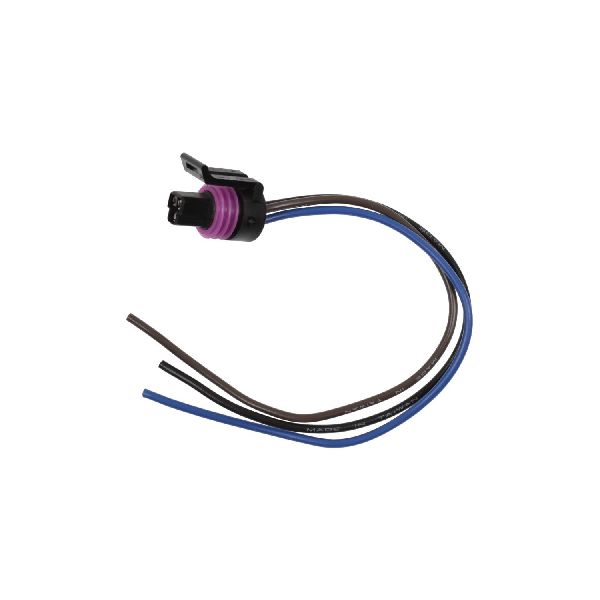
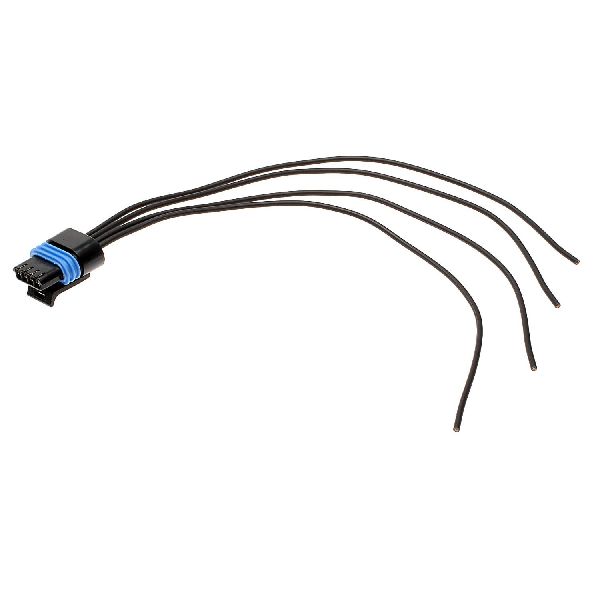
Typical fix: Repair the broken section of wire or replace the pigtail connector if it is damaged. Pigtail connectors are widely available from aftermarket suppliers.
Est. part cost: $10-$30 for a pigtail connector - Faulty Powertrain Control Module (PCM) ⚪ Low Probability
How to confirm: This is diagnosed by exclusion. If the MAP sensor and all wiring between the sensor and the PCM have been tested and are known to be good, but the 5-volt reference is still missing at the PCM's output pin, the PCM's internal 5-volt driver circuit has likely failed. This is a rare failure.
Typical fix: Replace and reprogram the Powertrain Control Module. This often requires professional-level tools to program the VIN and mileage into the replacement unit.
Est. part cost: $150-$400 for a remanufactured unit
Diagnosis Steps
- Verify the Code: Confirm P1296 is present using an OBD-II scanner. Note any other codes like P0107 or P0108.
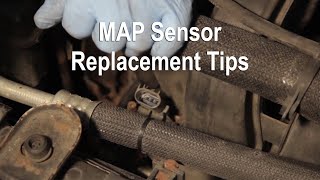
- Locate the MAP Sensor: Find the MAP sensor on the intake manifold, typically under the upper radiator hose. 🎬 Watch this video to help locate your MAP sensor It is a small black plastic sensor held by two Torx screws.
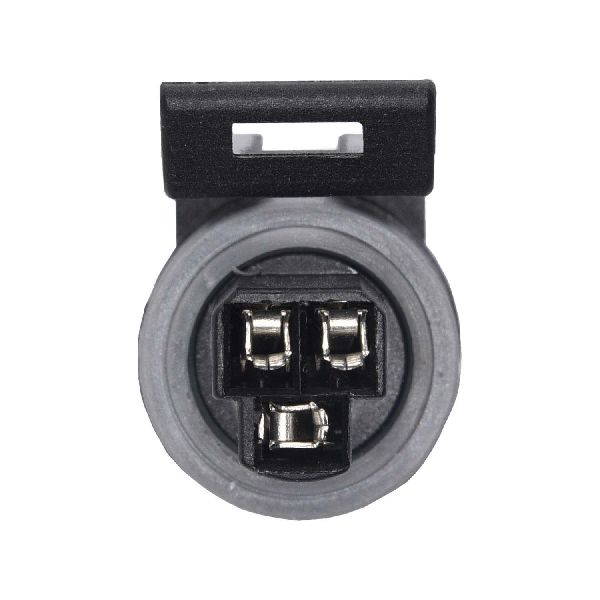
- Inspect the Connector and Wiring: Visually check the 3-wire connector and harness for any obvious signs of damage, such as cracks, corrosion, melted plastic, or loose pins. Pay close attention to the area where the harness is exposed to engine heat.
- Test for Power: Turn the ignition to the 'ON' position (engine off). Unplug the MAP sensor connector. Use a multimeter set to DC Volts. Probe the terminals. One wire (often Violet/White) should have approximately 5 volts.
- Test for Ground: Probe another terminal in the connector (often Black/Light Blue). It should have good continuity to the battery negative terminal or chassis ground (less than 1 ohm).
- Test the Signal Wire: The third wire is the signal return to the PCM. With the connector unplugged, there should be no voltage. When plugged in and back-probed, it should show a voltage that changes with engine vacuum.
- Analyze Findings: If 5 volts are missing, the problem is in the wiring harness or the PCM. If 5 volts and ground are present, the MAP sensor itself is the most likely cause.
- Test the Sensor (Optional): If you have a vacuum pump, you can test the sensor directly. With it plugged in, back-probe the signal wire. The voltage should be around 4.5-4.8V with no vacuum and should decrease smoothly as vacuum is applied.
- Replace the Faulty Component: Based on your findings, replace the MAP sensor or repair the wiring. After replacement, clear the codes and test drive.
Parts You'll Likely Need
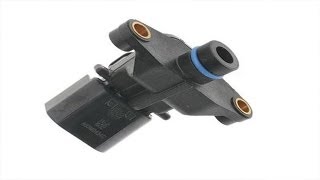
- Manifold Absolute Pressure (MAP) Sensor
(OEM #5269565, 4896003AB (supersedes))— This sensor is the most common failure point that triggers the P1296 code on this vehicle.
Trusted brands: Mopar, Delphi, NTK, Standard Motor Products (SMP), Walker
OEM price range: $80-$120
Aftermarket price range: $40-$90
Related Codes That Often Appear With This One
- P0107 — P0107 (Manifold Absolute Pressure/Barometric Pressure Circuit Low Input) can appear with P1296 as both relate to a fault in the MAP sensor circuit causing an abnormally low voltage reading. P1296 points to the supply voltage, while P0107 points to the signal voltage.
- P0108 — P0108 (Manifold Absolute Pressure/Barometric Pressure Circuit High Input) can also be triggered if the wiring fault is intermittent or shorts to a power source, causing erratic or unexpectedly high signals.
Platform-Specific Known Issues
- Real-World Repair Story: On a Dodge Intrepid with a similar engine family and code P1296, a user on the Car Talk Community forum was advised to test the 5-volt supply at the sensor to confirm if the sensor itself was bad before replacing it.
- Wiring Harness Damage: A user on a Dodge Ram SRT-10 forum (which uses similar Chrysler electronics logic) experienced a P1296 code after their serpentine belt damaged a wiring harness, highlighting how physical damage to wiring can cause this fault.
Mechanic-Grade Diagnostic Values
- MAP Sensor 5V Reference Supply — expected: 4.5 - 5.0 Volts DC. Failure: Voltage below 4.5V or 0V indicates an open/short in the supply circuit or a faulty PCM driver.
- MAP Sensor Signal Voltage (KOEO - Key On, Engine Off) — expected: 4.0 - 5.0 Volts. Failure: Voltage outside this range indicates a faulty sensor or circuit issue.
- MAP Sensor Signal Voltage (Hot Idle) — expected: 1.5 - 2.1 Volts. Failure: Voltage significantly higher or lower suggests a vacuum leak, poor engine vacuum, or a faulty sensor.
- MAP Sensor Signal Voltage vs. Applied Vacuum — expected: 0 in. Hg: 4.7V, 5 in. Hg: 3.9V, 10 in. Hg: 3.0V, 15 in. Hg: 1.1V. Failure: Readings that do not decrease smoothly with vacuum indicate a failed sensor.
- Scan Tool MAP Voltage at Idle (Warmed Up) — expected: 1.2 - 1.6 Volts. Failure: A value that is significantly higher may indicate a vacuum leak or restricted exhaust.
- Scan Tool MAP Voltage at Snap Throttle (WOT) — expected: Rises to approx. 3.8 - 4.2 Volts. Failure: A slow or limited rise in voltage indicates a breathing problem (e.g., clogged catalytic converter) or a slow sensor.
Scan Tool Commands That Help
- Professional Scan Tool (e.g., DRB III or modern equivalent): Live Data Graphing: MAP vs. TPS vs. RPM — Use during a 'snap throttle' test (KOER - Key On, Engine Running). Graphing the MAP sensor voltage should show a rapid increase to near 5V as the throttle opens (TPS voltage increases) and a rapid decrease as it closes. This verifies the sensor is responding quickly and the engine is breathing correctly. A slow response can indicate a clogged catalytic converter or a failing sensor.
Wiring & Ground Locations
- Shared 5V Reference Circuit — Violet/White wire running from the PCM to both the MAP sensor and the Throttle Position Sensor (TPS).. A short circuit in the TPS or its wiring can pull down the entire 5V reference circuit, starving the MAP sensor of power and setting a P1296 code, even if the MAP sensor itself is good.
- Shared Sensor Ground — Black/Light Blue wire running from the PCM to the MAP sensor and approximately 9 other engine sensors.. A poor connection at this shared ground circuit can cause erratic voltage readings for all connected sensors. This can mimic a MAP sensor failure when the root cause is a bad ground connection.
- G125 — Lower front of engine.. This is a primary engine ground. A loose or corroded connection here can cause a variety of electrical issues, including unstable sensor grounds.
- Chassis to Transaxle Ground Strap — A braided strap connecting the chassis to the transaxle housing, often hidden and difficult to see from above.. This is a critical ground path. If missing or corroded, the engine may seek a ground path through other components, leading to electrical noise and sensor errors.
- Common Harness Chafe Point — A spot on the engine wiring harness that is prone to rubbing bare against the chassis or engine components.. A forum post identified a common area where the harness can rub through, potentially shorting the 5V reference or signal wires to ground, which would directly cause a P1296.
Real Owner Repair Stories
- DodgeForum.com user 'DeathKnight' (1996 Dodge Neon Sport Coupe) — Weak starter motor, general electrical troubleshooting.
❌ Tried (didn't work) General troubleshooting for a weak starter.
✅ What actually fixed it The user discovered the main chassis-to-engine ground strap on the rear passenger side was incorrectly attached to an exhaust manifold bolt instead of its proper location. Relocating the ground strap to the correct position resolved the electrical issues.
OEM Part Supersession History
4896002AD, 4896003AA→4896003AB— Standard part revision and consolidation by the manufacturer.
Model Year Variations Within This Range
- 1996-1999: No significant variations have been identified for the MAP sensor circuit, its wiring, or the P1296 diagnostic logic within this model year range. The parts and diagnostic procedures are consistent across the first generation.
Diagnostic Flowchart
Other Known Issues on This Vehicle
Issues unrelated to this code that are worth knowing about as an owner of this generation:
- Head Gasket Failure 🔴 High — Very common on 1995-1998 models, typically between 40,000-60,000 miles. Usually presents as an external oil leak at the rear driver's side of the engine. (Ref: TSB 09-05-98 was issued in Nov 1998 describing an improved Multi-Layer Steel (MLS) head gasket to fix the issue.)
- Peeling Paint 🟡 Low — Common on early models, particularly certain colors like white and red. The clear coat and paint would delaminate and peel off in large sheets.
- Cam Position Sensor O-Ring Leak 🟠 Medium — A common oil leak from the cam position sensor O-ring is often misdiagnosed as a more serious head gasket leak. (Ref: TSB 09-07-98 addresses this specific leak and recommends replacing the O-ring seal.)
- Faulty Ignition Coils 🟠 Medium — Failure can occur around 100,000 km (62,000 miles), leading to misfires, rough idle, and poor fuel economy.
- Melted Headlight Switch Connector 🔴 High — Reported by owners of Neons (including later generations), where the wiring connector for the multi-function/headlight switch overheats and melts, causing loss of headlights.
Used vs. New Parts: Buying Guide for This Vehicle
When a used part is the smart pick: A used OEM Mopar MAP sensor from a reputable salvage yard is often a better choice than a cheap, new aftermarket part. Used wiring pigtails are also a great option if the connector is damaged and the donor vehicle's wiring is in good condition.
Donor-vehicle mileage cap: roughly under 100000 miles for the part to have meaningful remaining life.
What to inspect on the donor part:
- For sensors, check for cracks in the plastic housing and ensure electrical pins are straight and free of corrosion.
- For wiring pigtails, ensure the plastic is not brittle and the wires are flexible with no insulation cracks.
- Ask for the donor vehicle's mileage if possible.
OEM-only on this vehicle (don't cheap out):
- Powertrain Control Module (PCM) - While remanufactured units are common, a used one from a junkyard must be professionally reprogrammed, making OEM or high-quality remanufactured units a safer bet.
Aftermarket brands forum-validated for this vehicle:
- Mopar (OEM)
- NTK
- Delphi
- Standard Motor Products (SMP)
Brands owners have reported issues with on this vehicle:
- Unbranded, 'white-box' parts from online marketplaces should be avoided, as their quality control and sensor accuracy can be highly inconsistent.
Real Owner Stories
Aggregated from forums and TSBs cited above. Mileages and costs reflect what owners reported in those sources.
2001 Dodge
Symptoms: stuttering and stalling
What fixed it: Replacing the bad MAP sensor.
Source hint: DodgeForum.com
Dodge Ram SRT-10
Symptoms: P1296 code appeared after the serpentine belt damaged a wiring harness.
What fixed it: Repairing the damaged section of the wiring harness.
Source hint: Viper Truck Club of America (vtcoa.com)
Related OBD-II Codes
Frequently Asked Questions
Where exactly is the MAP sensor located on my 2.0L Neon?
I tested the MAP sensor connector and I'm not getting 5 volts. Does this mean my PCM is bad?
My 1997 Plymouth Neon has code P1296. Is the diagnosis the same as for the Dodge Neon?
Besides the MAP sensor, what else could cause stuttering and a rough idle on my Neon?
I have an oil leak near the top of the engine. Could this be related to the P1296 code?
What voltage should I see on the MAP sensor wires when testing?
Helpful Videos

We Have This Part in Stock


The information in this article is provided for general reference and educational purposes only. Vehicle specifications, procedures, and part compatibility can vary by production date, trim level, and region. Always consult your vehicle's factory service manual and verify part numbers before purchasing or performing repairs. Safety-critical components such as airbags, seat belts, and braking systems should be installed by a qualified professional.
- Dodge Neon:
- 🧭 Diagnostic Flowchart
- 🎬 Helpful Videos
- 🛍️ Shop This Part
- What's Unique About the 1996-1999 Dodge Neon
- Symptoms You May Notice
- Most Likely Causes
- Diagnosis Steps
- Parts You'll Likely Need
- Related Codes That Often Appear With This One
- Platform-Specific Known Issues
- Mechanic-Grade Diagnostic Values
- Scan Tool Commands That Help
- Wiring & Ground Locations
- Real Owner Repair Stories
- OEM Part Supersession History
- Model Year Variations Within This Range
- Other Known Issues on This Vehicle
- Used vs. New Parts: Buying Guide for This Vehicle
- Real Owner Stories
- 2001 Dodge
- Dodge Ram SRT-10
- Related OBD-II Codes
- Frequently Asked Questions
- 🎟️ Get 5% Off