
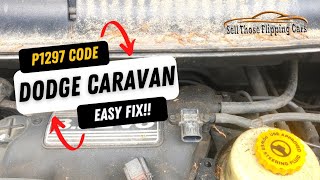
P1297 on 2001-2007 Dodge Caravan: MAP Sensor Fault Causes and Fixes
On a 2001-2007 Dodge Caravan, code P1297 almost always points to a failed Manifold Absolute Pressure (MAP) sensor. The engine's computer isn't seeing the expected pressure change when the engine starts. Replacing the MAP sensor is the most common fix, a DIY-friendly job costing around $30-$70 for an aftermarket part. Before replacing, check the connector and wiring, as a bad connection can also trigger the code.
- P1297 on your Caravan means the MAP sensor's signal isn't changing when the engine starts.
- The most likely culprit is a failed MAP sensor, which is an inexpensive and easy part to replace yourself.
- Before buying a new sensor, always check its electrical connector and nearby wiring for any obvious damage, as this can also cause the code.
- The correct Mopar part number is 56041018AD.
What's Unique About the 2001-2007 Dodge Caravan
For many other manufacturers like VW or Audi, a P1297 code indicates a turbocharger boost leak. On this Dodge platform, however, the code is not related to pressure leaks but is strictly an electrical or sensor fault 🎬 Watch: A quick overview of fixing P1297 on a Caravan related to the MAP sensor circuit. The problem is almost always the sensor itself failing to report pressure changes, or an issue with its direct wiring, rather than a physical vacuum leak elsewhere in the system.
Symptoms You May Notice
- Check Engine Light is on
- Rough or unstable idle
- Engine hesitates or stumbles during acceleration
- Noticeable loss of engine power
- Increased fuel consumption
- Engine may be hard to start or stall unexpectedly
- Engine runs very rich
- Replacing the MAP sensor without first checking for a secure connection and inspecting the wiring harness for damage.
- Assuming there is a vacuum leak in the intake system, which is the cause for a similar code on other vehicle brands but not for P1297 on a Dodge.
Most Likely Causes
- Defective Manifold Absolute Pressure (MAP) Sensor 🔴 High Probability → Shop Manifold Absolute Pressure Sensor The MAP sensor is a critical electronic component that operates in a harsh environment of heat and vibration, leading to eventual failure. It is the most common point of failure for this code, as confirmed by numerous owner experiences.
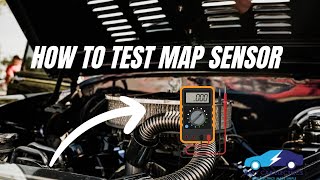
How to confirm: With the key on and engine off, the MAP sensor signal wire should read close to 5 volts (atmospheric pressure). With the engine running at idle, the voltage should drop to between 1 and 2 volts (engine vacuum). If the voltage does not change, the sensor is bad. A visual sign of failure can be a flattened or missing O-ring on the old sensor.
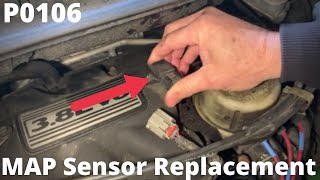
Typical fix: Replace the MAP sensor. It is mounted directly to the intake manifold, secured with two 7mm bolts. 🎬 Watch: How to replace the MAP sensor on this platform Disconnect the battery before replacement. The new sensor may need to be inserted at a slight angle and wiggled into place.
Est. part cost: $30-$70 - Damaged Wiring or Connector for MAP Sensor 🟡 Medium Probability → Shop Manifold Absolute Pressure Sensor Engine vibration and heat can cause wires to chafe, break, or corrode over time. The plastic connector and its red locking tab can also become brittle and fail. A specific known issue on this generation is a wiring harness routed near the exhaust manifold that can melt from heat.
How to confirm: Visually inspect the wiring harness leading to the MAP sensor for any signs of damage, fraying, or melting, paying close attention to the harness section near the power steering reservoir and exhaust. Check the connector for corrosion, bent pins, or a loose fit. Use a multimeter to verify continuity on the signal, ground, and 5V reference wires between the sensor and the PCM.
Typical fix: Repair the damaged section of wire or replace the pigtail connector. Ensure the red locking tab on the connector is fully engaged.
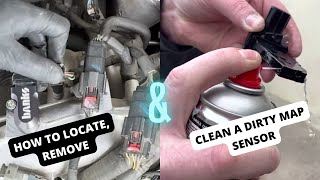
Est. part cost: $10-$25 - Clogged MAP Sensor Port ⚪ Low Probability → Shop Manifold Absolute Pressure Sensor Over time, carbon and oil vapor from the intake manifold can build up and obstruct the small port that the MAP sensor reads, preventing it from seeing changes in manifold pressure. This is more common on higher mileage vehicles.
How to confirm: Remove the MAP sensor and inspect its tip and the port in the intake manifold for any blockage from carbon or sludge. A user on EcoDieselRam.com reported their MAP sensor was 'caked with soot' causing a P1297 code.
Typical fix: Carefully clean the port using a small pick or brush and an appropriate throttle body or intake cleaner. Clean the tip of the sensor if it is dirty. When cleaning around the hole, wipe dust and debris away from the center to avoid pushing it into the intake manifold.
Est. part cost: $5-$15
Rare But Worth Checking
- Failed Powertrain Control Module (PCM): This is very rare. Before condemning the PCM, all other possibilities, including the sensor, wiring, and connections, must be exhaustively tested and ruled out. One owner on a Chrysler forum replaced a PCM for other issues, only to have the P1297 code appear months later due to a separate MAP sensor fault.
Diagnosis Steps
- Retrieve all stored OBD-II codes with a scanner.
- Visually inspect the MAP sensor, which is located on the top of the intake manifold, typically held by two 7mm bolts. Check for physical damage and ensure it is securely mounted.
- Inspect the electrical connector at the MAP sensor. Look for loose or corroded pins, and ensure the connector is fully seated and the red locking tab is engaged.
- Inspect the wiring harness leading to the sensor for any obvious signs of damage, such as chafing, melting, or breaks. Pay special attention to the harness section routed near the exhaust manifold and power steering reservoir.
- With a scan tool that can read live data, observe the MAP sensor reading (usually in volts or kPa) with the key on, engine off. Note the value, which should reflect barometric pressure.
- Start the engine and let it idle. The MAP sensor reading should change significantly to reflect engine vacuum. If the reading is stuck at the same value as when the engine was off, the sensor or its circuit is faulty.
- If you don't have a scan tool, use a multimeter. Disconnect the battery first. Then, with the key on, disconnect the sensor and check for a 5-volt reference and a good ground at the connector.
- Reconnect the sensor and probe the signal wire. With the key on, engine off, you should see a high voltage (approx. 4.5-5.0V). When the engine is started, this voltage should drop to around 1.0-2.0V at idle. If it doesn't change, the sensor has failed.
- If the sensor and wiring test good, remove the sensor and check its port in the intake manifold for any carbon buildup or obstruction that would prevent it from reading manifold pressure.
Parts You'll Likely Need
- Manifold Absolute Pressure (MAP) Sensor
(OEM #56041018AD (supersedes 56041018AC, 56041018AB))— This sensor is the most frequent cause of failure for code P1297 on this vehicle, as it fails to report the change in pressure from engine-off to engine-on states.
Trusted brands: Mopar, Bosch, Delphi, Standard Motor Products (SMP), SKP, NGK/NTK
OEM price range: $60-$90
Aftermarket price range: $30-$70
Platform-Specific Known Issues
- The MAP sensor is located on the top of the plastic intake manifold, making it very accessible. It is held in place by two 7mm bolts.
- When replacing, it is critical to disconnect the negative battery terminal first to avoid any electrical issues.
- The plastic intake manifold can become brittle with age, so care should be taken not to overtighten the MAP sensor bolts.
Mechanic-Grade Diagnostic Values
- MAP Sensor 5V Reference Wire Voltage — expected: 4.5 - 5.0 Volts DC with key on, engine off.. Failure: Voltage significantly below 4.5V or 0V indicates a problem with the PCM or the wiring (circuit K856).
- MAP Sensor Ground Wire Voltage Drop — expected: Less than 0.2 Volts DC (200 mV).. Failure: Voltage higher than 0.2V indicates high resistance in the ground circuit (circuit K900).
- MAP Sensor Signal Wire Voltage (KOEO) — expected: Approximately 4.5 - 5.0 Volts DC, reflecting atmospheric pressure.. Failure: Voltage is low (e.g., 1-2V) with the engine off, or does not match the 5V reference.
- MAP Sensor Signal Wire Voltage (KOER at Idle) — expected: Approximately 1.0 - 2.0 Volts DC, reflecting engine vacuum.. Failure: Voltage remains high (near 5V) and does not drop when the engine starts. This is the direct trigger for code P1297. 🎬 See this step-by-step guide to testing any MAP sensor
- MAP Sensor Signal Wire Voltage (Snap Throttle) — expected: Voltage should quickly rise from idle voltage (1-2V) to above 3.5V as the throttle opens, then return promptly to idle voltage.. Failure: Slow or no response to throttle changes indicates a faulty sensor or clogged port.
Scan Tool Commands That Help
- DRB III or equivalent scan tool: Live Data Monitoring — Use this to observe the 'MAP Sensor' voltage or pressure PID. The key diagnostic is to compare the reading with the Key On, Engine Off (KOEO) to the reading at idle. For P1297, the value will fail to change significantly between these two states.
Wiring & Ground Locations
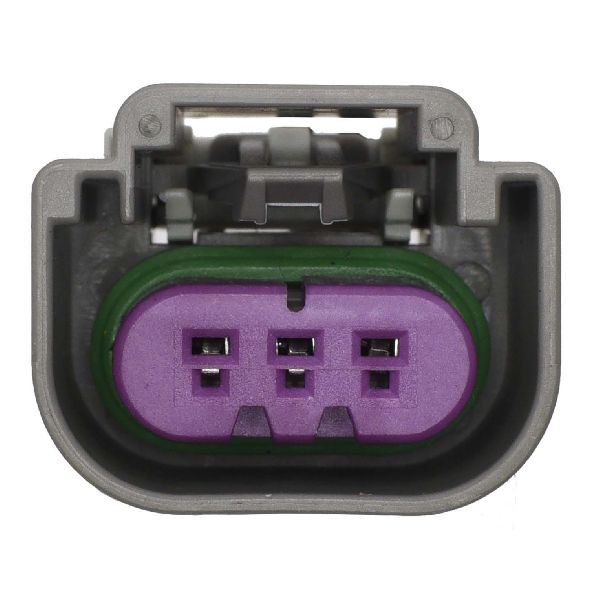
- MAP Sensor Connector Pinout (Typical) — On the MAP sensor itself, located on the top left side of the intake manifold.. Knowing the pin functions is essential for testing. Pin 1: Signal (to PCM), Pin 2: Ground (from PCM), Pin 3: 5V Reference (from PCM). Wire colors are typically Violet/White for 5V supply and Black/Light Blue for ground.
- Service Manual Circuit Designators — These are identifiers used in official wiring diagrams.. (K1) is the MAP Signal circuit, (K856) is the 5 Volt Supply circuit, and (K900) is the Sensor Ground circuit. Using these helps accurately trace wires back to the PCM.
- Engine Wiring Harness Chafe Point — The section of the main engine wiring harness that is routed near the power steering reservoir and close to the hot exhaust manifold.. This is a well-documented failure point on 2001-2007 models. Heat from the exhaust can melt the wire insulation, causing the MAP sensor signal, power, or ground wires to short circuit. This can trigger P1297 and other MAP codes even if the sensor is good.
OEM Part Supersession History
56041018AC→56041018AD— Standard part revision and improvement by the manufacturer.
Heads up: No incompatibility issues have been noted; 56041018AD is the correct service replacement for the entire 2001-2007 generation and beyond.
Model Year Variations Within This Range
- 2001-2007: The causes and fixes for P1297 are consistent across this entire generation (RS). The bolt-on style MAP sensor and the potential for a melted wiring harness are common to all these years. Later generations (2008+) use a different engine (3.6L Pentastar) with a different, twist-lock style MAP sensor.
Diagnostic Flowchart
Other Known Issues on This Vehicle
Issues unrelated to this code that are worth knowing about as an owner of this generation:
- Front Strut Tower Rust 🔴 High — Very common, especially in regions that use road salt. Can become structurally unsafe. (Ref: TSB #23-044-02 was issued, providing a repair kit, but it was not a recall.)
- A604/41TE Automatic Transmission Failure 🔴 High — This transmission is a known weak point, with issues like harsh shifting, shuddering, and outright failure being common. (Ref: Multiple TSBs exist, such as 18-27-94, addressing specific symptoms like EMCC issues.)
- Power Sliding Door and Lock Failures 🟠 Medium — Commonly caused by broken wires in the flexible track leading to the door, or failed lock actuators.
- Oil Leaks from Filter Adapter or Crankshaft Seal 🟡 Low — Leaks from the oil filter adapter gasket and front crankshaft seal are frequently reported.
- Electrical Problems (General) 🟠 Medium — Owners report various electrical gremlins, sometimes related to the TIPM (later models) or general wiring issues.
Used vs. New Parts: Buying Guide for This Vehicle
When a used part is the smart pick: A used MAP sensor from a reputable auto recycler is a reasonable choice for this repair. The part is not a high-wear item and is easy to access and replace, minimizing labor risk if the used part is faulty.
Donor-vehicle mileage cap: roughly under 100000 miles for the part to have meaningful remaining life.
What to inspect on the donor part:
- Check that the plastic housing has no cracks or signs of heat damage.
- Ensure the electrical connector pins are straight, clean, and free of corrosion.
- Verify the rubber O-ring is present, intact, and still pliable, not flattened or brittle.
OEM-only on this vehicle (don't cheap out):
- Powertrain Control Module (PCM)
Aftermarket brands forum-validated for this vehicle:
- Bosch
- Delphi
- Standard Motor Products (SMP)
- NGK/NTK
Real Owner Stories
Aggregated from forums and TSBs cited above. Mileages and costs reflect what owners reported in those sources.
EcoDiesel Ram — ~125000 miles
Symptoms: Check Engine Light on with code P1297. Upon inspection, the MAP sensor was found to be 'caked with soot'.
What fixed it: The issue was resolved by cleaning the soot off the MAP sensor and from its port in the intake manifold.
Source hint: EcoDieselRam.com - 'MAP sensor clogged with soot DTC P1297' (2022)
2003 Chrysler Town & Country
Symptoms: Engine was 'missing, bucking running rich' and was throwing codes P1297 and P0108.
What fixed it: The owner noted that replacing the MAP sensor, coil pack, and plug wires did not initially solve the problem, which highlights the importance of thorough diagnosis of the wiring and sensor circuits.
Source hint: Chrysler Forum - 'missing, bucking running rich' (2012)
Related OBD-II Codes
Frequently Asked Questions
Where is the MAP sensor located on my 2001-2007 Dodge Caravan?
What is the most common reason for a P1297 code on this van?
Is there a specific wiring issue I should look for with code P1297?
How can I test the MAP sensor myself without a professional scan tool?
Are there any special precautions when replacing the MAP sensor?
My van is a Chrysler Town & Country. Does this P1297 information apply?
Besides a bad sensor or wiring, what else could cause this code?
Helpful Videos
We Have This Part in Stock

The information in this article is provided for general reference and educational purposes only. Vehicle specifications, procedures, and part compatibility can vary by production date, trim level, and region. Always consult your vehicle's factory service manual and verify part numbers before purchasing or performing repairs. Safety-critical components such as airbags, seat belts, and braking systems should be installed by a qualified professional.
- Dodge Caravan:
- 🧭 Diagnostic Flowchart
- 🎬 Helpful Videos
- 🛍️ Shop This Part
- What's Unique About the 2001-2007 Dodge Caravan
- Symptoms You May Notice
- Most Likely Causes
- Rare But Worth Checking
- Diagnosis Steps
- Parts You'll Likely Need
- Platform-Specific Known Issues
- Mechanic-Grade Diagnostic Values
- Scan Tool Commands That Help
- Wiring & Ground Locations
- OEM Part Supersession History
- Model Year Variations Within This Range
- Other Known Issues on This Vehicle
- Used vs. New Parts: Buying Guide for This Vehicle
- Real Owner Stories
- EcoDiesel Ram — ~125000 miles
- 2003 Chrysler Town & Country
- Related OBD-II Codes
- Frequently Asked Questions
- 🎟️ Get 5% Off