
P1299 on 2011-2019 Ford Explorer 3.5L: Overheating Causes and Fixes
P1299 means your Explorer's engine is in a protective 'limp mode' due to overheating. It's often a false alarm from a bad Cylinder Head Temperature (CHT) sensor (~$40 part, $500+ labor). However, it can also signal a real and critical overheat, frequently caused by the engine's failure-prone internal water pump, a repair that can cost over $2,000.
- P1299 is a critical code for your Explorer. Do not drive the vehicle, as it is in a protective limp mode.
- Your first step is to determine if the engine is truly overheating or if it's a false alarm. A high temp reading on a cold engine points to a bad CHT sensor.
- A faulty CHT sensor is a common cause, but it is a labor-intensive repair due to its location under the intake manifold.
- If the engine is genuinely overheating, the failure-prone internal water pump is a primary suspect and requires immediate, expert attention to avoid engine destruction.
- Check for coolant leaks on the passenger side of the engine and look for milky engine oil as signs of water pump failure.
What's Unique About the 2011-2019 Ford Explorer
On the 5th generation Explorer with the 3.5L V6, this code presents a distinct fork in the diagnostic road. The most common cause of a *false* P1299 is a failed CHT sensor, but it's buried under the intake manifold, turning a simple part swap into a labor-intensive job. Conversely, the most common cause of a *real* P1299 overheat is the failure of the internal, timing-chain-driven water pump. This is a well-documented and extremely expensive failure point for this engine, where a coolant leak can destroy the engine if not caught immediately.
Symptoms You May Notice
- Check engine light is on
- Temperature gauge suddenly goes to HOT, sometimes immediately after a cold start
- Drastic loss of engine power (limp mode)
- Engine running rough or shaking
- Message on the dashboard indicating engine overheat or reduced power
- Steam coming from the engine bay (in cases of actual overheating)
- Low coolant level warning
- Heater stops working or blows cold air
- Replacing the thermostat or radiator when the actual problem is a faulty CHT sensor sending a false signal on a cold engine.
- Assuming a simple hose leak when the coolant is actually coming from the internal water pump's weep hole.
- Replacing the PCM when the issue is a simple sensor or wiring fault.
Most Likely Causes
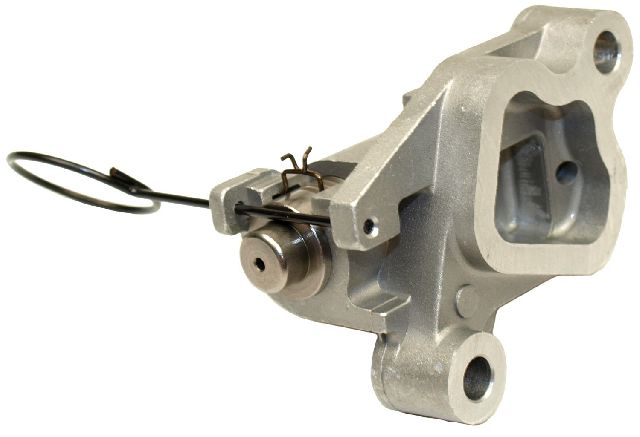
- Faulty Cylinder Head Temperature (CHT) Sensor 🔴 High Probability → Shop Engine Cylinder Head The sensor itself can fail, sending an incorrect high-temperature reading to the PCM even when the engine is cold. The sensor is located in a high-heat area in the engine valley, which can contribute to its failure over time.
How to confirm: With the engine completely cold (left overnight), use a scan tool to view the live data for the CHT sensor. If it reads an abnormally high temperature (e.g., 250°F) immediately upon startup, the sensor is bad. This is the most definitive test for a false overheat signal.
Typical fix: Replace the CHT sensor and the intake manifold gaskets. This requires removing the upper and lower intake manifolds to gain access to the sensor located in the engine's valley.
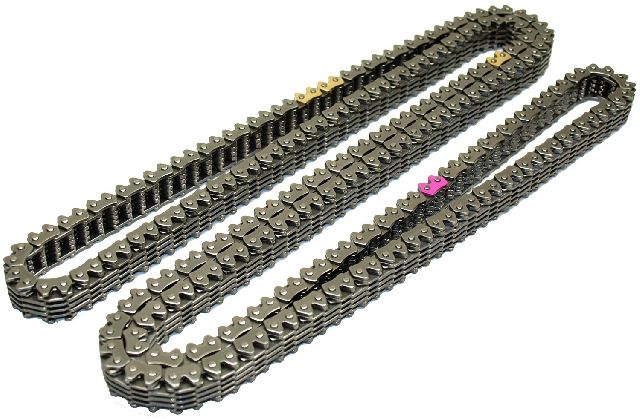
Est. part cost: $25-$50 - Internal Water Pump Failure 🟡 Medium Probability → Shop Engine Water Pump The 3.5L V6 engine family uses an internal water pump driven by the timing chain. The seals on this pump are a known common failure point, causing coolant to leak either externally through a dedicated weep hole or, more dangerously, internally into the engine oil. Failures are common between 90,000 and 150,000 miles.
How to confirm: Check for coolant dripping from a weep hole on the passenger side of the engine, often running down near the alternator or A/C compressor. This is the primary external indicator. Also, check the engine oil for a milky, frothy appearance, which indicates coolant contamination and a severe internal leak. A cooling system pressure test can also confirm a leak.
Typical fix: This is a major repair requiring the replacement of the water pump, timing chain, tensioners, and guides. It is a very labor-intensive job, often requiring 10+ hours of labor.
Est. part cost: $490-$525 - Stuck-Closed Thermostat ⚪ Low Probability → Shop Integrated Thermostat Housing Assembly Thermostats can fail over time, getting stuck in the closed position and preventing coolant from circulating to the radiator. This is a general wear-and-tear item not specific to this platform.
How to confirm: After the engine has warmed up, feel the upper and lower radiator hoses. If the thermostat is working, both should be hot. If the upper hose is hot and the lower one is cool, the thermostat is likely stuck closed.
Typical fix: Replace the thermostat and housing assembly.
Est. part cost: $40-$80 - Low Coolant Level / External Leak ⚪ Low Probability Hoses, the radiator, or the coolant reservoir can develop leaks over time, leading to an insufficient amount of coolant to cool the engine. This is not a platform-specific vulnerability but a common issue on all aging vehicles.
How to confirm: Visually inspect the engine bay for signs of coolant leaks (often bright orange or yellow residue). Check the coolant level in the reservoir. A cooling system pressure test can pinpoint the location of external leaks.
Typical fix: Repair the source of the leak and refill the cooling system.
Est. part cost: $20-$300 depending on the source of the leak
Rare But Worth Checking
- Cooling Fan Assembly Failure: If overheating only occurs at low speeds or in stop-and-go traffic, the cooling fans may not be activating. Listen for the fans to turn on when the A/C is running or as the engine gets hot.
- Blown Head Gasket: While less common than a water pump failure, a blown head gasket can cause overheating and P1299. This is often accompanied by white smoke from the exhaust and coolant in the oil.
- Wiring Harness Issue: Damaged wiring or a poor connection to the CHT sensor can cause a false reading, mimicking a failed sensor. The harness runs through the hot engine valley and can become brittle.
Diagnosis Steps
- CRITICAL FIRST STEP: Determine if the engine is actually overheating. If the code and high-temperature warning appear immediately on a cold start, proceed to step 2. If the engine is physically hot (steam, boiling sounds, etc.), proceed to step 3.
- False Overheat Diagnosis: Using a scan tool, check the live data from the Cylinder Head Temperature (CHT) sensor on a cold engine. If it reads a high temperature (e.g., above 200°F) when the engine is cold, the CHT sensor or its wiring is faulty. The sensor is the most likely culprit.
- Genuine Overheat Diagnosis: If the engine is confirmed to be hot, start with the basics. Check the coolant level in the reservoir. If it is low, look for visible leaks.
- Inspect the internal water pump weep hole area. This is on the passenger side of the engine, near the front, often behind the alternator and A/C compressor. Any coolant residue here is a strong indicator of a failing internal water pump.
- Check for coolant in the engine oil by examining the oil dipstick and oil fill cap for a milky, 'milkshake'-like consistency. This indicates a severe internal water pump seal failure.
- Verify cooling fan operation. Turn on the A/C, which should command the fans to run. If they don't, diagnose the fan circuit.
- If no external leaks are found and the water pump shows no signs of leaking, test the thermostat to ensure it is opening correctly by checking radiator hose temperatures.
- If the cause is still not found, perform a cooling system pressure test to find hidden leaks and a block test (chemical test) to check for a blown head gasket.
Parts You'll Likely Need
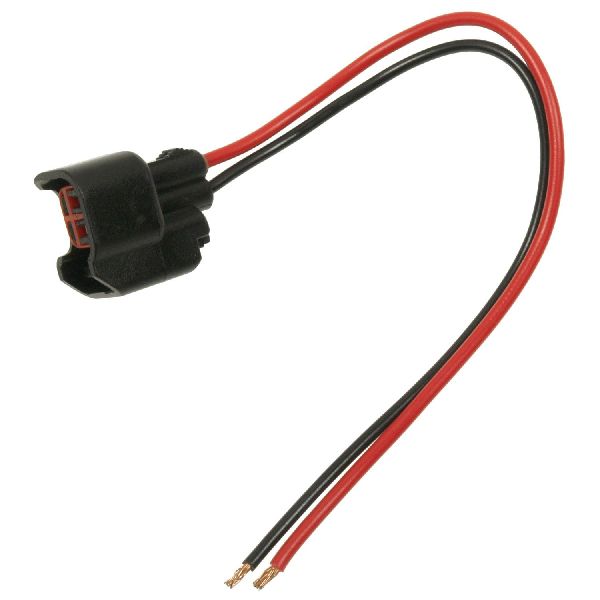
- Cylinder Head Temperature (CHT) Sensor
(OEM #9L8Z-6G004-E (supersedes 9L8Z-6G004-B))— This is the most common cause of a false P1299 code, where the sensor fails and sends an incorrect signal.
Trusted brands: Motorcraft, Standard Motor Products
OEM price range: $30-$50
Aftermarket price range: $20-$40 - Water Pump and Timing Chain Kit
(OEM #BR3Z-8501-T (Water Pump Kit))— This is the most common cause of a genuine, severe overheating event on this engine. The pump is internal and driven by the timing chain, so all related components are typically replaced at the same time.
Trusted brands: Motorcraft, Cloyes
OEM price range: $450-$600
Aftermarket price range: $300-$500
Related Codes That Often Appear With This One
- P0217 — This is a generic code for 'Engine Coolant Overtemperature Condition' and often appears alongside P1299 during a genuine overheating event.
- P1285 — This code means 'Cylinder Head Overtemperature Condition', which is a precursor to P1299. P1285 indicates the temperature limit was breached, and P1299 indicates the protective action (limp mode) has been taken.
Platform-Specific Known Issues
- The internal, timing-chain-driven water pump is a significant and expensive failure point. Owners should be vigilant for coolant leaks near the passenger side of the engine.
- The CHT sensor's location under the intake manifold makes a relatively inexpensive part a costly repair due to high labor requirements.
Mechanic-Grade Diagnostic Values
- CHT Sensor Reference Voltage (VREF) — expected: ~5.0 Volts at the sensor connector with the sensor unplugged and Key On, Engine Off (KOEO).. Failure: Significantly lower or no voltage suggests a wiring or PCM issue.
- CHT vs. IAT/Ambient Temp Comparison (Cold Soak) — expected: On a stone-cold engine (e.g., sat overnight), the CHT, Intake Air Temp (IAT), and Ambient Air Temp sensor readings on a scan tool should all be within a few degrees of each other.. Failure: If the CHT reading is drastically different (e.g., reads 250°F on a 70°F day), the sensor or its circuit is faulty.
- CHT Sensor Resistance — expected: The sensor is a thermistor; its resistance decreases as temperature increases. Specific values are found in service manuals, but a typical example is high resistance (e.g., ~30,000-60,000 ohms) when cold and low resistance (e.g., ~2,000-4,000 ohms) at operating temperature.. Failure: Infinite resistance (open circuit) or near-zero resistance (short circuit) indicates a failed sensor.
Scan Tool Commands That Help
- Ford IDS (or equivalent professional scanner): Datalogger - CHT PID — This is the primary method for diagnosing a false overheat. Use it on a cold engine to see if the CHT sensor is reporting an irrational, high temperature immediately at startup.
- Ford IDS (or equivalent professional scanner): Clear Continuous DTCs / Clear Permanent DTCs — After a genuine, severe overheating event has been repaired (e.g., blown hose, new water pump), the P1299 code may be stored as a 'permanent' DTC that cannot be cleared with a basic OBD-II reader. A professional tool is required to clear this type of stored code.
Wiring & Ground Locations
- CHT Sensor Connector — Deep in the valley of the V6 engine, underneath the upper and lower intake manifolds.. This is the primary connection to test for reference voltage and signal. The wiring harness runs through this hot engine valley and can become brittle or damaged, causing a short or open that mimics a failed sensor.
- Water Pump Weep Hole — On the passenger side of the engine block, it appears as a small hole above what looks like a freeze plug, located behind the alternator and A/C compressor.. This is not an electrical component, but its location is critical for diagnosis. Any coolant stain or dripping from this specific hole is the definitive external sign of an internal water pump failure, a primary cause of a *real* overheat.
- Main Engine Ground Strap — Typically located on the transmission case below the brake booster or on the rear of the driver's side cylinder head, connecting to the firewall.. A poor engine ground can cause a variety of electrical issues and erratic sensor readings. While not a primary cause, ensuring this connection is clean and tight is a crucial step in diagnosing any electrical fault, including a false sensor reading.
Real Owner Repair Stories
- Reddit user on r/Ford (2015 Ford Police Interceptor Utility (Explorer)) — Sudden overheat warning, smoke from hood and tailpipe while driving uphill.
❌ Tried (didn't work) Using a basic OBD-II reader to clear the code after the repair.
✅ What actually fixed it The initial cause was a large radiator hose that had disconnected. After reconnecting it and refilling with coolant, the P1299 code remained as a 'permanent' fault. The final resolution required a professional scan tool (like Forscan or Ford's IDS) to clear the permanent DTC, as a basic reader could not remove it. - Ford F150 Forum user (similar 3.5L engine) (2016 F-150 2.7L EcoBoost (demonstrates sensor failure mode)) — Rough idle, smell of unburnt fuel, then sudden overheat alert, check engine light, high-speed fan, and limp mode after 2 miles of driving.
❌ Tried (didn't work) Initial scan tool suggestion pointed to the thermostat.
✅ What actually fixed it The issue was a faulty Cylinder Head Temperature (CHT) sensor. The owner confirmed the engine was not actually hot. Replacing the CHT sensor (Part No. 9L8Z-6G004-F) and clearing the code with the scan tool resolved all symptoms. The owner noted the idle became much smoother after replacement, suggesting the sensor was failing prior to the catastrophic event.
OEM Part Supersession History
9L8Z-6G004-B→9L8Z-6G004-E— Standard part revision by the manufacturer for potential improvements in durability or performance.
Heads up: The new part number (9L8Z-6G004-E) is the correct replacement for the original. There are no known incompatibility issues.
Model Year Variations Within This Range
- 2011-2016 vs 2017-2019: The first-generation 3.5L EcoBoost was used from 2011-2016. A second-generation version with significant updates (including a dual fuel-injection system and revised turbochargers) was introduced for the 2017 model year F-150 and subsequently in other vehicles. While the fundamental causes of P1299 (CHT sensor, water pump) remain the same, specific part numbers for components other than the CHT sensor may differ between these engine generations.
Diagnostic Flowchart
Other Known Issues on This Vehicle
Issues unrelated to this code that are worth knowing about as an owner of this generation:
- Power Transfer Unit (PTU) Failure 🔴 High — Common after 60,000 miles, exacerbated by lack of service. Ford designated the fluid as 'lifetime,' which is a primary cause of failure. (Ref: TSB 19-2017 (for fluid leaks))
- Intake Valve Carbon Buildup 🟠 Medium — A known issue on first-generation (2011-2016) 3.5L EcoBoost direct-injection engines, leading to rough idle, misfires, and power loss over time.
- Timing Chain Stretch 🔴 High — Primarily affects earlier 2011-2015 models, often presenting as a rattling noise on cold startup. Can lead to timing-related codes and poor performance. (Ref: TSB 15-0131)
- Electronic Throttle Body (ETB) Malfunction 🟠 Medium — Common across many Ford models of this era, causing the vehicle to suddenly enter 'limp mode' with a wrench light. (Ref: Customer Satisfaction Program 13N03, TSB 16-0139)
Used vs. New Parts: Buying Guide for This Vehicle
When a used part is the smart pick: For this specific code, using used parts is generally not recommended. The primary culprits are a low-cost sensor that is difficult to access or a major internal engine component (water pump). The labor cost far outweighs the savings on a used sensor, and a used water pump is never advisable.
Donor-vehicle mileage cap: roughly under 50000 miles for the part to have meaningful remaining life.
What to inspect on the donor part:
- For any cooling system component (radiator, hoses, reservoir), inspect for cracks, brittleness, or signs of residue from stop-leak additives.
- Verify the donor vehicle was not in a front-end collision, which could have caused unseen damage to the radiator or cooling fans.
OEM-only on this vehicle (don't cheap out):
- Cylinder Head Temperature (CHT) Sensor: Due to the high labor cost for replacement, using a new OEM Motorcraft sensor is strongly advised to ensure longevity and prevent a repeat repair.
- Water Pump & Timing Components: This is a critical, internal engine repair. Only new, high-quality OEM or reputable aftermarket kits (e.g., Cloyes) should be used. A used water pump is a significant gamble that could lead to catastrophic engine failure.
Aftermarket brands forum-validated for this vehicle:
- Cloyes (for Timing Chain and Water Pump kits)
Brands owners have reported issues with on this vehicle:
- Unknown, no-name brand CHT sensors or water pump kits from online marketplaces. The risk of premature failure is too high given the labor involved.
Real Owner Stories
Aggregated from forums and TSBs cited above. Mileages and costs reflect what owners reported in those sources.
2011-2019 Ford Explorer 3.5L V6
Symptoms: Temperature gauge maxing out on a cold start, leading to a P1299 code and limp mode.
What fixed it: Replacement of the Cylinder Head Temperature (CHT) sensor.
Source hint: Ford-Trucks.com forum thread 'False overheat indication code P1299'
2011-2019 Ford Explorer 3.5L EcoBoost V6
Symptoms: P1299 code and limp mode; owner had to differentiate between a bad CHT sensor and a real overheat condition.
What fixed it: Diagnostic process identified a faulty CHT sensor rather than a mechanical cooling failure.
Source hint: ExplorerForum.com thread 'P1299 code and limp mode: a tale of two sensors'
2011-2019 Ford Explorer 3.5L V6 — ~120000 miles
Symptoms: Coolant leaks near the passenger side of the engine and concerns about internal failure into the oil.
What fixed it: Major repair involving replacement of the internal water pump, timing chain, tensioners, and guides.
Source hint: Reddit r/FordExplorer 'How common is the water pump issue in the 3.5'
Related OBD-II Codes
Frequently Asked Questions
Why is my 2011-2019 Ford Explorer 3.5L showing a HOT temperature gauge immediately after a cold start?
Is the water pump failure on the 3.5L EcoBoost V6 a common issue?
Where is the CHT sensor located on my Explorer, and why is the labor so expensive?
What should I look for if I suspect an internal water pump leak on my 3.5L V6?
Are there any TSBs related to the 3.5L engine's common issues?
Does the P1299 code always mean my engine is physically overheating?
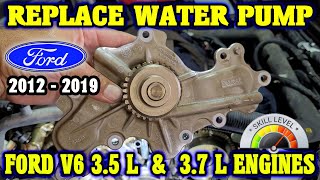
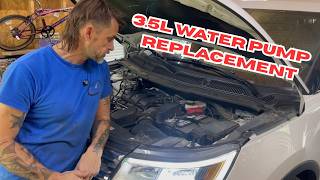
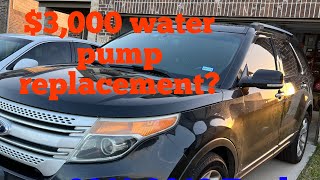
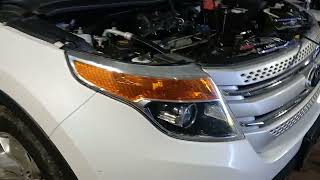
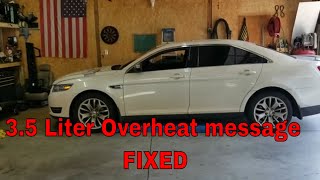
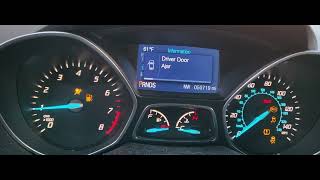
Helpful Videos


We Have This Part in Stock


The information in this article is provided for general reference and educational purposes only. Vehicle specifications, procedures, and part compatibility can vary by production date, trim level, and region. Always consult your vehicle's factory service manual and verify part numbers before purchasing or performing repairs. Safety-critical components such as airbags, seat belts, and braking systems should be installed by a qualified professional.
- Ford Explorer:
- 🧭 Diagnostic Flowchart
- 🎬 Helpful Videos
- 🛍️ Shop This Part
- What's Unique About the 2011-2019 Ford Explorer
- Symptoms You May Notice
- Most Likely Causes
- Rare But Worth Checking
- Diagnosis Steps
- Parts You'll Likely Need
- Related Codes That Often Appear With This One
- Platform-Specific Known Issues
- Mechanic-Grade Diagnostic Values
- Scan Tool Commands That Help
- Wiring & Ground Locations
- Real Owner Repair Stories
- OEM Part Supersession History
- Model Year Variations Within This Range
- Other Known Issues on This Vehicle
- Used vs. New Parts: Buying Guide for This Vehicle
- Real Owner Stories
- 2011-2019 Ford Explorer 3.5L V6
- 2011-2019 Ford Explorer 3.5L EcoBoost V6
- 2011-2019 Ford Explorer 3.5L V6 — ~120000 miles
- Related OBD-II Codes
- Frequently Asked Questions
- 🎟️ Get 5% Off