
P1326 on 2010-2013 Audi A3 2.0L TDI: Knock Control Limit Reached Fixes
This code means the knock control system for cylinder #2 has reached its limit. The most common cause is a failing Knock Sensor 2 (G66) or its wiring. The sensor is difficult to access, making replacement a labor-intensive job.
- P1326 on your Audi A3 TDI is NOT a catastrophic engine failure code; it is a specific fault with the knock sensor system for cylinder 2.
- The most likely causes are a faulty knock sensor, loose sensor mounting bolt, or a wiring issue.
- Do not confuse this with the P1326 code on Hyundai/Kia vehicles, which has a completely different and more severe meaning.
- Due to the difficult-to-access location of the sensor, this is a labor-intensive repair best left to a professional unless you are a very experienced DIYer.
What's Unique About the 2010-2013 Audi A3
While P1326 on some other car brands indicates a catastrophic engine failure is imminent, on an Audi TDI it is a much more specific and less severe fault. It points directly to the knock control system for cylinder 2, not a general engine failure. On these common-rail diesel engines (engine codes CBEA, CJAA), the knock sensor's primary job is to help the ECM control combustion noise ('diesel clatter') and optimize injection timing for efficiency and emissions. This fault means the adjustment range for cylinder 2 has been maxed out, usually due to a problem with the sensor itself, its mounting, or its wiring.
Symptoms You May Notice
- Check Engine Light (CEL) is on
- Reduced engine power and acceleration
- Noticeable increase in engine noise or 'diesel clatter'
- Slightly rougher idle
- Decreased fuel economy
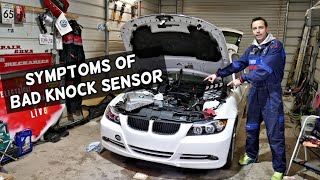
- Engine may hesitate or stumble during acceleration. 🎬 See a breakdown of common bad knock sensor symptoms
- Replacing fuel injectors or other fuel system components, assuming the knock is related to a fuel delivery problem.
- Confusing the code with the P1326 definition for Hyundai/Kia and assuming the engine has major internal damage.
- Replacing the wrong knock sensor. This engine has two, one for cylinders 1 & 2 (G61) and one for cylinders 3 & 4 (G66). P1326 is for cylinder 2, which is monitored by sensor G61. Double-check sensor location and wiring diagrams before replacement.
Most Likely Causes
- Faulty Knock Sensor 1 (G61) 🔴 High Probability → Shop Ignition Knock (Detonation) Sensor Sensors are subject to failure from extreme heat cycles and constant engine vibration over the life of the vehicle. While generally reliable, it is the most likely component to fail within this specific fault system.
How to confirm: After checking wiring, the most definitive test is to swap the sensor with a known good unit. A technician can also use an oscilloscope or a scan tool like VCDS to check the sensor's output signal for a proper waveform. A simple resistance check is often inconclusive, and some service documents state an electrical test of the sensor itself is not possible.
Typical fix: Replace the Knock Sensor 1 (G61). Given the labor involved, it's wise to use a high-quality OEM or equivalent part.
Est. part cost: $50-$100 - Loose or Improperly Torqued Knock Sensor 🟡 Medium Probability → Shop Ignition Knock (Detonation) Sensor The sensor's mounting torque is critical for accurate readings. Vibrations or previous incorrect servicing can lead to it becoming loose. The sensor functions like a microphone, and improper contact with the engine block distorts the 'sound' it picks up.
How to confirm: Visually inspect the sensor and attempt to tighten it to the manufacturer's specification, which is typically 20 Nm (15 ft-lbs). If the bolt is loose, this is a likely cause. The mounting surface must also be perfectly clean.
Typical fix: Clean the mounting surface on the engine block and the sensor, then tighten the sensor bolt to the correct torque specification (20 Nm). Do not over-tighten, as this can also cause incorrect readings or damage the sensor.
Est. part cost: $0 - Wiring Harness or Connector Issue 🟡 Medium Probability The engine bay environment is harsh. Wires can become brittle, chafed, or damaged by oil or coolant, and connectors can corrode or loosen over time. The harness for the knock sensor is often routed near hot or vibrating components.
How to confirm: Visually inspect the wiring harness leading to Knock Sensor 1 for any signs of damage, melting, or oil saturation. Check the connector for corrosion or loose pins. Use a multimeter to test for continuity and shorts between the sensor connector and the ECM. A common failure point is the wiring right at the connector due to vibration.
Typical fix: Repair the damaged section of wiring or replace the connector pigtail. Service literature recommends using only gold-plated contacts when repairing terminals in the knock sensor connectors.
Est. part cost: $15-$50
Rare But Worth Checking
- Faulty Engine Control Module (ECM): → Shop Engine Control Module (ECM) This is extremely rare. The ECM should only be considered after all other possibilities, including the sensor, wiring, and mechanical condition of the engine, have been thoroughly ruled out.
- Internal Engine Mechanical Problem: While the code usually points to the sensor system, a true internal engine issue (e.g., a problem with a piston, rod, or bearing on cylinder 2) could theoretically produce an abnormal noise that the knock control system cannot compensate for. This is highly unlikely to be the cause without other significant symptoms like loud metallic noises, severe performance loss, or other engine-related fault codes. A cylinder leakage test could help rule this out.
Diagnosis Steps
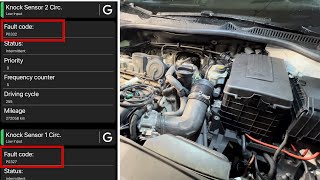
- Scan the vehicle for codes and confirm that P1326 is the primary or only code present. Note any other knock control codes (P1325, P1327, P1328).
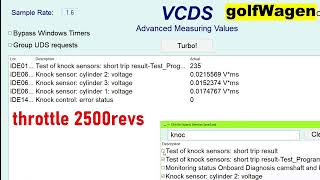
- Using a scan tool like VCDS, access Measuring Blocks for the Engine Control Module. Groups 020-029 relate to knock control. Observe the individual knock sensor voltage readings for each cylinder 🎬 Watch: How to check knock sensor voltage using VCDS at idle and while revving the engine. Note if cylinder 2 shows a consistently higher voltage than the others.
- Visually inspect the area around the engine block for any obvious issues like damaged wiring, oil leaks soaking harnesses, or loose connectors.
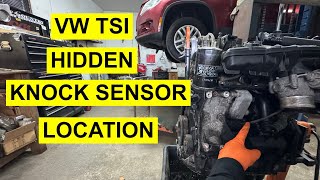
- Locate the correct knock sensor. On the 2.0L TDI (CBEA/CJAA), there are two sensors on the front of the engine block. G61 (Knock Sensor 1) covers cylinders 1 and 2. G66 (Knock Sensor 2) covers cylinders 3 and 4. P1326 points to an issue in the circuit for cylinder 2, which is G61. Access is difficult and may require removing the oil filter and cooler.
- Inspect the wiring and connector going to the sensor. Check for breaks, chafing, or corrosion. Ensure the connector is securely plugged in. Check relevant ground points, such as G13 or G15 on the cylinder head.
- If accessible, check the mounting torque of the knock sensor bolt. Verify it is tightened to 20 Nm (15 ft-lbs). If it's loose, clean the mounting boss, re-torque the sensor, clear the code, and test drive.
- If the wiring and torque are good, test the sensor's circuit. Disconnect the sensor and the ECM, and check for continuity on the signal and ground wires. Check for shorts to power or ground.
- If the circuit tests good, the sensor itself is the primary suspect. Replace the appropriate Knock Sensor (G61 for P1326).
- Clear the fault code and perform a test drive, monitoring live data for the knock control system to ensure the code does not return.
Parts You'll Likely Need
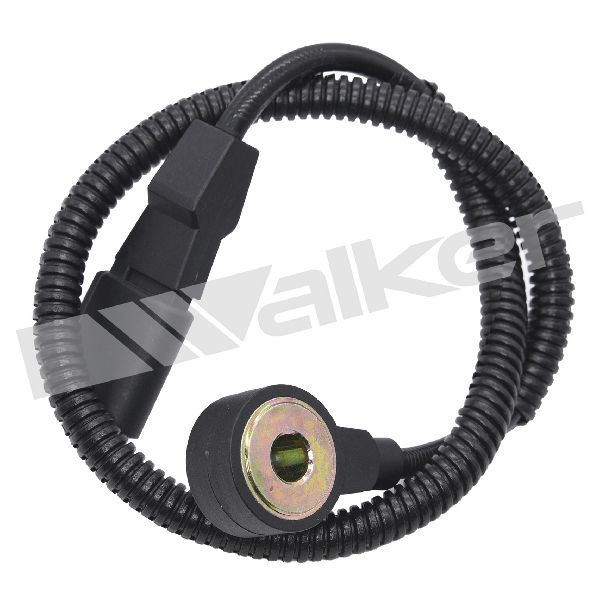
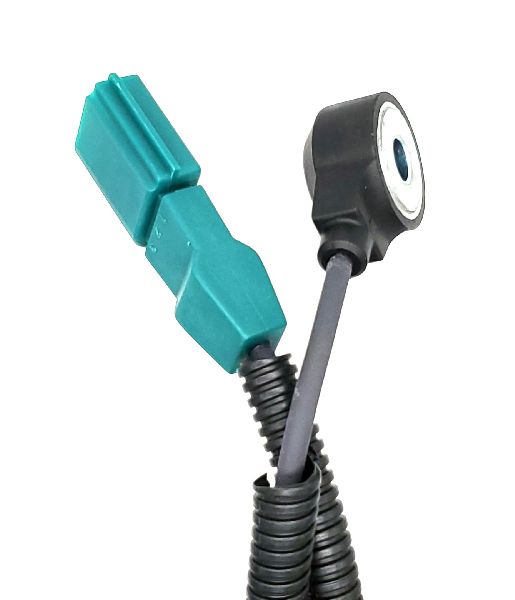
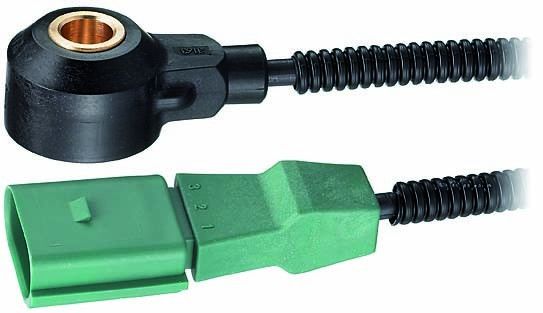
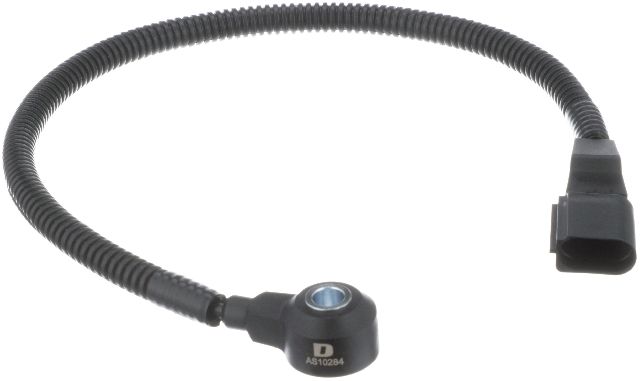
- Knock Sensor 1 (G61)
(OEM #03L905377)— This is the sensor that directly provides the reading for the system that has faulted on cylinder 2. It is the most common point of failure for this code. Note: Some parts catalogs may list this as G66, but for cylinder 2, G61 is typically correct. 🎬 Watch: Finding the hidden knock sensor on VW engines The part number 03L905377 is often used for both locations, but the harness length may differ.
Trusted brands: Bosch, NTK, Delphi, Genuine VW/Audi
OEM price range: $80-$120
Aftermarket price range: $40-$70
Related Codes That Often Appear With This One
- P1325 (Cylinder 1 Knock Control Limit Attained)
- P1327 (Cylinder 3 Knock Control Limit Attained)
- P1328 (Cylinder 4 Knock Control Limit Attained)
Platform-Specific Known Issues
- The location of the knock sensors on the 2.0L TDI engine block makes them difficult to access. Replacement often requires removing other components like the oil filter housing and oil cooler, significantly increasing labor time and cost compared to engines where the sensors are more exposed.
- There is conflicting information in some service documents regarding which sensor (G61 or G66) monitors which cylinders. It is critical to verify with a wiring diagram for the specific vehicle VIN. However, for the CJAA/CBEA engine, G61 is generally for Cyl 1-2 and G66 is for Cyl 3-4.
Mechanic-Grade Diagnostic Values
- Knock Sensor Mounting Bolt Torque — expected: 20 Nm (15 ft-lbs).. Failure: An under-torqued or over-torqued sensor will not 'listen' to the engine block correctly, leading to false signals.
- Knock Sensor Voltage (Live Data) — expected: Using VCDS Measuring Blocks 020-029, voltages for all cylinders should be low and relatively even at idle. Specific voltage values are not defined, but behavior is key.. Failure: A faulty sensor or circuit will often cause the voltage for its assigned cylinder(s) to be consistently higher than the others, especially when revving the engine.
Scan Tool Commands That Help
- VCDS (VAG-COM): Engine -> Measuring Blocks -> Groups 020-029 — This is the primary diagnostic step after reading the fault code. It allows the technician to view live voltage data from the knock sensors for each individual cylinder. By comparing the values, one can determine if the fault is related to a consistently high reading on cylinder 2, pointing towards the G61 sensor or its circuit.
Wiring & Ground Locations
- G13 / G15 — On or near the cylinder head. G15 is specified as 'on top of cylinder head' in diagrams for the related CJAA engine.. A poor ground connection for the engine block or the sensor's shielded wiring can introduce electrical noise, which the ECM may misinterpret as engine knock, potentially triggering a P1326 code.
- Knock Sensor Connector Terminals — At the connector for the knock sensor (G61) itself.. Official workshop manuals specify using only gold-plated contacts when making repairs to the terminals in the knock sensor connectors to ensure a clean, corrosion-free signal.
- G1 / G12 — At the left rear of the engine compartment.. These are primary chassis/engine ground points. While less direct than the cylinder head ground, a compromised main ground can cause floating voltages and unpredictable issues across multiple sensor circuits, including the knock sensors.
Real Owner Repair Stories
- Audi-Sport.net forum user (Audi S3 (with similar 2-sensor knock control system)) — No fault codes, but a tuning shop noticed excessive knock sensor voltages on cylinders 1 & 2 when revving the engine, preventing a remap.
❌ Tried (didn't work) Replacing spark plugs., Swapping coil packs between cylinders., Inspecting coil pack wiring harness., Re-torquing the knock sensors to the correct 20 Nm specification.
✅ What actually fixed it The user swapped the electrical connectors between the two knock sensors (G61 and G66). The high voltage readings immediately moved to cylinders 3 & 4. This definitively proved that the sensor for cylinders 1 & 2 (G61) was faulty, not the engine itself. The final fix was replacing the knock sensors.
Model Year Variations Within This Range
- 2010-2013: The 2.0L TDI engine in this range can be code CBEA or CJAA. The primary difference is the CBEA engine includes an oil pump driven by a balance shaft module, while the CJAA uses a simpler oil pump design without this module. This difference is a known topic for general reliability (the balance shaft module can fail) but it does not affect the location, function, or diagnosis of the knock sensors for fault P1326.
Diagnostic Flowchart
Other Known Issues on This Vehicle
Issues unrelated to this code that are worth knowing about as an owner of this generation:
- High-Pressure Fuel Pump (HPFP) Failure 🔴 High — A well-documented, though not universal, failure point for the Bosch CP4.1 pump used on CJAA engines. Failure can occur at any mileage and without warning. (Ref: No specific recall, but subject to class-action lawsuits and extensive discussion. Covered under the TDI Extended Emissions Warranty in some cases.)
- Diesel Particulate Filter (DPF) Clogging 🟠 Medium — Common for vehicles used primarily for short trips, which prevents the DPF from reaching temperatures needed for passive regeneration. Can occur from 60,000 miles onward. (Ref: TSB 01-18-13 addresses a related P0401 code caused by a cracked DPF clogging the EGR filter.)
- Intercooler Icing 🟠 Medium — Occurs in cold, humid climates. Moisture from the crankcase ventilation and EGR systems condenses and freezes in the intercooler, potentially causing a no-start or, in worst cases, engine hydrolock. (Ref: VW/Audi released a TSB and a 'winterization kit' to mitigate the issue, which involves installing a new charge air pipe and foam element.)
- Timing Belt Replacement Interval 🔴 High — This is a critical maintenance item, not a failure. The belt, tensioner, and rollers require replacement at a scheduled interval (typically around 120,000-130,000 miles, but check specific maintenance schedule). Failure to replace it will result in catastrophic engine damage.
- Dual-Mass Flywheel (DMF) Failure 🟠 Medium — More common on manual transmission models. The DMF can wear out, causing a rattling or chattering noise at idle that goes away when the clutch is depressed. Failure can start to appear from 80,000 miles onward.
Used vs. New Parts: Buying Guide for This Vehicle
When a used part is the smart pick: Using a used knock sensor is not recommended. The part is an electronic component subject to failure from thousands of heat cycles and constant vibration. The labor cost to access and replace the sensor is high, making it financially risky to install a used part with an unknown lifespan.
Donor-vehicle mileage cap: roughly under 40000 miles for the part to have meaningful remaining life.
What to inspect on the donor part:
- Ensure the donor vehicle was not in a front-end collision.
- Inspect the plastic housing of the sensor for any cracks or signs of heat damage.
- Check the electrical connector for corrosion or broken locking tabs.
- Verify the part number (03L905377) matches exactly.
OEM-only on this vehicle (don't cheap out):
- While not strictly 'OEM-only', using a low-quality, unbranded sensor is a significant risk due to the high labor cost for replacement. Stick to OEM or top-tier aftermarket brands.
Aftermarket brands forum-validated for this vehicle:
- Bosch
- NTK
- Delphi
Brands owners have reported issues with on this vehicle:
- Generic, unbranded 'white-box' parts from online marketplaces.
Real Owner Stories
Aggregated from forums and TSBs cited above. Mileages and costs reflect what owners reported in those sources.
2003 VW Golf 2.0L
Symptoms: The engine was dying and the scan log showed P1326 appearing alongside other knock control codes and misfire codes.
What fixed it: The codes appeared as part of a group during a significant engine running issue; diagnostic steps involve checking the knock control voltage in Measuring Blocks 020-029.
Source hint: Ross-Tech Forums - 2003 VW GOLF 2.0L engine dying
Related OBD-II Codes
Frequently Asked Questions
Which knock sensor is responsible for the P1326 code on my 2.0L TDI engine?
Is there a specific torque specification for the knock sensor on an Audi A3 TDI?
Why is the labor for replacing the G61 sensor on my A3 so expensive?
Can I use standard wiring to repair the knock sensor connector?
Does the P1326 code relate to the High-Pressure Fuel Pump (HPFP) issues common on this model?
Could my DPF clogging cause a knock sensor code?
Helpful Videos
We Have This Part in Stock


The information in this article is provided for general reference and educational purposes only. Vehicle specifications, procedures, and part compatibility can vary by production date, trim level, and region. Always consult your vehicle's factory service manual and verify part numbers before purchasing or performing repairs. Safety-critical components such as airbags, seat belts, and braking systems should be installed by a qualified professional.
- Audi A3:
- 🧭 Diagnostic Flowchart
- 🎬 Helpful Videos
- 🛍️ Shop This Part
- What's Unique About the 2010-2013 Audi A3
- Symptoms You May Notice
- Most Likely Causes
- Rare But Worth Checking
- Diagnosis Steps
- Parts You'll Likely Need
- Related Codes That Often Appear With This One
- Platform-Specific Known Issues
- Mechanic-Grade Diagnostic Values
- Scan Tool Commands That Help
- Wiring & Ground Locations
- Real Owner Repair Stories
- Model Year Variations Within This Range
- Other Known Issues on This Vehicle
- Used vs. New Parts: Buying Guide for This Vehicle
- Real Owner Stories
- 2003 VW Golf 2.0L
- Related OBD-II Codes
- Frequently Asked Questions
- 🎟️ Get 5% Off