
P1326 on 2000-2009 Volvo S60: Knock Sensor Circuit Causes and Fixes
On a 2000-2009 Volvo S60, code P1326 indicates a fault with the knock sensor circuit. The most common causes are a faulty knock sensor or a loose/damaged wiring connector. The sensor is located under the intake manifold, making replacement a moderately difficult DIY job. Unlike on Hyundai/Kia vehicles where this code signals potential catastrophic engine failure, on a Volvo it is a standard ignition system fault.
- P1326 on a Volvo S60 means there is a fault in the knock sensor circuit, NOT a catastrophic engine failure like on some other car brands.
- The most likely causes are a bad knock sensor or a simple loose/damaged connector.
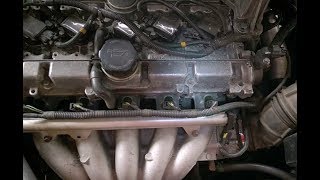
- The main challenge of this repair is access, as the sensor(s) are located under the intake manifold. This makes the job labor-intensive.
- Non-turbo 2.4L engines usually have one sensor, while turbo 2.5L engines have two. Verify your specific car's configuration before buying parts.
- If you remove the intake manifold for the repair, you must replace the gasket (OEM part #9458534).
- The correct torque for the knock sensor bolt is critical: 20 Nm (15 ft-lbs).
What's Unique About the 2000-2009 Volvo S60
It is critical to distinguish the Volvo P1326 code from the same code on Hyundai and Kia vehicles. 🎬 Watch: How P1326 differs on Hyundai and Kia engines On those brands, P1326 is a severe code related to a specific Knock Sensor Detection System (KSDS) designed to detect catastrophic connecting rod bearing failure, often resulting in engine replacement. On the Volvo S60, the code is a more conventional ignition system fault related to the sensor or its wiring and does not indicate imminent, widespread engine failure.
Symptoms You May Notice
- Check Engine Light is on
- Audible engine pinging or knocking, especially during acceleration or under load
- Reduced engine power and poor acceleration
- Decreased fuel economy
- Hesitation during acceleration
- Replacing spark plugs or ignition coils. While these can cause performance issues and even actual engine knock, they typically won't trigger a P1326 circuit fault code directly. The issue is with the sensor circuit that *detects* combustion problems, not necessarily the cause of them.
Most Likely Causes
- Faulty Knock Sensor(s) 🔴 High Probability → Shop Ignition Knock (Detonation) Sensor Sensors can fail internally over time due to constant heat cycles and engine vibration. The piezoelectric crystal inside degrades, leading to an incorrect signal, no signal, or a signal outside the expected voltage range.
How to confirm: After confirming wiring is intact, test the sensor's internal resistance with a multimeter. However, due to the difficult access requiring intake manifold removal, it's often more practical to replace the sensor(s) as a maintenance item once access is gained.
Typical fix: Replace the faulty knock sensor(s). It is highly recommended to replace all sensors at the same time on turbo models (or any model with two sensors). Also replace the single-use mounting bolts if new ones are supplied.
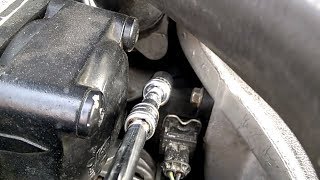
Est. part cost: $50-$150 per sensor - Loose, Corroded, or Damaged Wiring/Connector 🟡 Medium Probability The sensor connector, especially on non-turbo models where it's a single plug on top of the sensor, can become loose or brittle over time and slip off, causing an open circuit. The wiring harness is routed in a hot area of the engine bay, making it susceptible to heat damage, chafing, or corrosion on the pins.
How to confirm: On non-turbo models, it may be possible to reach under the intake manifold to feel if the connector has come loose and push it back on. For a full inspection, visually check the knock sensor harness and connector(s) for a secure fit, corrosion, or any signs of chafing or melting. Wiggle the connector while monitoring sensor data (if possible) to see if the signal drops out.
Typical fix: Secure the connector, clean the contacts with electrical cleaner, or repair/replace the damaged section of the wiring harness pigtail.
Est. part cost: $5-$50 for connector repair parts - Incorrect Sensor Installation ⚪ Low Probability This typically only occurs after a previous repair. The sensor is highly sensitive to its mounting torque. Over-tightening can pre-load the piezoelectric crystal, reducing its sensitivity, while under-tightening can prevent it from detecting knock correctly.
How to confirm: Verify the sensor is torqued correctly to the engine block. The common torque spec for these P2 platform engines is 20 Nm (about 15 ft-lbs). The sensor must be flush against a clean, flat block surface with no debris or rust present.
Typical fix: Clean the mounting surface on the engine block and re-torque the sensor to the manufacturer's specification. Some sources also note a specific rotational angle for the sensor, though torque and a clean surface are most critical.
Est. part cost: $0
Rare But Worth Checking
- Engine Control Module (ECM) Fault: → Shop Engine Control Module (ECM)
Diagnosis Steps
- Scan the vehicle for the P1326 code and any other stored codes.
- Research your specific engine (2.4L non-turbo or 2.5L turbo) to determine if you have one or two knock sensors.
- Locate the knock sensor(s) on the engine block, underneath the intake manifold.
- For non-turbo models, attempt to reach under the intake manifold and firmly press on the sensor's electrical connector. It is a common failure for this connector to become loose. Clear codes and re-test.
- If the code returns, a full inspection is needed. This requires removing the intake manifold for access, which is a significant job involving disconnecting the fuel rail, throttle body, and various hoses and connectors.
- Once the intake manifold is removed, thoroughly inspect the wiring harness and connector(s) leading to the sensor(s). Check for loose connections, corrosion on pins, or physical damage like melted or chafed wires.
- If the wiring appears intact, test the sensor itself. You can test the sensor's resistance with a multimeter, though specifications can be hard to find. A more practical test is to check for a signal while lightly tapping the engine block near the sensor (with the engine off, ignition on).
- Verify the sensor mounting bolt is torqued correctly to 20 Nm (15 ft-lbs) and that the mounting surface is perfectly clean.
- Due to the significant labor involved in accessing the sensors, it is standard practice to replace them once the intake manifold is off, especially on higher mileage vehicles. Always replace the intake manifold gasket at the same time.
- If new sensors and confirmed-good wiring do not resolve the code, the final diagnostic step would be to investigate the ECM, though this is extremely rare.
Parts You'll Likely Need
- Knock Sensor
(OEM #9432570, 31441011, 30750883)— This is the most common part to fail in the circuit, triggering the P1326 code. Turbo models use two.
Trusted brands: Bosch (OEM supplier), Genuine Volvo, Delphi, NTY
OEM price range: $120-$180
Aftermarket price range: $45-$100 - Intake Manifold Gasket
(OEM #9458534)— Required if the intake manifold is removed to access the knock sensor(s). It is a single-use gasket and must be replaced to prevent vacuum leaks.
Trusted brands: Victor Reinz, Elring (OEM supplier), Mahle, Genuine Volvo
OEM price range: $20-$40
Aftermarket price range: $7-$25
Platform-Specific Known Issues
- Loose Connector on Non-Turbo Models: On the 2.4L non-turbo engine, the single knock sensor has a connector directly on the sensor body. This connector's locking tab can become brittle and fail, allowing the plug to vibrate loose and cause an intermittent or total loss of signal. In some cases, the fix is as simple as reaching under the intake and firmly pushing the connector back into place.
- Dual vs. Single Sensor Confusion: While the general rule is one sensor for non-turbo and two for turbo, some early non-turbo models (approx. 2001-2002) reportedly used the dual-sensor setup from the turbo engines. It is crucial to visually verify or check with a dealer using your VIN before ordering parts.
Mechanic-Grade Diagnostic Values
- Knock Sensor Reference Voltage — expected: ~2.5 Volts DC. Failure: 0 volts or significantly different voltage indicates a circuit or sensor issue.
- Knock Sensor Ground Wire Voltage — expected: 0 Volts DC. Failure: Any voltage reading indicates a grounding problem.
- Knock Sensor Internal Resistance — expected: Infinite resistance (Open circuit). Failure: A low resistance or continuity reading. Note: This is for a piezoelectric sensor and differs from other sensor types.
- Knock Sensor Mounting Bolt Torque — expected: 20 Nm (approx. 15 ft-lbs). Failure: Over-tightening can make the sensor too sensitive; under-tightening can prevent it from detecting knock.
Hidden / Shadow Codes Worth Checking
- Confirmed vs. Unconfirmed DTC: Volvo's VIDA diagnostic system does not use shadow codes in the same way as other brands, but it does differentiate faults based on duration and frequency. A fault must be detected for a long enough duration and a sufficient number of times to be considered 'confirmed'. An 'unconfirmed' code indicates a transient or intermittent fault that has been detected but has not yet met the threshold to be considered a permanent, reliable fault. (see via Volvo VIDA/DiCE diagnostic tool)
Scan Tool Commands That Help
- Volvo VIDA: Erase All DTCs — After a repair is completed, this function is used to clear all stored fault codes. The specific path is Diagnostics -> Fault Trace -> Delivery tab -> scroll down to 'Erase all'. This is the manufacturer-specific method for ensuring all module faults are cleared.
- Generic OBD-II / Volvo VIDA: ECU/ECM Reset — After replacing a major component like a knock sensor, a full ECU reset can be performed to clear adaptive memory. This can be done by disconnecting the battery for several minutes or by using a scan tool function. After the reset, the vehicle should be driven for at least 10 miles to allow the ECM to relearn.
Wiring & Ground Locations
- 7/24 and 7/25 — Component designators for the front and rear knock sensors in Volvo wiring diagrams.. Helps to correctly identify the sensors and their associated wiring when reading official Volvo schematics.
- Knock Sensor Pinout (Typical Bosch) — At the sensor's electrical connector.. For a typical 2-wire shielded sensor, one pin is the signal (to ECU), one is sensor ground, and a third shield wire is grounded at the ECU to prevent interference. On a V70, the signal wire is brown and the ground is black. Knowing the pinout is essential for testing the circuit correctly.
- Harness Routing — The knock sensor harness runs from the engine block (under the intake) to the main engine harness.. The knock sensor harness must be routed away from the fuel injector harness. Electrical noise from the injectors firing can be picked up by the sensitive knock sensor circuit, leading to false signals and incorrect codes.
Real Owner Repair Stories
- Turbobricks Forum user 'OVERDRIVE' (Volvo 240 with LH2.4 fuel injection (similar Bosch system)) — Check Engine Light with code 1-4-3 (EZK code for 'knock sensor signal missing or faulty').
❌ Tried (didn't work) Replacing the original knock sensor with a new Bosch sensor from a reputable vendor. The code immediately returned.
✅ What actually fixed it The first new Bosch sensor was faulty out of the box. Replacing it with a second new Bosch sensor resolved the code. This highlights that even new parts from OEM suppliers can be defective. - Volvo Forums user 'momsmechanic' (1994 Volvo 850 Turbo (P80 platform, predecessor to P2)) — Intermittent knock sensor signal absent codes.
❌ Tried (didn't work) Initially, just clearing the code.
✅ What actually fixed it The user was able to reach the connector without removing the intake manifold. They unplugged and re-plugged the connector about a dozen times to clean the contacts, then applied dielectric grease. This fixed the intermittent connection issue and the code did not return.
Model Year Variations Within This Range
- Entire range, but varies: The knock sensor harness design may have changed during the S60's production run. Some earlier P2 platform cars had a connector directly on the sensor body under the intake manifold, while later models may have a hardwired sensor with a pigtail leading to a more accessible connector away from the engine block.
Diagnostic Flowchart
Other Known Issues on This Vehicle
Issues unrelated to this code that are worth knowing about as an owner of this generation:
- Electronic Throttle Module (ETM) Failure 🔴 High — Extremely common on 1999-2002 models. Less common on 2003+ models with a revised contactless sensor, but still a known failure point. Volvo extended the warranty to 10 years/200,000 miles. (Ref: Volvo ETM Extended Warranty Program (now expired).)
- Clogged PCV / Crankcase Breather System 🔴 High — Very common across all P2 5-cylinder engines, especially turbo models. Typically requires service every 80k-100k miles. A clogged system builds crankcase pressure, blowing out engine seals (like cam or main seals).
- AWD Angle Gear Collar Sleeve Failure 🟠 Medium — A common failure point on all P2 AWD models. The splines on the sleeve connecting the transmission to the angle gear strip, resulting in a loss of AWD. The failure is often 'silent' with no noise, just non-functional rear wheels. (Ref: No official recall, but a well-documented issue. An improved sleeve was introduced around 2006.)
- Automatic Transmission (AW55-50/51SN) Valve Body Failure / Harsh Shifting 🟠 Medium — Common on models equipped with this Aisin-Warner 5-speed automatic. Symptoms include harsh downshifts when warm, shift flares, or a 'bang' when coming to a stop. Often caused by worn solenoids in the valve body. (Ref: Software updates were issued to address a 'Stop-Neutral' feature that contributed to wear, but the underlying issue is often mechanical.)
- Front Upper Strut Mount / Spring Seat Failure 🟡 Low — The rubber in the upper spring seats degrades and cracks over time, leading to a clunking or popping noise from the front suspension when going over bumps. A very common age-related maintenance item.
Used vs. New Parts: Buying Guide for This Vehicle
When a used part is the smart pick: A used wiring harness pigtail from a junkyard is a cost-effective choice if only the connector or a small section of wire is damaged. The sensor itself should always be purchased new.
Donor-vehicle mileage cap: roughly under 50000 miles for the part to have meaningful remaining life.
What to inspect on the donor part:
- For a wiring harness, ensure the plastic connector is not brittle or cracked.
- Check that the connector's locking tab is intact and functional.
- Inspect the wire insulation for any signs of melting, chafing, or brittleness.
- Look at the metal pins inside the connector for any green or white corrosion.
OEM-only on this vehicle (don't cheap out):
- Knock Sensor: Due to the sensor's sensitivity and the high labor cost to replace it, using an OEM (Genuine Volvo) or OEM supplier (Bosch) part is strongly recommended. Aftermarket sensors may have different piezoelectric properties, leading to incorrect readings or premature failure.
Aftermarket brands forum-validated for this vehicle:
- Bosch (OEM supplier for this part)
Brands owners have reported issues with on this vehicle:
- Unbranded or generic 'white-box' sensors. While no specific brand is universally cited as bad, the risk of a faulty part and repeating the 3-4 hour installation job makes saving a small amount of money on a cheap sensor a poor decision.
Real Owner Stories
Aggregated from forums and TSBs cited above. Mileages and costs reflect what owners reported in those sources.
2001-2009 Volvo S60 2.5L Turbo
Symptoms: The owner experienced a P1326 code and attempted to repair the wiring harness without success.
What fixed it: Replacing both knock sensors resolved the code.
Source hint: Volvo Forums: A user with a turbo model confirmed that replacing both knock sensors resolved their P1326 code after attempts to fix wiring were unsuccessful
2001-2009 Volvo S60 2.4L Non-Turbo
Symptoms: The knock sensor signal was lost intermittently due to the connector vibrating loose.
What fixed it: Reaching under the intake manifold and firmly pushing the electrical connector back into place on the sensor body.
Source hint: Vehicle-specific issues: Loose Connector on Non-Turbo Models
2000-2009 Volvo S60 I5
Symptoms: Engine power loss and audible pinging during acceleration.
What fixed it: Replacing the knock sensors and the intake manifold gasket.
Source hint: Swedespeed Forums: Threads corroborate the symptoms of power loss and pinging, with owners sharing success stories after replacing sensors.
Related OBD-II Codes
Frequently Asked Questions
I have a 2.4L non-turbo S60; is it true I can fix P1326 without taking the engine apart?
How many knock sensors should I order for my 2.5L Turbo S60?
What is the correct torque specification for the knock sensor on the Volvo I5 engine?
Are there any other major services I should perform while fixing the knock sensors?
Could my 2002 non-turbo S60 have two knock sensors instead of one?
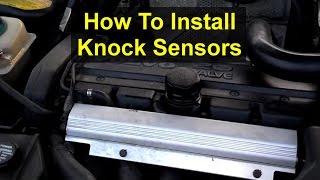
Helpful Videos
We Have This Part in Stock

The information in this article is provided for general reference and educational purposes only. Vehicle specifications, procedures, and part compatibility can vary by production date, trim level, and region. Always consult your vehicle's factory service manual and verify part numbers before purchasing or performing repairs. Safety-critical components such as airbags, seat belts, and braking systems should be installed by a qualified professional.
- Volvo S60:
- 🧭 Diagnostic Flowchart
- 🎬 Helpful Videos
- 🛍️ Shop This Part
- What's Unique About the 2000-2009 Volvo S60
- Symptoms You May Notice
- Most Likely Causes
- Rare But Worth Checking
- Diagnosis Steps
- Parts You'll Likely Need
- Platform-Specific Known Issues
- Mechanic-Grade Diagnostic Values
- Hidden / Shadow Codes Worth Checking
- Scan Tool Commands That Help
- Wiring & Ground Locations
- Real Owner Repair Stories
- Model Year Variations Within This Range
- Other Known Issues on This Vehicle
- Used vs. New Parts: Buying Guide for This Vehicle
- Real Owner Stories
- 2001-2009 Volvo S60 2.5L Turbo
- 2001-2009 Volvo S60 2.4L Non-Turbo
- 2000-2009 Volvo S60 I5
- Related OBD-II Codes
- Frequently Asked Questions
- 🎟️ Get 5% Off