
P1456 on 2001-2003 Acura CL: EVAP Leak Causes and Fixes
For a 2001-2003 Acura CL, code P1456 almost always means the gas cap is loose or its seal has failed. A new OEM gas cap is the most likely fix and is inexpensive. If that doesn't work, the next most common culprit is a rusted fuel filler neck.
- P1456 specifically points to a leak on the fuel tank side of the EVAP system.
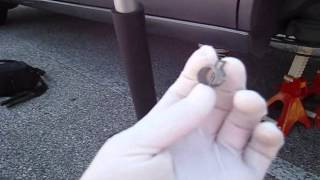
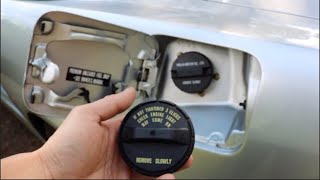
- Always check the gas cap first. Ensure it's tight (3+ clicks) and the rubber seal isn't cracked.
- Replacing the gas cap with an OEM part (e.g., 17670-S84-A01) is an inexpensive and highly effective first step. Avoid aftermarket caps.
- If a new OEM cap doesn't fix it, inspect the fuel filler neck for rust on the sealing surface.
- Do not confuse P1456 with P1457, which points to a leak on the charcoal canister side of the system.
- If simple fixes fail, a smoke test is the next logical step to find the leak.
What's Unique About the 2001-2003 Acura CL
On Honda and Acura vehicles of this era, the EVAP system diagnostics are split into two distinct codes: P1456 for the fuel tank side and P1457 for the canister side. This specificity is helpful, as P1456 strongly points towards the gas cap or fuel filler neck, making diagnosis much more straightforward than on vehicles with more generic EVAP leak codes. Owners on forums like AcuraZine frequently report solving this code simply by replacing the gas cap with a genuine OEM part.
Diagnostic Flowchart
Tap your situation to follow the diagnostic path that matches what you're seeing on this vehicle.
Symptoms You May Notice
- Check Engine Light is on
- Possible faint fuel smell, especially after refueling.
- Replacing the EVAP Purge Solenoid (usually under the hood)
- Replacing the EVAP Canister Vent Solenoid (this would typically cause a P1457 code on Honda/Acura products)
Most Likely Causes
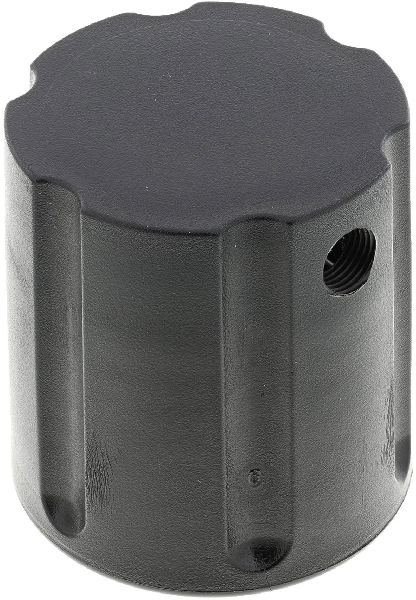
- Loose or Faulty Gas Cap 🔴 High Probability → Shop Fuel Tank Cap The rubber O-ring on the gas cap can dry out, crack, and fail over time, preventing a proper seal. It's also common for the cap to simply not be tightened enough after refueling (at least 3 clicks are recommended). 🎬 Watch: A quick demonstration of checking and tightening your gas cap. Aftermarket gas caps are a frequent source of repeat codes, as their seals may not meet OEM specifications.
How to confirm: First, ensure the cap is tightened until it clicks multiple times. If the code returns, visually inspect the rubber seal on the cap for cracks, stiffness, or deformities. TSB B99-040 specifically advises ensuring the cap is a genuine Acura part.
Typical fix: Replace the gas cap with a new OEM part. After replacement, the code may take a few drive cycles to clear on its own.
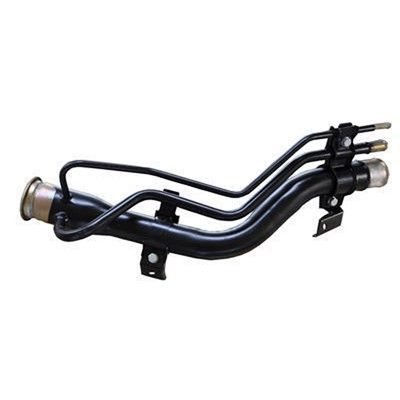
Est. part cost: $25-$40 - Rusted or Damaged Fuel Filler Neck 🟡 Medium Probability → Shop Fuel Filler Neck The metal tube leading to the gas tank can rust, especially in regions that use road salt. The rust creates a pitted, uneven surface where the gas cap O-ring sits, preventing it from sealing correctly even with a new cap.
How to confirm: Remove the gas cap and visually and physically inspect the lip and inside of the filler neck for rust, corrosion, or pitting. Run your finger along the sealing surface; it should be perfectly smooth.
Typical fix: The filler neck must be replaced. This is a more involved repair but can be done by a DIYer. The part is shared with the 1999-2003 Acura TL and 1998-2002 Honda Accord.
Est. part cost: $50-$150 - Faulty EVAP Two-Way Valve ⚪ Low Probability
How to confirm: This requires testing the valve's operation with a handheld vacuum pump and a bi-directional scan tool, as outlined in Acura TSB B99-040. The valve is located near the EVAP canister, which is under the car near the driver's side rear wheel. A handheld vacuum pump can be attached to test if the valve holds vacuum.
Typical fix: Replace the two-way valve.
Est. part cost: $40-$80 - Faulty Fuel Tank Pressure (FTP) Sensor ⚪ Low Probability → Shop Fuel Tank
How to confirm: The sensor's voltage needs to be tested to see if it's responding correctly to pressure changes. According to TSB B99-040, with the fuel cap removed and ignition on, the sensor voltage on an HDS scanner should be between 2.45V and 2.55V. A reading outside this range when open to atmosphere indicates a faulty sensor or wiring issue. With the sensor connector disconnected and ignition on, you should measure 5 volts between the reference wire and the ground wire.
Typical fix: Replace the FTP sensor, which is usually located on top of the fuel tank as part of the fuel pump assembly.
Est. part cost: $50-$100
Rare But Worth Checking
- Cracked or Leaking Fuel Tank: → Shop Fuel Tank While uncommon, physical damage or corrosion can cause the fuel tank itself to leak, triggering a P1456. This is a serious issue that would likely be accompanied by a strong fuel smell and visible leaks. A YouTube repair on a 2002 TL-S shows a full tank replacement to solve P1456 caused by a rusted tank. 🎬 Watch this walkthrough of a full fuel tank replacement.
- Disconnected EVAP Hose: A video documenting a P1456 fix on a 2003 Acura TL found a disconnected EVAP hose near the canister assembly under the driver's side rear of the car. The hose had simply popped off its fitting. 🎬 See how to find and reconnect a loose EVAP hose. Reconnecting it and adding a clamp resolved the issue.
Diagnosis Steps
- Retrieve the code P1456 with an OBD-II scanner.
- Check the gas cap. Remove it, inspect the seal for cracks or damage, and reinstall it, making sure to tighten it until it clicks at least three times.
- Clear the code with the scanner. The EVAP monitor only runs under specific conditions (fuel level 1/4-3/4, steady driving, etc.), so it may take several days of normal driving for the system to re-test and confirm the fix.
- If the light returns, replace the gas cap with a new OEM part. Many forum users warn that aftermarket caps may not seal properly and can cause the code to return.
- If the code persists with a new OEM cap, thoroughly inspect the fuel filler neck for any rust or corrosion on the sealing surface.
- If the filler neck and cap are in good condition, a professional smoke test is the next logical step. A technician will inject non-toxic smoke into the EVAP system to visually identify the source of the leak (e.g., a cracked hose, faulty valve, or leaking tank seam).
- Based on the smoke test results, replace the identified faulty component. This could be the two-way valve, FTP sensor, or even the fuel tank itself.
Parts You'll Likely Need
- Fuel Filler Cap
(OEM #17670-S84-A01)— This is the most frequent cause of a P1456 code. The seal degrades over time, preventing the system from holding pressure. This part may be superseded by newer numbers like 17670-SDA-A01 or 17670-T3W-A01.
Trusted brands: Acura (OEM)
OEM price range: $25-$40
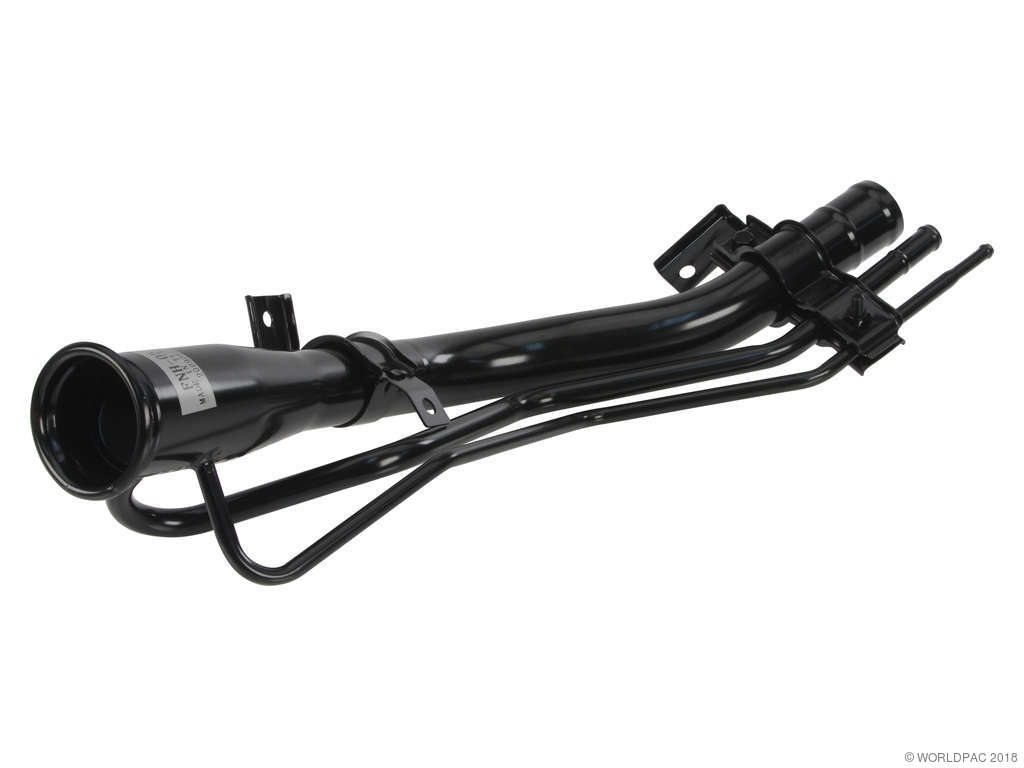
Aftermarket price range: $10-$25 - Fuel Filler Neck
(OEM #17660-S84-A01)— If a new gas cap doesn't solve the leak, rust on the filler neck's sealing surface is the next most likely cause, especially in areas with road salt.
Trusted brands: Acura (OEM), Dorman 577-963, Spectra Premium FN502, TRQ FNA69730
OEM price range: $100-$150
Aftermarket price range: $50-$100
Technical Service Bulletins (TSBs) & Recalls
- B99-040: "SERVICE BULLETIN - THIS BULLETIN UPDATES THE TROUBLESHOOTING PROCEDURES FOR DTC P1456 (EVAP CONTROL SYSTEM LEAKAGE [FUEL TANK SYSTEM]) AND DTC P1457 (EVAP CONTROL SYSTEM LEAKAGE[EVAP CANISTER SYSTEM])." This TSB provides detailed, step-by-step diagnostic procedures for technicians using a Honda Diagnostic System (HDS) tool, including specific voltage checks for the FTP sensor.
Platform-Specific Known Issues
- Aftermarket Gas Cap Failures: → Shop Fuel Tank Cap A recurring theme in Acura forums is the failure of aftermarket gas caps to resolve a P1456 code. In a thread on AcuraZine, a user with a '99 TL had the code return with an AutoZone cap because the seal came out of its groove. Using an OEM cap is strongly recommended.
- Fuel Level Dependency: Owners often report the Check Engine Light appears a day or two after filling the gas tank completely. This is because the EVAP leak test is designed to run only when the fuel level is between 15% and 85% (approximately 1/4 to 3/4 of a tank), so the fault isn't detected until some fuel has been used.
Mechanic-Grade Diagnostic Values
- Fuel Tank Pressure (FTP) Sensor Voltage at atmospheric pressure — expected: 2.45V - 2.55V. Failure: A voltage reading outside this range with the gas cap off indicates a faulty sensor or wiring issue.
- FTP Sensor reference voltage at connector — expected: ~5V DC. Failure: No voltage indicates an open in the 5V reference wire from the ECM.
- FTP Sensor voltage under light vacuum — expected: Voltage should drop towards ~1.5V. Failure: If voltage does not change when vacuum is applied, the sensor is faulty.
- EVAP Purge Control Solenoid resistance — expected: 15 - 30 Ohms (general range). Failure: A reading far outside this range indicates a damaged internal circuit.
Scan Tool Commands That Help
- Honda HDS (or PGM Tester): INSPECTION > EVAP TEST > SINGLE SOLENOIDS — To individually activate the EVAP Bypass Solenoid (BPS), Canister Vent Shut (CVS) valve, and Purge Control Solenoid (PCS) to listen for an audible click, confirming electrical operation.
- Honda HDS (or PGM Tester): INSPECTION > EVAP TEST > MULTIPLE SOLENOIDS > PCS ON, CVS ON, BPS ON — This command seals the entire EVAP system by activating all solenoids simultaneously, allowing a technician to perform a vacuum test on the sealed system while monitoring the FTP sensor voltage.
- Honda HDS: EVAP FUNCTION TEST — This is the initial test recommended by Acura TSB B99-040. It runs an automated check of the system. If it fails, you proceed with manual troubleshooting; if it passes, the issue is likely intermittent.
Wiring & Ground Locations
- EVAP System Components (Canister, Valves, FTP Sensor) — Under the car, near the driver's side rear wheel/seat area.. This is the physical location for most components related to P1456 and P1457, essential for visual inspection, smoke testing, and parts replacement.
- G101 (Main Engine Ground) — Located at the center rear of the engine.. A poor main engine ground can cause a variety of sensor reading errors. While not a primary cause for P1456, ensuring it's clean and tight is a good practice during any electrical diagnosis.
- EVAP Canister Purge Valve — In the engine compartment, at the left rear.. While not a typical cause for P1456 (more often P0443 or P1457), knowing its location is important to differentiate it from other EVAP components during diagnosis.
- G301 — A document for a different GM-based vehicle shows G301 behind the right rear passenger seat track on the floor, but its location on an Acura CL is not confirmed in searches. A separate DIY guide for a grounding kit mentions a passenger side chassis ground above the ABS controller.. A ground point in the rear of the vehicle could potentially serve the FTP sensor or other rear-mounted EVAP components. A corroded ground could cause incorrect sensor readings.
Real Owner Repair Stories
- YouTube video by 'Toma's Auto-Fix' (2003 Acura TL (platform mate)) — Check Engine Light with code P1456.
❌ Tried (didn't work) The video starts with diagnosis, not a list of failed parts.
✅ What actually fixed it A disconnected EVAP hose was found near the vapor canister under the driver's side rear of the car. The hose had popped off its fitting. Reconnecting the hose and securing it with a clamp resolved the issue. - Honda-Tech forum user (Honda Accord (platform mate)) — Persistent pending P1456 code that would set after about 10 minutes of driving.
❌ Tried (didn't work) Verified system holds vacuum per TSB., Confirmed no leaks with hand pump test., Resetting the code.
✅ What actually fixed it The user concluded the system could hold a vacuum but not pressure. The FTP sensor voltage would not rise as expected after starting the car. This pointed to a faulty two-way valve that was not sealing correctly against positive pressure, even though it held vacuum.
OEM Part Supersession History
17670-S84-A01→17670-SDA-A01, 17670-T3W-A01— Standard part evolution and consolidation across multiple Honda/Acura models.
Heads up: The newer part numbers like 17670-T3W-A01 are widely listed as replacements for the original, and are used on many Honda models from 2006-2024.17670-SV1-A01→17670-SM4-A04— Part update for older Honda models.
Heads up: This is an older part number chain, less likely to be relevant to the 2001-2003 CL but shows the pattern of supersession.
Helpful Videos
We Have This Part in Stock


The information in this article is provided for general reference and educational purposes only. Vehicle specifications, procedures, and part compatibility can vary by production date, trim level, and region. Always consult your vehicle's factory service manual and verify part numbers before purchasing or performing repairs. Safety-critical components such as airbags, seat belts, and braking systems should be installed by a qualified professional.
- Acura CL:
- 🧭 Diagnostic Flowchart
- 🎬 Helpful Videos
- 🛍️ Shop This Part
- What's Unique About the 2001-2003 Acura CL
- Symptoms You May Notice
- Most Likely Causes
- Rare But Worth Checking
- Diagnosis Steps
- Parts You'll Likely Need
- Technical Service Bulletins (TSBs) & Recalls
- Platform-Specific Known Issues
- Mechanic-Grade Diagnostic Values
- Scan Tool Commands That Help
- Wiring & Ground Locations
- Real Owner Repair Stories
- OEM Part Supersession History
- 🎟️ Get 5% Off