
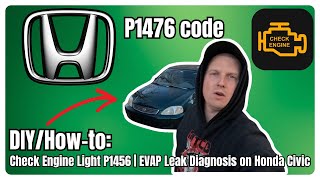
P1456 on 1996-2000 Acura Integra: EVAP Leak (Fuel Tank) Causes and Fixes
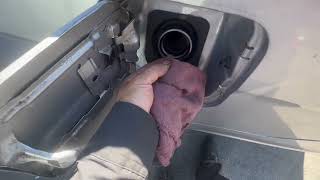
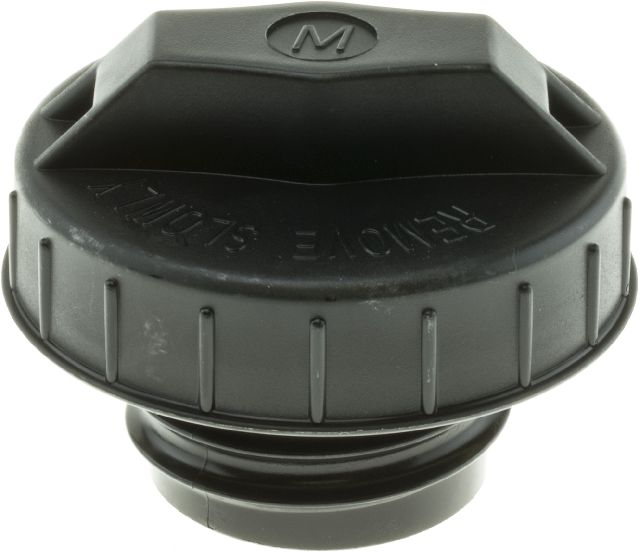
For a 1996-2000 Acura Integra, code P1456 almost always means you have a loose, worn, or incorrect gas cap. Start by tightening it (3 clicks) or replacing it with an OEM cap (Part No. 17670-SM4-A04) for about $50. If that doesn't work, inspect the fuel filler neck for rust or cracks, as this is the second most common cause.
- P1456 specifically means the leak is on the fuel tank side of the EVAP system.
- Always start with the simplest fix: check that your gas cap is tight. If the light comes back, replace the gas cap with an OEM part.
- If a new gas cap doesn't solve the issue, your next step is to inspect the fuel filler neck for rust or damage.
- Do not confuse P1456 with P1457; they point to different parts of the emissions system. Do not replace canister components for a P1456 code.
- This code will not affect how your car drives, but it will cause you to fail an emissions test.
What's Unique About the 1996-2000 Acura INTEGRA
On this generation of Honda and Acura vehicles, including the related 1996-2000 Honda Civic, the EVAP system diagnostics are very specific. The computer can distinguish between a leak in the fuel tank area (P1456) and a leak in the charcoal canister area (P1457). This is helpful because it directs your diagnosis to a specific set of components. While many cars have a generic "small EVAP leak" code, your Integra helps narrow it down, with P1456 almost always starting with the gas cap or the pipe it seals against.
Diagnostic Flowchart
Tap your situation to follow the diagnostic path that matches what you're seeing on this vehicle.
Symptoms You May Notice
- Check Engine Light is on
- Possible faint smell of gasoline, especially near the rear driver's side of the car or fuel filler area.
- No whoosh of pressure being released when opening the gas cap after driving.
- A noticeable drop in fuel economy has been reported by some owners after the code appears.
- Replacing the EVAP charcoal canister or vent solenoid. These parts are part of the canister side of the system and typically trigger a P1457 code, not P1456.
Most Likely Causes
- Loose, Damaged, or Incorrect Gas Cap 🔴 High Probability → Shop Fuel Tank Cap The gas cap is the most frequently removed and re-installed part of the fuel system. Its rubber seal can dry out and crack over time, or it may simply not be tightened properly. Aftermarket caps are a very common source of this code as their seals may not meet OEM specifications.
How to confirm: Ensure the cap is tightened until it clicks at least three times. Inspect the rubber O-ring on the cap for cracks, stiffness, or damage. A smoke test performed with the cap on may reveal a slight leak from the cap area, confirming it is faulty. If the cap is not OEM, it is immediately suspect.
Typical fix: Replace the gas cap with a new one. It is highly recommended to use an OEM (Original Equipment Manufacturer) cap from Acura/Honda, as many aftermarket caps do not seal correctly and will not resolve the code.
Est. part cost: $25-$55 - Rusted or Corroded Fuel Filler Neck 🟡 Medium Probability → Shop Fuel Filler Neck The metal fuel filler neck, where the gas cap screws on, is exposed to moisture and road salt, causing it to rust over time. This creates an uneven or pitted surface that the gas cap cannot seal against, even if the cap is new.
How to confirm: Remove the gas cap and visually and physically inspect the lip and inside of the filler neck for rust, pitting, or corrosion. Run your finger along the sealing surface; if it feels rough or flaky, it will prevent a proper seal. A cracked filler neck can also be a cause.
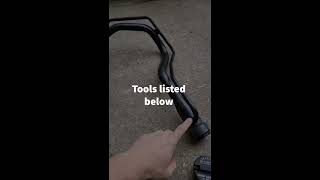
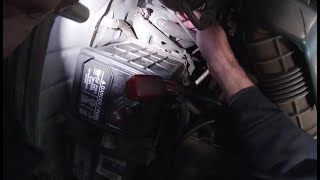
Typical fix: The fuel filler neck must be replaced. This involves removing the rear driver's side wheel and plastic liners to access the part. Some owners attempt to clean the rust off with steel wool as a temporary measure, but replacement is the permanent solution.
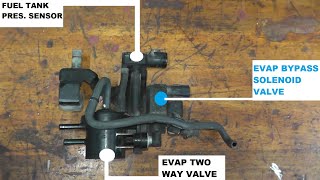
Est. part cost: $75-$150 - Faulty EVAP Two-Way Valve ⚪ Low Probability This valve, located near the fuel tank, is designed to control the flow of vapor under specific pressure and vacuum conditions. It can fail or get stuck over time, causing a leak to be detected.
How to confirm: Testing requires a hand-held vacuum and pressure pump to see if the valve opens and closes within the specified pressure ranges outlined in the service manual. This is typically done after a smoke test fails to find an external leak.
Typical fix: Replace the two-way valve.
Est. part cost: $40-$70 - Cracked or Disconnected EVAP Hoses ⚪ Low Probability Rubber hoses around the fuel tank, filler neck, and EVAP canister can become brittle and crack with age, leading to leaks.
How to confirm: Visually inspect all EVAP hoses connected to the fuel tank, filler neck, and two-way valve for cracks, loose connections, or obvious damage. A smoke test is the most effective way to find a small leak in a hose that isn't visibly disconnected.
Typical fix: Replace the cracked or damaged hose section. Ensure clamps are secure.
Est. part cost: $10-$30
Rare But Worth Checking
- Faulty Fuel Tank Pressure (FTP) Sensor: → Shop Fuel Tank While less common for P1456, a faulty FTP sensor can give an incorrect reading, tricking the computer into thinking there is a leak. This is often considered after other, more common causes are ruled out. TSB B99-040 provides a diagnostic procedure to check the FTP sensor voltage.
- Leaky Fuel Tank or Fuel Pump Gasket: → Shop Fuel Tank A leak in the fuel tank itself or the gasket for the fuel pump assembly can also trigger this code, but this is much less common than a cap or filler neck issue.
Diagnosis Steps
- Read the code with an OBD-II scanner to confirm P1456 is present.
- Check the gas cap. Ensure it is tight and clicks at least 3 times. If it is an aftermarket cap, replace it with an OEM cap (Part No. 17670-SM4-A04) as the first step.
- Clear the code and drive the vehicle for a few days to see if the Check Engine Light returns. The EVAP monitor may take several drive cycles to run.
- If the light returns, remove the gas cap and thoroughly inspect the fuel filler neck for any signs of rust or corrosion on the sealing surface.
- Inspect the visible EVAP hoses around the fuel tank and filler neck area for any obvious cracks or disconnections. A common failure point is a hose becoming disconnected from the vapor canister.
- If the cap and filler neck are in good condition, the most definitive next step is to perform a smoke test. This involves injecting smoke into the EVAP system (usually through a port near the canister) to visually locate the source of the leak. 🎬 Watch: A professional mechanic's diagnostic process for EVAP leaks.
- If a smoke test reveals no external leaks, test the function of the EVAP two-way valve using a vacuum/pressure gauge as per the service manual.
- As a final step, test the Fuel Tank Pressure (FTP) sensor and its wiring to ensure it is reading correctly, following the procedure in TSB B99-040 if possible.
Parts You'll Likely Need
- Fuel Tank Cap
(OEM #17670-SM4-A04)— This is the most common failure point for P1456. The seal wears out or an aftermarket cap fails to seal properly. Using an OEM cap is critical for a proper seal. This part number also supersedes 17670-SM4-A03 and 17670-SV1-A01.
Trusted brands: Acura/Honda (OEM)
OEM price range: $40-$55
Aftermarket price range: $10-$25 - Fuel Filler Neck
(OEM #17660-S04-A03 (for some models, verify by VIN))— Rust on the filler neck prevents the gas cap from creating an airtight seal, which is the second most likely cause of this code after the cap itself. Cracks can also develop.
Trusted brands: Dorman, Spectra Premium, Acura/Honda (OEM)
OEM price range: $100-$150
Aftermarket price range: $75-$120
Technical Service Bulletins (TSBs) & Recalls
- B99-040 / 99-075: Updates troubleshooting for DTC P1456 (EVAP Control System Leakage [Fuel Tank System]) and DTC P1457 (EVAP Control System Leakage [EVAP Canister System]). It provides specific voltage checks for the FTP sensor and a clear diagnostic path.
Platform-Specific Known Issues
- Acura/Honda issued Technical Service Bulletin (TSB) B99-040 (also listed as 99-075), which updates the diagnostic procedures for both P1456 and P1457. It emphasizes they are distinct problems and provides a step-by-step diagnostic tree, starting with checking the FTP sensor voltage with the cap off (should be 2.45V-2.55V).
- Owners on forums consistently report that using a non-OEM gas cap is a primary cause for this code to appear or persist after a repair attempt.
Mechanic-Grade Diagnostic Values
- Fuel Tank Pressure (FTP) Sensor Voltage at Atmospheric Pressure — expected: 2.45V - 2.55V (with fuel cap off). Failure: A reading greater than 2.7V or less than 2.3V with the cap on suggests the system is holding pressure or vacuum when it should be at atmospheric, pointing to a restriction or stuck valve. A reading outside the 2.45-2.55V range with the cap off indicates a faulty sensor or circuit issue.
- Fuel Tank Pressure (FTP) Sensor Voltage Under Normal Operation — expected: Should rise to approximately 3.0V as natural vapor pressure builds.. Failure: If the voltage fails to rise above ~2.55V while driving, it can indicate the system is unable to build pressure, possibly due to a faulty two-way valve bleeding off pressure prematurely, even if it passes a vacuum test.
- EVAP Two-Way Valve Vacuum Test — expected: Valve should open (and vacuum should stabilize) between 0.8 and 2.1 kPa (6-16 mmHg).. Failure: If the valve opens below 0.8 kPa or above 2.1 kPa, it is faulty and should be replaced.
- EVAP Two-Way Valve Pressure Test — expected: Valve should open when pressure exceeds 1.0 kPa (8 mmHg).. Failure: If the valve opens below 1.0 kPa, it is faulty and will not allow the tank to build sufficient natural pressure for the ECU's self-test.
Hidden / Shadow Codes Worth Checking
- Mode $06, Test ID $27 (TID 39): This is a non-continuously monitored test for the EVAP system (tank side). A failure of this specific test can trigger a P1456 code, even before the MIL is illuminated. (see via An advanced OBD-II scanner capable of displaying Mode $06 data. The value will be below the minimum threshold specified by the manufacturer.)
Scan Tool Commands That Help
- Honda Diagnostic System (HDS) or equivalent: EVAP Test: Multi-Solenoid Activation (PCS ON, CVS ON, BPS ON) — This function is used to manually command the Purge Control Solenoid, Canister Vent Solenoid, and Bypass Solenoid to open or close. It allows a technician to isolate and test specific components and sections of the EVAP system during diagnosis, such as when performing a vacuum or smoke test.
Wiring & Ground Locations
- ECU / PCM — Located in the passenger-side footwell, behind the right kick panel.. The ECU/PCM is the source for sensor reference voltage and the destination for sensor signals (like the FTP sensor). All electrical tests for sensor circuits will ultimately lead back to these connectors.
- G501 — Located behind the left (driver's side) kick panel.. This is a primary body ground point. A poor connection at this ground could cause erratic behavior or failure of EVAP system components that rely on it for a complete circuit.
Real Owner Repair Stories
- YouTube user on a 2000 Honda Odyssey (similar system) (2000 Honda Odyssey EX) — Persistent P1456 check engine light.
❌ Tried (didn't work) Replacing the gas cap with a new OEM part, Replacing the EVAP two-way valve, Replacing the vent valve
✅ What actually fixed it Applying Permatex gasket sealant to the joint where the fuel filler neck tube connects to the fuel tank. The code did not return after more than 500 miles of driving. - Honda-Tech forum user (Honda with P1456) — Pending P1456 code after reset. System passed a vacuum hold test.
❌ Tried (didn't work) Standard vacuum leak testing
✅ What actually fixed it The user diagnosed that the fuel tank was not building sufficient pressure (FTP voltage only reached 2.55V instead of the expected ~3.0V). The conclusion was that the two-way valve was faulty, bleeding off pressure prematurely, even though it held vacuum correctly. The final fix was replacing the two-way valve based on this pressure-side diagnosis.
"I Checked Everything" — The Actual Cause
- A common scenario where a smoke test may not find a leak is when the two-way valve is faulty on its pressure-holding side. The system can hold vacuum perfectly, so a smoke test (which applies low pressure) or a vacuum test will show no leaks. However, the valve may open prematurely as natural tank pressure builds, preventing the FTP sensor from seeing the required pressure rise (to ~3.0V). The ECU interprets this inability to build pressure as a leak, setting P1456.
OEM Part Supersession History
17670-SV1-A01, 17670-SM4-A03→17670-SM4-A04— Standard part revision and consolidation by the manufacturer.EVAP Canister Hose (Purge Solenoid to Canister)→Different PNs for different years (17725-ST7-L50 for '98, 17725-ST7-A31 for '00-'01)— Changes in the EVAP canister mounting location and hardware between model years.
Heads up: The hose for a 2000-01 model is a different length than the one for a 1998 model and will not fit correctly without modification.
Model Year Variations Within This Range
- 1996-1997 vs 1998-1999 vs 2000-2001: There are significant differences in the EVAP system across the 1996-2000 range. The 1998-99 models added a fuel tank pressure (FTP) sensor. The 2000-01 models further revised the system with an additional vent at the top of the tank, a different canister with an extra sensor, and different hose routing and sizes. The ECU wiring and connectors also changed between the 98-99 and 00-01 models.
Helpful Videos
We Have This Part in Stock


The information in this article is provided for general reference and educational purposes only. Vehicle specifications, procedures, and part compatibility can vary by production date, trim level, and region. Always consult your vehicle's factory service manual and verify part numbers before purchasing or performing repairs. Safety-critical components such as airbags, seat belts, and braking systems should be installed by a qualified professional.
- Acura INTEGRA:
- 🧭 Diagnostic Flowchart
- 🎬 Helpful Videos
- 🛍️ Shop This Part
- What's Unique About the 1996-2000 Acura INTEGRA
- Symptoms You May Notice
- Most Likely Causes
- Rare But Worth Checking
- Diagnosis Steps
- Parts You'll Likely Need
- Technical Service Bulletins (TSBs) & Recalls
- Platform-Specific Known Issues
- Mechanic-Grade Diagnostic Values
- Hidden / Shadow Codes Worth Checking
- Scan Tool Commands That Help
- Wiring & Ground Locations
- Real Owner Repair Stories
- "I Checked Everything" — The Actual Cause
- OEM Part Supersession History
- Model Year Variations Within This Range
- 🎟️ Get 5% Off