
P1457 on 2009-2015 Honda Pilot: EVAP Canister Leak Causes and Fixes
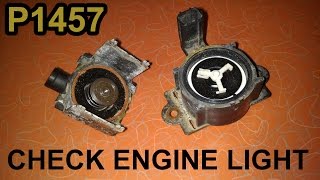
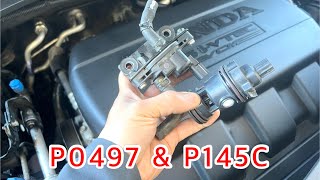
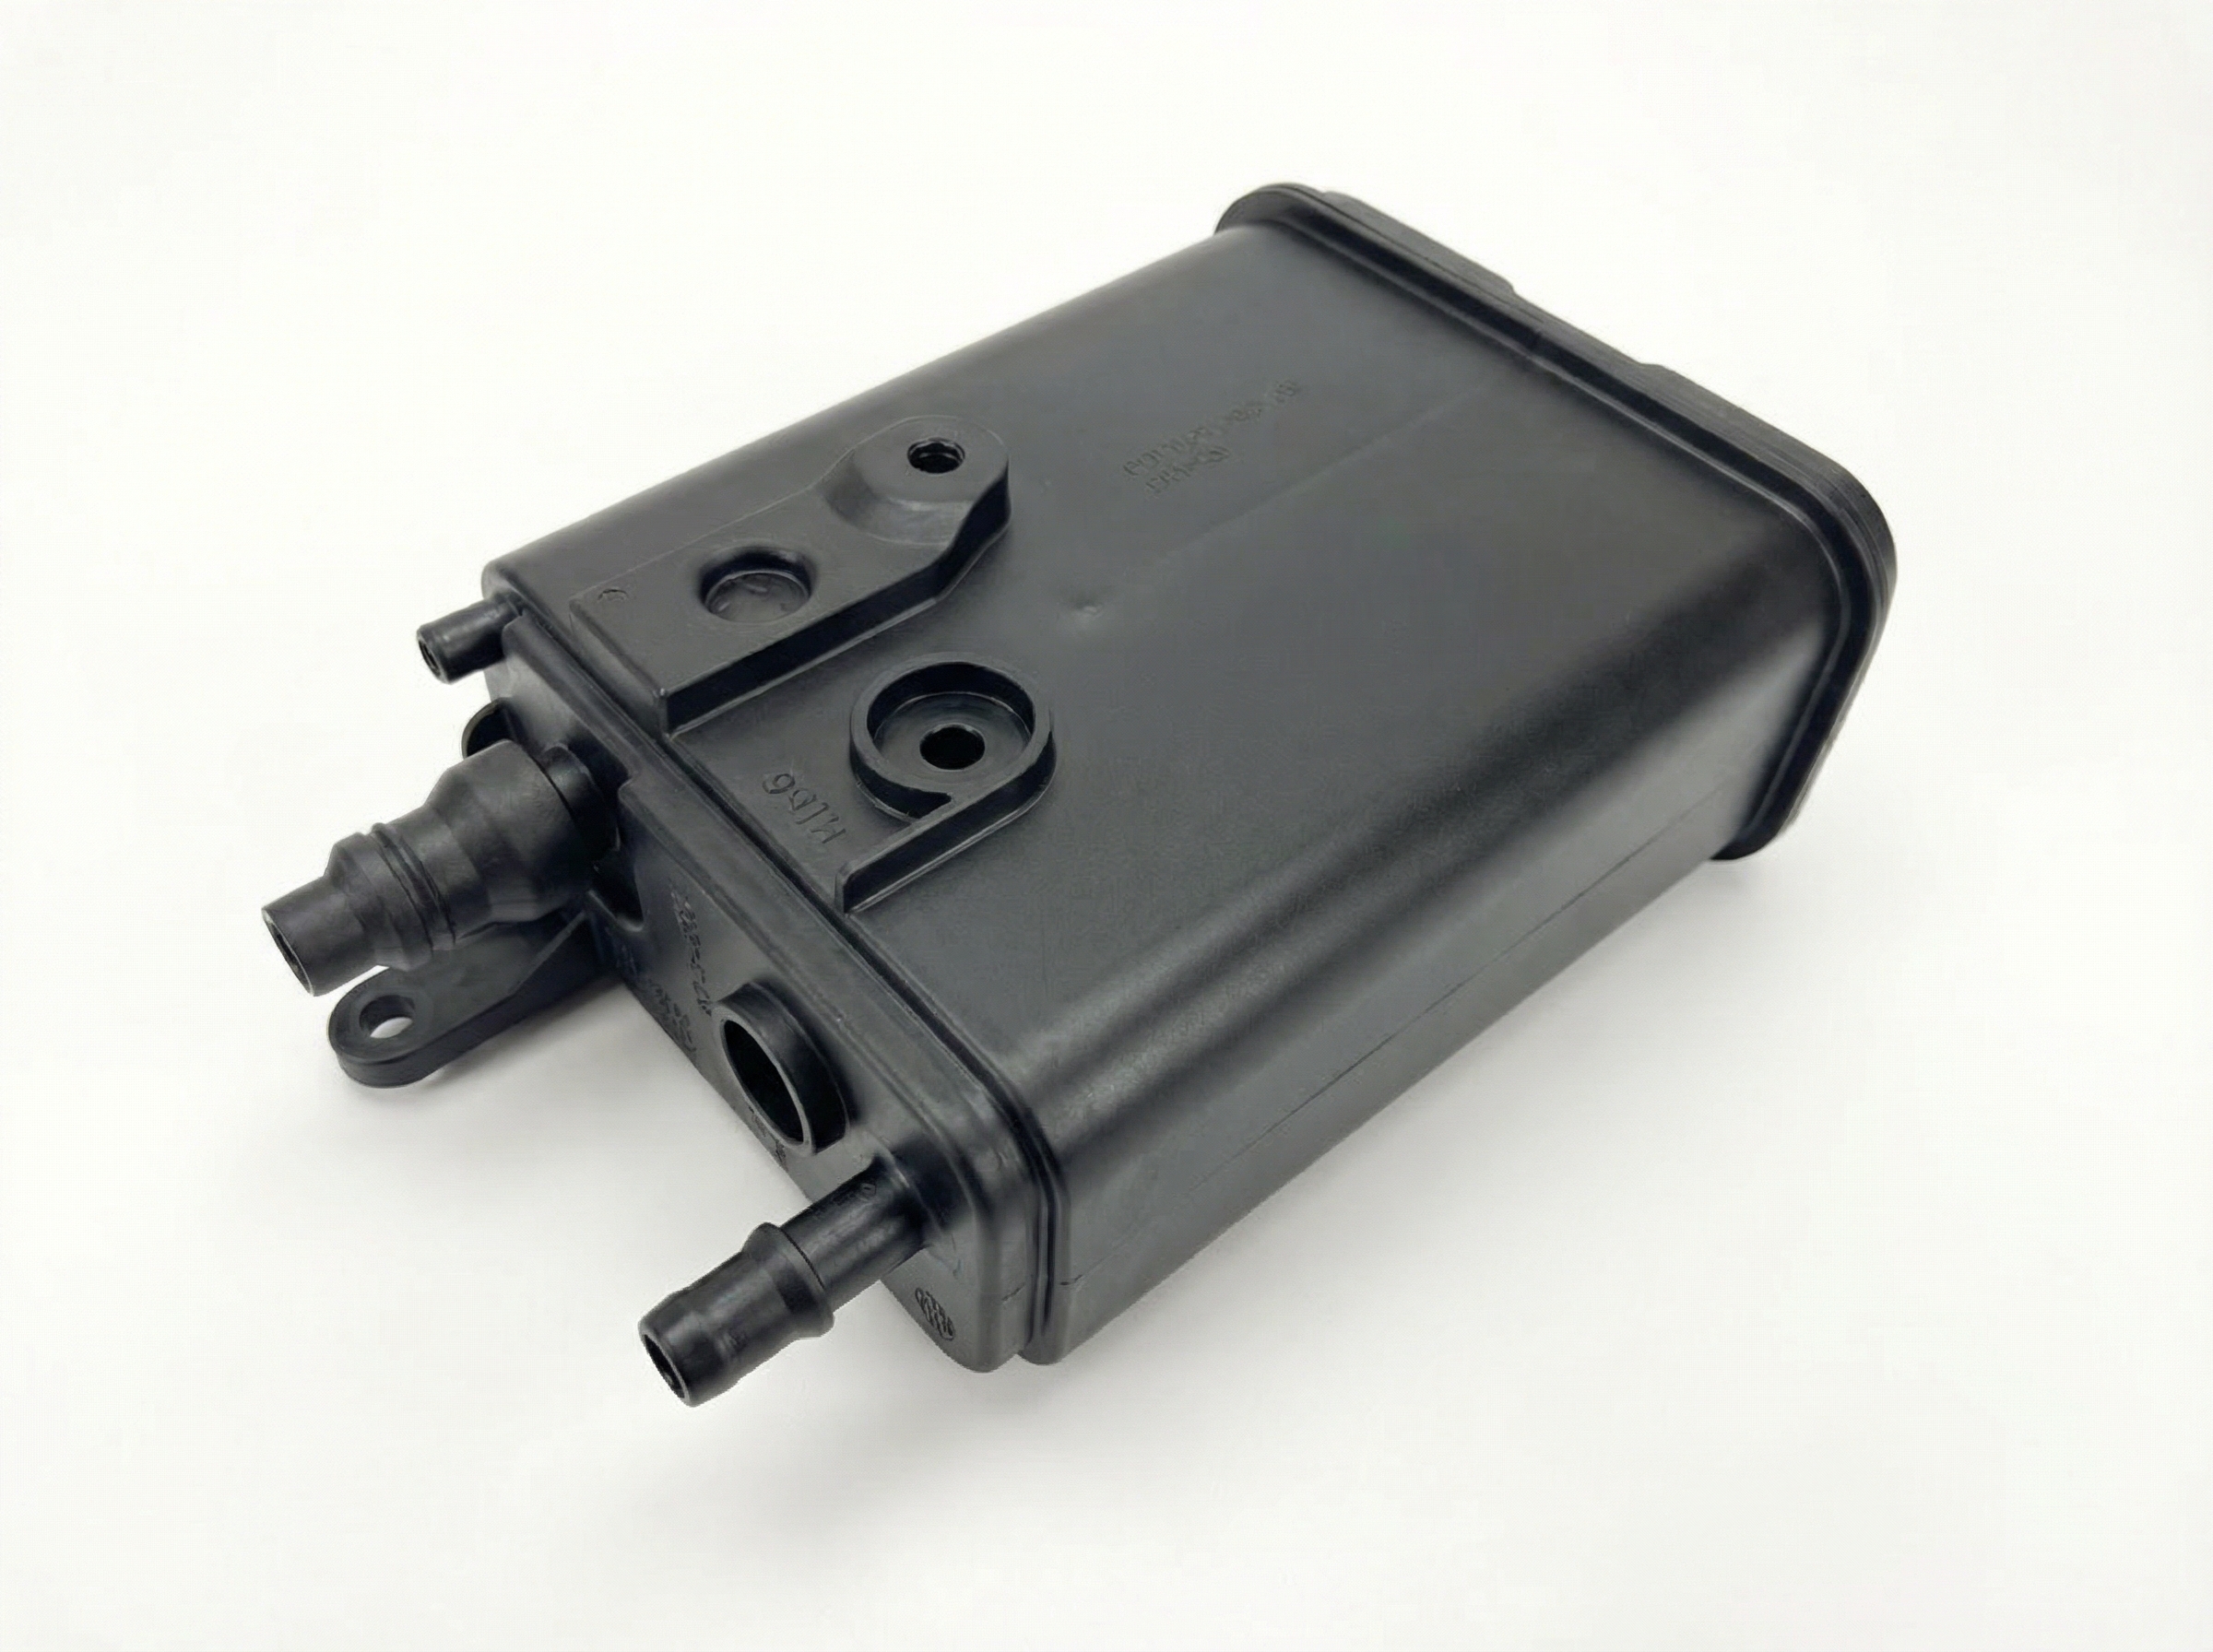
On a 2009-2015 Honda Pilot, code P1457 is almost always caused by a corroded and failed EVAP Canister Vent Shut (CVS) Valve. Due to rust, the bolts holding the valve often seize, requiring replacement of the entire canister assembly, not just the valve.
- P1457 means the leak is in the charcoal canister area under the car, not the gas cap.
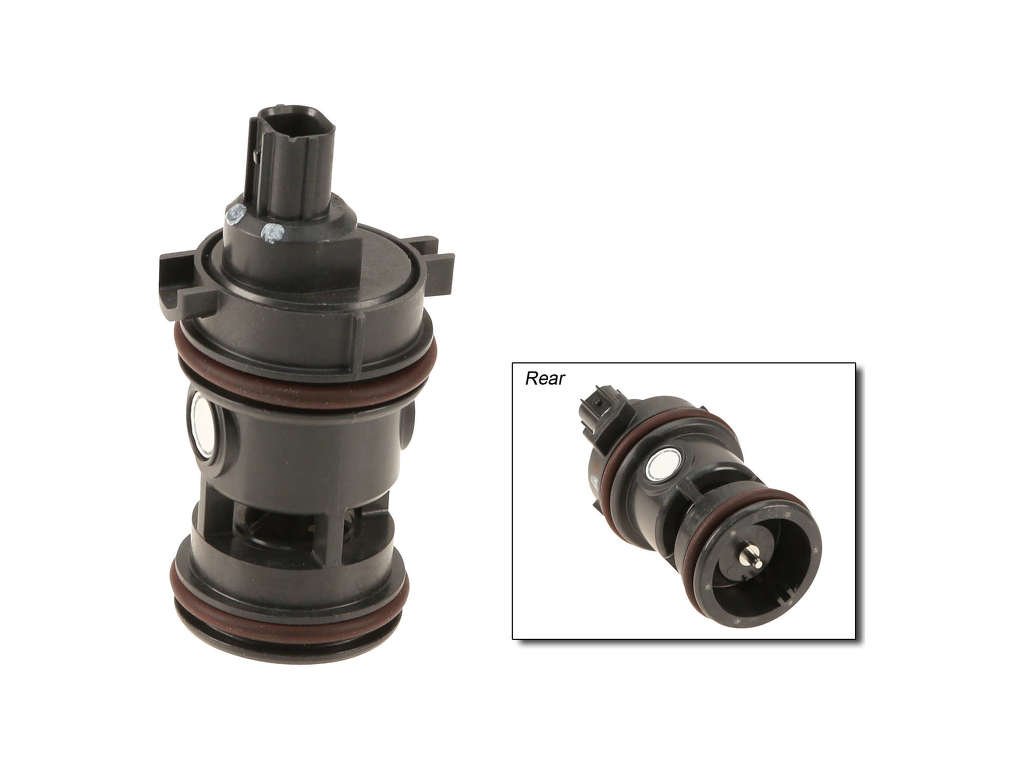
- The most likely failed part is the Canister Vent Shut (CVS) Valve, which rusts due to its location.
- Be prepared for the valve's mounting screws to be seized. If they break the canister during removal, you will need to replace the entire canister assembly (P/N: 17011-SZA-A01).
- A smoke test is the best way to diagnose the issue if the vent valve appears to be working correctly.
- An aftermarket vent valve (like Dorman 911-710) is available if you can successfully remove the old one.
What's Unique About the 2009-2015 Honda Pilot
The second-generation Honda Pilot, like many Hondas from this era, places the EVAP canister vent shut valve under the vehicle where it is highly exposed to road salt, water, and grime. This leads to a very common failure pattern where the valve itself corrodes and fails. The steel screws holding the valve to the plastic canister housing are notorious for rusting and seizing, making a 'simple' valve replacement nearly impossible without breaking the canister. As a result, many owners and technicians are forced to replace the entire canister assembly. This issue is so prevalent that it affects a wide range of Honda and Acura models from the same period. A unique characteristic of the Pilot is that its EVAP vent hose is routed up to the engine compartment firewall, unlike many vehicles where it vents into the frame rail near the canister.
Symptoms You May Notice
- Check Engine Light is on
- Will not pass an emissions inspection
- Possible faint fuel odor, especially around the rear of the vehicle
- Replacing the gas cap. A faulty gas cap on a Honda will typically cause a P1456 code, not P1457.
Most Likely Causes
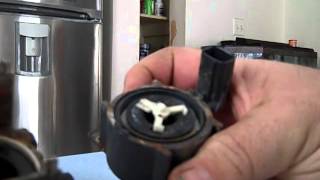
- Corroded or Failed EVAP Canister Vent Shut (CVS) Valve 🔴 High Probability → Shop Vapor Canister The valve is mounted under the vehicle, exposing it to road salt and moisture which causes the internal solenoid and external metal bracket to corrode and fail. The metal plate on the valve rusts, breaking the seal against the O-ring.
How to confirm: Visually inspect the valve for heavy rust. Apply 12-volt power directly to the valve's terminals; a healthy valve will make an audible 'click'. If it doesn't click, it has failed. A bi-directional scanner can also be used to command the valve closed while performing a smoke test; smoke exiting the valve indicates failure.
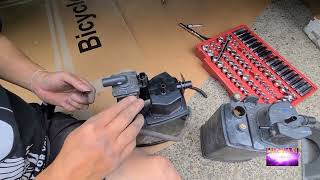
Typical fix: Replace the Canister Vent Shut (CVS) Valve. However, if the mounting screws are rusted and seized, the entire EVAP Canister Assembly must be replaced. 🎬 Watch: Step-by-step EVAP canister replacement guide Some owners have successfully disassembled and cleaned the valve to restore the seal. 🎬 See how to repair the shut valve for free
Est. part cost: $60-$100 for the valve, $250-$350 for the full canister assembly. - Seized/Rusted Vent Valve Mounting Screws 🔴 High Probability The Phillips head steel screws are threaded into brass inserts in the plastic canister body and are exposed to the elements, causing them to rust firmly in place.
How to confirm: Attempt to loosen the screws holding the vent valve to the canister. If they spin in place, strip, or break the plastic canister housing, they have failed and will necessitate a full canister replacement.
Typical fix: If the screws cannot be removed without damage, the entire EVAP Canister Assembly must be replaced. Using generous amounts of penetrating oil, an impact screwdriver, and/or locking pliers (Vise-Grips) on the screw head may help, but be prepared for failure. Some owners have had to drill the screws out or heat them with a torch.
Est. part cost: $250-$350 (for the full canister assembly). - Cracked or Disconnected EVAP Hoses ⚪ Low Probability Hoses become brittle with age and heat cycles.
How to confirm: Visually inspect all rubber hoses connected to the charcoal canister for brittleness, cracks, or loose connections. A smoke test is the definitive way to find a small hose leak.
Typical fix: Replace the cracked or damaged hose section.
Est. part cost: $10-$30
Rare But Worth Checking
- Blocked EVAP Vent Tube: In some cases, insects (like mud daubers or spiders) can build nests inside the EVAP system's vent tube, causing a blockage that the system interprets as a leak, triggering P1457. On the Pilot, this vent tube runs from the canister to the firewall area.
- Cracked Charcoal Canister Body: → Shop Vapor Canister Physical damage from road debris or stress can crack the plastic housing of the canister itself, causing a leak. This is usually found during a smoke test. The plastic mounting tabs for the screws can also break off during a valve replacement attempt.
- Faulty EVAP Two-Way/Bypass Valve: Less common than the vent valve, the two-way or bypass valve can also fail, causing this code. Honda TSB 03-001/16 addressed this issue on older models, noting that a faulty valve could damage the PCM.
- Faulty Powertrain Control Module (PCM/ECU): In very rare cases, the internal driver circuit within the PCM that controls the EVAP valve can fail. This can happen even if the valve and wiring are good, leading to a persistent P1457 code.
Diagnosis Steps
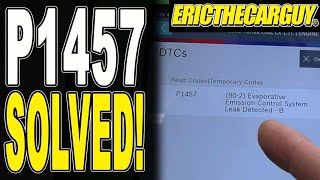
- Verify the code with an OBD-II scanner. Confirm P1457 is present. 🎬 Watch: How to diagnose and fix a P1457 code
- Do NOT replace the gas cap; this code is not for the tank side of the system.
- Locate the EVAP canister assembly under the vehicle, on the driver's side, roughly below the rear passenger door area, protected by a plastic cover.
- Visually inspect the Canister Vent Shut (CVS) valve for excessive rust and corrosion. Check the surrounding hoses for obvious cracks or disconnection.
- Attempt to test the CVS valve. If you have a bi-directional scanner, command the valve to open and close and listen for a click. Alternatively, disconnect the valve and apply 12V power to its pins to see if it actuates.
- If the valve is visibly corroded or fails the actuation test, it needs replacement. Carefully attempt to remove the two Phillips head mounting screws. It is highly recommended to soak them in penetrating oil, tap the top of the screwdriver with a hammer to shock the threads, and use a high-quality screwdriver or impact driver.
- If the screws strip or break the canister housing, you must replace the entire canister assembly.
- If the valve appears to work correctly, the next step is to perform a smoke test. Introduce low-pressure smoke into the EVAP service port and look for leaks around the canister, vent valve, and all associated hoses.
Parts You'll Likely Need
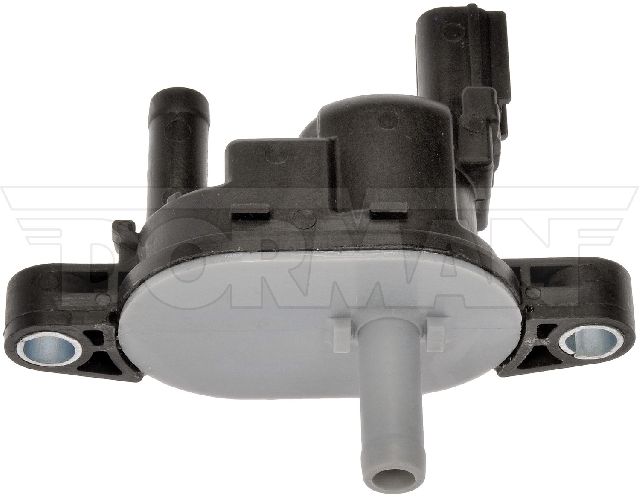
- EVAP Canister Assembly
(OEM #17011-SZA-A01)— This is the most common fix because the screws for the vent valve seize, forcing the replacement of the whole unit.
Trusted brands: Honda (Genuine OEM)
OEM price range: $280-$390
Aftermarket price range: $200-$280 - EVAP Canister Vent Shut (CVS) Valve
(OEM #17310-S0X-A02 (This is a common Honda part number, but verify fitment. Honda may not sell it separately for this specific canister.))— This is the component that typically fails due to corrosion. If you can successfully remove the old one without breaking the canister, replacing only the valve is a cheaper repair.
Trusted brands: Dorman (P/N: 911-710), Standard Motor Products (P/N: CP736)
OEM price range: $50-$90
Aftermarket price range: $60-$100 - Vent Valve Mounting Screws
(OEM #93893-05010-08)— The original screws are almost guaranteed to be seized and will likely be destroyed during removal. It is highly recommended to have replacements on hand.
Trusted brands: Honda (Genuine OEM)
OEM price range: $2-$5 per screw
Aftermarket price range: N/A
Technical Service Bulletins (TSBs) & Recalls
- Honda Service Bulletin 99-075 (Revised Aug 2013): While for an earlier Pilot model (2003-2004), it provides detailed troubleshooting steps for P1457, confirming the diagnostic focus on the canister system components like the two-way valve and vent shut valve.
- Honda Service Bulletin 03-001/16: Addresses failure of the EVAP bypass solenoid valve on older models, noting that if the valve shorts internally, it can damage the PCM (vehicle's computer). This underscores the importance of addressing EVAP valve issues.
Documented NHTSA Reports
- NHTSA ODI #10132606 describes a situation where a mechanic and a dealership both confirmed code P1457 after the check engine light illuminated.
- NHTSA ODI #10233305 notes that an owner encountered the "infamous P1457 code" at higher mileage, highlighting the long-term prevalence of this specific fault in the manufacturer's EVAP systems.
- NHTSA ODI #10315726 suggests that the P1457 issue is often an oversight in packaging the unit to protect it from the elements, particularly for vehicles operated in regions like New England where road salt is common.
Platform-Specific Known Issues
- The primary issue for this platform is the near-guaranteed seizure of the vent valve mounting screws due to rust. DIYers should be prepared for this simple job to escalate into a full canister replacement. Using an impact screwdriver and penetrating oil is recommended but not always successful.
- A thread on Piloteers.org details a user's experience where they had to drill out the old screws and re-tap the holes to save the original canister, highlighting the difficulty of the 'simple' valve replacement.
Mechanic-Grade Diagnostic Values
- EVAP Canister Vent Shut (CVS) Valve Resistance — expected: 25 to 30 Ohms (at room temperature). Failure: An infinite reading (open circuit) or zero resistance (short circuit) indicates a failed valve coil.
- Fuel Tank Pressure (FTP) Sensor Voltage (Key On, Engine Off) — expected: 2.45 to 2.55 Volts (at normal atmospheric pressure). Failure: A voltage that is stuck or significantly different from the expected range at atmospheric pressure indicates a faulty sensor.
- EVAP Canister Vent Shut (CVS) Valve Connector Voltage — expected: Approximately 12V (Battery Voltage) on the power supply pin with Key On, Engine Off.. Failure: No voltage indicates a break in the power supply wire or a blown fuse.
Hidden / Shadow Codes Worth Checking
- Mode $06 Data: While not a 'hidden code,' Mode $06 provides the raw test results from the PCM's self-diagnostics before a code is set. A technician can view the EVAP monitor test results (TID/CID or MID/TID) to see if a component is marginal or failing, even before the Check Engine Light comes on. For example, a test for the EVAP system leak check might be failing its test but not by enough to trigger the P1457 code on the first trip. (see via A professional scan tool with Mode $06 capability. The specific Test IDs (TID) and Monitor IDs (MID) are manufacturer-specific and require a service manual or reference chart to interpret correctly for the Pilot.)
Scan Tool Commands That Help
- Honda HDS (or equivalent professional scanner): EVAP Test: Single Solenoids — This is a manufacturer-specific function that allows a technician to individually command the EVAP Canister Vent Shut Valve, EVAP Bypass Solenoid Valve, and EVAP Purge Control Solenoid Valve to cycle on and off. This is used to confirm if each solenoid is mechanically functioning (listen for a click) without having to remove them.
- Bi-Directional Scan Tool: Command EVAP Vent Valve Closed — This is the most direct test for the most common failure. Command the vent valve closed and then introduce smoke into the system. If smoke exits from the vent valve, the valve has failed and is not sealing, confirming it as the source of the leak.
Wiring & Ground Locations
- EVAP Canister Vent Hose Routing — The vent hose runs from the canister assembly (under the driver's side) up along the firewall and opens into the engine compartment.. Unlike many cars that vent into the frame rail, the Pilot's long vent hose is susceptible to blockages (insect nests, debris) far from the canister itself. A blockage here can trigger P1457 and will not be found by inspecting only the canister area.
- G401 — Under the left side of the dash.. This is a major ground point for components in the driver's side cabin area. While not directly for the EVAP system, a poor ground here can cause a variety of difficult-to-diagnose electrical issues.
- PCM Connector A (51-Pin) — The PCM (ECU) is located behind the glove box. Connector A is one of the main harness connections.. This is the connector where the control wire for the EVAP vent valve terminates. Advanced diagnosis for a suspected wiring or ECU fault requires checking for continuity from the valve's connector back to the specific pin on this connector.
Real Owner Repair Stories
- AcuraZine Forum User 'mast00' (Acura TL (similar Honda platform and EVAP system)) — Persistent P1457 code.
❌ Tried (didn't work) Visual inspection and testing of external EVAP components.
✅ What actually fixed it The user diagnosed a faulty Power Transistor Array (part STA415A) inside the ECU itself. The transistor responsible for controlling the EVAP valve had shorted internally. Replacing this $3 component on the ECU circuit board resolved the code, saving a very expensive ECU replacement. - YouTube user 'Autolatch' (2001 Honda Accord (similar EVAP components)) — P1457 code returned after replacing the canister vent valve.
❌ Tried (didn't work) Replacing the EVAP Canister Vent Shut Valve.
✅ What actually fixed it A thorough visual inspection revealed a cracked vacuum hose adjacent to the charcoal canister. Pinching the hose revealed more cracks. Replacing the small, brittle section of hose finally resolved the code.
"I Checked Everything" — The Actual Cause
- In a documented case on an Acura forum, a persistent P1457 code where all external EVAP components and wiring checked out was ultimately traced to a failed power transistor array inside the vehicle's main computer (ECU/PCM). A smoke test would show no leaks, and the valves might even click when commanded, but the faulty internal ECU driver prevented the system from operating correctly during its self-test, causing the code to return.
- A blockage in the EVAP vent tube can cause the system to fail its pressure test, triggering P1457. A smoke test might show 'no flow' rather than a visible leak, which can be misinterpreted. On the Pilot, this tube runs to the firewall, and a blockage from an insect nest or debris can occur far from the canister where technicians typically look.
OEM Part Supersession History
17310-S01-A01, 17310-S04-A01, 17310-S84-A01, 17310-S84-A02→17310-S0X-A02— Part consolidation and potential design revisions over time. This part is used on a very wide range of Honda and Acura vehicles from the late 1990s through the 2000s.
Diagnostic Flowchart
Other Known Issues on This Vehicle
Issues unrelated to this code that are worth knowing about as an owner of this generation:
- Variable Cylinder Management (VCM) Issues 🔴 High — Widespread. Can lead to fouled spark plugs, excessive oil consumption, and engine vibration. Piston ring alignment issues were part of a class-action lawsuit. (Ref: Warranty Extension TSB 13-082 (2009-2013), 15-060 (2013-2015))
- Warped Front Brake Rotors 🟠 Medium — Very common. Causes vibration or 'shimmy' in the steering wheel when braking from highway speeds.
- Spool Valve Oil Leak 🟠 Medium — Common at higher mileage. The VTEC spool valve gasket degrades, causing an oil leak that can drip onto the alternator and cause it to fail prematurely.
- Failing Low Beam Headlight Wiring 🟠 Medium — Common. The wiring connector at the headlight stalk switch on the steering column can overheat and melt, causing the low beams to fail.
- Timing Belt Replacement Interval 🔴 High — Scheduled maintenance item, not a failure. The J35Z4 is an interference engine, so a failed timing belt will cause catastrophic engine damage. Replacement is due around 105,000 miles.
- Failing Compliance Bushings 🟡 Low — Common at higher mileage (100k+ miles). The front lower control arm bushings (compliance bushings) crack and fail, causing clunking noises and poor alignment. (Ref: TSB 15-045 (Warranty Extension))
Used vs. New Parts: Buying Guide for This Vehicle
When a used part is the smart pick: A used part is generally NOT recommended for this repair. The primary failure point, the Canister Vent Shut (CVS) valve, is an electronic component prone to corrosion. A complete used canister assembly from a junkyard carries a high risk of having the same seized screw problem as the one you are replacing, or a valve that is already near the end of its life.
Donor-vehicle mileage cap: roughly under 50000 miles for the part to have meaningful remaining life.
What to inspect on the donor part:
- If considering a used canister assembly, only select one from a vehicle in a dry, salt-free climate.
- Visually inspect the vent valve for any signs of rust on its metal bracket. If rust is present, do not buy it.
- Attempt to turn the Phillips head screws with a screwdriver before purchase. If they show any resistance, assume they are seized and will break the canister upon removal.
OEM-only on this vehicle (don't cheap out):
- EVAP Canister Assembly: While aftermarket assemblies exist, the OEM unit (17011-SZA-A01) is proven. Given the labor involved, using a guaranteed-fit OEM part is the safest bet to avoid doing the job twice.
Aftermarket brands forum-validated for this vehicle:
- Dorman (P/N: 911-710) is a widely available aftermarket alternative for the Canister Vent Shut (CVS) valve and is frequently cited as a viable replacement if you can successfully remove the old valve without damaging the canister.
- Standard Motor Products (SMP)
Brands owners have reported issues with on this vehicle:
- Avoid unbranded, no-name electronic valves from online marketplaces. The savings are minimal compared to the risk of premature failure and having to repeat the repair.
Real Owner Stories
Aggregated from forums and TSBs cited above. Mileages and costs reflect what owners reported in those sources.
2009-2015 Honda Pilot J35Z4
Symptoms: The owner attempted a 'simple' valve replacement but found the Phillips head mounting screws were rusted firmly in place and would not come out.
What fixed it: The owner had to drill out the old screws and re-tap the holes to save the original canister.
Source hint: Piloteers.org thread mentioned in vehicle_specific_issues
2009 Honda Pilot 3.5L V6
Symptoms: Check Engine Light with code P1457; owner was warned that road salt corrosion on the EVAP bypass solenoid and canister vent shut valve could lead to PCM damage.
What fixed it: Replacement of the corroded canister vent shut valve.
Source hint: Honda-Tech.com thread titled 'ODB code P1457'
2009-2015 Honda Pilot J35Z4
Symptoms: Check Engine Light is on and the vehicle will not pass an emissions inspection; visual inspection showed extreme rust on the vent valve.
What fixed it: Replacement of the entire EVAP canister assembly because the mounting screws were seized and the metal plate on the valve had rusted.
Cost: $250-$350
Source hint: Piloteers.org thread titled 'P1457 Code - EVAP leak'
Honda Platform Vehicle (Acura/Honda)
Symptoms: A smoke test revealed a leak specifically at the top of the valve (#6 in the diagram).
What fixed it: The owner opted to replace the entire canister and all associated valves to prevent the code from returning.
Source hint: AcuraZine.com thread titled 'code P1457 Leak in EVAP system'
Related OBD-II Codes
Frequently Asked Questions
Can I fix P1457 on my 2009-2015 Honda Pilot by just replacing the gas cap?
Where is the EVAP canister located on my Pilot?
Does Honda Service Bulletin 03-001/16 apply to the risks of driving with P1457?
Why is the Canister Vent Shut (CVS) valve so prone to failure on this vehicle?
I'm trying to replace just the vent valve, but the screws won't budge. What should I do?
Are there any other major issues I should look out for on my 2009-2015 Pilot while fixing this?
Helpful Videos
Used OEM Parts in Stock
New Aftermarket Parts Available


The information in this article is provided for general reference and educational purposes only. Vehicle specifications, procedures, and part compatibility can vary by production date, trim level, and region. Always consult your vehicle's factory service manual and verify part numbers before purchasing or performing repairs. Safety-critical components such as airbags, seat belts, and braking systems should be installed by a qualified professional.
- Honda Pilot:
- 🧭 Diagnostic Flowchart
- 🎬 Helpful Videos
- 🛍️ Shop This Part
- What's Unique About the 2009-2015 Honda Pilot
- Symptoms You May Notice
- Most Likely Causes
- Rare But Worth Checking
- Diagnosis Steps
- Parts You'll Likely Need
- Technical Service Bulletins (TSBs) & Recalls
- Documented NHTSA Reports
- Platform-Specific Known Issues
- Mechanic-Grade Diagnostic Values
- Hidden / Shadow Codes Worth Checking
- Scan Tool Commands That Help
- Wiring & Ground Locations
- Real Owner Repair Stories
- "I Checked Everything" — The Actual Cause
- OEM Part Supersession History
- Other Known Issues on This Vehicle
- Used vs. New Parts: Buying Guide for This Vehicle
- Real Owner Stories
- 2009-2015 Honda Pilot J35Z4
- 2009 Honda Pilot 3.5L V6
- 2009-2015 Honda Pilot J35Z4
- Honda Platform Vehicle (Acura/Honda)
- Related OBD-II Codes
- Frequently Asked Questions
- 🎟️ Get 5% Off