
P1571 on 2010-2019 Ford Taurus: Brake Switch Malfunction Causes and Fixes
On a 2010-2019 Ford Taurus, code P1571 almost always indicates a faulty brake light switch. This inexpensive part causes issues with brake lights, cruise control, and starting. Expect to pay $20-$50 for a new switch and fix it yourself in under 30 minutes.
- P1571 on a Ford Taurus almost always points to a bad brake light switch.
- Symptoms include non-functional brake lights, no cruise control, and potentially a no-start or can't-shift-from-park condition.
- Before buying parts, check the brake switch fuse: 10A fuse F59 (2013-2019) or 15A fuse F13 (2010-2012) in the under-hood fuse box.
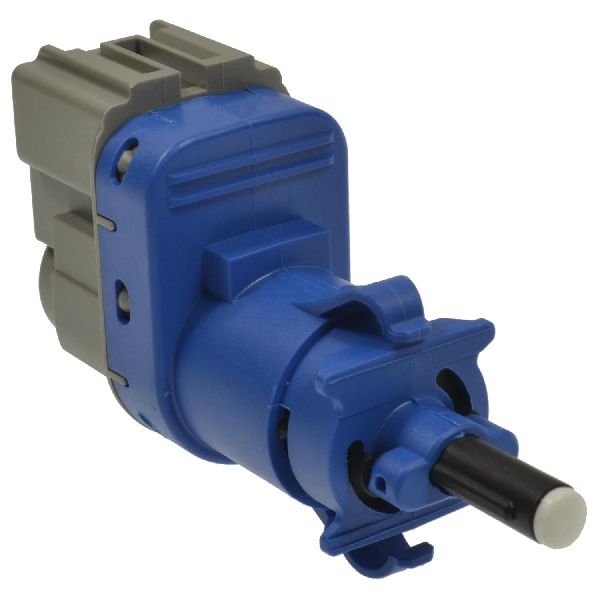
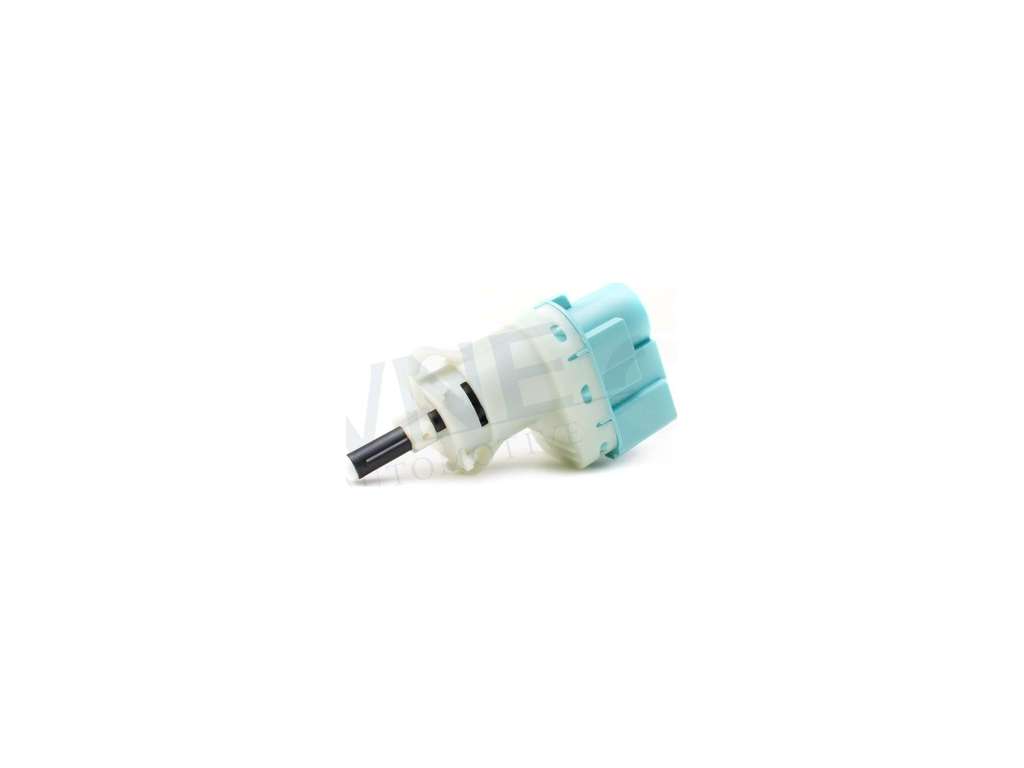
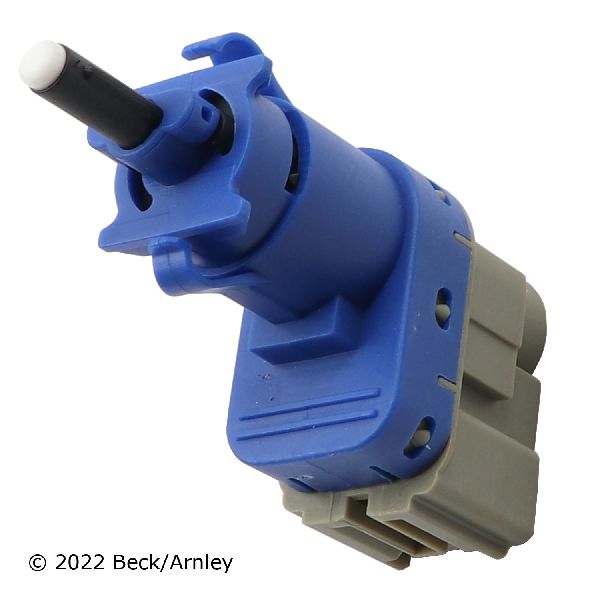
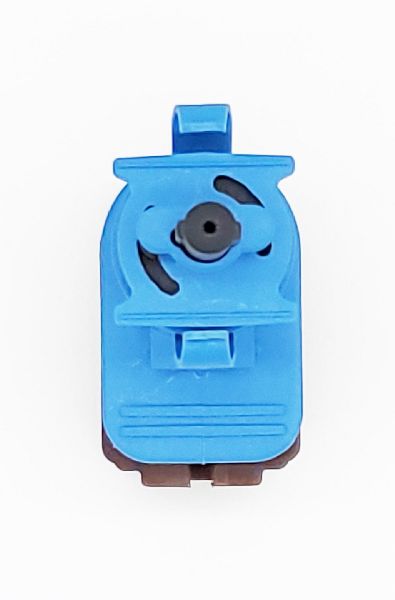
- Replacing the brake light switch is a simple, inexpensive DIY job that can be done in under 30 minutes with basic tools. The OEM part number is 8T4Z-13480-A.
What's Unique About the 2010-2019 Ford Taurus
The 2010-2019 sixth-generation Ford Taurus is highly dependent on network communications between modules. Unlike older vehicles where the brake switch only operated the brake lights, on this Taurus it provides a critical input for the engine control module, transmission, ABS, and cruise control. A failure of this simple switch can cause a cascade of seemingly unrelated electronic symptoms, making correct diagnosis of the P1571 code essential.
Symptoms You May Notice
- Check Engine Light is on
- Brake lights do not work when the pedal is pressed.
- Brake lights stay on even when the pedal is not pressed.
- Cruise control cannot be set or turns off unexpectedly.
- Unable to shift the vehicle out of 'Park'.
- Car may not start (on models with push-button start).
- ABS or Traction Control warning lights may illuminate on the dash.
- "Service AdvanceTrac" message may appear on the instrument cluster.
- Replacing the brake light bulbs when the issue is the switch not sending power.
- Replacing the ABS module or wheel speed sensors when the fault is only with the brake switch input.
Most Likely Causes
- Faulty Brake Light Switch / Brake Pedal Position (BPP) Sensor 🔴 High Probability → Shop Brake Pedal This is a high-use electromechanical part that wears out over time from repeated use. The internal contacts can fail, leading to the illogical signals detected by the PCM.
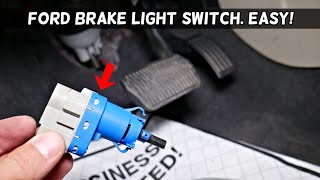
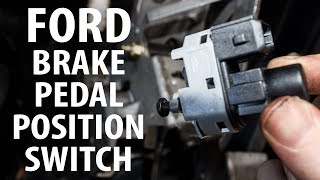
How to confirm: Observe the brake lights while a helper presses the pedal. If they don't work, work intermittently, or stay on, the switch is the likely culprit. The switch is located on the brake pedal support arm under the dashboard. 🎬 See this video on how to remove and reinstall the switch A definitive test involves using a multimeter to check for proper opening and closing of the two internal circuits as the switch plunger is operated.
Typical fix: Replace the brake light switch. This involves disconnecting the electrical connector, twisting or unclipping the old switch from the pedal bracket, and installing the new one. It is recommended to disconnect the battery before starting.
Est. part cost: $20-$50 - Blown Fuse 🟡 Medium Probability A short in the circuit or an issue with the switch itself can cause the fuse to blow.
How to confirm: Check the fuses in the under-hood fuse box. Specifically for the 2013-2019 Taurus, check fuse F59 (10A), labeled for the 'Brakes ON/OFF Switch'. For 2010-2012 models, check fuse F13 (15A) in the same fuse box.
Typical fix: Replace the blown fuse. If the new fuse blows immediately, it indicates a short circuit in the wiring or the switch that needs to be diagnosed further.
Est. part cost: $1-$5 - Wiring or Connector Issue ⚪ Low Probability The wiring near the pedal can be subject to stress from foot movement or damage from items on the floor. Connectors can become loose or corroded over time.
How to confirm: Visually inspect the wiring harness and connector at the brake light switch for any signs of damage, corrosion, or loose pins. Use a multimeter to check for power and ground at the switch connector.
Typical fix: Repair the damaged section of wiring or clean/replace the connector pigtail.
Est. part cost: $10-$40
Rare But Worth Checking
- Faulty Powertrain Control Module (PCM): This is extremely rare. All other possibilities, including the switch, fuse, and wiring, should be exhaustively ruled out before considering a PCM failure.
Diagnosis Steps
- Verify the Symptoms: Confirm the operation of the brake lights. Do they work at all? Are they stuck on? Does the cruise control work?
- Scan for Codes: Confirm P1571 is the primary code. Note any other codes present, especially from the ABS module.
- Check the Fuses: Inspect the fuse for the brake switch circuit. For 2013-2019 models, this is fuse F59 (10A) in the under-hood fuse box. For 2010-2012, check fuse F13 (15A). If blown, replace it and re-test. If it blows again, suspect a short circuit.
- Inspect the Brake Light Switch Connector: Unplug the connector from the switch on the brake pedal arm. Check for corrosion, bent pins, or damaged wires.
- Test the Switch: The most definitive test is to replace the switch, as it is inexpensive. Alternatively, a multimeter can be used to test for continuity across the two separate circuits within the switch as the plunger is depressed and released. The readings should be logical opposites.
- Test the Circuit: If a new switch and good fuse do not resolve the issue, use a multimeter to check for 12V power at the switch connector with the key on. If power is missing, there is a wiring issue between the fuse box and the switch.
- Inspect Wiring: If all else fails, trace the wiring harness from the switch for any signs of physical damage, chafing, or breaks.
Parts You'll Likely Need
- Brake Light Switch / Stop Light Switch
(OEM #8T4Z-13480-A (Motorcraft SW-6572))— This is the most common failure point for the P1571 code. It's a mechanical switch that wears out over time.
Trusted brands: Motorcraft, Standard Motor Products, Dorman
OEM price range: $30-$50
Aftermarket price range: $20-$40
Platform-Specific Known Issues
- Owner Repair Experience: A user on TaurusClub.com with a 2013 Taurus reported the P1571 code along with no brake lights and the inability to shift out of park. After confirming the fuse was good, they replaced the brake light switch (part number 8T4Z-13480-A) located on the brake pedal arm. The repair took approximately 15 minutes and resolved all symptoms. They noted the most difficult part was the awkward angle required to access the switch under the dash.
Mechanic-Grade Diagnostic Values
- Brake Pedal Position (BPP) Switch Power Supply Voltage — expected: One wire at the switch connector should show battery voltage (approximately 12.0-12.6V) with the key in the 'ON' position.. Failure: A reading of 0V indicates a blown fuse (F59 or F13) or an open circuit in the power wire from the fuse box.
- BPP Switch Continuity Test (using a multimeter) — expected: With the switch unplugged, one pair of pins should have continuity (near 0 ohms) when the plunger is out (pedal pressed) and the other pair should have continuity when the plunger is in (pedal released). The states should be opposite.. Failure: If a circuit remains open or closed regardless of plunger position, or if both circuits are open/closed at the same time, the switch is internally faulty.
Scan Tool Commands That Help
- Ford IDS (Integrated Diagnostic Software): DataLogger > PCM > PIDs: BOO1, BOO2 — To monitor the live status of the two brake switch circuits (BOO1 and BOO2) as seen by the PCM. This allows a technician to see if the switch signals are being received and if they are logical (one ON, one OFF) when the pedal is pressed and released, confirming if the fault is with the switch or downstream wiring/PCM.
Wiring & Ground Locations
- BPP Switch Connector C278 — The 4-pin electrical connector that plugs directly into the brake light switch on the brake pedal support arm.. This is the primary point for testing voltage and is a common location for corrosion or loose pins that can cause the P1571 code.
- Pin 1 (VT-WH wire) at C278 — Violet with White stripe wire at the BPP switch connector.. This is the primary power feed from the fuse. It should have 12V+ with the key on. Lack of power here points directly to a fuse or wiring issue upstream.
- Pin 4 (GN-RD wire) at C278 — Green with Red stripe wire at the BPP switch connector.. This is the signal wire for the stop lamps. It should show 12V+ only when the brake pedal is depressed.
OEM Part Supersession History
GL3Z-13480-A→8T4Z-13480-A (Motorcraft SW-6572)— Part consolidation and potential minor design revision for durability.
Model Year Variations Within This Range
- 2010-2012 vs 2013-2019: The fuse protecting the brake switch circuit is different. Pre-facelift (2010-2012) models use a 15A fuse at position F13 in the under-hood fuse box. Facelift (2013-2019) models use a 10A fuse at position F59 in the same box.
Diagnostic Flowchart
Other Known Issues on This Vehicle
Issues unrelated to this code that are worth knowing about as an owner of this generation:
- Internal Water Pump Failure (3.5L V6) 🔴 High — Common after 80,000-120,000 miles. A weep hole leak is the first sign. If it fails internally, it mixes coolant with engine oil, leading to catastrophic engine failure.
- PTU (Power Transfer Unit) Failure (AWD Models) 🔴 High — The PTU fluid gets cooked by the nearby exhaust, turning to sludge and causing gear failure. Ford calls the fluid 'lifetime,' but regular changes (every 30k miles) are recommended by owners to prevent failure. Symptoms include grinding/clunking on turns or a smell like propane.
- EPAS (Electric Power Steering) Rack Failure 🔴 High — Can occur at various mileages, leading to a sudden loss of power steering assist. Symptoms include a 'Steering Assist Fault' message. Earlier models were recalled (15S18), but 2013+ models can still experience this failure, which is a significant safety hazard. (Ref: Recall 15S18 for earlier models (2011-2013))
- Carbon Buildup on Intake Valves (3.5L EcoBoost SHO) 🟠 Medium — As a direct-injection engine, fuel does not wash over the intake valves, leading to carbon accumulation over time. This can cause misfires and reduced performance. Walnut blasting the valves is a common maintenance procedure around 80,000-100,000 miles.
- Throttle Body Failure 🟠 Medium — Can cause the vehicle to enter 'limp mode' with sudden loss of power, accompanied by a wrench light on the dash. Often requires replacement of the electronic throttle body.
Used vs. New Parts: Buying Guide for This Vehicle
When a used part is the smart pick: Never. The brake light switch is an inexpensive, high-wear electromechanical part. The cost savings of a used part (typically $10-$15) are negligible compared to the risk of premature failure and the labor to replace it again. Always buy this part new.
What to inspect on the donor part:
- Not applicable as buying used is not recommended.
OEM-only on this vehicle (don't cheap out):
- While not strictly 'OEM-only', using the OEM Motorcraft part is highly recommended. The cost difference is minimal, and it ensures correct fitment, calibration, and electrical behavior, avoiding potential compatibility issues that can arise with some aftermarket versions of sensitive electronic parts.
Aftermarket brands forum-validated for this vehicle:
- Standard Motor Products (SMP)
- Dorman
Brands owners have reported issues with on this vehicle:
- No-name, unbranded parts from online marketplaces should be avoided due to inconsistent quality control.
Real Owner Stories
Aggregated from forums and TSBs cited above. Mileages and costs reflect what owners reported in those sources.
2013 Ford Taurus
Symptoms: P1571 code, no brake lights, and the inability to shift the vehicle out of 'Park'.
What fixed it: Replaced the brake light switch (part number 8T4Z-13480-A) located on the brake pedal arm. The repair took about 15 minutes.
Source hint: TaurusClub.com - 'P1571 Code, No Brake Lights, Can't Shift from Park'
Related OBD-II Codes
Frequently Asked Questions
Which fuse should I check for a P1571 code on my 2014 Ford Taurus?
My 2011 Taurus won't shift out of Park and has a P1571 code. Which fuse is responsible?
What is the specific Ford part number for the brake light switch to fix this issue?
Can a P1571 code prevent my push-button start Taurus from starting?
Is there a recall for the steering issues I'm seeing alongside my brake light problems?
Why does my instrument cluster say 'Service AdvanceTrac' when I have a P1571 code?
Helpful Videos

We Have This Part in Stock


The information in this article is provided for general reference and educational purposes only. Vehicle specifications, procedures, and part compatibility can vary by production date, trim level, and region. Always consult your vehicle's factory service manual and verify part numbers before purchasing or performing repairs. Safety-critical components such as airbags, seat belts, and braking systems should be installed by a qualified professional.
- Ford Taurus:
- 🧭 Diagnostic Flowchart
- 🎬 Helpful Videos
- 🛍️ Shop This Part
- What's Unique About the 2010-2019 Ford Taurus
- Symptoms You May Notice
- Most Likely Causes
- Rare But Worth Checking
- Diagnosis Steps
- Parts You'll Likely Need
- Platform-Specific Known Issues
- Mechanic-Grade Diagnostic Values
- Scan Tool Commands That Help
- Wiring & Ground Locations
- OEM Part Supersession History
- Model Year Variations Within This Range
- Other Known Issues on This Vehicle
- Used vs. New Parts: Buying Guide for This Vehicle
- Real Owner Stories
- 2013 Ford Taurus
- Related OBD-II Codes
- Frequently Asked Questions
- 🎟️ Get 5% Off