
OBD-II Code P1849: Transfer Case Position Sensor Circuit Problem
The Ultimate Expert Guide to What P1849 Means, Why It Triggers, and How to Fix It for Good
- P1849 indicates a short to ground on the 'A' circuit of the transfer case position sensor, immediately disabling your 4WD system.
- Inspect the wiring harness near the exhaust for melted sections before buying parts; this 10-minute visual check prevents a $300 misdiagnosis.
- If the wiring is intact, replacing the transfer case shift motor (which houses the sensor) is the fix in 80% of cases and takes about 1.2 hours for a DIYer.
- Seeing P1849 alongside codes P1850, P1853, or P1857 points directly to a corroded main connector or a completely failed shift motor assembly rather than a single broken wire.
What Does P1849 Mean?
P1849 is a manufacturer-specific code, primarily used by Ford, indicating the Powertrain Control Module (PCM) or 4x4 Control Module detects a short to ground in the 'A' circuit of the transfer case position sensor. This sensor, an internal part of the shift motor called a 'contact plate', tells the computer which gear the 4WD system is in. When shorted, the computer receives a constant ground signal instead of the expected voltage, making it impossible to verify the transfer case's position.
Technical definition: Transmission Transfer Case Contact Plate 'A' Short Circuit To Ground. The 4x4 Control Module continuously monitors the voltage from a set of four contact plates (A, B, C, D) to determine the rotational position of the transfer case shift shaft. A P1849 code is set when the module detects a continuous low voltage (short to ground) on the 'A' circuit at a time when a different voltage reading (an open or high signal) is expected based on the commanded position.
Can I Drive With P1849?
Yes, But With Caution. You can continue to drive, but the 4WD system is disabled. The immediate risk is low on dry pavement, but you lack 4WD capability in hazardous conditions. Ignoring the code causes the transfer case to stick between gears, making the vehicle undrivable. Diagnose the issue promptly to ensure safety and prevent a $2,000+ transfer case rebuild.
Common Causes
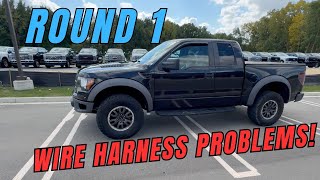
- Damaged or Melted Wiring Harness (Very Common) — The wiring harness for the transfer case shift motor routes under the vehicle, making it highly susceptible to damage. It melts from proximity to the exhaust, chafes against the frame, or snags during off-road use, causing wires to short directly to ground. 🎬 See how to identify and repair common Ford wiring harness problems.
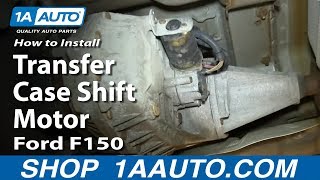
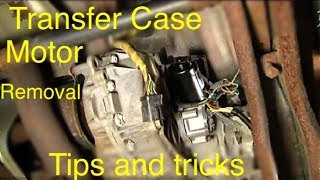
- Failed Transfer Case Shift Motor Assembly (Very Common) — The position sensor (contact plate) is integrated into the shift motor assembly. Internal electrical contacts wear down, break, or short out over time, causing erratic signals or a permanent ground fault. The entire motor must be replaced to fix the sensor. 🎬 Watch: This video shows how to diagnose and replace the motor.
- Water Intrusion and Corrosion in Connector (Common) — The main electrical connector for the shift motor is vulnerable to moisture and road salt. Water seeps in, bridging the pins and causing a short to ground. This triggers multiple contact plate codes simultaneously (e.g., P1849, P1853, P1857).
- Faulty 4x4 Control Module (TCCM) (Less Common) — The Transfer Case Control Module fails internally, incorrectly interpreting a valid signal as a short. This is more likely if multiple, unrelated 4x4 system codes are present alongside P1849.
- Poor Electrical Ground Connection (Less Common) — A loose, corroded, or broken ground wire for the 4x4 system or the TCCM creates a floating ground, leading to incorrect voltage readings that the module interprets as a circuit short.
- Blown Fuse for 4x4 System (Uncommon) — A short circuit in the wiring or shift motor blows the fuse for the 4x4 system. While this typically results in a total loss of power, it sometimes leads to circuit fault codes being stored.
- Low Battery Voltage (Uncommon) — Insufficient system voltage from a weak battery or failing alternator causes unpredictable behavior in electronic modules. The TCCM generates false circuit codes like P1849 during startup or under heavy electrical load.
Symptoms
- 4WD or 'Check 4x4' Light is On — The most common and immediate indicator. The warning light on the instrument cluster illuminates to alert the driver of a fault in the 4WD system.
- 4WD System is Inoperative — The vehicle refuses to shift into or out of 4WD. It remains stuck in 2WD, 4WD High, or 4WD Low, and does not respond to the selector switch.
- Flashing 4WD Indicator Light — Before the solid 'Check 4x4' light appears, the 4WD mode lights flash several times when attempting to engage the system, indicating a failed shift attempt.
- Clicking or Grinding Noises from Under the Vehicle — A clicking sound emits from the shift motor as it attempts to engage but fails, or a grinding noise occurs if the transfer case gears do not mesh correctly.
- Vehicle Enters 'Limp Mode' (also visible on scanner) — In some models, a critical fault in the 4x4 system triggers the PCM to put the transmission into a limp mode, locking it in a single gear to prevent further damage.
Diagnostic Flowchart
Tap your situation to follow the diagnostic path that matches what you're seeing on this code.
Common Fixes & Costs
- Repairing Damaged Wiring Harness — Parts: $10-$50, Labor: $200-$500, ~2.5 hr book time (Intermediate)
- Replacing the Transfer Case Shift Motor Assembly
— Parts: $150-$400, Labor: $125-$250, ~1.2 hr book time
(DIY)
Ford F-150 (2004-2008): OEM 8L3Z-7G360-A (Alt: {'Dorman': '600-911', 'Cardone': '48-208 (Reman)'})
Ford Explorer (2006-2010): OEM 8L2Z-7G360-A (Alt: {'Dorman': '600-925', 'SKP': 'SK600925'})
Ford Expedition (2003-2006): OEM 5L1Z-7G360-AA (Alt: {'Dorman': '600-806', 'TRQ': 'DTA15633'}) - Cleaning Connector and Applying Dielectric Grease — Parts: $5-$15, Labor: $50-$100, ~0.5 hr book time (Beginner)
- Replacing the 4x4 Control Module (TCCM)
— Parts: $150-$550, Labor: $100-$215, ~0.8 hr book time
(Intermediate)
Ford F-150 (2004-2008): OEM 6L3A-12A650-ASC (example, varies by calibration) (Alt: {'Dorman': '599-252 (Reman)'})
Ford Explorer (2008-2010): OEM 8L2A-7H473-AA (Alt: {'Dorman': 'Various (Reman)'}) - Replacing a Blown 4WD System Fuse — Parts: $1-$10, Labor: $0-$50, ~0.1 hr book time (Beginner)
Used vs. New Parts: Buying Guide
When a used part is worth it: A used shift motor makes sense for a high-mileage vehicle where the budget is the primary concern and the owner accepts the risk of a shorter lifespan. It is a gamble, as the used part has similar wear on its internal contacts.
Donor-vehicle mileage cap: roughly under 60000 miles for the part to have meaningful remaining life.
Donor quality checklist:
- Source the part from a vehicle with documented low mileage that was wrecked due to collision, not drivetrain failure.
- Inspect the electrical connector on the used part for any signs of corrosion, melting, or broken pins.
- Match the OEM part number exactly. Different years or models use physically identical motors with different internal wiring.
Decision logic:
- If The vehicle is a daily driver and reliability is critical, especially for winter conditions. → Buy a new OEM or high-quality aftermarket part (e.g., Dorman, Cardone). The peace of mind and warranty are worth the extra cost.
- If The vehicle is older (>150k miles) and the budget is extremely tight. → A used part is a viable option, but understand it is a short-term solution. Expect 30-50% of the life of a new part.
- If Diagnosis is uncertain between wiring and the motor itself. → Buy a new part with a good return policy. If the new motor doesn't fix the issue, the problem is in the wiring, and you can return the part.
Warranty tradeoff: Used parts from a salvage yard offer a 30-90 day warranty covering only part replacement. New aftermarket parts come with a 1-year to limited-lifetime warranty. New OEM parts carry a 1-2 year warranty.
Worst-case if a used part fails: $250-$500 if a used motor fails shortly after installation, requiring a second replacement part and repeat labor costs.
What Happens If You Wait — Timeline
- 0-1 Month: Code P1849 is set, and the 'Check 4x4' light illuminates. The 4WD system is completely disabled as a failsafe. The vehicle remains in its last known good position (usually 2WD). (MPG impact: 0%% · Added cost: $0)
- 1-3 Months: If the fault is intermittent, the driver attempts to shift, causing the system to try and fail. This results in grinding noises or the transfer case getting stuck between gears, requiring a tow to a shop to be manually shifted back into 2WD. (MPG impact: 0%% · Added cost: $150-$300 (for a tow and manual shift))
- 3-8 Months: Repeated failed shift attempts or driving with a partially engaged drivetrain puts significant stress on the transfer case shift forks. These forks bend or break. (MPG impact: 0-5% (if binding)% · Added cost: $400-$800 (for shift fork replacement, parts are cheap but labor is high as the case must be opened).)
- 8+ Months: Catastrophic failure. A broken shift fork or continued operation with a binding drivetrain destroys internal gears, bearings, or the drive chain. The transfer case requires a complete rebuild or replacement. (MPG impact: N/A (Vehicle may be undrivable)% · Added cost: $2,100-$4,000+ (for a replacement or rebuilt transfer case).)
Cost of Not Fixing It
- Immediate: Complete loss of four-wheel drive functionality. This is a critical safety issue if you rely on 4WD for inclement weather or off-road conditions. (Added cost: $0)
- 1-6 Months: The transfer case sticks between gears during a failed shift attempt, resulting in grinding noises, drivetrain binding, and making the vehicle undrivable. (Added cost: $150-$300 (for a tow and manual shifting of the transfer case))
- 6+ Months: Continued failed shift attempts or driving with a binding drivetrain causes severe internal damage to the transfer case, including broken shift forks or worn-out clutch packs. (Added cost: $2,000-$4,000+)
Diagnosis Steps
- Scan for All DTCs
Use a high-quality OBD-II scanner capable of communicating with the 4x4 Control Module (TCCM). Record P1849 and any other codes. A cluster of contact plate codes (e.g., P1849, P1853, P1857) points towards a connector or motor assembly failure, not just a single wire.
Tools: Bi-directional OBD-II Scanner (Beginner) - Thorough Visual Inspection of Wiring and Connector
Safely raise the vehicle. Locate the transfer case shift motor and meticulously inspect the wiring harness. Look for melted sections near the exhaust, chafing against the frame, and signs of corrosion or water inside the main connector. Tug gently on the wires at the connector to check for loose pins.
Tools: Jack, Jack Stands, Flashlight, Safety Glasses (Beginner) - Inspect Fuses and Relays
Consult the owner's manual to locate and inspect all fuses related to the 4x4 system, TCCM, and transfer case. A blown fuse is a strong indicator of a severe short circuit that must be located.
Tools: Owner's Manual, Fuse Puller (Beginner) - Test the 'A' Circuit for Short to Ground
Disconnect the harness from the shift motor. Using a multimeter set to Ohms (Ω), place one probe on the pin for the 'Contact Plate A' wire in the harness-side connector and the other probe on a clean chassis ground. A reading near 0 Ω confirms the wiring harness is shorted to ground. An 'OL' or infinite reading confirms the wiring is okay, meaning the fault is inside the shift motor.
Tools: Multimeter, Vehicle Service Manual (for pinout diagram) (Intermediate) - Advanced Scan Tool Analysis (PID Monitoring)
With a bi-directional scanner, access the TCCM's live data stream. Monitor the PIDs for 'PLATE_A', 'PLATE_B', 'PLATE_C', and 'PLATE_D'. Command the transfer case to shift. If PLATE_A is stuck on 'Closed' or 'Ground' while others change, it confirms the fault is on that circuit. If none respond, it indicates a power or ground issue to the sensor.
Tools: Bi-directional OBD-II Scanner (Advanced) - Advanced: Voltage Drop Test
With the shift motor harness disconnected and ignition ON, measure the voltage on the 'Contact Plate A' circuit wire. It should be near 5.0 volts (reference voltage from the TCCM). If the voltage is near 0V, it confirms a short to ground in the harness. If 5.0V is present, the short is inside the shift motor assembly.
Tools: Multimeter, Wiring Diagram (Advanced) - Advanced: Shift Motor Bench Test (Resistance Sweep)
Remove the shift motor. Using a multimeter, identify the common pin and the four contact plate pins. Measure resistance between the common pin and each contact plate pin while slowly turning the motor's shaft. Resistance switches cleanly between near 0 Ω and OL. A constant 0 Ω on the 'A' pin indicates a failed internal plate.
Tools: Multimeter, Pliers, Service Manual (for pinout) (Advanced) - Test 4WD Selector Switch
If other tests are inconclusive, check the 4WD selector switch in the cabin. Back-probe the switch connector and use a multimeter to verify it sends the correct resistance signal for each position. A service manual is critical for exact resistance values.
Tools: Multimeter, Service Manual (Intermediate) - Test the 4x4 Control Module (TCCM)
If the wiring, shift motor, and switch all test good, the TCCM has failed. Check for proper power and ground inputs at the module's connector. If inputs are good but the module doesn't send power to the shift motor or read sensor data correctly, replace the module.
Tools: Multimeter, Vehicle Wiring Diagram (Advanced)
When This Code Triggers (Freeze-Frame Conditions)
- Vehicle Speed: 0 MPH (The code sets immediately at key-on, before the vehicle moves, as the 4x4 module performs a self-test on its sensor circuits.)
- Commanded 4WD Position: 2H (Fault stores during normal driving when no shift is commanded, as the module continuously monitors for unexpected ground signals.)
- Attempted 4WD Shift: Shift to 4H or 4L (The code triggers when the driver attempts to shift the 4WD system and the module does not see the expected voltage change from the 'A' contact plate.)
- System Voltage: 11.5V - 14.5V (The fault is detected under normal battery voltage conditions; it is a specific circuit failure, not caused by low system voltage.)
Related Codes
- P1867 — A general circuit failure code for the transfer case contact plates. It appears alongside P1849 when the computer cannot get a coherent reading from the sensor assembly. P1867 is generic, while P1849 specifically identifies a short to ground on the 'A' circuit.
- P1891 — Indicates an open circuit in the transfer case contact plate ground return, the opposite of P1849's short circuit. A test for P1849 shows near-zero resistance to ground, whereas P1891 shows infinite resistance.
- P1850, P1853, P1857 — These codes point to short-to-ground faults in the 'B', 'C', and 'D' contact plate circuits. Seeing P1849 along with these codes proves the entire shift motor assembly, main connector, or TCCM is at fault, rather than a single wire.
- U1900 — A CAN Bus communication fault code. It appears with P1849 if the wiring short is severe enough to disrupt communication between the 4x4 module and other vehicle modules.
Climate & Environmental Factors
- Road Salt / High Humidity: Regions using road salt in winter or having high humidity see a much higher rate of P1849 triggers. Salt and moisture accelerate corrosion in the shift motor's electrical connector and seep past seals, destroying the internal contact plates.
- Extreme Cold: In very cold weather, moisture inside the shift motor or connector freezes, causing intermittent open circuits or shorts. The plastic and rubber components of the wiring harness become brittle and susceptible to cracking.
- Off-Road Use: Vehicles used frequently off-road are at a higher risk. The wiring harness snags on debris, and the shift motor assembly is exposed to water and mud submersion, leading to premature failure.
How to Talk to a Mechanic About This Code
Say this: "I have a 'Check 4x4' light and a P1849 code. I'd like to book a diagnostic appointment. Based on my research, the most common causes are a melted wiring harness near the exhaust or the shift motor itself. Can you please start by inspecting the wiring harness for shorts before recommending a new shift motor?"
This signals you are an informed customer. It directs the technician to check the cheapest and most common failure point (wiring) before replacing a more expensive part (the motor), preventing a common misdiagnosis and saving you money.
Avoid saying:
- 'My 4-wheel drive is broken, fix it.'
- 'My 'Check 4x4' light is on, can you look at it?' (too vague)
- 'Just replace the shift motor.' (This may be the wrong part, leading to wasted money)
Questions to ask before authorizing the repair:
- Did you find a short to ground in the wiring harness or is the short internal to the shift motor?
- If the wiring is bad, can you show me the damaged section?
- If the TCCM (4x4 module) needs to be replaced, does the new one require programming and is that included in the quote?
- What is the warranty on the parts and labor for this repair?
Where to Take It: Dealer vs Independent vs Chain
- Dealer:
Recommended if TCCM programming is needed or if other shops have failed to find the fault. Otherwise, a good independent shop is more cost-effective.
Best for: Vehicles under warranty., Complex cases where the TCCM (module) is suspected and requires brand-specific programming., If you've already tried replacing the motor and the problem persists.
Downsides: Highest labor rates., Quick to replace the entire shift motor assembly ($$$) instead of repairing a simple wiring issue ($). (Typical cost: +50% vs. baseline) - Independent Shop:
Best choice for most P1849 situations. This is a very common code on domestic trucks, and most experienced independent mechanics fix it regularly.
Best for: Out-of-warranty vehicles., Diagnosing and repairing common wiring issues or replacing the shift motor., Most cost-effective option for the most likely repairs.
Downsides: Quality varies, so check reviews. Ensure they are comfortable with electrical diagnostics., Lacks the tools to program a new TCCM if that turns out to be the issue. (Typical cost: +0% vs. baseline) - Chain Shop:
Use with caution. Acceptable for a straightforward shift motor replacement, but not recommended for the initial diagnosis, which requires careful electrical testing to avoid replacing the wrong parts.
Best for: Simple, clear-cut part replacements where the diagnosis is already certain (e.g., you've diagnosed it yourself and just need the labor)., Tire changes and oil services.
Downsides: Technician skill varies widely., Lacks the advanced diagnostic experience for electrical issues that aren't obvious., High pressure to upsell services. (Typical cost: -10% vs. baseline)
When to Walk Away From the Repair
If the estimated repair cost exceeds 50% of the vehicle's private-party market value, seriously consider if the investment is worthwhile.
- Car worth $7000, fix is $650: Fix it. A $650 repair for a shift motor replacement is well below the threshold and restores a critical vehicle function.
- Car worth $4500, fix is $2800: Walk away. If the issue has cascaded into needing a full transfer case replacement, the repair cost is over 60% of the vehicle's value. It is not a sound financial decision.
- Car worth $15000, fix is $3000: Borderline. If the diagnosis requires a new transfer case on a more valuable truck, get a second opinion from another shop before proceeding.
What Scan Tool You Need for This Code
Minimum: A scanner that reads codes from manufacturer-specific modules like the Transfer Case Control Module (TCCM). A basic engine-only (PCM) code reader will NOT see the P1849 code.
A standard $20 reader only talks to the engine computer. P1849 is stored in the separate 4x4/drivetrain module. Without accessing this module, you won't even know the code exists.
Budget: BlueDriver Pro Scan Tool (~$100) — Reads and clears codes from the TCCM on many Ford, GM, and Chrysler vehicles. It displays live data for the contact plate circuits, which is essential for diagnosis.
Mid-range: Foxwell NT510 Elite (~$180) — Offers deep manufacturer-specific diagnostics. It reads live data from the TCCM and features bi-directional control, allowing you to command the transfer case to shift, which is a powerful diagnostic test.
Professional: Autel MaxiCOM MK808BT (~$550) — Provides professional-level, bi-directional control of the 4x4 system. It reads/graphs all relevant PIDs, performs system tests, and offers programming functions for a replacement TCCM if needed.
Rent vs buy: Auto parts stores allow you to borrow a capable OBD-II scanner for free with a refundable deposit. If this is a one-time fix, renting is the most cost-effective option. Buy only if you plan to do your own diagnostics regularly.
How to Clear the Code After You Fix It
- Use a compatible OBD-II scan tool to clear the code from the 4x4 Control Module (TCCM).
- Disconnect the battery for 15-20 minutes as a secondary clearing method if a capable scanner is unavailable.
- Perform a functional test by shifting the 4WD system through all its ranges (2H, 4H, 4L) and back to 2H to confirm the repair.
Drive cycle (~10 minutes): A specific drive cycle is not required. After clearing the code, start the engine and let it idle for 1-2 minutes. With the vehicle stationary and the transmission in Neutral, attempt to shift into 4H, then 4L, then back to 4H, and finally to 2H. A successful series of shifts without the 'Check 4x4' light returning confirms the fix.
Readiness monitors affected: None
Watch out for:
- Clearing the code without fixing the underlying short circuit causes the code to return immediately upon the next key cycle or shift attempt.
- Using a basic OBD-II reader that only communicates with the PCM fails to clear codes stored in the separate 4x4 Control Module (TCCM).
Will This Fail Emissions / State Inspection?
No — by itself this code doesn't fail OBD inspection (but it can keep readiness monitors from setting, which causes a separate fail).
- California: This code illuminates a 'Check 4x4' warning light, not the main Check Engine Light (MIL). California's SMOG check fails a vehicle for an illuminated MIL. As P1849 does not trigger the MIL, it does not cause a SMOG check failure.
- New York: New York's annual inspection includes safety and emissions. While an active P1849 won't fail the OBD-II emissions scan, inspectors flag the illuminated 'Check 4x4' light as a safety concern, though it is not an automatic failure.
- Texas: In the 17 counties requiring emissions testing, the OBD-II test looks for emissions-related codes commanding the MIL. Since P1849 is a drivetrain code that doesn't illuminate the MIL, it passes the emissions test.
Most Commonly Affected Vehicles
- Ford F-150 (2004-2015) — Extremely common. The 2004-2008 models are notorious. The wiring harness routes too close to the exhaust, causing it to melt. The shift motor's internal contact plates are also a primary failure point.
- Ford Explorer (2002-2010) — Shares similar 4WD system architecture with the F-150. Prone to shift motor failure and issues with the 4x4 control module located behind the glovebox.
- Ford Expedition / Lincoln Navigator (1997-2006) — Uses a nearly identical transfer case shift motor and wiring setup as the F-150. The 1997-2002 models often require de-pinning and swapping the electrical connector when replacing the motor.
- Ford Ranger / Mazda B-Series (1998-2011) — The electric shift motor and its internal position sensor are a frequent point of failure, leading to an inoperative 4WD system.
- Dodge Ram 1500 (2002-2010) — Experiences issues with the transfer case 'encoder motor' (the Dodge term for the shift motor assembly) and its wiring. Repair costs are often higher than on Ford models.
- Chevrolet / GMC Silverado / Sierra 1500 (1999-2013) — The issue is often a failed transfer case encoder motor sensor ring or the motor itself. Shift motor replacement costs range from $700-$800 at a shop.
- Jeep Grand Cherokee (1999-2010) — Suffers from position sensor failures triggering similar diagnostic codes, though the transfer case design differs. Shift motor replacement costs are higher on these models.
- Nissan Titan / Armada (2004-2015) — Failures of the transfer case control unit (TCCU) and the shift actuator assembly are common, causing an inability to switch 4WD modes.
Manufacturer-Specific Notes
- Ford: The shift motor wiring harness routes notoriously close to the exhaust manifold on many F-Series and Explorer models. The factory heat shielding is inadequate, leading to melted wires. This is the first place to look.
- General Motors (GM): On Silverado and Sierra trucks, the issue is a failed 'encoder motor ring' inside the shift motor assembly. This plastic ring contains the conductive traces for the position sensor and cracks or wears out. It is usually serviced as a complete shift motor assembly.
- Dodge / Ram: The Transfer Case Control Module (TCCM) is known to fail due to water intrusion. Before replacing an expensive encoder motor, check the TCCM for signs of corrosion on the circuit board, especially if the truck has had a cabin water leak.
- SAAB: On certain SAAB models (like the 9-3), code P1849 has a completely different meaning. It refers to a short-circuited pressure regulation solenoid within the automatic transmission itself, unrelated to the 4WD system.
Real Owner Stories
2006 Ford F-150 with ~150k miles - The Classic Misdiagnosis
The 'Check 4x4' light came on and the system was inoperative. The owner scanned the codes and found P1849 and the general contact plate failure code P1867.
What they tried:
- Assuming the most common failure, the owner replaced the transfer case shift motor. The code immediately returned.
- After the new part didn't work, they inspected the wiring harness more closely.
Outcome: The owner discovered the wiring harness had melted due to its proximity to the exhaust. After repairing the melted wires, the 4x4 system functioned correctly with the original shift motor. The new motor was not needed.
Lesson: Always perform a thorough visual inspection of the wiring harness for melting or chafing before replacing the shift motor. This is the most common cause of misdiagnosis and saves over $200 on an unnecessary part.
2005 Ford F-150 Lariat - The Intermittent Gremlin
4x4 would sometimes fail to engage, occasionally flashing the light, and other times working perfectly. The issue became progressively worse over several months.
What they tried:
- The owner initially suspected the dash switch or a fuse, but both checked out.
- They disconnected and cleaned the main electrical connector at the shift motor, which was full of dirt and showed minor corrosion.
- After cleaning the connector and applying dielectric grease, the system worked reliably for a short time before failing again.
Outcome: The owner replaced the transfer case shift motor. The new motor resolved the problem permanently. The internal contact plates of the original motor were worn and making intermittent contact, causing the unpredictable failures.
Lesson: Intermittent failures that aren't resolved by cleaning the connector point to a failing shift motor assembly. The internal contacts wear out and cause unpredictable behavior before failing completely.
2014 F-150 at 23k miles - A Cascade of Failures
After using 4-Low, the driver attempted to shift back to 2WD. The truck displayed a 'shift delayed-pull forward' message, followed by loud grinding and popping from the front end before finally setting the 'Check 4x4' light.
What they tried:
- The owner tried shifting between modes several times. The truck would get stuck, rev without moving, and the speedometer would read 60 mph while stationary.
Outcome: Since the vehicle was under warranty, it was taken to the dealer. The diagnosis was a failed transfer case shift motor. The motor's failure to correctly report its position caused the control module to attempt shifts at the wrong time, leading to the grinding and binding in the drivetrain.
Lesson: Loud grinding or binding during a shift attempt is a critical symptom. Do not continue trying to force the shift. The problem is a simple electronic failure causing a dangerous mechanical situation.
How to Prevent This Code From Triggering
- Apply Dielectric Grease to the Shift Motor Connector (Any time the connector is disconnected, or every 2-3 years.) — Dielectric grease is non-conductive and seals the connector's rubber gaskets, preventing moisture and road salt from entering and causing corrosion on the pins, which is a common cause of circuit faults.
- Inspect and Secure the Wiring Harness (During every oil change.) — Visually check the harness for contact with the exhaust pipe or driveshaft. Ensure it is properly secured in its clips. Re-securing a loose harness prevents it from melting or chafing, the #1 cause of P1849.
- Install Protective Heat Shielding on Harness (Once, as a permanent upgrade.) — For vehicles where the harness routes close to the exhaust, adding a high-temperature wire loom or heat-reflective sleeve provides a robust barrier, preventing the wires from melting and shorting out.
- Change Transfer Case Fluid (Every 60,000 miles for severe use (towing, off-road) or 100,000-150,000 miles for normal use.) — Clean fluid ensures proper lubrication and cooling of the transfer case internals. It prevents mechanical binding that puts extra stress on the shift motor during engagement, extending its life.
- Engage 4WD System Periodically (Once a month for a short distance.) — Cycling the system through its ranges (4H and 4L) keeps the shift motor and internal transfer case components lubricated and moving freely, preventing them from seizing up from long periods of disuse.
Frequently Asked Questions
What is a 'Contact Plate'?
A contact plate is a simple position sensor inside the shift motor assembly. It features a disc with conductive metal traces that wipers move across as the motor turns. This opens and closes circuits to signal the transfer case shaft's exact position to the 4x4 control module.
Can I fix P1849 myself?
Yes, this is a very common DIY repair. If the cause is the shift motor, it is typically held on by just three or four bolts and is easily accessible on the back of the transfer case. Basic hand tools are usually all that is required.
Is it expensive to fix a P1849 code?
The cost varies based on the root cause. A simple wiring repair costs $200-$500 at a shop, while replacing the transfer case shift motor costs $275-$650 total. If you DIY the shift motor replacement, parts cost between $150 and $400.
I replaced the shift motor, but the P1849 code came back. What's next?
This is a classic diagnostic pitfall indicating the fault is in the wiring harness or the 4x4 control module itself. Perform a resistance test on the 'A' circuit wire from the module connector to the motor connector to find the short to ground.
My 4x4 is stuck. How can I get it back into 2WD to drive to a shop?
Remove the failed shift motor (usually 3-4 bolts) to expose the transfer case shaft. Use a wrench to turn this shaft to the '2H' position marked on the housing. This mechanically locks the vehicle in two-wheel drive so you can drive safely.
Is the problem the sensor or the motor?
On the vast majority of affected vehicles, the position sensor (contact plate) is permanently integrated into the transfer case shift motor. They are serviced as a single unit. You must replace the entire motor assembly to fix a bad sensor.
Could a bad battery cause a P1849 code?
While uncommon, low system voltage causes electronic modules to generate false or erratic trouble codes. If you have P1849 along with other electrical codes (like P0562 - System Voltage Low), have your battery and alternator tested first.
Can I just ignore code P1849?
You can, but your four-wheel drive will not function, creating a major safety issue in adverse weather. Ignoring it also leads to the transfer case becoming stuck between gears, potentially stranding you. Address the issue promptly to avoid mechanical damage.
Key Takeaways
- P1849 indicates a short to ground on the 'A' circuit of the transfer case position sensor, immediately disabling your 4WD system.
- Inspect the wiring harness near the exhaust for melted sections before buying parts; this 10-minute visual check prevents a $300 misdiagnosis.
- If the wiring is intact, replacing the transfer case shift motor (which houses the sensor) is the fix in 80% of cases and takes about 1.2 hours for a DIYer.
- Seeing P1849 alongside codes P1850, P1853, or P1857 points directly to a corroded main connector or a completely failed shift motor assembly rather than a single broken wire.
Helpful Videos


Shop the Parts Behind P1849
Below are the parts most often responsible for code P1849, ranked by how frequently each one is the actual culprit (per the diagnosis above). Tap any to see what we have for your vehicle.


The information in this article is provided for general reference and educational purposes only. Vehicle specifications, procedures, and part compatibility can vary by production date, trim level, and region. Always consult your vehicle's factory service manual and verify part numbers before purchasing or performing repairs. Safety-critical components such as airbags, seat belts, and braking systems should be installed by a qualified professional.
- 🧭 Diagnostic Flowchart
- 🎬 Helpful Videos
- 🛍️ Shop This Part
- What Does P1849 Mean?
- Can I Drive With P1849?
- Common Causes
- Symptoms
- Common Fixes & Costs
- Used vs. New Parts: Buying Guide
- What Happens If You Wait — Timeline
- Cost of Not Fixing It
- Diagnosis Steps
- When This Code Triggers (Freeze-Frame Conditions)
- Related Codes
- Climate & Environmental Factors
- How to Talk to a Mechanic About This Code
- Where to Take It: Dealer vs Independent vs Chain
- When to Walk Away From the Repair
- What Scan Tool You Need for This Code
- How to Clear the Code After You Fix It
- Will This Fail Emissions / State Inspection?
- Most Commonly Affected Vehicles
- Manufacturer-Specific Notes
- Real Owner Stories
- 2006 Ford F-150 with ~150k miles - The Classic Misdiagnosis
- 2005 Ford F-150 Lariat - The Intermittent Gremlin
- 2014 F-150 at 23k miles - A Cascade of Failures
- How to Prevent This Code From Triggering
- Frequently Asked Questions
- What is a 'Contact Plate'?
- Can I fix P1849 myself?
- Is it expensive to fix a P1849 code?
- I replaced the shift motor, but the P1849 code came back. What's next?
- My 4x4 is stuck. How can I get it back into 2WD to drive to a shop?
- Is the problem the sensor or the motor?
- Could a bad battery cause a P1849 code?
- Can I just ignore code P1849?
- Key Takeaways
- 🎟️ Get 5% Off