
P1870 on 1999-2003 GMC Savana: Transmission Slipping Causes and Fixes
On a 1999-2003 GMC Savana with a 4L60E or 4L80E transmission, code P1870 almost always means the transmission valve body's TCC regulator valve bore is worn. This causes a hydraulic leak, preventing torque converter lockup and triggering harsh, banging shifts after the vehicle warms up. The definitive fix is to repair the valve body bore with a reamer and an aftermarket sleeve kit (like Sonnax 77754-04K) or replace the valve body with an updated unit. This repair typically costs between $400 and
- P1870 on a GMC Savana indicates transmission slippage, almost always caused by a worn valve body.
- The most common symptom is a harsh 1-2 shift that appears after the van has been driven for 15-20 minutes.
- Do not ignore this code. The harsh shifting commanded by the computer will eventually cause severe transmission damage.
- The correct fix is not just a solenoid replacement, but a repair of the TCC valve bore in the valve body using a specialized kit or a complete remanufactured valve body.
- This is not a beginner-friendly DIY job and should be handled by a professional transmission shop.
What's Unique About the 1999-2003 Gmc SAVANA
The GMC Savana from this era uses the 4L60E or 4L80E automatic transmission. These transmissions are notorious for a specific design flaw leading to code P1870. The TCC regulator valve, which is pulse-width modulated (PWM), constantly oscillates within its bore in the soft aluminum valve body. This movement, especially as the transmission fluid heats up and thins, wears the bore, creating a hydraulic leak that prevents the TCC from applying with sufficient pressure. When the PCM detects this slip, it commands maximum line pressure to prevent further damage, which causes the characteristic harsh 1-2 shift. GM acknowledged this widespread issue in Technical Service Bulletin 01-07-30-023B, recommending a valve body replacement for affected vehicles built before January 15, 2000. GM began revising the valve body to address the wear issue around 2001-2002.
Diagnostic Flowchart
Tap your situation to follow the diagnostic path that matches what you're seeing on this vehicle.
Symptoms You May Notice
- Check Engine Light or Service Engine Soon light is on. [⭐ MANUFACTURER TSB — highest authority]
- Very harsh or banging 1-2 shift, which is most noticeable after the transmission has reached operating temperature (e.g., after 20-30 minutes of driving).
- Transmission may feel like it's slipping at highway speeds, just before or after the harsh shifts begin.
- The transmission may be prevented from shifting into overdrive (4th gear) as a protective measure by the PCM.
- Engine RPMs are higher than usual during highway cruising because the torque converter is not locking up.
- The harsh shift symptom disappears or is less noticeable when the transmission is cold.
- Replacing only the TCC solenoid without addressing valve body wear. If the bore is worn, a new solenoid will not fix the hydraulic leak and the P1870 code will return.
- Assuming the entire transmission needs to be rebuilt immediately. If caught early (fluid is not burnt, no debris in pan), a valve body repair is often sufficient to solve the problem without a full rebuild.
- Replacing the torque converter. While possible, it is far less common than valve body wear. The valve body should always be inspected first.
Most Likely Causes
- Worn TCC Regulator Valve Bore in Valve Body 🔴 High Probability → Shop Transmission Valve Body The PWM TCC regulator valve constantly oscillates, wearing the soft aluminum valve body bore. This wear creates a hydraulic leak, preventing the TCC from locking up when the fluid is hot and thin. This is a well-documented design flaw in 4L60E/4L80E transmissions.
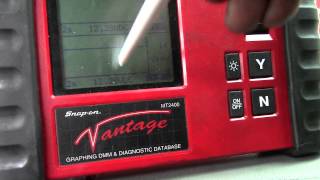
How to confirm: A technician can use a scan tool to monitor TCC slip RPM while driving. 🎬 See how a technician diagnoses slip using a scan tool. If slip is over 150 RPM when the TCC is commanded on (especially when hot), a hydraulic leak is confirmed. Visual inspection or vacuum testing the valve bore after removing the valve body provides definitive proof of wear.
Typical fix: The valve body bore must be reamed with a special tool and an oversized valve and sleeve kit installed. The correct kit for this vehicle is Sonnax 77754-04K. Alternatively, a remanufactured valve body with the fix already incorporated can be installed.
Est. part cost: $60-$300 - Failed TCC PWM Solenoid 🟡 Medium Probability → Shop Transmission Valve Body This solenoid (ACDelco P/N 24227792) controls the hydraulic pressure for TCC application. It can fail electrically (testing for 10-11 ohms resistance) or mechanically (cracked snout).
How to confirm: A scan tool can check for specific solenoid circuit codes (like P1860). The solenoid's resistance can be tested with a multimeter; it should be 10-11 ohms at 68°F (20°C). A visual inspection may reveal a cracked plastic snout, which causes a major leak.
Typical fix: Replace the TCC PWM solenoid. This is located on the valve body and is almost always replaced as a 'while you're in there' item during a valve body repair.
Est. part cost: $25-$75 - Low or Contaminated Transmission Fluid ⚪ Low Probability → Shop Transmission Assembly
How to confirm: Check the transmission fluid level and condition with the engine running and transmission warm. Fluid should be at the correct level, red, and not smell burnt. Burnt, dark fluid indicates clutch damage, meaning the problem is more severe than just the valve body.
Typical fix: Perform a transmission fluid and filter change. If the fluid is very dark or contains metal, a transmission rebuild is likely necessary.
Est. part cost: $50-$150
Rare But Worth Checking
- Failing Torque Converter: → Shop Automatic Transmission Torque Converter While the valve body is the most common culprit, the torque converter's internal clutch can fail, causing slippage. This is a more expensive repair and is often misdiagnosed when the valve body is the real issue.
- Worn Stator Support Bushings: Severe wear in the stator support bushings inside the transmission pump can cause a major hydraulic leak in the TCC apply circuit. One owner on BAT Auto Technical forums found this to be the root cause after a Sonnax kit did not fix their P1870, requiring a transmission teardown to replace the bushings and input shaft.
- Cracked TCC Apply Solenoid Snout: Not the PWM solenoid, but the on/off TCC solenoid located in the pump. A crack in its plastic housing can cause a leak that prevents lockup. This was documented in a YouTube video by Automatic Transmission Service Group where a new, defective solenoid was the culprit after all other common fixes were performed.
Diagnosis Steps
- Check the transmission fluid level and condition. Ensure it is full and does not look or smell burnt. Burnt fluid or excessive metal in the pan points to damage beyond the valve body.
- Scan the TCM for any other trouble codes. Diagnose and fix other codes first, especially solenoid electrical codes like P1860.
- Using a capable scan tool, drive the vehicle until the transmission is at full operating temperature (above 93°C / 200°F), as the issue may not appear when cold.
- Monitor the 'TCC Slip Speed' data parameter while driving at a steady highway speed (over 50 MPH). When the scan tool shows 'TCC Command' as 'ON' or 'Yes', the slip speed should be less than 50 RPM. If it is significantly higher (e.g., 150+ RPM), a slip is confirmed.
- If a slip is present, drop the transmission pan. Inspect for excessive clutch material (a fine black sludge) or metal debris. A relatively clean pan strongly suggests the issue is isolated to the valve body.
- If the pan is clean, remove the valve body. Visually inspect the TCC regulator valve bore for scoring or wear. A vacuum test kit can provide a quantitative measure of the wear.
- If the valve body bore is worn, perform a repair using a reamer and sleeve kit (Sonnax 77754-04K) or replace the valve body assembly with a remanufactured unit that has these updates.
Parts You'll Likely Need
- TCC Regulator & Isolator Valve Kit — This kit is the most direct fix for the common cause of P1870. It includes an oversized valve and a sleeve to restore the hydraulic seal in the worn valve body bore. The -04K version is correct for '98+ vehicles.
Trusted brands: Sonnax (P/N: 77754-04K), TransGo
Aftermarket price range: $60-$90 - Remanufactured Valve Body
(OEM #24213533 (check VIN))— A complete remanufactured valve body is an alternative to reaming the original. 🎬 Watch: Why a rebuilt valve body is a great alternative. It comes with the TCC bore already repaired and updated, along with new solenoids, saving diagnostic and labor time.
Trusted brands: Sonnax, ACDelco (remanufactured)
OEM price range: $250-$400
Aftermarket price range: $200-$350 - TCC PWM Solenoid
(OEM #24227792)— This solenoid is often replaced as a preventative measure when the valve body is serviced, as it is a critical component for TCC operation and a potential failure point.
Trusted brands: ACDelco (GM Genuine)
OEM price range: $40-$60
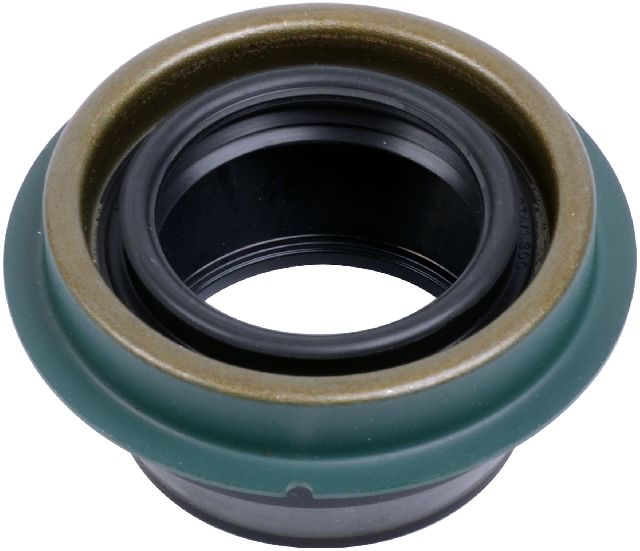
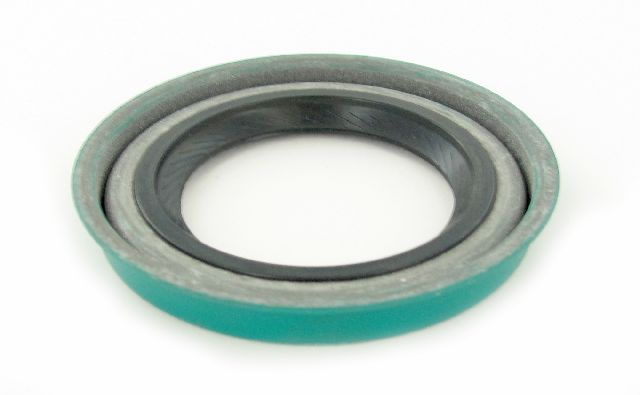
Aftermarket price range: $25-$45 - Transmission Filter and Gasket Kit
(OEM #24208576 (Deep Pan))— This is required anytime the transmission pan is removed for service.
Trusted brands: ACDelco
OEM price range: $30-$50
Aftermarket price range: $15-$30
Related Codes That Often Appear With This One
- P0894 — This code also means 'Transmission Component Slipping' and is often set alongside P1870, as noted in GM's own service bulletins PIP5340A and 01-07-30-023B. [⭐ MANUFACTURER TSB — highest authority, 31]
- P1860 — This code indicates an electrical circuit fault for the TCC PWM solenoid. If P1860 is present, it points directly to a wiring or solenoid electrical issue, whereas P1870 indicates a mechanical/hydraulic slip.
Technical Service Bulletins (TSBs) & Recalls
- 01-07-30-023B: Supersedes earlier versions. Details the cause of P1870 (valve body bore wear), the symptom (harsh 1-2 shift when hot), and the fix (replace valve body on pre-2000 models). Confirms that if the fluid is clean, a full rebuild is not necessary.
- PIP5340A: A later bulletin instructing dealers to contact the GM Technical Assistance Center (TAC) for P1870/P0894 codes, indicating this remained a high-profile issue requiring specialized guidance even after the valve body fix was known. [⭐ MANUFACTURER TSB — highest authority]
Platform-Specific Known Issues
- General Moto
Mechanic-Grade Diagnostic Values
- TCC PWM Solenoid Resistance — expected: 10-11 Ohms at 68°F (20°C) or 13-15 Ohms at 212°F (100°C).. Failure: An open circuit (no continuity) or resistance far outside the expected range indicates a failed solenoid.
- 1-2 and 2-3 Shift Solenoid Resistance — expected: 20-40 Ohms at 68°F (20°C).. Failure: Readings outside this range suggest a failing shift solenoid.
- TCC Slip Speed (Live Data) — expected: Under 50 RPM with TCC commanded ON at steady cruise.. Failure: Sustained slip of 150+ RPM when the TCC is commanded ON confirms a hydraulic slip condition.
- Transmission Case Connector Pin E Voltage — expected: 12 volts (battery voltage) with key on.. Failure: No voltage indicates a power supply issue to the transmission solenoids.
Scan Tool Commands That Help
- Tech 2 (or equivalent professional scanner): TCC Control Solenoid ON/OFF Command — Used to verify the PCM can control the TCC enable and PWM solenoids. While monitoring the solenoid circuit wires with a multimeter, a technician can command the solenoid on and off to confirm the PCM driver is working and the wiring is intact to the transmission connector.
Wiring & Ground Locations
- G103 — At the rear of the left-hand (driver's side) engine cylinder head.. This is a primary engine and PCM ground. A poor connection here can cause erratic sensor readings and incorrect PCM behavior, potentially affecting transmission control. A service bulletin notes to ensure this ground is clean and tight when diagnosing transmission DTCs.
- Transmission Case Connector — On the passenger side of the transmission case, a large round 20-pin connector.. This is the main electrical interface for the transmission. All solenoid commands and sensor data pass through it. Pin E is the 12V power feed for the solenoids. Pins for the TCC PWM solenoid can be tested here for resistance without dropping the pan.
- G104, G105, G106 — These are primary frame and body ground points in the front of the vehicle, often on or near the radiator core support.. Service bulletins for erratic transmission behavior, especially on vans with relocated batteries, emphasize checking these main ground connections to ensure the entire electrical system has a solid reference.
Real Owner Repair Stories
- GMTNation forum user (Suburban with 4L60E at 184,000 miles) — Harsh 1-2 shift and P1870 code.
❌ Tried (didn't work) A complete transmission overhaul, including reaming the TCC bore with a Sonnax kit.
✅ What actually fixed it After the full rebuild still resulted in a P1870 code, the owner replaced the internal transmission wiring harness (which includes the TCC on/off solenoid), the TCC PWM solenoid, and the EPC (force motor) solenoid. This combination of new electronic components finally resolved the code. - BAT Auto Technical forum user (1999 Chevy S-10 Blazer with 4.3L engine) — P1870 code with 150+ RPM TCC slip confirmed on scan tool. Fluid was clean.
❌ Tried (didn't work) Installing a new, remanufactured valve body that already had the Sonnax TCC valve/sleeve fix installed. The P1870 code and slip immediately returned.
✅ What actually fixed it The owner dropped the transmission and found severe wear on the rear stator support bushing in the pump, to the point where an oil groove was gone. This wear created a major hydraulic leak in the TCC apply circuit that the valve body repair could not overcome. Replacing the stator support and worn input shaft finally fixed the issue.
When the Usual Fixes Don't Work
- In some documented cases, a full transmission rebuild, including the common Sonnax valve body repair kit, did not resolve the P1870 code. One owner on a forum reported that the code was only fixed after they also replaced the entire internal wiring harness, the TCC PWM solenoid, and the pressure control solenoid (force motor). This suggests that even after the primary hydraulic leak is addressed, underlying electrical component failures can prevent the system from working correctly and keep the code active. Another case showed that even after a valve body replacement, the code persisted until the transmission was removed and severely worn stator support bushings in the pump were discovered and replaced, indicating a more severe internal hydraulic leak.
Model Year Variations Within This Range
- 1999-2000 vs 2001-2003: GM began introducing revised valve bodies around 2001-2002 to address the TCC regulator bore wear issue. While the P1870 code is still possible on later models, it is most notorious for the 1996-2000 period. A valve body from a 2001+ model may be a suitable upgrade for an earlier truck. The casting number on the valve body can help identify the year.
- 1999 vs 2000: There can be a mid-year change in the TCC regulator valve design itself between 1999 and 2000. Some aftermarket repair kits note that if you are unsure which valve your 1999 or 2000 vehicle has, you should order the later style kit (e.g., A74741QA), which can be modified to fit the earlier valve body if needed.
Helpful Videos


We Have This Part in Stock


The information in this article is provided for general reference and educational purposes only. Vehicle specifications, procedures, and part compatibility can vary by production date, trim level, and region. Always consult your vehicle's factory service manual and verify part numbers before purchasing or performing repairs. Safety-critical components such as airbags, seat belts, and braking systems should be installed by a qualified professional.
- Gmc SAVANA:
- 🧭 Diagnostic Flowchart
- 🎬 Helpful Videos
- 🛍️ Shop This Part
- What's Unique About the 1999-2003 Gmc SAVANA
- Symptoms You May Notice
- Most Likely Causes
- Rare But Worth Checking
- Diagnosis Steps
- Parts You'll Likely Need
- Related Codes That Often Appear With This One
- Technical Service Bulletins (TSBs) & Recalls
- Platform-Specific Known Issues
- Mechanic-Grade Diagnostic Values
- Scan Tool Commands That Help
- Wiring & Ground Locations
- Real Owner Repair Stories
- When the Usual Fixes Don't Work
- Model Year Variations Within This Range
- 🎟️ Get 5% Off