
P1890 on 2002-2004 Oldsmobile Bravada: AWD System Fault Causes and Fixes
P1890 on a 2002-2004 Bravada almost always indicates a problem with the all-wheel-drive system, most commonly a failed transfer case encoder motor. This can cause the AWD to stop working or bind up during turns. Replacing the encoder motor is the most frequent fix, though the control module (TCCM) can also be at fault.
- P1890 on your Bravada points directly to a fault in the 'Smart Trak' all-wheel-drive system.
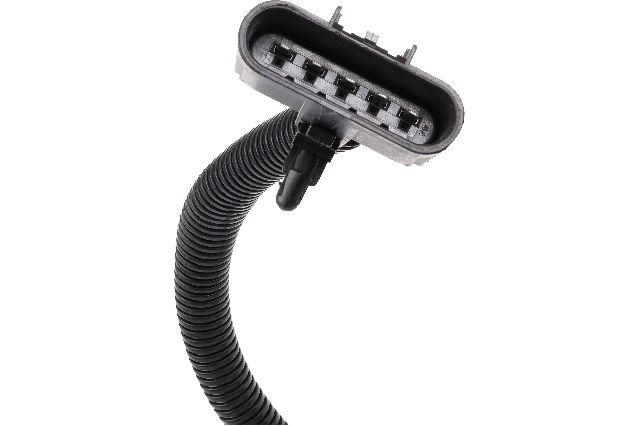
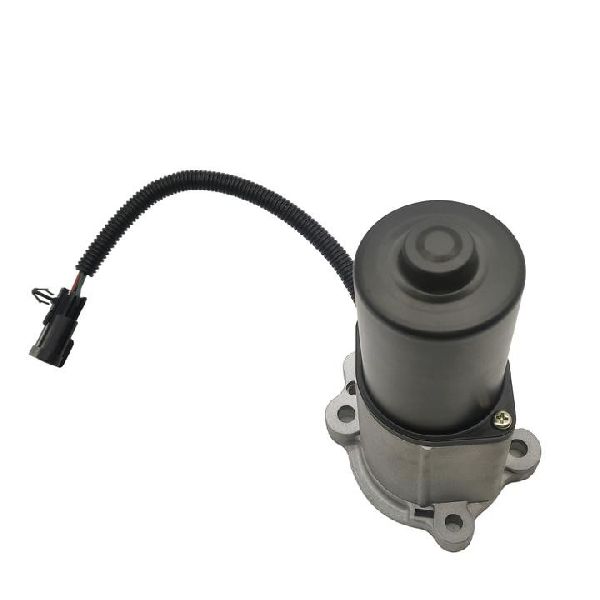
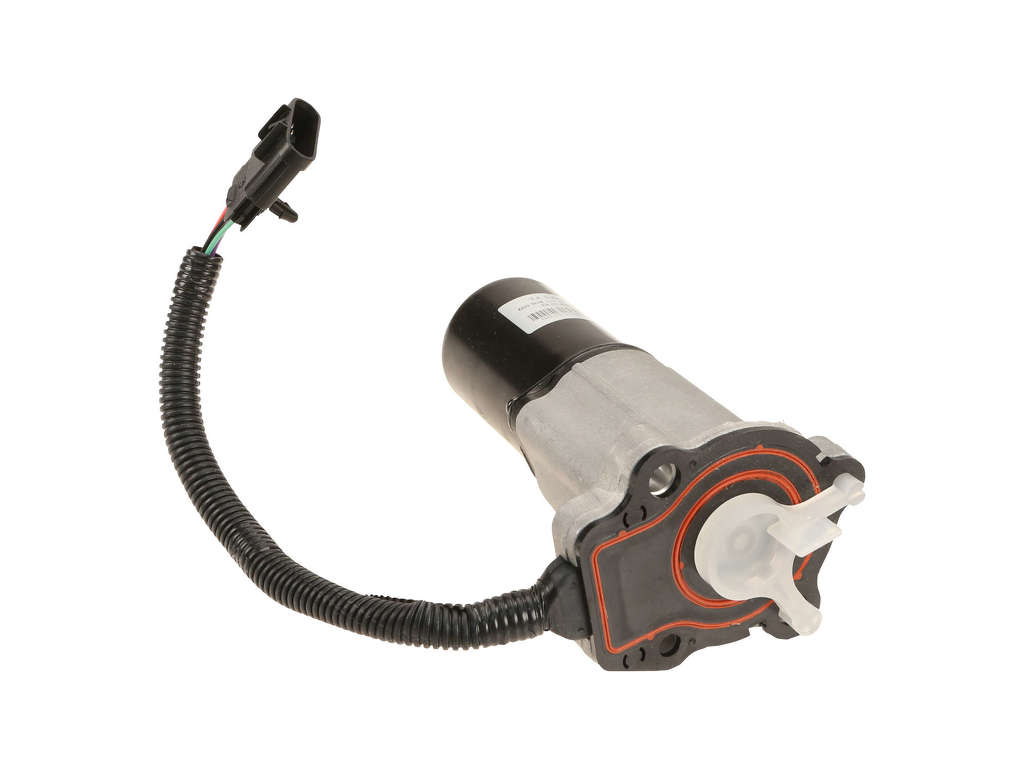
- The most common cause is a failed transfer case encoder motor, which is mounted on the side of the transfer case.
- Symptoms often include a 'Service 4WD' light and a binding or shuddering sensation when making sharp, slow turns.
- Before replacing expensive parts, ensure the transfer case is filled with the correct fluid (GM Auto-Trak II), as old fluid can cause similar symptoms.
- This is a manageable DIY repair for someone with moderate experience, but involves working under the vehicle.
What's Unique About the 2002-2004 Oldsmobile Bravada
The Oldsmobile Bravada uses a full-time 'Smart Trak' AWD system with the NVG-126 single-speed transfer case, unlike its sister vehicles (Chevy Trailblazer, GMC Envoy) which often have a selectable 2WD/4WD system with a dash switch and a two-speed transfer case (like the NVG-226). While the P1890 definition mentions a 'Mode Select' circuit, the Bravada has no such manual selector. The fault is therefore isolated to the automated components, specifically the transfer case encoder motor and the Transfer Case Control Module (TCCM), which are known failure points on this GMT360 platform. The system is designed to operate primarily in RWD and automatically engage the front axle via a clutch pack in the transfer case when rear wheel slip is detected.
Symptoms You May Notice
- "Service 4WD" or similar warning light on the instrument cluster.
- All-wheel-drive system does not engage, vehicle operates in rear-wheel-drive only.
- AWD system feels stuck or locked, causing binding, shuddering, or 'crow-hopping' during slow-speed turns, especially in parking lots.
- Audible clunking or grinding noises from underneath the vehicle, especially from the transfer case area.
- A burning smell from the transfer case area if the clutches are slipping or binding excessively.
- The ATC (Automatic Transfer Case) fuse in the underhood fuse block may repeatedly blow, indicating a short or a seized motor.
- Replacing the entire transfer case when only the encoder motor has failed.
- Assuming the transmission is failing due to the binding/shuddering symptoms, when the issue is in the transfer case clutch pack or encoder motor.
- Replacing the front axle actuator, which is a more common issue on selectable 4WD Trailblazers and Envoys but is not typically related to a P1890 code on a Bravada.
Most Likely Causes
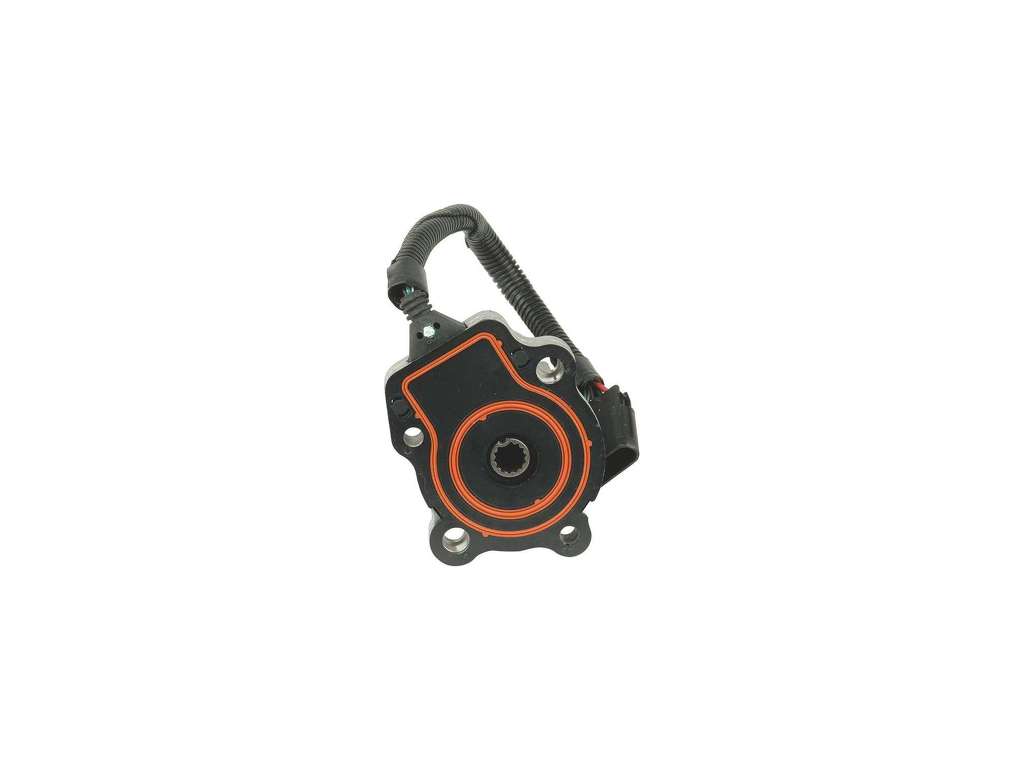
- Failed Transfer Case Encoder Motor 🔴 High Probability → Shop Transfer Case Motor The position sensor inside the encoder motor assembly is a very common failure point on the GMT360 platform. Over time, the internal electronic components, particularly the solder joints on the ceramic circuit board, can crack due to heat cycles and vibration, leading to an erratic or lost signal. Corrosion from moisture intrusion is also a factor.
How to confirm: A scan tool capable of reading TCCM data can show erratic or out-of-range voltage readings from the encoder position sensor. Wiggling the wiring harness where it enters the encoder motor may cause the voltage to fluctuate wildly, confirming an internal fault. In many cases, it is diagnosed by replacement after confirming power and ground to the motor.
Typical fix: Replace the transfer case encoder motor assembly. This part is located on the side of the transfer case. It is held on by several bolts and has one electrical connector.
Est. part cost: $150-$350 - Failed Transfer Case Control Module (TCCM) 🟡 Medium Probability → Shop Transfer Case Motor The TCCM on these vehicles is known to fail due to internal software glitches or hardware faults. It is located under the driver's side dashboard, near the steering column, and can be 🎬 See how to access and remove the control module. susceptible to moisture or electrical issues. Sometimes these modules simply lose their programming or develop cold solder joints. Voltage spikes from improperly installed aftermarket accessories can also damage the TCCM.
How to confirm: If a new encoder motor does not solve the issue, the TCCM is the next likely culprit. A scan tool may show a 'No Communication' error with the TCCM. Before replacing, it's crucial to verify the TCCM is receiving good power and ground.
Typical fix: Replace the Transfer Case Control Module. A common temporary fix is to perform a system reset by disconnecting the battery for at least 30 minutes or pulling the designated ATC/TCCM fuse, which can sometimes clear a software glitch. Replacement modules may need to be programmed by a dealer or a well-equipped independent shop.
Est. part cost: $200-$400 - Worn or Incorrect Transfer Case Fluid 🟡 Medium Probability → Shop Transfer Case Motor The clutch-based AWD system in the NVG-126 transfer case requires a specific fluid, GM Auto-Trak II (blue in color), which has special friction modifiers. If the wrong fluid is used or if the correct fluid is old and broken down, the clutches can chatter and bind. This causes shuddering and places excessive stress on the encoder motor, which can lead to its failure.
How to confirm: Check service records or drain a small amount of fluid to inspect its condition. The correct fluid is blue. If the fluid is dark, burnt, smells foul, or is not the correct blue color, it needs to be changed.
Typical fix: Drain and refill the transfer case with GM Auto-Trak II fluid (GM Part #88900402 / ACDelco #10-4017). Some service procedures recommend changing the fluid, driving for a short period (including some figure-eight turns in a parking lot), and then draining and new-filling a second time to fully flush the old fluid and additives 🎬 Watch: Step-by-step guide to changing your transfer case fluid. from the clutch pack.
Est. part cost: $20-$40 - Damaged Wiring or Corroded Connectors ⚪ Low Probability The wiring harness leading to the transfer case is exposed to road debris, moisture, and heat, which can lead to chafed wires or corroded connector pins. The main connector at the encoder motor and the C101 connector near the underhood fuse block are known points of inspection.
How to confirm: Visually inspect the entire length of the wiring harness from the TCCM to the encoder motor. Unplug the connector at the encoder motor and the TCCM and check for green or white corrosion, bent pins, or backed-out terminals.
Typical fix: Repair the damaged section of wire or clean the connector terminals with a specialized contact cleaner. If corrosion is severe, the connector pigtail may need to be replaced.
Est. part cost: $10-$50
Rare But Worth Checking
- Poor TCCM Ground Connection: GM vehicles of this era are known for grounding issues. The TCCM ground (often G103 or G104) is typically located on the frame rail near the driver's side body mount or inside the driver's side kick panel area. A corroded or loose ground can cause a host of intermittent and difficult-to-diagnose electrical problems with the AWD system, including P1890 and communication codes.
Diagnosis Steps
- Read all fault codes from the PCM and TCCM using a capable OBD-II scanner that can access chassis modules.
- Attempt to reset the system by pulling the ATC fuse (typically in the underhood fuse box) for a few minutes or disconnecting the vehicle's battery for 30 minutes. This can sometimes clear a temporary software glitch in the TCCM.
- Check the level and condition of the transfer case fluid. If it is old, dark, or not the specified blue GM Auto-Trak II fluid, perform a fluid change.
- Inspect the wiring harness and electrical connector at the transfer case encoder motor for any signs of physical damage, chafing, or corrosion. Check for a solid connection.
- Inspect the ground connection for the TCCM, usually located on the frame under the driver's door or on the cowl above the brake booster.
- Using a scan tool, monitor the live data for the encoder motor position sensor. If the voltage is erratic, stuck, or reads out of range (e.g., 4.75V or higher), it strongly suggests a failed encoder motor.
- If symptoms persist and the encoder motor wiring and signal appear stable, the transfer case encoder motor is the most probable cause and should be replaced.
- If a new encoder motor does not resolve the code, the TCCM is the next most likely component to have failed and should be replaced. A replacement TCCM may require programming.
Parts You'll Likely Need
- Transfer Case Encoder Motor
(OEM #89059688)— This is the most common failure point for P1890. The internal position sensor fails, preventing the computer from knowing the status of the transfer case.
Trusted brands: ACDelco, Dorman (Part # 600-901)
OEM price range: $250-$400
Aftermarket price range: $150-$250 - Transfer Case Control Module (TCCM)
(OEM #12590220)— This is the second most likely cause if the encoder motor replacement does not fix the issue. The module itself can fail electronically.
Trusted brands: ACDelco, Dorman
OEM price range: $300-$400
Aftermarket price range: $200-$300 - GM Auto-Trak II Transfer Case Fluid
(OEM #88900402 (GM), 10-4017 (ACDelco))— Using the correct fluid is critical for the proper operation of the transfer case clutches and can prevent binding that stresses the encoder motor.
Related Codes That Often Appear With This One
- C0327 — This code specifically points to an 'Encoder Circuit Malfunction' and is often set along with P1890, further isolating the problem to the transfer case encoder motor assembly or its wiring.
- U1000 — This code indicates a 'Class 2 Data Link Malfunction,' meaning modules are not communicating. It can appear if the TCCM has failed completely or has a bad power/ground connection, preventing it from talking to the PCM.
Technical Service Bulletins (TSBs) & Recalls
- GM TSB #02-04-21-006A: Addresses a shudder or binding condition on slow turns. The primary fix is to replace the transfer case fluid with the blue Auto-Trak II fluid. If the condition persists, the TSB advises replacing the transfer case encoder motor.
- GM Document ID# 1242381: This is an internal GM document, not a public TSB, but is widely referenced in owner forums. It describes diagnosing and fixing a shudder during low-speed turns by replacing the encoder motor and flushing the transfer case fluid.
Platform-Specific Known Issues
- A known issue on the GMT360 platform is 'crow hopping' or binding in slow turns, which is often caused by worn transfer case fluid or a failing encoder motor. A GM Technical Service Bulletin (TSB #02-04-21-006A) was issued for this symptom, recommending a fluid change with Auto-Trak II and, if that doesn't work, replacement of the encoder motor.
Mechanic-Grade Diagnostic Values
- Encoder Motor Circuit Resistance — expected: 0.5 - 35 Ohms. Failure: A reading outside this range indicates a faulty motor.
- Encoder Lock Solenoid Resistance — expected: 18 - 25 Ohms. Failure: A reading outside this range indicates a faulty lock solenoid within the encoder motor assembly.
- Encoder 8V Reference Signal — expected: ~8 Volts. Failure: A lack of voltage indicates a problem with the TCCM or the wiring from it.
- Encoder 5V Reference Signal — expected: ~5 Volts. Failure: A lack of this voltage points to a TCCM or wiring fault, preventing the position sensor from working.
Scan Tool Commands That Help
- GM Tech 2: Powertrain > Special Functions > ATC Output Controls > Transfer Case Lock — This bidirectional command allows a technician to directly command the transfer case lock solenoid to engage and disengage, verifying the functionality of the solenoid and its circuit independently of the encoder motor's main drive.
- GM Tech 2: Chassis > Special Functions > ABS Relay Test — While not directly for the transfer case, this allows testing of the ABS module which communicates with the TCCM. Intermittent ABS faults can sometimes cause related issues in the AWD system.
- GM Tech 2: Powertrain > Data Display > TCCM Data — Used to monitor live data from the TCCM, including the encoder position sensor voltage. This is critical for observing erratic signals that confirm a failing encoder sensor.
Wiring & Ground Locations
- G103 — Located at the left rear of the engine compartment on the cowl, above the brake booster.. This is a major ground point for multiple modules, including the BCM and potentially circuits that communicate with the TCCM. A poor connection here can cause widespread, difficult-to-diagnose electrical issues.
- G105 — Located at the left front of the engine compartment behind the cooling fan relays.. This ground serves several components in the engine bay. While not the primary TCCM ground, ensuring all major grounds are clean and tight is a key step in diagnosing electronic faults on this platform.
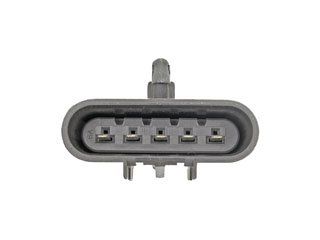
- Encoder Motor Connector — On the side of the transfer case, connecting directly to the encoder motor assembly.. This is the primary point for testing voltages and resistances of the encoder motor and its internal sensor. It is exposed to road spray and heat, making it a common point of corrosion and failure.
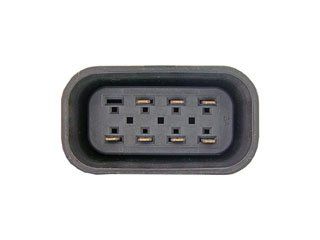
- TCCM Connectors — Under the driver's side dashboard, near the steering column, plugged into the TCCM.. Wiggling these connectors while monitoring scan tool data can reveal intermittent internal faults in the TCCM or poor pin connections.
Real Owner Repair Stories
- GM-Trucks.com user 'johnnyreb' (2005 GM Truck (platform relative)) — Service 4WD message and code C0327 (Encoder Circuit Malfunction), which is functionally similar to and often accompanies P1890.
❌ Tried (didn't work) Dealer diagnosis recommended replacing the entire encoder motor assembly.
✅ What actually fixed it The owner declined the full motor replacement, ordered only the internal encoder position sensor (Part #88962315), and replaced it themselves in about 90 minutes. This resolved the code and the warning message without replacing the entire motor. - GMTNation.com user 'TJBaker57' (GMT360 Platform Vehicle) — Intermittent C0327 code, erratic encoder voltage readings on a scan tool.
❌ Tried (didn't work) Initial inspection of the encoder motor and its external connections showed no obvious faults.
✅ What actually fixed it The user diagnosed an intermittent connection by wiggling the TCCM wiring harness under the dash. After further inspection, the root cause was found to be cracked solder joints on the ceramic circuit board inside the encoder motor's position sensor. Replacing the encoder motor assembly fixed the issue.
OEM Part Supersession History
12590220 (TCCM)→Multiple part numbers exist depending on specific application and year. Remanufactured units like Dorman 599-103 are programmed for the vehicle and cover this OE number.— Internal component revisions and software updates.
Heads up: An unprogrammed TCCM will not function. OEM replacements require dealer programming. Some aftermarket modules (like Dorman) are sold pre-programmed to the vehicle's VIN and are plug-and-play.88962315 (Encoder Position Sensor only)→This part is often no longer sold separately by GM, who now favors selling the complete encoder motor assembly (89059688).— Simplification of repair process for dealers; higher revenue from selling the complete assembly.
Heads up: While the sensor itself was the common failure point, sourcing it separately may now require finding aftermarket or new-old-stock parts.
Diagnostic Flowchart
Other Known Issues on This Vehicle
Issues unrelated to this code that are worth knowing about as an owner of this generation:
- Cracked Exhaust Manifold 🟠 Medium — Very common. The original manifold design is prone to cracking from heat cycles, often noticeable by a ticking noise when the engine is cold that may disappear as the manifold heats up and expands. (Ref: A special coverage warranty was issued by GM for some model years, but it has since expired.)
- Failing Fan Clutch 🟠 Medium — Common failure item. The electronically controlled fan clutch can fail in two ways: either locked on (sounding like a jet engine all the time) or not engaging (causing overheating at idle or in slow traffic).
- Instrument Cluster Stepper Motor Failure 🟡 Low — Extremely common across many GM vehicles of this era. The small stepper motors that drive the gauge needles (speedometer, tachometer, fuel, etc.) fail, causing gauges to stick, read incorrectly, or stop working entirely. (Ref: GM had a special policy to cover repairs, but it has long since expired. Repair involves desoldering the old motors and soldering in new ones.)
- Failing Camshaft Actuator Solenoid 🟠 Medium — A frequent problem on the 4.2L LL8 engine. The solenoid controls the variable valve timing. When it fails or gets clogged with dirty oil, it can cause a rough idle, stalling, and set codes like P0014 or P0017.
- Fuel Level Sensor Failure 🟡 Low — Common issue where the fuel gauge becomes erratic or reads empty. The failure is in the sending unit attached to the fuel pump module inside the gas tank.
- HVAC Blower Motor Resistor Failure 🟡 Low — A very common failure causing the blower fan to only work on the highest setting or not at all. The resistor module overheats and fails. It's a relatively cheap and easy part to replace.
Used vs. New Parts: Buying Guide for This Vehicle
When a used part is the smart pick: A used Transfer Case Control Module (TCCM) from a junkyard can be a cost-effective option, BUT it must come from an identical vehicle (same year, model, and RPO codes for the transfer case) to have a chance of working without reprogramming. A used encoder motor is also a viable option if its history is known or if it can be tested.
Donor-vehicle mileage cap: roughly under 80000 miles for the part to have meaningful remaining life.
What to inspect on the donor part:
- For a TCCM, check the donor vehicle's RPO sticker (in the glove box) to ensure it has 'NP4' for the NVG-126 transfer case.
- For an encoder motor, inspect the electrical connector for any signs of corrosion (green or white powder) or bent pins.
- Check the case of the encoder motor for cracks or signs of severe impact.
- If possible, ask the salvage yard if the donor vehicle had a 'Service 4WD' light on before it was dismantled.
OEM-only on this vehicle (don't cheap out):
- Transfer Case Fluid: Only use GM Auto-Trak II fluid (ACDelco #10-4017). Using standard ATF will damage the clutch packs in the transfer case.
Aftermarket brands forum-validated for this vehicle:
- ACDelco (for Encoder Motor and TCCM - OEM supplier)
- Dorman (offers encoder motors and pre-programmed TCCMs, though some users report mixed long-term reliability).
Brands owners have reported issues with on this vehicle:
- Unbranded, no-name encoder motors from online marketplaces have a very high failure rate, often within months. Many users report having to replace them multiple times.
Real Owner Stories
Aggregated from forums and TSBs cited above. Mileages and costs reflect what owners reported in those sources.
2002-2004 Oldsmobile Bravada 4.2L LL8 I6
Symptoms: Owner was diagnosing a C0327 code and used a scan tool to find an erratic signal from the encoder motor.
What fixed it: The owner disassembled the failed encoder motor and identified cracked solder joints on the internal ceramic circuit board as the root cause, necessitating replacement of the motor.
Source hint: GMTNation.com thread titled 'DTC C0327 Resolved - GMTNation'
2002 Oldsmobile Bravada 4.2L LL8 I6
Symptoms: Multiple owners discussed a 'crow hop' or shuddering issue during slow-speed turns.
What fixed it: A confirmed fix involved replacing the encoder motor and flushing the transfer case fluid, as recommended in GM Document ID# 1242381.
Source hint: Car Forums at Edmunds.com thread titled 'Oldsmobile Bravada - Car Forums at Edmunds.com'
2002-2004 Oldsmobile Bravada 4.2L LL8 I6
Symptoms: The ATC fuse in the engine bay was repeatedly blowing when the AWD system was under load, such as in deep snow.
What fixed it: The symptoms pointed to an encoder motor that was seizing and drawing too much current, which requires replacing the encoder motor assembly.
Source hint: Blazer Forum thread titled 'Bravada AWD Issue - Blazer Forum'
Related OBD-II Codes
Frequently Asked Questions
My Bravada is shuddering and 'crow-hopping' in parking lots. What's the first thing I should check?
What specific fluid does the transfer case on my 2002-2004 Bravada require?
I replaced the encoder motor, but the P1890 code came back. What's the next most likely cause?
The 'Service 4WD' light is on and the ATC fuse in the underhood fuse box keeps blowing. What does this indicate?
Where is the Transfer Case Control Module (TCCM) located on my Bravada?
Can I just reset the 4WD system to clear the P1890 code?
Helpful Videos

We Have This Part in Stock

The information in this article is provided for general reference and educational purposes only. Vehicle specifications, procedures, and part compatibility can vary by production date, trim level, and region. Always consult your vehicle's factory service manual and verify part numbers before purchasing or performing repairs. Safety-critical components such as airbags, seat belts, and braking systems should be installed by a qualified professional.
- Oldsmobile Bravada:
- 🧭 Diagnostic Flowchart
- 🎬 Helpful Videos
- 🛍️ Shop This Part
- What's Unique About the 2002-2004 Oldsmobile Bravada
- Symptoms You May Notice
- Most Likely Causes
- Rare But Worth Checking
- Diagnosis Steps
- Parts You'll Likely Need
- Related Codes That Often Appear With This One
- Technical Service Bulletins (TSBs) & Recalls
- Platform-Specific Known Issues
- Mechanic-Grade Diagnostic Values
- Scan Tool Commands That Help
- Wiring & Ground Locations
- Real Owner Repair Stories
- OEM Part Supersession History
- Other Known Issues on This Vehicle
- Used vs. New Parts: Buying Guide for This Vehicle
- Real Owner Stories
- 2002-2004 Oldsmobile Bravada 4.2L LL8 I6
- 2002 Oldsmobile Bravada 4.2L LL8 I6
- 2002-2004 Oldsmobile Bravada 4.2L LL8 I6
- Related OBD-II Codes
- Frequently Asked Questions
- 🎟️ Get 5% Off