
OBD-II Code P2006: Intake Manifold Runner Control Stuck Closed
The Ultimate 2026 Guide to Meaning, Diagnosis, and Repair
- Code P2006 indicates your engine's intake manifold runner flaps are stuck closed, choking airflow and causing a severe 10-15% drop in fuel economy and power above 3,500 RPM.
- Manually test the flap linkage by hand before buying parts; if it is completely seized, you need a $450-$900 professional walnut blasting service, not a new actuator.
- Do not drive for more than 50-100 miles with this code active, as the resulting rich air-fuel mixture will overheat and destroy your catalytic converter, adding up to $2,500 in repair costs.
- Avoid paying $1,500+ for a full intake manifold replacement on Mercedes M272 or Ford 5.0L engines without first checking if a $50 aftermarket metal linkage kit will permanently fix the broken plastic arm.
What Does P2006 Mean?

The Powertrain Control Module (PCM) detected the airflow control flaps inside your engine's intake manifold are stuck closed on Bank 1. These Intake Manifold Runner Control (IMRC) flaps stay closed below 3,000 RPM to increase air velocity for torque, and open at higher RPMs to maximize horsepower. When they remain shut, the engine is choked, severely hampering high-speed performance and efficiency.
🎬 Watch: A quick breakdown of how P2006 affects your engineTechnical definition: Intake Manifold Runner Control (IMRC) Stuck Closed (Bank 1). This diagnostic trouble code (DTC) is set when the Powertrain Control Module (PCM) commands the IMRC flaps for engine bank 1 to open, but the IMRC position sensor reports the flaps have not moved from their closed position.
Can I Drive With P2006?
Yes, But With Caution. Yes, you can drive the vehicle, but avoid extended periods. You will experience significantly reduced power when accelerating hard or at engine speeds above 3,000 RPM. Driving for more than 50 miles causes the imbalanced air-fuel mixture to foul spark plugs and overheat the catalytic converter—a secondary repair costing $800-$2,500. Limit driving to short, low-RPM trips to a repair shop.
Common Causes

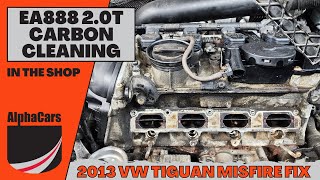
- Carbon Buildup on Intake Runners/Flaps (Very Common) — The leading cause on Gasoline Direct Injection (GDI) engines (Audi, VW, Kia, Hyundai). Oil vapor bakes onto the intake ports, forming a hard sludge that physically jams the flaps closed.
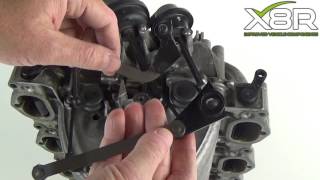
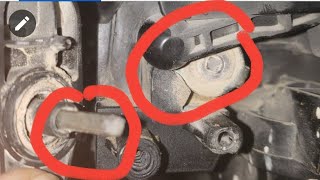
- Broken or Disconnected IMRC Linkages (Very Common) — The plastic arms connecting the actuator to the manifold flaps become brittle from heat cycles and snap. This severs the connection, leaving flaps closed. This is the primary failure point on Mercedes M272 and Ford 5.0L V8s. 🎬 See how to install the Mercedes M272 metal lever repair kit
- Failed IMRC Actuator or Solenoid (Common) — The vacuum diaphragm tears or the electric motor burns out. The control solenoid also fails, preventing the system from moving the flaps.
- Vacuum Leaks (Common) — A cracked or disconnected rubber vacuum hose prevents the actuator from generating enough force to open the flaps. This is a known issue on Audi/VW models.
- Faulty Intake Manifold Runner Position Sensor (Less Common) — The sensor incorrectly reports the flaps are closed even after they open. This triggers P2006 when mechanical parts work correctly. Known issue on Nissan 2.5L engines.
- Wiring or Connector Issues (Less Common) — The wiring harness frays or melts from engine heat. Corrosion inside the electrical connector blocks the signal.
- Loose Internal Flap Screws (Rare) — On Subaru FB20 engines, small screws holding the butterfly valves back out, jamming the flaps and causing a distinct rattling noise.
- Outdated PCM Software (Rare) — Overly sensitive monitoring parameters trigger the code falsely. A manufacturer software reflash resolves this if hardware passes inspection.
- Faulty Powertrain Control Module (PCM) (Very Rare) — An internal failure of the PCM's driver circuit fails to send voltage to the actuator. Exhaust all mechanical possibilities before replacing the PCM.
Symptoms

- Severe Lack of Power at High RPM — The vehicle feels sluggish and 'out of breath' above 3,000 RPM, as if the engine is hitting a wall.
- Check Engine Light is On — The Malfunction Indicator Lamp (MIL) illuminates immediately upon fault detection.
- Hesitation or 'Flat Spot' on Acceleration — A noticeable delay or stumble occurs before the engine responds to the gas pedal.
- Poor Fuel Economy — The choked engine runs a richer air-fuel mixture, decreasing fuel efficiency by 10-15%.
- Rough or Unstable Idle — The engine shakes or stumbles at low speeds due to suboptimal airflow.
- Engine Misfires (also visible on scanner) — Incomplete combustion causes misfires under heavy load.
Diagnostic Flowchart
Tap your situation to follow the diagnostic path that matches what you're seeing on this code.
Common Fixes & Costs
- Intake Manifold Replacement
— Parts: $300-$800, Labor: $300-$700, ~3.5 hr book time
(Professional)
: OEM
: OEM
: OEM - Intake Manifold Cleaning (Walnut Blasting) — Parts: $20-$50, Labor: $450-$900, ~4 hr book time (Professional)
- Replace Broken IMRC Linkage/Bushings
— Parts: $40-$100, Labor: $150-$300, ~1.2 hr book time
(DIY)
: OEM - IMRC Actuator/Solenoid Replacement — Parts: $150-$350, Labor: $100-$200, ~1.5 hr book time (Intermediate)
- Vacuum Hose Repair/Replacement — Parts: $5-$30, Labor: $50-$150, ~0.5 hr book time (DIY)
Used vs. New Parts: Buying Guide
When a used part is worth it: For older, high-mileage vehicles where the cost of a new OEM manifold is prohibitive. It carries significant risk.
Donor-vehicle mileage cap: roughly under 60000 miles for the part to have meaningful remaining life.
Donor quality checklist:
- Visually inspect for cracks near mounting points and plastic seams.
- Manually actuate the runner flaps to ensure they move smoothly without binding.
- Check for signs of sludge or metal shavings inside.
- Match part numbers exactly.
Decision logic:
- If The failure mode is broken plastic linkage or a seized internal flap → Avoid used parts, as they develop the same problem. Buy new OEM or a quality aftermarket replacement.
- If Vehicle is less than 10 years old and the part is under $800 new → Buy new. The savings from a used part are not worth the risk of repeat labor costs.
- If Vehicle is over 15 years old and budget is the primary concern → A used part from a low-mileage, accident-damaged vehicle is a viable option, but inspect it thoroughly.
Warranty tradeoff: Used parts from a salvage yard typically offer a 30-90 day warranty on the part only. New aftermarket parts offer a 1-year to limited lifetime warranty. New OEM parts carry a 1-2 year warranty.
Worst-case if a used part fails: 400-800 if the used part fails after installation, requiring repeat labor costs.
What Happens If You Wait — Timeline
- 0-1 month: Check Engine Light is on. A noticeable 'flat spot' or lack of power occurs when accelerating hard above 3,500 RPM. No other symptoms during normal city driving. (MPG impact: 0-5%% · Added cost: $0-30 in wasted fuel)
- 1-3 months: MPG loss reaches 10-15%. The engine feels consistently sluggish. A rough or unstable idle develops as imbalanced airflow affects low-speed operation. (MPG impact: 10-15%% · Added cost: $50-150 in wasted fuel)
- 3-8 months: The engine consistently runs a rich air-fuel mixture. Unburnt fuel overheats the catalytic converter, degrading its internal structure. Spark plugs foul. (MPG impact: 10-20%% · Added cost: $300-800 (fouled spark plugs and early-stage catalytic converter damage))
- 8+ months: Catastrophic failure of the catalytic converter occurs. The internal honeycomb structure melts, causing a major exhaust blockage, severe power loss, and automatic emissions test failure. (MPG impact: 15-25%% · Added cost: $1200-2800 for catalytic converter replacement)
Cost of Not Fixing It
- 0-1 month: Noticeable drop in fuel economy (5-15%) and poor acceleration performance at highway speeds. (Added cost: 50-150 in wasted fuel)
- 1-6 months: Risk of overheating and damaging the catalytic converter due to a consistently rich fuel mixture. (Added cost: 1200-2800 for catalytic converter replacement)
- 6+ months: Fouled spark plugs, engine misfires, and automatic failure of state emissions inspections. (Added cost: 300-500 for spark plugs and diagnostics, plus the original repair cost.)
Diagnosis Steps

- Read Codes and Review Freeze Frame Data
Connect an OBD-II scanner to confirm P2006. Examine freeze-frame data for exact RPM and load conditions. Note related codes like P2015 or P2007 for diagnostic clues.
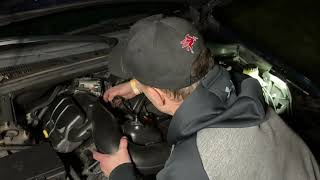
Tools: OBD-II Scanner (Beginner) - Perform a Thorough Visual Inspection
Locate the IMRC actuator. Inspect plastic linkage arms for cracks or disconnections. Check for cracked vacuum lines. On Ford 5.0L, verify the actuator mounting nub hasn't snapped off the manifold.
Tools: Flashlight, Inspection Mirror (Beginner) - Manually Test Flap Movement
With the engine off, move the runner flap linkage by hand. Smooth movement with spring resistance is normal. Seized linkage means internal carbon buildup. Zero resistance means broken internal linkage.
Tools: Long Screwdriver (optional) (Intermediate) - [PRO TIP] Active Test with a Bi-Directional Scanner
Use a bi-directional scanner to command the IMRC actuator to 100%. If the linkage moves, the actuator is good. If it doesn't, proceed to circuit testing.
Tools: Advanced Bi-Directional Scanner (Intermediate) - Test Vacuum System (If Applicable)
Disconnect the vacuum line at the actuator. Apply 15-20 inHg with a handheld vacuum pump. If it doesn't hold vacuum, the internal diaphragm is torn and requires replacement.
Tools: Handheld Vacuum Pump with Gauge (Intermediate) - [PRO TIP] Test Sensor and Actuator Voltage
Back-probe the position sensor for voltage changes when manually moved. Command the actuator on via scanner and check for 12V at the power wire. No voltage indicates a wiring or PCM issue.
Tools: Digital Multimeter, T-pins for back-probing (Advanced) - [PRO TIP] Analyze Live Data PIDs
Monitor 'IMRC Position' PIDs. At 4,000 RPM, 'Command' should jump to 100%. If 'Actual' remains low, it confirms mechanical failure. Low MAF/MAP readings confirm airflow restriction.
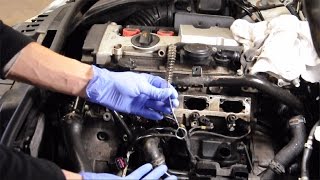
Tools: Advanced OBD-II Scanner (Advanced) - Check for Carbon Buildup Internally
If external components work but flaps are seized, remove the intake manifold to visually confirm heavy carbon deposits jamming the ports.
Tools: Socket Set, Wrenches, Gaskets (Advanced) - Inspect for Loose Internal Components
With the manifold removed, specifically on Subaru models, check butterfly valve screws for tightness to prevent binding.
Tools: Screwdriver/Bit Set (Advanced)
When This Code Triggers (Freeze-Frame Conditions)
- Engine Coolant Temp: 180-210°F (The engine is fully warmed up. The diagnostic test runs after the engine reaches normal operating temperature.)
- RPM: 3000-4000 RPM (During acceleration. The code sets when the driver demands more power, the PCM commands the runners to open, and they fail to respond.)
- Engine Load: 40-70% (Moderate to heavy load, such as climbing a hill or merging onto a highway, triggering the command for more airflow.)
- Vehicle Speed: 45-65 mph (Occurs at steady highway speeds when a sudden request for acceleration triggers the IMRC system test.)
Related Codes
- P2004 — The direct opposite: 'Intake Manifold Runner Control Stuck Open Bank 1'. Suggests the flaps fail to close due to a broken return spring, disconnected linkage, or stuck actuator.
- P2007 — The identical 'Stuck Closed' fault for Bank 2. If seen with P2006, look for a cause common to both banks, such as a central broken linkage piece or a vacuum supply issue.
- P2015 — 'Intake Manifold Runner Position Sensor Circuit Range/Performance'. Frequently accompanies P2006. It confirms a mechanical movement failure, as the sensor reports an illogical position because the flaps are physically stuck.
- P2017 — 'Intake Manifold Runner Position Sensor Circuit High'. Points specifically to a problem in the sensor's circuit itself, such as a short to power or a faulty sensor sending a constant high-voltage signal.
Climate & Environmental Factors
- Cold Weather: Cold temperatures make plastic components, like IMRC actuator linkages and vacuum lines, brittle and susceptible to breaking. Cold also stiffens lubricants within actuators, increasing strain on the motor.
- High Humidity / Temperature Cycles: Cycles from hot to cold in a humid environment cause condensation inside electrical connectors. This moisture accelerates corrosion on electrical pins and damages internal actuator components.
- High Altitude: Lower atmospheric pressure affects MAP sensor readings, which the PCM uses to detect IMRC faults. This influences diagnostic thresholds, though it is not a direct cause of failure.
How to Talk to a Mechanic About This Code
Say this: "I have a P2006 code and a loss of power at high RPM. I'd like to book a diagnostic appointment. Can you please have the technician manually check if the intake runner flaps are seized or if the linkage is broken before recommending a full intake manifold replacement?"
This signals you understand the common failure points (carbon buildup, broken plastic parts) and prevents the shop from defaulting to the most expensive repair.
Avoid saying:
- 'My check engine light is on, can you look at it?'
- 'The car feels sluggish, just fix it.'
- 'I read online it's the intake manifold, how much to replace it?'
Questions to ask before authorizing the repair:
- Did you physically test the movement of the runner flap linkage by hand? Was it seized, loose, or disconnected?
- If it's a vacuum-operated system, did you test the actuator with a vacuum pump to see if it holds vacuum?
- If you are recommending a full manifold replacement, can you explain why a component-level repair (like a new linkage arm or actuator) isn't possible?
- What is the warranty on the recommended parts and labor?
Where to Take It: Dealer vs Independent vs Chain
- Dealer:
Recommended only for warranty claims or if a specific TSB or software update is the known solution. Otherwise, an independent shop is more cost-effective.
Best for: Vehicles still under powertrain or emissions warranty., Complex diagnostics involving manufacturer-specific software updates., Cases where a known Technical Service Bulletin (TSB) applies.
Downsides: Highest labor rates, often 1.5-2x more than independent shops., More likely to recommend replacing the entire intake manifold assembly when a cheaper, component-level fix is available. (Typical cost: +50% vs. baseline) - Independent Shop:
Best fit for most P2006 repairs. An experienced independent technician is highly likely to have seen this common code and will be open to cost-effective solutions.
Best for: Out-of-warranty vehicles where cost is a major factor., Diagnosing common, well-documented P2006 failures (Mercedes M272 lever, Ford 5.0 linkage, VW/Audi carbon buildup)., Access to flexible repair options, like aftermarket parts or component-level fixes.
Downsides: Quality and experience vary greatly; vet shops based on reviews and ASE certifications., May lack access to the latest manufacturer-specific diagnostic software for brand-new models. (Typical cost: +0% vs. baseline) - Chain Shop:
AVOID for P2006 diagnosis and repair. The risk of misdiagnosis (replacing a good actuator when flaps are seized) is high.
Best for: Simple, routine maintenance like oil changes and tire rotations.
Downsides: Technician skill varies dramatically; lacks the diagnostic depth for complex mechanical issues like P2006., Business model encourages upselling and replacing parts without a thorough diagnosis. (Typical cost: -10% vs. baseline)
When to Walk Away From the Repair
If the estimated repair cost exceeds 50% of the car's private-party value, sell or trade it in instead of repairing it.
- Car worth $5000, fix is $2200: Borderline. The repair is almost half the car's value. Get a second opinion before proceeding.
- Car worth $15000, fix is $1800: Fix it. The repair cost is well below the threshold.
- Car worth $3000, fix is $1800: Walk away. The repair cost is over 50% of the vehicle's value.
What Scan Tool You Need for This Code
Minimum: A scanner that reads live data PIDs for IMRC commanded vs. actual position.
A basic $20 code reader only shows the code, but cannot determine why it is happening. You need live data to see if the computer commands the flaps to open and if they respond. A bi-directional tool is best for definitive diagnosis.
Budget: BlueDriver Pro (~$100) — Connects to your smartphone and provides access to freeze-frame data and live data graphing, including IMRC-related PIDs. This shows if the 'actual' position changes when the 'commanded' position does.
Mid-range: Foxwell NT510 Elite / XTOOL D7 (~$180) — Offers bi-directional control, allowing you to manually command the IMRC actuator open and closed. This is the single best test to determine if the actuator works or if the problem is a mechanical jam.
Professional: Autel MaxiCOM MK808 / MK906BT (~$500-1200) — Provides full OEM-level diagnostics, including bi-directional control, advanced live data graphing, and ECU coding functions.
Rent vs buy: Auto parts stores read codes for free, but their tools lack live data or active tests. Buying a budget or midrange scanner is a worthwhile investment to avoid costly shop diagnostic fees.
How to Clear the Code After You Fix It
- Use an OBD-II scan tool to clear the P2006 code.
- Perform a complete drive cycle to allow the vehicle's readiness monitors to run.
- Clearing with a scan tool is preferred over disconnecting the battery to preserve other module settings.
Drive cycle (~30 minutes): A general drive cycle includes a cold start, 2-3 minutes of idling, followed by a mix of city driving and steady highway driving (15 minutes at 55-60 mph). This allows the PCM to run its self-tests.
Readiness monitors affected: Catalyst Monitor, Evaporative System (EVAP) Monitor, O2 Sensor Monitor
Before emissions retest: drive at least 50-100 miles to fully set monitors.
Watch out for:
- Disconnecting the battery clears the code but resets all readiness monitors to 'Not Ready', causing an automatic emissions test failure.
- The code returns immediately if the underlying mechanical or electrical fault is not fixed.
- Not driving long enough or under the correct conditions leaves monitors 'Not Ready'.
Will This Fail Emissions / State Inspection?
Yes — this code typically fails an OBD-II emissions inspection.
- California: An illuminated Check Engine Light results in an automatic smog check failure. Some permanent codes require up to 200 miles and 15 warm-up cycles to clear from the ECU's memory before passing.
- New York: An active P2006 code and illuminated MIL causes an automatic failure. The vehicle cannot be registered until repaired and cleared.
- Texas: In counties requiring emissions testing, an illuminated Check Engine Light is an automatic failure. Drive 50-100 miles after clearing the code to ensure readiness monitors are set.
Most Commonly Affected Vehicles
- Mercedes-Benz C-Class, E-Class, ML-Class, Sprinter (with M272 V6 engines) (2005-2012) — Extremely common due to a small plastic lever on the actuator linkage that breaks. An aftermarket metal lever is the preferred permanent repair.
- Ford F-150, Mustang (with 5.0L 'Coyote' V8) (2011-2017) — Very common failure. The plastic actuator rod or the nub it connects to snaps off, requiring full intake manifold replacement. TSB 16-0011 was issued for some 2016 F-150s.
- Audi / Volkswagen A4, A6, GTI, Tiguan (with 2.0T FSI/TSI & other GDI engines) (2008-Present) — Highly susceptible to heavy carbon buildup that physically jams the runner flaps. Cracked vacuum lines controlling the actuator are another very common cause.
- Dodge / Chrysler / Jeep Charger, Challenger, Grand Cherokee, Wrangler (with 3.6L Pentastar V6) (2011-Present) — The intake manifold's integrated runner control and actuator assembly is a well-documented failure point, often requiring full manifold replacement.
- Chevrolet Cruze, Sonic (with 1.8L Ecotec engine) (2011-2016) — Frequently affected by a failed IMRC actuator or issues with the plastic linkage on the intake manifold.
- Nissan Altima, Rogue (with 2.5L QR25DE engine) (2013-2018) — Often caused by a faulty IMRC position sensor rather than a mechanical issue. TSB NTB17-091 was issued for the related P2004 code.
- Subaru Impreza, Crosstrek, Forester (with 2.0L FB20 engine) (2012-2017) — Known to set P2006. A unique cause is the small screws for the butterfly valves backing out, causing a rattle and jamming the flaps.
- Kia / Hyundai Sonata, Optima, Santa Fe (with GDI engines) (2011-Present) — These direct-injection engines suffer from significant carbon buildup that causes the IMRC flaps to stick over time.
Manufacturer-Specific Notes
- Mercedes-Benz: The failure is almost always a small plastic lever on the actuator linkage that snaps. The official dealer repair is a $1,500 manifold replacement, but aftermarket metal levers provide a permanent repair for under $50.
- Ford: On the 2011-2017 5.0L V8, the plastic control rod on the back of the manifold breaks, requiring a full manifold replacement. Due to high failure rates, these manifolds are sometimes on backorder.
- Audi/VW: Carbon buildup from the GDI engine design is the #1 cause. Chemical cleaners are ineffective; professional 'walnut blasting' is the only reliable fix. A cracked vacuum line to the actuator is the second most common cause.
- Nissan: On the 2.5L engine, the P2006 code is frequently caused by a failed position sensor, not a stuck flap. The sensor is cheaper than a manifold but located in a difficult-to-access position.
Real Owner Stories
2016 Ford F-150 5.0L at 1,400 miles
Check Engine Light came on a few weeks after buying the truck new. It felt sluggish. The dealer found code P2006.
What they tried:
- The dealer initially suspected a bad position sensor and ordered a new one.
Outcome: Ford corporate engineering informed the dealer of a known defect in a batch of intake manifolds for that VIN range. The entire intake manifold assembly was replaced under warranty, resolving the issue.
Lesson: On newer vehicles, a P2006 code is sometimes caused by a defective manifold from the factory. Always check for Technical Service Bulletins (TSBs) related to your VIN.
Audi A6 3.0T with P2006 & P2007
Car had both P2006 (Bank 1) and P2007 (Bank 2) codes for two years. Recently, it developed a new whirring noise.
What they tried:
- Checked all vacuum lines for visible cracks.
- Tested the control solenoids.
- Removed the supercharger to access the IMRC actuators underneath.
Outcome: One vacuum-operated actuator had a torn internal diaphragm, causing a vacuum leak affecting both banks. Replacing the faulty actuator fixed the problem.
Lesson: When you have codes for both banks, the cause is a single component common to both, like a major vacuum leak. A torn actuator diaphragm is easily confirmed with a handheld vacuum pump.
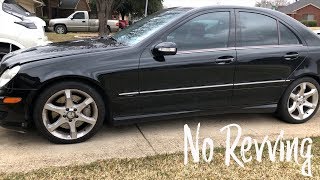
Mercedes-Benz E350 (M272 V6) with ~100k miles
Classic P2006 code with loss of power. The owner researched the M272 engine and found it was an extremely common problem.
What they tried:
- Identified the plastic linkage arm connecting the actuator to the flaps was broken.
- Ordered an aftermarket metal repair lever for under $50 instead of a $1500 manifold.
Outcome: Replacing only the broken plastic lever with a robust metal version restored the connection and cleared the code. This permanent fix is stronger than the OEM design.
Lesson: Do not accept that the entire assembly needs replacement. For common failures like the Mercedes M272 linkage, aftermarket component-level fixes save over a thousand dollars.
2017 Audi A4 2.0T with P2006 and P2015
Check engine light appeared after accelerating hard. Codes P2006 and P2015 were present. Car drove normally at low RPMs.
What they tried:
- Manually moved the linkage arm by hand; it moved smoothly, ruling out seized flaps.
- Connected a handheld vacuum pump to the actuator. It would not hold vacuum.
- Swapped the vacuum actuator from a spare manifold.
Outcome: The original actuator's internal diaphragm was torn. Replacing just the actuator resolved both codes. P2015 was a direct result of the P2006 mechanical failure.
Lesson: P2015 often appears with P2006 and confirms a mechanical movement problem. Test the actuator with a vacuum pump before assuming the flaps are seized with carbon.
How to Prevent This Code From Triggering
- Install a high-quality oil catch can (Install once, empty every 5,000 miles) — Intercepts oil vapor before it enters the intake, significantly reducing the primary cause of carbon buildup and seized flaps on GDI engines.
- Use Top Tier certified gasoline (Every fill-up) — High-quality detergents keep fuel injectors clean, promoting complete combustion and reducing soot pushed back into the intake during valve overlap.
- Perform a professional intake system cleaning service (Every 40,000 miles) — Walnut blasting physically removes carbon deposits from the intake ports and flaps before they become thick enough to cause a P2006 code.
- Follow manufacturer's oil change intervals with specified oil (Per manufacturer schedule) — High-quality synthetic oil reduces vaporization, limiting the material available to form carbon deposits on the intake components.
- Regularly inspect vacuum lines and plastic components (Every oil change) — Catch brittle plastic linkages and cracked rubber hoses before they fail and trigger a power loss.
Frequently Asked Questions
What does 'Bank 1' mean?
Bank 1 is the side of the engine containing the #1 cylinder. On an inline engine, there is only one bank, but V-type engines have two. Consult your service manual to confirm, though it is often the passenger side for US-market vehicles.
I replaced the actuator but the P2006 code came back. What did I miss?
This is a very common misdiagnosis. The root cause is often not the actuator, but the flaps being physically jammed by carbon buildup or a broken linkage. Before replacing the actuator, manually verify the flaps move freely; if seized, a new actuator will not solve the problem.
Can a fuel system cleaner or Seafoam fix this?
No. On a Gasoline Direct Injection (GDI) engine, fuel is injected directly into the cylinder and never washes over the intake valves or runners. Manual cleaning (walnut blasting) is the only proven method to remove hardened carbon.
Can the P2006 code clear itself?
It is highly unlikely. The code is triggered by a mechanical or electrical failure requiring a physical repair. The underlying problem persists and the code returns until properly fixed.
What are some preventative measures to avoid P2006?
For GDI engines, use high-quality Top Tier gasoline and perform professional induction cleaning services every 40,000 miles to reduce carbon buildup. For all engines, change the air filter regularly and address oil leaks promptly. These steps keep the intake system breathing freely.
Is this an expensive repair?
The cost varies dramatically from $50 for a vacuum hose to over $1,500 for a full intake manifold replacement at a dealership. Independent shops offer component-level repairs, like a $100 metal linkage upgrade for Mercedes, saving you thousands. Always diagnose the exact failure point before authorizing a full replacement.
Why did my car get both a P2006 (stuck closed) and P2004 (stuck open) code?
This indicates a complex failure, such as one bank's linkage breaking closed while the other breaks open. On Subaru engines, loose internal screws cause one flap to jam open and another closed. It also points to a major electrical or PCM software issue causing conflicting readings.
Key Takeaways
- Code P2006 indicates your engine's intake manifold runner flaps are stuck closed, choking airflow and causing a severe 10-15% drop in fuel economy and power above 3,500 RPM.
- Manually test the flap linkage by hand before buying parts; if it is completely seized, you need a $450-$900 professional walnut blasting service, not a new actuator.
- Do not drive for more than 50-100 miles with this code active, as the resulting rich air-fuel mixture will overheat and destroy your catalytic converter, adding up to $2,500 in repair costs.
- Avoid paying $1,500+ for a full intake manifold replacement on Mercedes M272 or Ford 5.0L engines without first checking if a $50 aftermarket metal linkage kit will permanently fix the broken plastic arm.
Helpful Videos
Shop the Parts Behind P2006
Below are the parts most often responsible for code P2006, ranked by how frequently each one is the actual culprit (per the diagnosis above). Tap any to see what we have for your vehicle.


The information in this article is provided for general reference and educational purposes only. Vehicle specifications, procedures, and part compatibility can vary by production date, trim level, and region. Always consult your vehicle's factory service manual and verify part numbers before purchasing or performing repairs. Safety-critical components such as airbags, seat belts, and braking systems should be installed by a qualified professional.
- 🧭 Diagnostic Flowchart
- 🎬 Helpful Videos
- 🛍️ Shop This Part
- What Does P2006 Mean?
- Can I Drive With P2006?
- Common Causes
- Symptoms
- Common Fixes & Costs
- Used vs. New Parts: Buying Guide
- What Happens If You Wait — Timeline
- Cost of Not Fixing It
- Diagnosis Steps
- When This Code Triggers (Freeze-Frame Conditions)
- Related Codes
- Climate & Environmental Factors
- How to Talk to a Mechanic About This Code
- Where to Take It: Dealer vs Independent vs Chain
- When to Walk Away From the Repair
- What Scan Tool You Need for This Code
- How to Clear the Code After You Fix It
- Will This Fail Emissions / State Inspection?
- Most Commonly Affected Vehicles
- Manufacturer-Specific Notes
- Real Owner Stories
- 2016 Ford F-150 5.0L at 1,400 miles
- Audi A6 3.0T with P2006 & P2007
- Mercedes-Benz E350 (M272 V6) with ~100k miles
- 2017 Audi A4 2.0T with P2006 and P2015
- How to Prevent This Code From Triggering
- Frequently Asked Questions
- What does 'Bank 1' mean?
- I replaced the actuator but the P2006 code came back. What did I miss?
- Can a fuel system cleaner or Seafoam fix this?
- Can the P2006 code clear itself?
- What are some preventative measures to avoid P2006?
- Is this an expensive repair?
- Why did my car get both a P2006 (stuck closed) and P2004 (stuck open) code?
- Key Takeaways
- 🎟️ Get 5% Off