
OBD-II Code P2017: Intake Runner Sensor Circuit High
What P2017 means, why it triggers, and how to fix it
- P2017 triggers when the engine computer receives a voltage signal stuck near 5.0V from the intake runner position sensor, indicating an open circuit in the ground or signal wire.
- Inspect the sensor's electrical wiring and connector first, as broken wires or corroded pins cause the majority of P2017 faults.
- Expect a 10-15% drop in fuel economy, sluggish acceleration, and an automatic emissions test failure until the circuit is repaired.
- Do not replace an entire $600+ intake manifold without first verifying if a $50 aftermarket metal lever kit or a simple carbon cleaning will solve the mechanical binding.
What Does P2017 Mean?
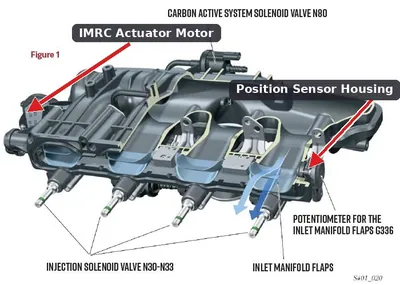
The P2017 code means the Powertrain Control Module (PCM) detects a voltage signal from the Intake Manifold Runner Position Sensor exceeding the expected range (typically over 4.8 volts). This sensor tracks the position of flaps controlling engine airflow. When the signal is stuck high, the PCM cannot confirm flap position, causing an incorrect air-fuel mixture that hurts performance and fuel economy.
Technical definition: Intake Manifold Runner Position Sensor/Switch Circuit High Bank 1.
Can I Drive With P2017?
Yes, But With Caution. You can drive with this code, but expect poor engine performance, reduced power, and worse gas mileage. Fix it soon to prevent catalytic converter damage from an imbalanced air-fuel mixture, which costs $800 to $2500 to repair.
Common Causes

- Damaged Wiring or Bad Connection (Very Common) — The most frequent cause is a broken wire, chafed harness, or corroded connector. An open in the ground or signal wire forces the voltage to read high (near 5V), triggering the code.
- Faulty Intake Manifold Runner Control (IMRC) Actuator or Sensor (Common) — The sensor sends a bad signal, or the actuator motor breaks down internally. On many vehicles, the sensor and actuator are a single integrated unit.
- Carbon Buildup (Common) — Sticky carbon deposits build up on the intake runner flaps and manifold walls, jamming them. If the flaps 🎬 See how to properly clean carbon buildup from your intake. cannot move, it burns out the actuator motor or forces the sensor reading out of range.
- Internal Actuator/Linkage Wear (Common) — Actuators often use small plastic levers or gears to move the flaps. These become brittle and break, disconnecting the motor from the flaps and causing a total loss of control.
- Vacuum Leaks (Less Common) — On systems using vacuum to move the runner flaps, a cracked, disconnected, or clogged vacuum line prevents the flaps from moving correctly, causing the sensor to report an unexpected position.
- Improper Service/Reassembly (Less Common) — If the intake manifold was recently removed, misaligning the manifold or forgetting to reconnect a vacuum line or electrical connector triggers the code.
- Bad IMRC Actuator Relay (Rare) — Some vehicles use a relay to supply power to the IMRC actuator. A failed relay causes a loss of power and erratic operation, leading to a circuit fault code.
- Faulty Powertrain Control Module (PCM) (Rare) — A faulty internal converter or corrupted software causes a misreading. Only consider this after exhausting all other electrical and mechanical possibilities.
Symptoms
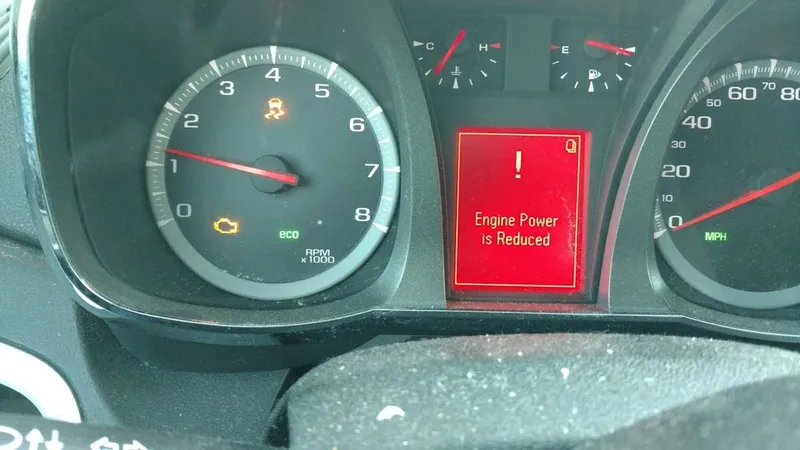
- Check Engine Light is On — The computer illuminates the Check Engine Light on your dashboard immediately after detecting the high voltage.
- Reduced Engine Power — The vehicle feels sluggish, hesitates, and struggles to accelerate, especially at highway speeds.
- Poor Fuel Economy — An incorrect air-fuel mixture makes the engine less efficient, dropping fuel economy by 10-15%.
- Rough or Fluctuating Idle — The engine idles roughly or surges as the computer struggles to maintain a stable air-fuel ratio at low speeds.
- Limp Mode Activation — Some vehicles trigger a reduced power mode, severely limiting engine RPM to prevent internal damage.
- Audible Clicking or Ticking Noise — You will often hear a clicking sound from the engine bay during startup, which is the actuator motor attempting to move stuck flaps.
Diagnostic Flowchart

Tap your situation to follow the diagnostic path that matches what you're seeing on this code.
Common Fixes & Costs
- Repairing Wiring or Connectors — Parts: $5-$50, Labor: $125-$250, ~1.5 hr book time (Intermediate)
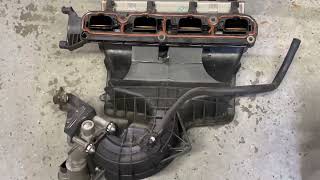
- Replacing the Intake Manifold Runner Control Actuator/Sensor
— Parts: $50-$300, Labor: $100-$285, ~1.2 hr book time
(DIY)
Dodge/Jeep 2.4L: OEM 4884549AD (Alt: Dorman 911-902, Standard Motor Products F00H600071)
VW/Audi 2.0T: OEM 06J133201BH (Alt: Bosch 06J133201BD, Vaico V10-4389) - Cleaning the Intake Manifold (Carbon Removal) — Parts: $20-$60, Labor: $200-$500, ~3.0 hr book time (Professional)
- Replacing the Entire Intake Manifold Assembly
— Parts: $150-$1250, Labor: $150-$550, ~3.5 hr book time
(Professional)
Dodge/Jeep 2.4L: OEM 4892293AC (Alt: Dorman 615-905)
VW/Audi 2.0T (CCTA/CBFA): OEM 06J133201BD (Alt: Bosch 06J133201AS, Dorman 615-375)
Mercedes M272: OEM A2721402401 (Alt: URO Parts 2721402401) - Replacing the Intake Manifold Gaskets
— Parts: $40-$250, Labor: $180-$400, ~2.5 hr book time
(Professional)
Dodge/Jeep 2.4L: OEM 5045432AA (Alt: Fel-Pro MS97204)
VW/Audi 2.0T: OEM 06F129717D (Alt: Victor Reinz 71-38548-00)
Used vs. New Parts: Buying Guide
When a used part is worth it: For a complete intake manifold assembly on a high-mileage vehicle where budget is the primary concern. A used OEM part from a low-mileage donor is a good value.
Donor-vehicle mileage cap: roughly under 80000 miles for the part to have meaningful remaining life.
Donor quality checklist:
- Verify the donor vehicle was not scrapped for engine or emissions-related failures.
- Inspect plastic manifolds carefully for cracks around mounting points and seams.
- Match the part number exactly to ensure sensor compatibility.
Decision logic:
- If The failure is a common wear item like a plastic lever on a Mercedes manifold → Buy a new aftermarket metal repair kit instead of a used or new manifold.
- If The vehicle is over 150,000 miles and the budget is tight → A used manifold is acceptable, but be aware it has limited remaining life.
- If The part is just the external actuator/sensor and is available separately → Buy a new OEM or high-quality aftermarket part; the savings on a used one are minimal.
Warranty tradeoff: Used parts typically come with a 30-90 day warranty covering the part only. New aftermarket parts offer 1-year to limited lifetime warranties. OEM parts carry a 1-year manufacturer warranty.
Worst-case if a used part fails: 400-800
What Happens If You Wait — Timeline
- 0-1 month: Check Engine Light is on. A slight drop in fuel economy and minor hesitation during acceleration occur. The vehicle fails emissions tests. (MPG impact: 5-10%% · Added cost: $20-$60 in wasted fuel)
- 1-4 months: Engine performance worsens. The car feels sluggish, idles roughly, and fuel consumption increases significantly. The risk of 'limp mode' increases. (MPG impact: 10-15%% · Added cost: $100-$250 in wasted fuel)
- 4-8 months: Unburnt fuel enters the exhaust, overheating and degrading the catalytic converter. Carbon buildup on valves and pistons accelerates. (MPG impact: 15-20%% · Added cost: $800-$2500 (potential catalytic converter replacement))
- 8+ months: Catastrophic failure of the catalytic converter occurs. Severe carbon buildup requires extensive engine cleaning and contributes to cylinder wall wear. (MPG impact: 20-25%% · Added cost: $2500-$4000+ (catalytic converter, O2 sensors, and potential engine work))
Cost of Not Fixing It
- 0-1 month: Noticeable drop in fuel economy (5-15%) and poor acceleration. Automatic emissions test failure. (Added cost: 50-150)
- 1-6 months: Incorrect air-fuel ratios overheat the catalytic converter with unburnt fuel, causing internal failure. (Added cost: 1200-2800)
- 6+ months: Sustained poor combustion creates severe carbon buildup on valves and pistons, accelerating internal engine wear. (Added cost: 1500-4000)
Diagnosis Steps
- Read the Codes and Freeze Frame Data
Use an OBD-II scanner to confirm P2017 is present and check for related codes (e.g., P2016, P2004, P0171). Note the freeze frame data to see engine RPM and load when the code set.
Tools: OBD-II Scanner (Beginner) - Perform a Thorough Visual Inspection
Inspect the intake manifold runner control sensor, actuator, and all wiring. Look for unplugged connectors, melted wires, corroded pins, and cracked vacuum lines. Check where the harness rubs against metal brackets.
Tools: Flashlight (Beginner) - Check Live Sensor Data
Watch the live data for the 'Intake Runner Position' sensor PID. At idle, it reads low (0.5V - 1.7V). Revving past 3,000 RPM increases it to 3.8V - 4.5V. A reading stuck near 5V confirms an open circuit or bad ground.
Tools: Advanced OBD-II Scanner (Intermediate) - Test the Sensor Circuit with a Multimeter
Unplug the sensor. With the key on (engine off), check the harness connector pins. You need a 5V reference wire, a ground wire (near 0V), and a signal wire. A missing ground or signal wire causes the PCM to read a constant 5V.
Tools: Digital Multimeter (Intermediate) - Check for Mechanical Sticking
Remove the actuator and move the runner flaps by hand. They must move smoothly without binding. Stuck flaps indicate the intake manifold is clogged with carbon and requires cleaning or replacement.
Tools: Basic Hand Tools (Advanced) - Test the Actuator Function
Command the actuator to open and close using a bidirectional scanner while watching live data. Alternatively, apply direct voltage or vacuum to the actuator to verify the motor works.
Tools: Advanced OBD-II Scanner, Vacuum Pump, or Power Probe (Advanced) - Pro Tip: Perform a Voltage Drop Test on the Ground Circuit
Connect the multimeter's black lead to the battery negative and the red lead to the sensor's ground pin (plugged in, key on). A reading above 100mV (0.1V) proves excessive resistance in the ground circuit.
Tools: Digital Multimeter (Advanced) - Test Actuator/Solenoid Resistance
Disconnect the electronic actuator and measure resistance between its power and ground terminals. A good solenoid reads 30-40 ohms. 'OL' (Over Limit) confirms an open circuit and a dead component.
Tools: Digital Multimeter (Advanced) - Pro Tip: Use an Oscilloscope for Intermittent Faults
Connect an oscilloscope to the sensor's signal wire. A good sensor produces a smooth line that rises and falls. A bad sensor shows a flat line at 5V, or a pattern with sharp drops and electrical noise.
Tools: Automotive Oscilloscope (Professional)
When This Code Triggers (Freeze-Frame Conditions)
- Engine Coolant Temp: 180-200°F (Fully warmed up, in closed-loop operation.)
- RPM: 1500-3000 (Cruise, steady throttle, or during acceleration when the PCM commands a change in flap position.)
- Engine Load: 30-60% (Under moderate load, not at idle or full throttle.)
- Vehicle Speed: 35-60 mph (Steady highway or arterial road driving.)
Related Codes
- P2016 — The opposite of P2017, meaning 'Circuit Low'. P2017 (High) is caused by an open circuit. P2016 (Low) is caused by a short to ground. If they appear together, you have an intermittent wiring short.
- P2004 — Means 'Intake Manifold Runner Control Stuck Open'. P2017 is an electrical fault, while P2004 is a mechanical fault. If the sensor voltage stays high when commanding the actuator, it's P2017. If the actuator clicks but flaps don't move, it's P2004.
- P2006 — Means 'Intake Manifold Runner Control Stuck Closed'. Like P2004, it indicates the flaps are physically jammed, whereas P2017 indicates the computer lost the electrical signal entirely.
- P0171 — Means 'System Too Lean (Bank 1)'. A faulty IMRC system causes this by allowing un-metered air into the engine. Fix the P2017 code first; the P0171 will clear if the IMRC was the root cause.
Climate & Environmental Factors
- Cold Weather: Extreme cold makes plastic components, such as the intake manifold and internal actuator linkages, brittle and prone to snapping. This is the primary failure mode for Mercedes-Benz and VW/Audi plastic levers.
- High Humidity / Salt Belt Regions: Road salt and high humidity accelerate corrosion on the electrical connector pins for the IMRC sensor. This corrosion increases circuit resistance, forcing incorrect voltage readings.
- High Altitude: Operating at high altitude makes the performance symptoms (like lack of power) more severe, as the engine already operates with less dense air.
How to Talk to a Mechanic About This Code
Say this: "I have a P2017 code, and I'd like to schedule a diagnostic. I want to confirm if the cause is electrical (sensor circuit/connector) or mechanical (stuck runner flaps from carbon) before replacing any major parts."
This guides the technician to perform a complete diagnosis rather than immediately quoting a full intake manifold replacement.
Avoid saying:
- 'Just fix whatever's wrong'
- 'My check engine light is on, can you look at it?'
- 'My car feels sluggish, I think I need a new intake'
Questions to ask before authorizing the repair:
- Did you test the sensor's wiring and connector for power, ground, and signal continuity?
- Were you able to see the sensor's position voltage on a scan tool? Was it stuck high?
- Did you check if the runner flaps are physically stuck inside the manifold?
- Can you show me the damaged part or a photo of the issue?
- What is the warranty on this specific repair, covering both parts and labor?
Where to Take It: Dealer vs Independent vs Chain
- Dealer:
A safe but expensive choice. Best if your car is under warranty or is a German brand known for complex electronics.
Best for: Vehicles still under a powertrain or emissions warranty, Complex manufacturer-specific quirks requiring software adaptation, Recalls or Technical Service Bulletins (TSBs)
Downsides: Highest labor rates, Defaults to replacing a full assembly when a smaller component fix is possible (Typical cost: +50% vs. baseline) - Independent Shop:
Best fit for most situations. A good independent mechanic diagnoses wiring and mechanical issues effectively and suggests cost-saving repairs.
Best for: Most out-of-warranty P2017 repairs, Vehicles where the cause is a well-known issue (e.g., broken Mercedes lever), Owners looking for a balance of expertise and value
Downsides: Shop quality varies; vet shops by reading reviews and looking for ASE certifications, Lacks expensive, factory-specific programming tools for the newest models (Typical cost: +0% vs. baseline) - Chain Shop:
AVOID for diagnosis. They correctly identify the code but are prone to recommending a full manifold replacement without proper testing.
Best for: Simple, routine maintenance like oil changes and tire rotations
Downsides: Technician skill varies dramatically, High pressure to upsell services and parts, Lacks in-depth diagnostic training for complex electrical engine faults (Typical cost: -10% vs. baseline)
When to Walk Away From the Repair
If the estimated repair cost exceeds 40-50% of the car's private-party value, take it to a professional shop for a second opinion or consider selling it.
- Car worth $4000, fix is $2000: Walk away. The repair cost is 50% of the car's value, and other age-related issues will appear soon.
- Car worth $12000, fix is $800: Fix it. The repair cost is well below the threshold and is a worthwhile investment.
- Car worth $2500, fix is $1500: Walk away. The repair cost is 60% of the car's value, making it financially unwise.
What Scan Tool You Need for This Code
Minimum: A scanner that reads codes, shows freeze-frame data, and displays live data PIDs for the intake manifold runner position sensor.
A $20 code reader cannot show live sensor voltage, which is critical for determining if the fault is electrical (stuck at 5V) or mechanical.
Budget: BlueDriver Pro Scan Tool (~$100) — Connects to your smartphone via Bluetooth. It graphs the live voltage from the IMRC position sensor so you can see if it responds when you rev the engine.
Mid-range: Innova 5610 (~$320) — Offers bidirectional control. This allows you to command the IMRC actuator to open and close directly from the scanner to test the motor.
Professional: Autel MaxiCOM MK808 / Topdon Phoenix Lite 2 (~$500-700) — Provides full bidirectional controls and performs the required relearn or adaptation procedure after a new intake manifold is installed.
How to Clear the Code After You Fix It
- Use an OBD-II scan tool to clear the P2017 trouble code.
- Perform a complete OBD-II drive cycle to allow the readiness monitors to run.
- Verify that all relevant readiness monitors (e.g., Catalyst, O2 Sensor) are set to 'Ready'.
Drive cycle (~30 minutes): Cold start (sit overnight). Idle for 2-3 minutes with A/C on. Accelerate to 55 mph and hold steady for 3-5 minutes. Coast down to 20 mph without braking. Accelerate back to 55-60 mph at 3/4 throttle and hold for 5 minutes. Decelerate and stop.
Readiness monitors affected: Catalyst Monitor, Oxygen (O2) Sensor Monitor, EGR System Monitor
Before emissions retest: drive at least 100 miles to fully set monitors.
Watch out for:
- Disconnecting the battery clears the code but resets all readiness monitors to 'Not Ready', guaranteeing an emissions test failure.
- The code returns immediately if the root cause (bad wiring, faulty part) is not fixed.
- Failing to complete the specific drive cycle leaves monitors 'Not Ready'.
Will This Fail Emissions / State Inspection?
Yes — this code typically fails an OBD-II emissions inspection.
- California: An illuminated Check Engine Light results in an automatic smog check failure. After repair, all readiness monitors must be 'Ready' before re-testing. Driving 100-200 miles is required.
- New York: A vehicle with an active Check Engine Light automatically fails the emissions portion. After clearing the code, only one non-continuous monitor is allowed to be 'Not Ready' for 2001+ vehicles.
- Texas: An illuminated Check Engine Light is an automatic failure. For 2001 and newer vehicles, one readiness monitor can be 'Not Ready' to pass. Two or more results in failure.
Most Commonly Affected Vehicles
- Dodge Caliber / Avenger / Journey (2007-2012) — Extremely common on 2.0L and 2.4L 'World Engines'. Requires replacement of the entire intake manifold assembly due to internal flap or actuator failure.
- Jeep Patriot / Compass (2007-2017) — Shares the 2.0L/2.4L engine with Dodge. The actuator motor fails frequently, or the flaps stick completely, requiring a full manifold replacement.
- Volkswagen Jetta / Golf / Passat / Tiguan (2.0T) (2008-2016) — On 2.0T (CCTA/CBFA) engines, the runner control motor fails or flaps stick inside the plastic intake manifold. TSB 24-17-04 addresses separated flaps.
- Audi A4 / A6 (2.0T) (2008-2016) — Similar to Volkswagen, 2.0T models experience frequent failures of the runner control valve or associated wiring. The sensor reads >4.8V when the fault occurs.
- Mercedes-Benz C-Class / E-Class (M272 Engine) (2005-2012) — The plastic lever on the intake manifold actuator breaks, disabling the runner flaps. Aftermarket metal repair kits fix this without replacing the $1,200 manifold.
- Hyundai Tucson (2011-2021) — On GDI engines, this code appears due to heavy carbon buildup or sensor failure. An open in the signal or ground circuit is the primary electrical cause.
- Kia Optima (2011-2020) — Common on 2.4L GDI engines, often paired with code P2008. The runner control actuator/sensor fails frequently.
- BMW 3-Series / 5-Series (e.g., 328i) (2007-2013) — Appears due to issues with the intake manifold's adjusting unit (DISA valve) on N52 engines. Failure of either DISA valve causes severe performance issues.
Manufacturer-Specific Notes
- Volkswagen / Audi: TSB 24-17-04 addresses related codes P2015 and P2004 on 2.0T engines, noting the runner flap separates from its carrier plate. An ECM adaptation using a factory-level scan tool is mandatory after replacing the manifold.
- Mercedes-Benz: The plastic lever on the actuator breaks constantly. Buy an aftermarket metal repair kit (e.g., URO Parts, Vaico) to replace just the lever, saving you from buying an entirely new intake manifold.
- Chrysler / Dodge / Jeep: On 2.0L/2.4L 'World Engines', the runner flaps and actuator are integrated, requiring a full manifold replacement. Manually turn the actuator's pivot point first; if it moves freely, you only need to replace the external actuator motor.
- Hyundai / Kia: On GDI engines, carbon buildup is the primary cause for IMRC codes. The direct injection design allows carbon to jam the runner flaps. Regular intake cleaning services are mandatory preventative maintenance.
Real Owner Stories
2009 Dodge Caliber with 127K miles
Check Engine Light with P2017 appeared immediately after an oil change. The car felt sluggish.
What they tried:
- Cleared the code, but it returned after 50 miles.
- Visually inspected the air filter housing and wiring harness, finding no issues.
- Discovered heavy carbon buildup inside the intake manifold preventing the runner flaps from moving.
Outcome: The owner removed the intake manifold, cleaned out the carbon deposits, and installed a new gasket. This resolved the issue without replacing the expensive manifold.
Lesson: Don't assume a 'Circuit High' code is always an electrical failure. On high-mileage Dodge/Jeep 2.4L engines, carbon buildup physically jams the flaps, forcing the sensor to report an out-of-range high voltage.
Mercedes-Benz with M272 V6 Engine
Vehicle experienced poor idle, loss of power, and a Check Engine Light with P2017 and P2004.
What they tried:
- A dealership recommended replacing the entire intake manifold assembly for over $1,200.
- The owner researched and found the common failure is a small plastic lever on the actuator breaking.
Outcome: The owner purchased an aftermarket aluminum lever repair kit for under $200. Replacing just the broken lever restored full function and cleared the codes.
Lesson: For Mercedes M272/M273 engines, investigate aftermarket metal repair kits before agreeing to a full intake manifold replacement. It saves over $1,000.
2013 Ram 1500 5.7L HEMI
P2017 code appeared with P2008. The truck had reduced power and poor acceleration.
What they tried:
- Initial diagnosis pointed to the Intake Manifold Runner Control (IMRC) actuator.
- Visual inspection revealed the wiring harness going to the actuator was extremely tight and heat-damaged.
Outcome: The problem was a broken wire right at the connector. The owner spliced in a new pigtail connector (Dorman OE FIX 911-933) to provide more slack, fixing the issue cheaply.
Lesson: On Ram 5.7L trucks, the IMRC wiring harness is too short from the factory. Perform a 'wiggle test' on the harness before buying a new actuator.
How to Prevent This Code From Triggering
- Perform regular engine intake system cleaning (Every 30,000-40,000 miles) — On GDI engines, fuel doesn't wash over the intake valves. Using a GDI-specific intake cleaner or walnut blasting removes carbon deposits before they jam the runner flaps.
- Install an oil catch can (Once (requires emptying every 3,000-5,000 miles)) — An oil catch can intercepts oil vapors from the PCV system before they bake onto the hot intake valves and runner flaps, significantly reducing carbon buildup.
- Use high-quality synthetic engine oil (Per manufacturer's schedule) — Premium synthetic oils have lower volatility, meaning less oil vapor enters the PCV system. This reduces the primary source of carbon deposits.
- Inspect and protect engine wiring harnesses (During routine maintenance) — Wiring becomes brittle from heat and chafes against the engine. Add protective split-loom tubing or heat-reflective sleeving to the IMRC sensor harness.
- Use Top Tier certified gasoline (Every fill-up) — Top Tier gas contains enhanced detergents that keep fuel injectors and combustion chambers cleaner, promoting complete combustion and reducing soot in the PCV system.
Frequently Asked Questions
What are the most common misdiagnosis mistakes for P2017?
A common mistake is replacing the entire intake manifold when the actual problem is a loose connector, broken wire, or cheap plastic actuator lever. Always perform a thorough electrical test and visual inspection before condemning an expensive part.
What does 'Bank 1' mean?
Bank 1 is the side of the engine containing cylinder #1. On an inline 4-cylinder or straight-6 engine, there is only one bank. On a V6 or V8 engine, it's the bank with the #1 cylinder.
Will I fail an emissions test with a P2017 code?
Yes, an active P2017 code causes an automatic failure of an emissions test because the Check Engine Light is on.
Can I just clean the intake manifold instead of replacing it?
Yes, if heavy carbon buildup causes the flaps to stick, a thorough 'walnut blasting' or manual cleaning solves the issue. However, if the flaps, internal seals, sensor, or actuator motor are broken, you must replace the part.
Can a P2017 code clear itself?
No, P2017 indicates a hard electrical fault like an open circuit. This code remains active until you repair the underlying wiring, sensor, or component issue.
Do I have to replace the whole intake manifold or just the sensor?
This depends entirely on your vehicle. On some cars, you can unbolt and replace the sensor or actuator separately. On many newer cars with plastic intakes, the components are built-in, requiring a full manifold replacement.
Can a vacuum leak cause a P2017 code?
Yes, on systems using vacuum to operate the IMRC actuator. A cracked or clogged vacuum line prevents the actuator from moving the flaps, causing the position sensor to send a fault signal to the PCM.
Key Takeaways
- P2017 triggers when the engine computer receives a voltage signal stuck near 5.0V from the intake runner position sensor, indicating an open circuit in the ground or signal wire.
- Inspect the sensor's electrical wiring and connector first, as broken wires or corroded pins cause the majority of P2017 faults.
- Expect a 10-15% drop in fuel economy, sluggish acceleration, and an automatic emissions test failure until the circuit is repaired.
- Do not replace an entire $600+ intake manifold without first verifying if a $50 aftermarket metal lever kit or a simple carbon cleaning will solve the mechanical binding.
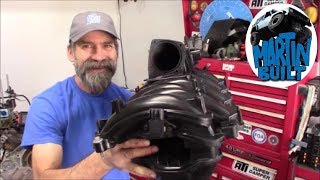
Helpful Videos
Shop the Parts Behind P2017
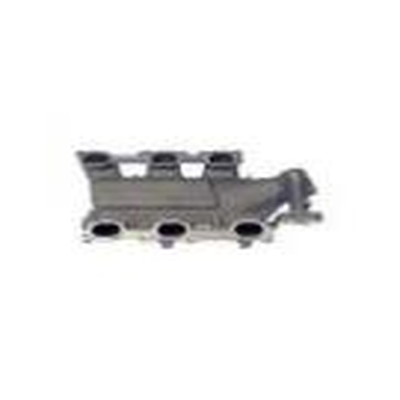
Below are the parts most often responsible for code P2017, ranked by how frequently each one is the actual culprit (per the diagnosis above). Tap any to see what we have for your vehicle.


The information in this article is provided for general reference and educational purposes only. Vehicle specifications, procedures, and part compatibility can vary by production date, trim level, and region. Always consult your vehicle's factory service manual and verify part numbers before purchasing or performing repairs. Safety-critical components such as airbags, seat belts, and braking systems should be installed by a qualified professional.
- 🧭 Diagnostic Flowchart
- 🎬 Helpful Videos
- 🛍️ Shop This Part
- What Does P2017 Mean?
- Can I Drive With P2017?
- Common Causes
- Symptoms
- Common Fixes & Costs
- Used vs. New Parts: Buying Guide
- What Happens If You Wait — Timeline
- Cost of Not Fixing It
- Diagnosis Steps
- When This Code Triggers (Freeze-Frame Conditions)
- Related Codes
- Climate & Environmental Factors
- How to Talk to a Mechanic About This Code
- Where to Take It: Dealer vs Independent vs Chain
- When to Walk Away From the Repair
- What Scan Tool You Need for This Code
- How to Clear the Code After You Fix It
- Will This Fail Emissions / State Inspection?
- Most Commonly Affected Vehicles
- Manufacturer-Specific Notes
- Real Owner Stories
- 2009 Dodge Caliber with 127K miles
- Mercedes-Benz with M272 V6 Engine
- 2013 Ram 1500 5.7L HEMI
- How to Prevent This Code From Triggering
- Frequently Asked Questions
- What are the most common misdiagnosis mistakes for P2017?
- What does 'Bank 1' mean?
- Will I fail an emissions test with a P2017 code?
- Can I just clean the intake manifold instead of replacing it?
- Can a P2017 code clear itself?
- Do I have to replace the whole intake manifold or just the sensor?
- Can a vacuum leak cause a P2017 code?
- Key Takeaways
- 🎟️ Get 5% Off