
P2066 on 2014 Ram 2500: Fuel Level Sensor 2 Performance Causes and Fixes
On a 2014 Ram 2500, code P2066 is most often caused by a faulty fuel level sensor or outdated powertrain software. Before replacing parts, check with a dealer for software updates mentioned in TSBs #18-096-16 and #18-042-15, as a reflash may solve the issue without hardware replacement. If the sensor is bad, it is part of the fuel pump module.
- For a 2014 Ram 2500, P2066 means there's a performance issue with the secondary fuel level sensor.
- **Always check for a PCM software update first.** This is a known issue on this platform and a reflash from the dealer can fix the problem without replacing any parts.
- If software is not the issue, the most likely causes are a failed fuel level sending unit or a corroded/damaged wire or connector.
- Driving is possible, but the inaccurate fuel gauge means you could run out of gas unexpectedly.
- Replacing the sensor is a significant job that requires either dropping the fuel tank or lifting the truck bed, making it a difficult DIY task.
What's Unique About the 2014-2014 Ram 2500
For the 2014 Ram 2500, this code is frequently not a hardware problem. Ram issued multiple Technical Service Bulletins (TSBs) indicating that a PCM software glitch can falsely trigger the P2066 code, along with several other unrelated codes. The TSBs specifically apply to DJ/D2 vehicle platforms (Ram 2500/3500 Pickups). Therefore, a crucial first step, unique to this platform, is to check if a simple software update is available, which can save significant time and money on unnecessary hardware replacement.
Diagnostic Flowchart
Tap your situation to follow the diagnostic path that matches what you're seeing on this vehicle.
Symptoms You May Notice
- Check Engine Light is on
- Inaccurate or erratic fuel gauge reading (e.g., stuck on empty, full, or fluctuating wildly).
- Fuel gauge drops to empty suddenly, often when the tank is around 1/2 to 3/4 full.
- Fuel warning light may be on despite having fuel in the tank
- Distance-to-empty calculation on the trip computer is incorrect or shows dashes.
- Remote start feature may not work correctly.
- Replacing the fuel level sensor when a PCM software update was the actual required fix.
- Replacing the entire fuel pump assembly when only the serviceable sending unit/sensor was faulty (if available separately). Note: For this platform, the sensor is usually part of the module.
- Replacing the instrument cluster, assuming the gauge itself is the problem.
- Assuming the issue is with the primary fuel pump when the fault lies with the secondary sending unit or its wiring.
Most Likely Causes
- Outdated Powertrain Control Module (PCM) Software 🔴 High Probability → Shop Engine Control Module (ECM) Manufacturer TSBs #18-096-16, #18-042-15, #1800414, and #18-004-14 explicitly list P2066 as a code that can be resolved with a software update for DJ/D2 platforms.
How to confirm: Contact a Ram dealership or a qualified shop with a wiTECH scan tool to check if the vehicle's PCM calibration is up to date. The TSBs involve reprogramming the module.
Typical fix: Reprogramming (flashing) the PCM with the latest manufacturer software. This must be done by a dealer or a shop with the appropriate tools.
Est. part cost: $0 - Faulty Fuel Level Sensor 2 (Sending Unit) 🔴 High Probability → Shop Fuel Tank Sending Unit The sensor is a moving part (a float on an arm) with electrical contacts that can wear out or become contaminated over time, leading to incorrect resistance readings. Forum users frequently report the contact patch on the resistor strip wears through, causing an open circuit, typically when the fuel level is between 1/2 and 3/4 of a tank.
How to confirm: Access the sensor and measure its resistance with a multimeter while sweeping the float arm. 🎬 Watch: How to test a fuel level sending unit's resistance. The resistance should change smoothly without any dropouts or open circuits. For many Chrysler/Ram vehicles, the resistance should be greater than 96.5 ohms when empty and less than 8 ohms when full; a sudden jump to infinite resistance (open circuit) during the sweep indicates failure.
Typical fix: Replace the fuel level sensor. On these trucks, the sensor is typically integrated into the fuel pump module and not sold separately. The entire fuel pump module must be replaced. 🎬 Watch this step-by-step guide to replacing the fuel pump assembly.
Est. part cost: $150-$400 - Wiring or Connector Issue 🟡 Medium Probability The wiring harness runs along the truck's frame to the fuel tank and is exposed to the elements. Corrosion at the connectors or physical damage (chafing) to the wires can interrupt the signal. The main inline connector near the left front wheel well is a known spot for corrosion and open circuits.
How to confirm: Visually inspect the wiring harness from the PCM to the fuel tank. Pay close attention to the main inline connector near the left front wheel and the connector on top of the fuel tank (C315) for corrosion (green crust), bent pins, or broken wires. Perform a continuity test on the signal and ground wires from the tank to the PCM.
Typical fix: Repair the damaged section of wire or clean/replace the corroded connector. Dielectric grease should be used on reassembly to prevent future moisture intrusion.
Est. part cost: $10-$50
Rare But Worth Checking
- Faulty Powertrain Control Module (PCM): → Shop Engine Control Module (ECM) This is very rare. Before condemning the PCM, all other possibilities, including software, sensors, and wiring, must be exhaustively ruled out.
- Fuel Transfer Pump Failure: → Shop Fuel Pump On vehicles with saddle tanks, a separate transfer pump may be used to move fuel from one side of the tank to the other. If this pump fails, the fuel levels between the two sides will become unequal, causing the two sensors to report conflicting information and triggering the P2066 code.
Diagnosis Steps
- Use an OBD-II scanner to confirm P2066 is the active code and check for any other related codes.
- Crucial Step: Contact a Ram dealer or use a professional scan tool (wiTECH) to verify if the PCM software is up-to-date according to TSBs #18-096-16, #18-042-15, #1800414, or #18-004-14. If an update is available, perform the reflash procedure. This often resolves the code.
- If the software is current, inspect the wiring harness between the fuel tank and the front of the vehicle. Pay close attention to the large inline connector behind the left front wheel well for any signs of corrosion or damage. Disconnect, inspect, clean with electrical contact cleaner, and apply dielectric grease before reconnecting.
- Inspect the electrical connector on top of the fuel tank (C315) for corrosion, moisture, or loose pins. This requires lowering the tank slightly or lifting the bed for access.
- If wiring appears intact, gain access to the top of the fuel tank. This may require lowering the tank or lifting the truck bed. Many owners find lifting the bed (6 bolts and a few wiring connectors) is easier than dropping a heavy fuel tank.
- Disconnect the sensor and use a multimeter set to Ohms (Ω) to test the resistance of the sending unit. Manually move the float arm up and down. The resistance reading should change smoothly and consistently. An erratic reading, or one that is infinite (open circuit) at any point in the travel, indicates a failed sensor.
- If the sensor tests good, check for 5V reference voltage and a good ground at the sensor connector coming from the PCM with the key on. A good ground connection should show less than 0.1 volts when tested.
- If all wiring and the sensor are confirmed to be good, the fault may lie within the PCM, though this is highly unlikely.
Parts You'll Likely Need
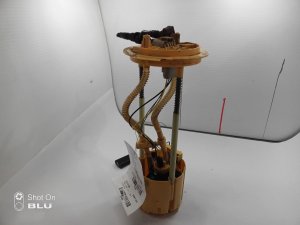
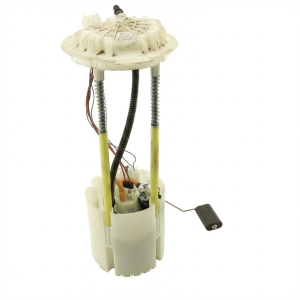
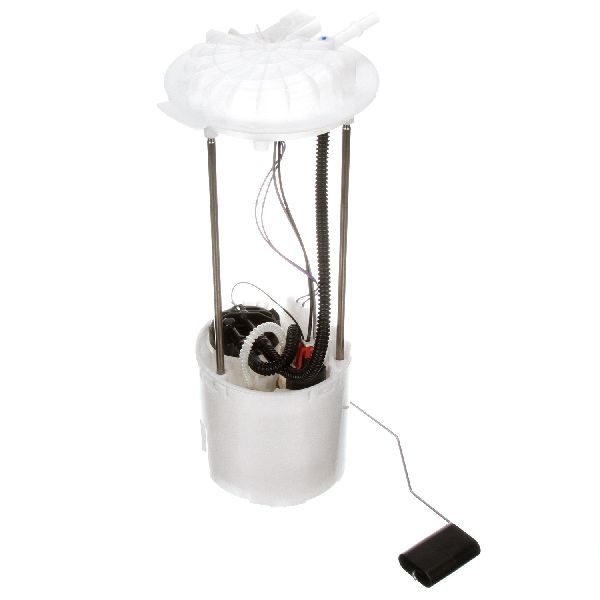
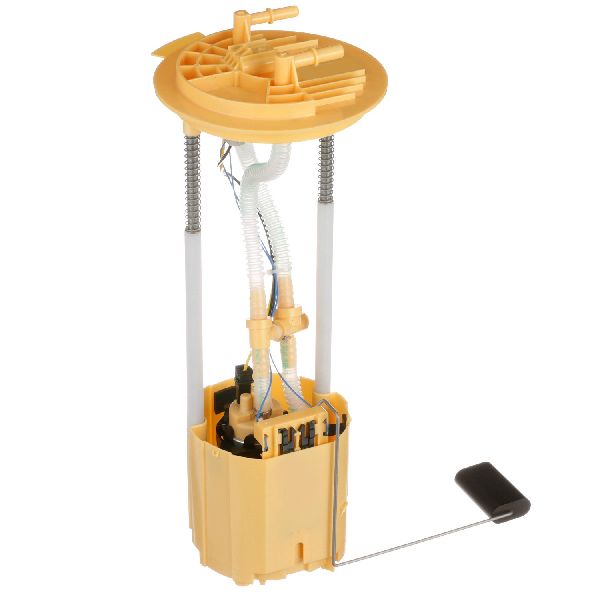
- Fuel Pump and Sending Unit Assembly
(OEM #05145571AA (Note: Part numbers can be superseded. Verify with VIN at dealer. This part fits multiple years/engines including 6.7L Cummins and 5.7L/6.4L V8s with the 28-gallon tank).)— This is the most common hardware failure for this code. The sensor's resistor strip wears out, causing erratic signals. The sensor is typically integral to the fuel pump module and not sold separately by Mopar.
Trusted brands: Mopar, Delphi, Spectra Premium
OEM price range: $250-$450
Aftermarket price range: $150-$300
Related Codes That Often Appear With This One
- P0441 — Listed in the same TSBs (#18-096-16, #18-042-15, #1800414, #18-004-14) as being potentially resolved by the same PCM software update.
- P2504 — Listed in the same TSBs (#18-096-16, #18-042-15, #1800414) as being potentially resolved by the same PCM software update.
- P0401 — Listed in the same TSBs (#18-096-16, #18-042-15) as being potentially resolved by the same PCM software update on specific Ram models.
Technical Service Bulletins (TSBs) & Recalls
- 18-096-16: Lists P2066 as a code that can be addressed by a PCM software update.
- 18-042-15: Also lists P2066 as a code that can be addressed by a PCM software update.
- 1800414: Mentions P2066 in a list of codes related to software improvements for DJ/D2 vehicles.
- 18-004-14: Also includes P2066 in a list of codes that can be set, with software updates being a potential fix for DJ/D2 vehicles.
Platform-Specific Known Issues
- A significant number of P2066 cases on this truck are caused by a software issue, not a failed part. Multiple TSBs confirm that a PCM reflash can correct this and other false codes. Always check for software updates before replacing hardware.
- Owner forums frequently cite that the fuel gauge fails specifically when the tank level drops to between 3/4 and 1/2 full. This is a classic symptom of a worn spot on the sending unit's resistor card.
- For DIY repair, many owners recommend removing the truck bed (6-8 bolts and disconnecting the taillight harness/filler neck) to access the top of the fuel tank, rather than dropping the heavy tank itself. This is often considered easier, especially if the tank is not empty.
Mechanic-Grade Diagnostic Values
- Fuel Level Sensor Resistance — expected: Should change smoothly. For many Ram trucks: < 8 Ohms at Full, > 96.5 Ohms at Empty. Other sender standards exist, such as 20 Ohms (Full) to 220 Ohms (Empty).. Failure: A reading of infinite resistance (Open Loop/OL) at any point, or a reading that does not change when the float arm is moved.
- Voltage Drop on Ground Circuit — expected: Less than 0.1 Volts (100 millivolts).. Failure: A reading higher than 0.1V indicates high resistance or a poor ground connection at a location like G304.
- Voltage at Fuel Pump Power Wire — expected: Battery voltage (12V+) for a few seconds when the key is first turned on, and constant battery voltage when the engine is running.. Failure: No voltage or significantly low voltage indicates a problem with the relay, fuse, or wiring leading to the pump.
Scan Tool Commands That Help
- wiTECH: Live Data Monitoring: 'Fuel Tank Level Sensor 1' & 'Fuel Tank Level Sensor 2' — This is the primary diagnostic step to observe the behavior of both sensors in real-time. A stuck or erratic reading for Sensor 2 while Sensor 1 reads correctly points directly to a Sensor 2 circuit fault.
- wiTECH: Reprogram the ECM/PCM — Used to apply software updates as specified in TSBs #18-096-16, #18-042-15, #1800414, and #18-004-14, which can resolve a false P2066 code.
- wiTECH: PCM Configuration Routine — This routine, found in the PCM 'Misc Functions' menu, must be performed after reprogramming (flashing) the PCM to ensure it is correctly configured for the vehicle.
Wiring & Ground Locations
- G304 — On the driver's side frame rail, typically near the fuel tank or transfer case area.. This is a primary chassis ground for the fuel pump module. Corrosion or a loose connection here can cause erratic voltage and ground signals for the fuel level sensor, triggering P2066.
- C315 — The main electrical connector on top of the fuel pump module/fuel tank.. This is the single connection point for the fuel pump and both level sensors. Inspecting its pins for corrosion, moisture, or damage is a critical diagnostic step.
- Fuel Pump Module Connector Pinout — At connector C315 on the fuel tank.. Knowing the pinout allows for direct testing. Pin 1 is Ground, Pin 3 is the Fuel Level Sensor Signal, and Pin 4 is the Fuel Pump Control Output. Testing for continuity, ground integrity, and signal voltage at these specific pins is essential for isolating the fault.
Real Owner Repair Stories
- Mopar1973Man.Com forum user (2nd Gen Dodge Ram (similar fuel system design)) — Fuel gauge did not work after installing a new sending unit. Instrument cluster self-test passed.
❌ Tried (didn't work) Replacing the fuel sending unit.
✅ What actually fixed it The owner tested resistance at the new sender and got a correct reading (220 ohms). However, testing at the male connector near the left front wheel well showed an infinite reading (open circuit). The fix was to find and repair the open wire in the harness between the front connector and the fuel tank.
When the Usual Fixes Don't Work
- While replacing the fuel pump module is the most common hardware fix, a significant counter-narrative exists where the module is replaced unnecessarily. In one documented case, a new sending unit did not fix the problem. The actual cause was an open circuit in the wiring harness between the fuel tank and a connector in the left front wheel well. The fix was repairing the wire, not replacing the module again. This highlights the importance of testing the full circuit's continuity before condemning the in-tank component.
OEM Part Supersession History
05145571AA→05145571AB— Standard part revision by the manufacturer.
Heads up: Part 05145571AB is the direct replacement for 05145571AA. Part number 5145625AA is also listed as a replaced part number in this chain. Always verify with VIN.
Helpful Videos

Used OEM Parts in Stock
New Aftermarket Parts Available


The information in this article is provided for general reference and educational purposes only. Vehicle specifications, procedures, and part compatibility can vary by production date, trim level, and region. Always consult your vehicle's factory service manual and verify part numbers before purchasing or performing repairs. Safety-critical components such as airbags, seat belts, and braking systems should be installed by a qualified professional.
- Ram 2500:
- 🧭 Diagnostic Flowchart
- 🎬 Helpful Videos
- 🛍️ Shop This Part
- What's Unique About the 2014-2014 Ram 2500
- Symptoms You May Notice
- Most Likely Causes
- Rare But Worth Checking
- Diagnosis Steps
- Parts You'll Likely Need
- Related Codes That Often Appear With This One
- Technical Service Bulletins (TSBs) & Recalls
- Platform-Specific Known Issues
- Mechanic-Grade Diagnostic Values
- Scan Tool Commands That Help
- Wiring & Ground Locations
- Real Owner Repair Stories
- When the Usual Fixes Don't Work
- OEM Part Supersession History
- 🎟️ Get 5% Off