
P2120 on 2007-2013 Chevrolet Avalanche: Causes and Fixes for Pedal Sensor Circuit 'D'
On a 2007-2013 Avalanche, code P2120 almost always points to a problem with the accelerator pedal or its connector, triggering 'Reduced Engine Power' mode. The most common cause is poor terminal tension in the pedal's electrical connector, a known issue cited in GM TSB #PIP3783D. The fix is often a simple connector repair or replacing the complete pedal assembly (GM Part #25832864).
- P2120 on a 2007-2013 Avalanche is a serious code that will likely put the truck in 'Reduced Engine Power' mode.
- Always check the electrical connector at the accelerator pedal first. Poor pin tension is a very common problem on this vehicle and is cited in a GM service bulletin.
- Do not immediately assume the throttle body is the problem; P2120 points specifically to the accelerator pedal circuit.
- If the connector is good, the most likely fix is to replace the entire accelerator pedal assembly, which contains the integrated sensor.
- This repair is generally considered DIY-friendly and requires basic hand tools.
What's Unique About the 2007-2013 Chevrolet AVALANCHE
The GMT900 platform, which the 2007-2013 Avalanche is built on, is known for having issues with poor terminal tension in the APP sensor connector. This specific weakness is well-documented by General Motors in Technical Service Bulletin #PIP3783D. This means that before you suspect a failed pedal assembly, the first and most important check is the electrical connector itself, as a simple pin-tension issue can mimic a complete sensor failure. This issue is common across the entire GMT900 lineup, including the Silverado, Sierra, Tahoe, and Yukon.
Diagnostic Flowchart
Tap your situation to follow the diagnostic path that matches what you're seeing on this vehicle.
Symptoms You May Notice
- "Reduced Engine Power" message on the dashboard
- Check Engine Light (Malfunction Indicator Lamp) is on
- Poor or no acceleration
- Vehicle will not accelerate from a stop
- Hesitation or surging during acceleration
- Vehicle speed is severely limited ('limp mode')
- Service Stabilitrak warning message may also appear
- Replacing the Throttle Body. P2120 specifically relates to the accelerator pedal assembly where the driver's foot is. Other codes relate to the throttle body, which is on the engine. Replacing the throttle body will not fix a P2120 code.
Most Likely Causes
- Poor Terminal Tension at APP Sensor Connector 🔴 High Probability This is a well-documented issue on GM trucks of this era, as cited in TSB #PIP3783D. The female terminals in the 6-pin connector can lose their grip on the male pins of the sensor, causing an intermittent or lost signal. Forum users frequently report this as the root cause, often after needlessly replacing the pedal itself.
How to confirm: Visually inspect the connector for pushed-out pins or corrosion. Perform a 'wiggle test' on the harness while monitoring live sensor data for APP 🎬 Watch a technician demonstrate the wiggle test and live data. Sensor 1 on a scan tool; if the voltage signal drops out or becomes erratic, the connection is faulty. The expected voltage should sweep smoothly. Any jumps or drops during the wiggle test confirm a connection issue.
Typical fix: Repairing the connection by ensuring the pins are fully seated and have proper tension. Sometimes, carefully using a small pick to slightly bend the female terminals 🎬 See how to fix terminal tension and clear these codes. can restore tension. If the connector or terminals are damaged, replace the connector pigtail (ACDelco PT2712).
Est. part cost: $15-$50 - Faulty Accelerator Pedal Position (APP) Sensor 🟡 Medium Probability → Shop Accelerator Pedal Assembly The APP sensor is an electronic component that wears out over time from the constant movement of the gas pedal. The internal Hall-effect sensors or resistive strips can develop dead spots, leading to signal dropouts.
How to confirm: With a scan tool, monitor the live data for APP Sensor 1 and APP Sensor 2. The voltage should change smoothly as you press the pedal. Any jumps, drops, or dead spots indicate a failed sensor. For example, APP Sensor 1 should sweep smoothly from around 0.9V to 2.4V. If the signal is erratic while the connector is confirmed to be secure, the sensor is bad.
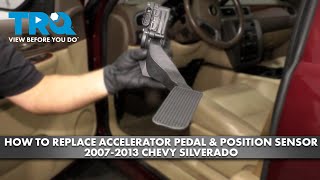
Typical fix: Replace the entire accelerator pedal assembly, as the sensor is integrated into it. The GM Genuine 🎬 Watch this step-by-step guide to replacing the pedal assembly. part is #25832864.
Est. part cost: $60-$180 - Damaged Wiring Harness ⚪ Low Probability
How to confirm: Visually inspect the wiring harness between the APP sensor and the Engine Control Module (ECM) for any signs of chafing, melting, or breaks, especially where it passes through the firewall. Perform a continuity test on each wire with a multimeter if a visual inspection is inconclusive.
Typical fix: Repair or replace the damaged section of the wiring harness. This involves cutting out the bad section, splicing in new wire, and sealing the repair with heat-shrink tubing.
Est. part cost: $10-$50 for repair supplies
Rare But Worth Checking
- Poor Ground Connection: A less common but notable cause can be a poor ground connection at the main engine-to-chassis ground strap or other ground points used by the ECM. A forum user with a 2008 Sierra (a platform mate) traced P2120 and P2138 to a bad ground, which was resolved by cleaning the G107 ground point on the engine block.
- Faulty Engine Control Module (ECM): → Shop Engine Control Module (ECM) This is extremely rare. The ECM should only be considered as the cause after all other possibilities, including wiring, connectors, grounds, and the sensor itself, have been definitively ruled out.
Diagnosis Steps
- Connect an OBD-II scanner and check for P2120 and any other related codes (e.g., P2125, P2138). Note the freeze frame data to see the conditions when the code was set.
- Locate the accelerator pedal assembly under the dashboard.
- Carefully disconnect the electrical connector from the pedal assembly. Inspect both the male pins on the sensor and the female terminals in the connector for any signs of corrosion, damage, or backed-out pins.
- Following the advice of TSB #PIP3783D, check for poor terminal tension. A special tool can be used, but a simple check is to see if the pins feel loose when reconnected. A 'wiggle test' on the harness while monitoring live data is highly effective.
- If the connector looks good, reconnect it and use a scan tool to monitor live data for 'APP Sensor 1' and 'APP Sensor 2'.
- With the key on and engine off, slowly press and release the accelerator pedal. Watch the voltage readings. They should sweep smoothly and in correlation with each other. For example, APP Sensor 1 may sweep from ~0.9V to ~2.4V. Any drops, spikes, or freezing in the data points to a faulty pedal sensor.
- If the connector is confirmed good but the sensor data is erratic, the accelerator pedal assembly needs to be replaced.
- If the sensor and connector are good, inspect the main engine and chassis ground connections for corrosion or looseness. A poor ground can cause erratic sensor readings.
- If grounds are good, perform a continuity check on the wiring between the APP sensor connector and the ECM to rule out a wiring issue.
- After any repair, clear the DTCs and perform a test drive to ensure the 'Reduced Engine Power' message does not return. An idle relearn procedure may be recommended.
Parts You'll Likely Need
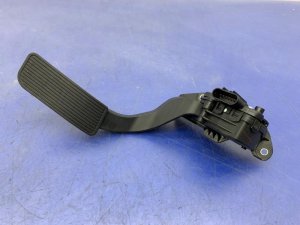
- Accelerator Pedal Assembly
(OEM #25832864)— This is the most common part to fail after the connector is ruled out. The sensor is integrated into the pedal assembly and is not sold separately. This part number also replaces previous versions 15101848 and 15847349.
Trusted brands: ACDelco (GM Genuine), Dorman
OEM price range: $110-$180
Aftermarket price range: $60-$120 - Accelerator Pedal Position Sensor Connector Pigtail
(OEM #PT2712)— If the connector itself is damaged or the terminals have lost tension (a common issue per TSB #PIP3783D), replacing the pigtail is the correct repair. This involves splicing the new connector into the existing harness.
Trusted brands: ACDelco, Dorman
OEM price range: $30-$50
Aftermarket price range: $15-$30
Related Codes That Often Appear With This One
- P2122 — Relates to APP Sensor 'D' Circuit Low Voltage.
- P2123 — Relates to APP Sensor 'D' Circuit High Voltage.
- P2125 — Relates to APP Sensor 'E' Circuit, the second sensor in the assembly.
- P2127 — Relates to APP Sensor 'E' Circuit Low Voltage.
- P2128 — Relates to APP Sensor 'E' Circuit High Voltage.
- P2138 — Indicates a correlation problem between the two APP sensors ('D' and 'E'). All these codes are mentioned together in TSB #PIP3783D and point to the same general fault area.
Technical Service Bulletins (TSBs) & Recalls
- PIP3783D: Addresses Service Engine Soon light or reduced engine power messages with codes P2120, P2122, P2123, P2125, P2127, P2128, and/or P2138. The bulletin advises technicians to inspect the Accelerator Pedal Position circuits for poor terminal tension.
Platform-Specific Known Issues
- A prominent issue for this platform is poor terminal tension at the accelerator pedal connector, as documented in GM Technical Service Bulletin #PIP3783D. This can cause intermittent signal loss and trigger the P2120 code, even if the pedal sensor itself is functional.
- Owners on forums for the Avalanche and its platform-mates frequently discuss this exact issue, with many confirming that either tightening the connector pins or replacing the pigtail connector resolved the 'Reduced Engine Power' mode without needing to replace the entire pedal assembly.
Mechanic-Grade Diagnostic Values
- APP Sensor 1 ('D' Circuit) Voltage, Key On Engine Off — expected: ~0.5-1.1V at pedal released, ~2.6-4.5V at pedal depressed. Voltage should sweep smoothly.. Failure: Voltage is less than 0.24V or more than 4.49V for over 0.5 seconds. Any jumps, drops, or non-linear response to pedal movement.
- APP Sensor 2 ('E' Circuit) Voltage, Key On Engine Off — expected: ~1.2-2.0V at pedal released, ~3.4-5.3V at pedal depressed.. Failure: Voltage is outside the expected range or does not sweep smoothly. A P2125 or P2138 code may be present.
- 5-Volt Reference at APP Connector — expected: 4.8V to 5.2V. Failure: Voltage is less than 4.8V or more than 5.2V, indicating an issue with the ECM or wiring.
- Low Reference (Ground) Circuit Resistance — expected: Less than 3.0 Ohms between the low reference pin at the APP connector and a known good chassis ground.. Failure: Resistance is higher than 3.0 Ohms, indicating an open or high resistance in the ground circuit.
Scan Tool Commands That Help
- Tech2 / GDS2 / Professional Scan Tool: Idle Relearn Procedure — After replacing the accelerator pedal assembly or throttle body, this procedure may be required to reset learned idle values and ensure the engine idles correctly. The manual procedure involves specific cycles of running the engine and turning it off.
- Tech2 / GDS2 / Professional Scan Tool: Live Data Monitoring: APP Sensor 1, APP Sensor 2, and APP Correlation Status — This is the primary diagnostic function. It allows real-time viewing of sensor voltages to check for smooth operation and to see if the ECM flags a 'Disagree' status between the two sensors, which is common with codes like P2138.
Wiring & Ground Locations
- APP Sensor Connector (X209) — At the top of the accelerator pedal assembly, under the driver's side dashboard.. This is the 6-pin connector where poor terminal tension is most common per TSB PIP3783D. Pin E (Dark Blue wire) is the signal circuit for APP Sensor 1, which relates to P2120.
- APP Connector Pinout — On the 6-pin connector at the pedal assembly.. Pin A: Low Reference, Pin B: APP Sensor 2 Signal, Pin C: 5V Reference 2, Pin D: Low Reference, Pin E: APP Sensor 1 Signal (Circuit 'D'), Pin F: 5V Reference 1. Knowing the pinout is essential for testing voltages and continuity.
- ECM Connector J1 (or X1) — The vehicle's Engine Control Module (E38 model) is located in the engine bay. J1 is one of the main harness connectors plugging into it.. A poor pin connection or fretting corrosion at the ECM side of the harness can mimic a sensor or pedal-side connector failure. A 'wiggle test' should be performed here as well.
- Ground G107 — Typically located on the rear of the driver's side cylinder head on the engine block.. This is a critical engine control ground point. A loose or corroded G107 can cause erratic behavior and codes for multiple sensors that share this ground path, including the APP sensor. This was cited as a fix for a platform-mate.
- Intake Manifold Harness Ground — A small, black ground wire located in the wiring harness on the passenger side of the intake manifold.. This is an easily overlooked ground wire. A break in this specific wire has been documented to cause intermittent 'Reduced Engine Power' mode and various communication codes.
Real Owner Repair Stories
- YouTube channel 'South Florida Technical Training' (2007-2013 GMT900 Truck (Silverado/Sierra family)) — P2138 (correlation code), 'Reduced Engine Power' message, scan tool data for one APP sensor was off.
❌ Tried (didn't work) Wiggling the harness at the pedal assembly and at connector C205 in the dash produced no change.
✅ What actually fixed it The problem was a poor connection at the J1 connector of the E38 ECM. Wiggling the wires at the ECM connector caused the scan tool data to return to normal, pinpointing the fault location to the ECM connector pins, not the pedal. - YouTube channel 'Rainman Ray's Repairs' (referenced by Go-Parts.com) (GM Truck (Silverado/Sierra platform)) — 'Reduced Engine Power' message, vehicle would die when hitting bumps, multiple communication codes.
❌ Tried (didn't work) Adding new, redundant ground wires from the engine to the chassis did not solve the issue.
✅ What actually fixed it The technician found and repaired a small, broken black factory ground wire located in the harness on the passenger side of the intake manifold.
When the Usual Fixes Don't Work
- While the most common fix for P2120 is addressing the accelerator pedal or its connector as per TSB #PIP3783D, a significant number of cases are resolved elsewhere. One documented repair found the root cause to be a poor pin connection at the J1 connector on the Engine Control Module (ECM), which was diagnosed by wiggling the ECM-side harness and watching the live data stabilize. Another case traced similar symptoms to a small, broken ground wire in the engine harness near the intake manifold, which was not the main chassis ground or the sensor's direct ground path. These instances show that if a pedal replacement or pigtail repair doesn't fix the issue, the fault is likely further up the harness at the ECM or within a related ground circuit.
OEM Part Supersession History
15101848, 15847349→25832864— Design update for improved reliability.
Heads up: The updated part (25832864) is a direct replacement. Some owners have noted the new part has a physically larger and more robust sensor housing compared to the original, suggesting a design improvement to address failures.
Helpful Videos
We Have This Part in Stock

The information in this article is provided for general reference and educational purposes only. Vehicle specifications, procedures, and part compatibility can vary by production date, trim level, and region. Always consult your vehicle's factory service manual and verify part numbers before purchasing or performing repairs. Safety-critical components such as airbags, seat belts, and braking systems should be installed by a qualified professional.
- Chevrolet AVALANCHE:
- 🧭 Diagnostic Flowchart
- 🎬 Helpful Videos
- 🛍️ Shop This Part
- What's Unique About the 2007-2013 Chevrolet AVALANCHE
- Symptoms You May Notice
- Most Likely Causes
- Rare But Worth Checking
- Diagnosis Steps
- Parts You'll Likely Need
- Related Codes That Often Appear With This One
- Technical Service Bulletins (TSBs) & Recalls
- Platform-Specific Known Issues
- Mechanic-Grade Diagnostic Values
- Scan Tool Commands That Help
- Wiring & Ground Locations
- Real Owner Repair Stories
- When the Usual Fixes Don't Work
- OEM Part Supersession History
- 🎟️ Get 5% Off