
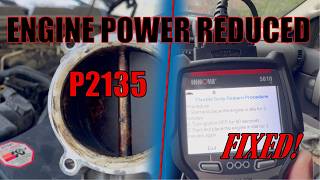
P2135 on 2006 GMC Sierra 1500: Reduced Power Causes and Fixes
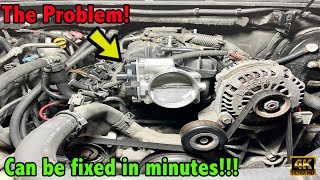
On a 2006 GMC Sierra 1500, code P2135 almost always means the throttle position sensor, which is part of the throttle body, has failed. This triggers 'Reduced Engine Power' mode. The most common fix is replacing the entire throttle body assembly, which costs around $150-$350 for the part. A throttle relearn procedure is required after replacement.
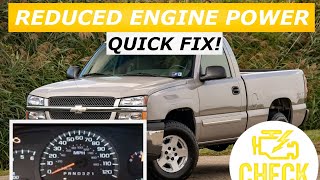
- P2135 on a 2006 Sierra will almost certainly put the truck in 'Reduced Engine Power' mode, making it unsafe for normal driving.
- The most common cause by a wide margin is a failed throttle body assembly due to internal electronic wear.
- Before replacing the throttle body, always perform a 'wiggle test' on the wiring harness and inspect for chafing to rule out a simple electrical fault.
- Replacing the accelerator pedal is a frequent misdiagnosis and should be avoided unless specific pedal-related codes are present.
- A throttle relearn procedure is required after replacing the throttle body to ensure a stable idle.
What's Unique About the 2006-2006 Gmc SIERRA 1500
On this generation of GMC trucks (GMT800), the P2135 code is a notoriously common issue that almost always points directly to a failure of the electronic components on the throttle body itself. The problem was so widespread that GM issued a Special Coverage Adjustment (#11273A) extending the warranty to 10 years or 120,000 miles for this specific failure. While later models have a specific TSB to replace just the sensor cover, the root cause is the same: the internal sensors wear out. Owners should be aware that replacing the gas pedal assembly is a common misdiagnosis; the problem is almost always at the engine's throttle body for this code.
Diagnostic Flowchart
Tap your situation to follow the diagnostic path that matches what you're seeing on this vehicle.
Symptoms You May Notice
- "Reduced Engine Power" message displayed on the dashboard
- Check Engine Light is on
- Vehicle has very limited acceleration and power (limp mode)
- Rough or unstable idle, sometimes hunting up and down
- Hesitation or stalling when pressing the gas pedal
- "Service Stability System" or "Traction Control Disabled" message may also appear.
- Replacing the Accelerator Pedal Position (APP) Sensor. P2135 specifically points to a sensor correlation error at the throttle body. A faulty gas pedal would typically set a different code, such as P2138.
- Only cleaning the throttle body. While cleaning carbon buildup is good practice and should be done when replacing the part, it will not fix the internal electronic sensor failure that causes P2135.
Most Likely Causes
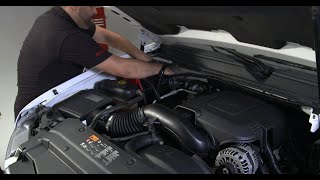
- Faulty Throttle Body Assembly 🔴 High Probability → Shop Fuel Injection Throttle Body The integrated electronic throttle position sensors (TPS) are a known high-failure item on this platform. The internal carbon tracks or contacts for the two sensors wear out over time, causing the voltage signals to become erratic, spike, or drop out, leading to the correlation fault.
How to confirm: Using a scan tool with live data, graph the voltage of TPS1 and TPS2 while slowly pressing the accelerator pedal (with the engine off, key on). The two signals should move smoothly and mirror each other (one may rise while the other falls). If one signal drops out, spikes, or is erratic, the throttle body has failed internally.
Typical fix: Replace the entire throttle body assembly. This is the most common and reliable repair. A throttle relearn procedure is required afterward.
Est. part cost: $150-$350 - Damaged Wiring Harness or Connector 🟡 Medium Probability The wiring harness to the throttle body is susceptible to rubbing against engine components like the alternator bracket, power steering pump, or the edge of the cylinder head, causing wires to chafe and short out. The connector pins can also suffer from corrosion or become loose from engine vibration, causing intermittent signal loss.
How to confirm: Visually inspect the entire wiring harness leading to the throttle body for any signs of rubbing, melting, or breaks. Wiggle the connector and harness with the engine running while watching live data on a scan tool; if the readings jump or the code appears, the harness is faulty. A user on GMT800.net reported having to replace the pigtail connector and still having issues, indicating a deeper wiring problem. In some cases, a wire can break internally inside the insulation.
Typical fix: Repair the damaged section of wire or replace the connector pigtail (ACDelco P/N PT2628 is a common pigtail). Secure the harness away from sharp edges or heat sources using zip ties or loom.
Est. part cost: $20-$50 - Poor Ground Connection ⚪ Low Probability The primary PCM and sensor grounds are located on the engine block, often in hard-to-see locations. Over time, these grounds can corrode or loosen, causing erratic sensor readings throughout the system, including the TPS.
How to confirm: Locate the main PCM ground wires, which are typically black and bolted to the front or rear of the driver's side cylinder head. Check that the bolt is tight and free of corrosion. A voltage drop test from the ground pin at the TPS connector to the battery negative terminal can confirm a bad ground.
Typical fix: Remove the ground bolt, clean the terminal ends and the engine block surface with a wire brush until shiny, apply dielectric grease, and re-tighten securely.
Est. part cost: $0-$5 - Faulty Throttle Position Sensor (TPS) Cover ⚪ Low Probability → Shop Fuel Injection Throttle Body GM released a Technical Service Bulletin (TSB #11-06-04-007C) for this issue on slightly newer models (2008+), indicating a known problem with the sensor cover and its internal contacts. While the TSB doesn't officially cover 2006 models, the design is similar. This TSB provides a procedure to replace only the sensor cover instead of the whole throttle body.
How to confirm: This is diagnosed by ruling out wiring issues and confirming the sensor signals are erratic. The TSB itself is the primary guide for this specific repair. The kit part number is GM #19259452. 🎬 See how to replace the TPS sensor cover and perform a relearn.
Typical fix: Replace the throttle position sensor cover and gasket following the TSB procedure. This involves removing the old cover from the throttle body and installing the new one. Many technicians and owners report that replacing the entire throttle body is a more durable long-term fix.
Est. part cost: $50-$100
Rare But Worth Checking
- Faulty Powertrain Control Module (PCM): → Shop Engine Control Module (ECM) This is extremely rare and should only be considered after the throttle body and all related wiring and grounds have been thoroughly tested and ruled out.
Diagnosis Steps
- Connect a scan tool and confirm P2135 is the primary code stored. Note any other codes.
- Using the scan tool's live data feature, monitor the voltage readings for 'Throttle Position Sensor 1' and 'Throttle Position Sensor 2'.
- With the ignition on but the engine off, slowly press and release the accelerator pedal. Both sensor voltage readings should change smoothly. One should sweep from low to high voltage (e.g., ~0.5V to ~4.5V) and the other from high to low. Any jumps, dropouts, or erratic behavior from one sensor indicates a faulty throttle body.
- If the sensor data seems okay, perform a 'wiggle test'. With the engine running, carefully wiggle the wiring harness and connector at the throttle body. If this causes the engine to stumble or the code to set, you have a wiring issue.
- Thoroughly inspect the wiring harness from the throttle body back to the main loom for any signs of chafing, melting, or corrosion, paying close attention to where it might rub on the alternator bracket or cylinder head.
- Inspect the electrical connector pins at the throttle body for corrosion, moisture, or damage.
- Check the main engine and PCM ground connections on the cylinder head and block for tightness and corrosion.
- If wiring and grounds are good, and the sensor data is erratic, the throttle body assembly is faulty and needs replacement.
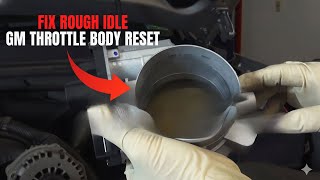
- After replacement, perform the throttle relearn procedure. 🎬 Watch this guide to manually reset and relearn your throttle body.
Parts You'll Likely Need
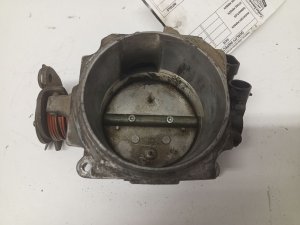
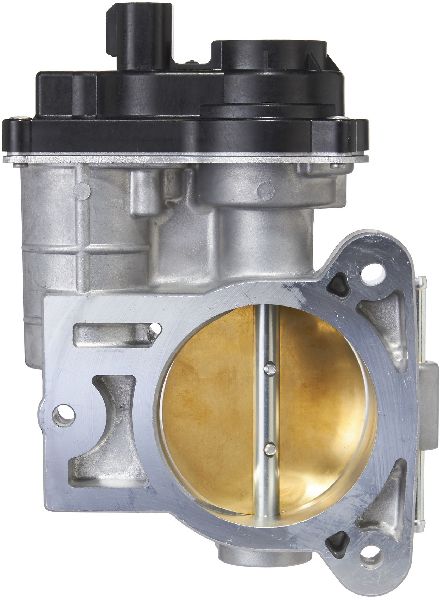
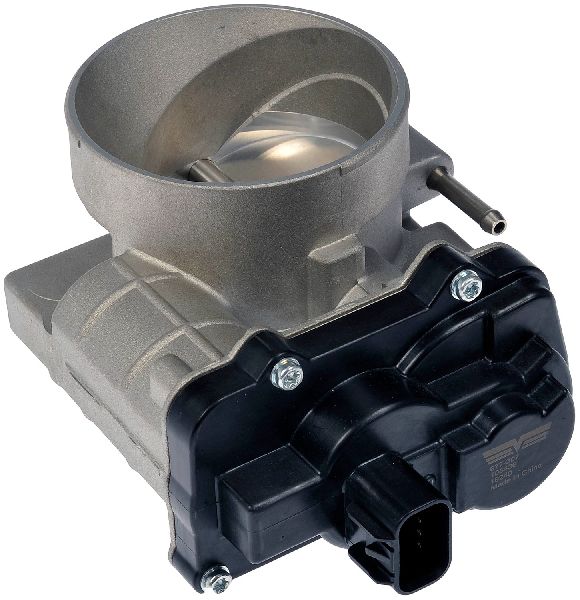
- Throttle Body Assembly
(OEM #12580760, 217-2296, 217-3156 (Verify by VIN))— This is the most common failure. The internal throttle position sensors are integrated into the assembly and fail electronically, causing the P2135 correlation error. Replacing the whole unit is the most reliable fix.
Trusted brands: ACDelco (GM Original Equipment), Delphi, Hitachi, Standard Motor Products (SMP), Dorman
OEM price range: $250-$400
Aftermarket price range: $150-$250
Technical Service Bulletins (TSBs) & Recalls
- 11-06-04-007C: Addresses DTC P2135 by replacing the throttle position sensor cover instead of the entire throttle body assembly on 2008-2011 models.
- Special Coverage Adjustment #11273A: Extended warranty coverage for the throttle position sensor failure, acknowledging it as a common defect.
Platform-Specific Known Issues
- A GM Technical Service Bulletin (TSB #11-06-04-007C) was issued for this code on similar model years, recommending the replacement of the throttle position sensor cover as a specific repair. The bulletin states, '...procedure for replacing the throttle position sensor cover for concerns regarding a indicator lamp illuminated reduced power message displayed and DTC P2135 set.' [Bulletin #11-06-04-007C]
- A Special Coverage Adjustment (#11273A) was also issued by GM, extending the warranty on the throttle position sensor to 10 years or 120,000 miles, highlighting the prevalence of this defect.
- A throttle relearn procedure is mandatory after replacement. A common method is: 1) Start and idle the engine for 3 minutes. 2) Turn the engine off for 60 seconds. 3) Start and idle the engine again for 3 minutes. The idle should now be stable. If not, a drive cycle above 44 MPH may be required.
Mechanic-Grade Diagnostic Values
- TPS Sensor 1 & 2 Voltage Correlation — expected: With the key on and engine off, both sensor voltages should be within a close range. As the throttle is opened, one sensor (e.g., TPS1) should sweep from approximately 0.5V-0.7V up to 4.5V, while the other (TPS2) sweeps inversely, from ~4.5V down to 0.5V-0.7V. The sum of the two voltages should remain relatively constant.. Failure: A voltage reading from either sensor that is erratic, jumps, or drops out indicates a failure. The PCM will set P2135 if the two signals diverge by more than a specified amount (e.g., >0.2V) for a few seconds.
- Throttle Body Connector Pin Voltages (Key On, Engine Off) — expected: Pin E (5V Reference) and Pin H (5V Reference) should both read approximately 5.0 volts. Pin B (Low Reference) and Pin D (Low Reference) should show good continuity to ground (< 5 ohms).. Failure: A missing 5V reference or a high-resistance ground points to a wiring or PCM issue, not a faulty throttle body.
Hidden / Shadow Codes Worth Checking
- P1516: A GM-specific code for 'Throttle Actuator Control (TAC) Module Throttle Actuator Position Performance'. It often sets alongside P2135 because the PCM cannot verify the throttle's position, which is a performance error for the TAC system. (see via Standard OBD-II scanner)
- P2101: Means 'Throttle Actuator Control Motor Circuit Range/Performance'. This indicates a problem with the DC motor that opens and closes the throttle blade. It can be triggered by the same root causes as P2135, such as a faulty throttle body or wiring. (see via Standard OBD-II scanner)
Scan Tool Commands That Help
- Tech2 / Professional Scan Tool: Idle Learn Reset / Throttle Relearn — This function should be used after replacing the throttle body assembly. It forces the PCM to erase its previously learned idle airflow values and learn the new baseline position of the new throttle plate. While a manual relearn often works, a scan tool reset is the official and most reliable method.
- Tech2 / Professional Scan Tool: Live Data Graphing (TPS1 vs TPS2) — This is the primary diagnostic step. Graphing both TPS voltages on the same screen while slowly operating the pedal makes it very easy to spot any dropouts, spikes, or areas where the sensors do not mirror each other, confirming an internal throttle body fault.
Wiring & Ground Locations
- Throttle Body Connector — Connected directly to the driver's side of the throttle body assembly at the front of the intake manifold.. This 8-pin connector is the single point of failure for all signals from the TPS sensors and power to the throttle actuator motor. Corrosion on pins, fretting, or a loose connection here is a common cause of P2135. The pinout is: F: TP Sensor 2 Signal, G: TP Sensor 1 Signal, E & H: 5V Reference, B & D: Low Reference/Ground, A & C: TAC Motor Control.
- G103 & G104 — These are the primary engine-to-chassis and PCM grounds. On a 2006 Sierra, G104 is typically located on the left rear (driver's side) of the engine block/cylinder head. G103 is on the right front (passenger side) of the engine block/cylinder head.. The PCM and its sensors rely on these grounds as a stable reference. A corroded or loose G103 or G104 can cause floating voltages and erratic sensor readings, including the TPS signals, leading to a false P2135 code. Cleaning these grounds is a critical step if wiring checks out okay.
- Firewall Ground Straps — Braided metal straps connecting the rear of the engine/cylinder heads to the vehicle's firewall on both the driver and passenger sides.. These straps ensure the engine and body have the same ground potential. A broken or corroded strap can cause ground loops and electrical noise, which can interfere with sensitive sensor signals like the TPS.
Real Owner Repair Stories
- Chevrolet Forum user (2006 5.3L Flex-fuel engine (Tahoe/Suburban/Silverado platform)) — Persistent misfires and eventually a P2135 code.
❌ Tried (didn't work) Replacing spark plugs and wires, Replacing knock sensors
✅ What actually fixed it The final fix was locating and cleaning ground G103 on the engine block. It was corroded, causing erratic sensor behavior that the PCM interpreted as a throttle body fault.
OEM Part Supersession History
12580760→12679524— Standard part revision and update by GM.
Heads up: The original part number 12580760 has been superseded by 12679524. Both are generally interchangeable for the 2006 model year, but it is always best practice to use the latest revision (12679524) for any repair.
Helpful Videos
Used OEM Parts in Stock
New Aftermarket Parts Available


The information in this article is provided for general reference and educational purposes only. Vehicle specifications, procedures, and part compatibility can vary by production date, trim level, and region. Always consult your vehicle's factory service manual and verify part numbers before purchasing or performing repairs. Safety-critical components such as airbags, seat belts, and braking systems should be installed by a qualified professional.
- Gmc SIERRA 1500:
- 🧭 Diagnostic Flowchart
- 🎬 Helpful Videos
- 🛍️ Shop This Part
- What's Unique About the 2006-2006 Gmc SIERRA 1500
- Symptoms You May Notice
- Most Likely Causes
- Rare But Worth Checking
- Diagnosis Steps
- Parts You'll Likely Need
- Technical Service Bulletins (TSBs) & Recalls
- Platform-Specific Known Issues
- Mechanic-Grade Diagnostic Values
- Hidden / Shadow Codes Worth Checking
- Scan Tool Commands That Help
- Wiring & Ground Locations
- Real Owner Repair Stories
- OEM Part Supersession History
- 🎟️ Get 5% Off