
P2135 on 2006-2009 Pontiac G6: Throttle Position Sensor Failure, Causes, and Fixes
On a 2006-2009 Pontiac G6, code P2135 is almost always caused by a failing electronic throttle body. This triggers the 'Reduced Engine Power' message. The official GM repair varies: for some models, replacing just the sensor cover was advised, while for others, replacing the entire throttle body assembly is the fix. A full replacement costs around $90-$260 for the part. An idle relearn procedure is required after the repair.
- P2135 on a Pontiac G6 almost always points to a problem with the electronic throttle body or its sensor/wiring.
- The most common symptom is a 'Reduced Engine Power' warning, which makes the car very slow to accelerate.
- The official GM repair depends on the throttle body brand (Bosch vs. Hitachi), but replacing the entire assembly is the most common DIY fix.
- Before replacing parts, always inspect and clean the wiring connector to the throttle body, as a bad connection can cause the same code.
- After replacing the part, a throttle idle relearn procedure is necessary for the computer to adapt to the new component.
What's Unique About the 2006-2009 Pontiac G6
This is a very common failure on many General Motors vehicles from this era, including the Pontiac G6. The electronic throttle body assembly is a known weak point. The repair advice from GM has been nuanced. TSB #12-06-04-003A explicitly instructed technicians *not* to replace the entire throttle body, but to instead replace the throttle position sensor cover and gasket. However, a later Special Coverage Adjustment (#14582A) for 2008-2010 models clarified the repair based on the throttle body's manufacturer: Bosch units required a full assembly replacement, while Hitachi units were to be serviced with a sensor kit first. For many owners and shops today, replacing the complete throttle body assembly has become the standard, most reliable long-term repair, bypassing the more delicate sensor-only fix.
Diagnostic Flowchart
Tap your situation to follow the diagnostic path that matches what you're seeing on this vehicle.
Symptoms You May Notice
- "Reduced Engine Power" message disp 🎬 Watch: See how P2135 causes stalling and reduced engine power.layed on the dashboard.
- Check Engine Light is on.
- Vehicle has very limited acceleration (limp mode).
- Unstable, rough, or high idle.
- Engine revving on its own, sometimes up to 2,500-3,000 RPM, especially right after starting.
- Hesitation or stalling, especially when coming to a stop.
- The accelerator pedal feels unresponsive or dead.
- Replacing the Accelerator Pedal Position (APP) Sensor. While a faulty APP sensor can cause similar symptoms, the P2135 code specifically points to a correlation error between the two sensors on the throttle body itself, not the sensor at the gas pedal.
Most Likely Causes
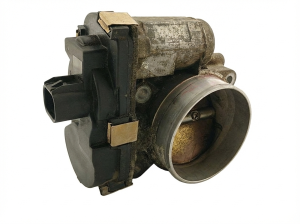
- Faulty Throttle Body Assembly / Position Sensor 🔴 High Probability → Shop Fuel Injection Throttle Body The internal electronic throttle position sensors are a known high-failure item on this GM platform. The sensors can fail electronically, causing the correlation error. Depending on the throttle body brand (Bosch or Hitachi), the sensor may or may not be serviced separately from the main assembly.
How to confirm: Use a scan tool to monitor live data for 'TP Sensor 1' and 'TP Sensor 2'. The voltage readings should be smooth and mirror each other (one rises, one falls) as the accelerator is pressed. If one is erratic, jumps, or doesn't respond, the sensor/throttle body is bad.
Typical fix: Replace the entire throttle body assembly. This is the most common and lasting DIY repair. Alternatively, follow TSB #12-06-04-003A to replace only the sensor cover and gasket, or follow Special Coverage #14582A based on the part manufacturer. An idle relearn procedure is required after any repair.
Est. part cost: $90-$260 for full assembly, $40-$80 for sensor kit. - Damaged Wiring or Connector 🟡 Medium Probability The wiring harness near the throttle body is subject to heat and vibration, which can lead to chafed wires or loose/corroded pins in the connector over time. These cars are known for wiring issues.
How to confirm: Visually inspect the wiring harness leading to the throttle body for any signs of damage, chafing, or corrosion. Wiggle the connector and harness with the engine running (or ignition on) while watching live sensor data on a scan tool to see if it triggers the fault.
Typical fix: Repair the damaged section of wire or replace the connector pigtail. Some owners have fixed the P2135 code simply by unplugging, cleaning, and reseating the connectors to the throttle body, accelerator pedal, and ECM. Applying dielectric grease to the cleaned connector pins can prevent future corrosion.
Est. part cost: $15-$40
Rare But Worth Checking
- Faulty Powertrain Control Module (PCM): → Shop Engine Control Module (ECM) This is very rare. The PCM should only be considered after definitively ruling out the throttle body and wiring. A faulty PCM can misinterpret sensor signals.
Diagnosis Steps
- Connect an OBD-II scanner and confirm P2135 is the primary code. Note any other codes present, like P1516, P0121, or P0221.
- Turn the ignition OFF. Open the hood and locate the throttle body at the end of the air intake.
- Carefully inspect the electrical connector and wiring harness going to the throttle body. Look for loose connections, corrosion on the pins, or any visible wire damage like chafing or melting. Follow the harness as far back as you can.
- As a simple first step, try disconnecting the connectors at the throttle body and PCM, cleaning them with electrical contact cleaner, and reconnecting them securely.
- Turn the ignition ON (engine OFF). Use a scan tool with live data capability to monitor the voltages of TP Sensor 1 and TP Sensor 2.
- The two sensor voltages should not be identical at rest, but they should change smoothly as you slowly press the accelerator pedal. One voltage will typically rise while the other falls.
- If one or both signals are erratic, jumpy, or do not change smoothly, the throttle body assembly/sensor is faulty.
- If the signals are stable, try wiggling the harness and connector to see if you can induce a fault. If wiggling the wires causes the voltage to jump or the code to set, you have a wiring issue.
- If cleaning the throttle body is attempted, note that this is unlikely to fix an electronic P2135 code, as the fault is in the sensor, not carbon buildup.
- Required Post-Repair Procedure: Idle Relearn
- After replacing the throttle body or sensor, the PCM must relearn the new component's idle and off-idle positions. A manual relearn often works:
- Start the engine and let it idle in Park for 3 minutes. The idle may be high or rough initially.
- Turn the engine OFF and wait for at least 60 seconds.
- Start the engine again and let it idle in Park for another 3 minutes.
- Turn the engine OFF again and wait for at least 60 seconds.
- The idle should now be stable. Drive the vehicle for 5-10 minutes at varying speeds to allow the PCM to complete the learning process. A scan tool can also be used to perform an 'Idle Learn Reset'.
Parts You'll Likely Need
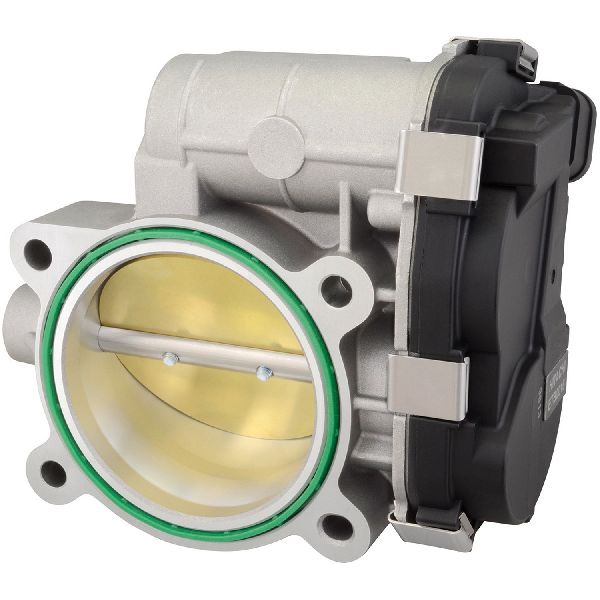
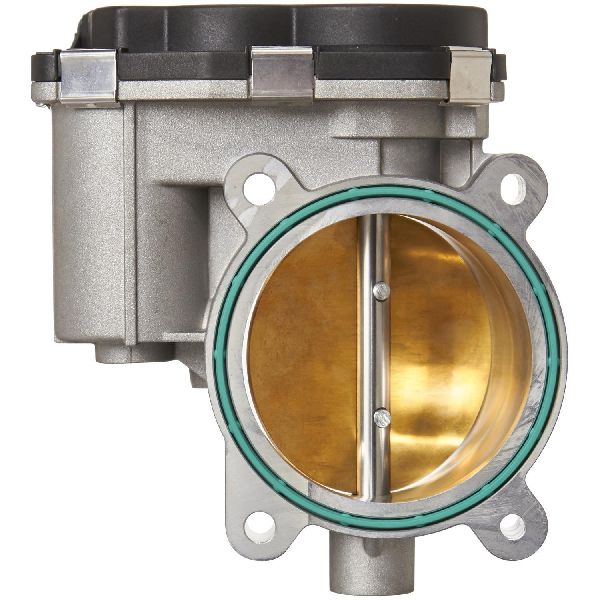
- Throttle Body Assembly
(OEM #GM 12615516 (Verify by VIN))— This is the most common cause of P2135, as the internal throttle position sensors fail. The sensors are integrated into the assembly.
Trusted brands: ACDelco (OE Part #217-3108), Duralast, Hitachi
OEM price range: $200-$275
Aftermarket price range: $90-$200 - Throttle Position Sensor Kit
(OEM #GM 19259452 (For Hitachi units, Verify by VIN))— For vehicles with a Hitachi-brand throttle body, GM's official repair procedure was to replace the sensor, cover, and gasket first before replacing the entire assembly.
Trusted brands: ACDelco
OEM price range: $50-$80
Aftermarket price range: $40-$60
Related Codes That Often Appear With This One
- P1516 — This code relates to the Throttle Actuator Control (TAC) module performance, which is often triggered as a result of the P2135 sensor correlation fault.
- P0121 — This is another throttle position sensor performance code that can be triggered by the same fault, and was included in GM's Special Coverage Adjustment.
- P0221 — This is a performance code for TP Sensor 'B', which can be seen alongside P2135 when the sensor fails. It was also included in GM's Special Coverage Adjustment.
Technical Service Bulletins (TSBs) & Recalls
- 12-06-04-003A: Malfunction Indicator Lamp (MIL) Illuminated, Reduced Engine Power Message Displayed, DTC P2135 Set.
- 14582A: Special Coverage Adjustment – Throttle Body – Reduced Power Mode.
Platform-Specific Known Issues
- General Motors issued Technical Service Bulletin (TSB) #12-06-04-003A for this exact code and symptom on the 2006-2009 G6. The bulletin explicitly states 'DO NOT replace the throttle body,' and instead provides a procedure for replacing only the throttle position sensor cover and gasket.
- GM also had a Special Coverage Adjustment (#14582A) that extended the warranty for this issue on 2008-2010 models to 10 years or 120,000 miles. While likely expired for most vehicles, it provides critical diagnostic insight: it instructed dealers to replace the entire throttle body assembly on vehicles with a Bosch unit, but to first try installing a sensor kit on vehicles with a Hitachi unit.
Mechanic-Grade Diagnostic Values
- TP Sensor 1 and TP Sensor 2 Voltage Correlation (Live Data) — expected: TP Sensor 1 should read low voltage (approx. 0.5V - 1.5V) at closed throttle and increase smoothly to approx. 4.5V at wide-open throttle. TP Sensor 2 should read high voltage (approx. 3.5V - 4.5V) at closed throttle and decrease smoothly. The sum of the two voltages should remain relatively constant (around 5V).. Failure: A signal that is jumpy, erratic, non-responsive, or does not move in opposition to the other sensor. The PCM will set P2135 if the values disagree by more than 6% for two seconds.
- Throttle Body Internal Resistance — expected: With the throttle body disconnected, the resistance between the 5V reference pin (Pin E) and the Low Reference/Ground pin (Pin C) should be approximately 1.5 K Ohms.. Failure: An open circuit (infinite resistance) or a short (very low resistance) indicates a failure within the throttle body's internal sensor circuitry.
Scan Tool Commands That Help
- Tech2 / GDS2 (GM Dealer Tool): Idle Learn Reset — This command should be used after replacing the throttle body assembly. It forces the Engine Control Module (ECM) to erase the previously learned idle values and begin a new learning process with the new part, which is faster and more reliable than the manual relearn procedure.
- Tech2 / GDS2 (GM Dealer Tool): TP Sensor 1 and 2 Agree/Disagree Parameter — During diagnosis, this specific parameter can be monitored while actuating the pedal. It provides a direct pass/fail status from the PCM's perspective, confirming if the correlation fault is actively being detected.
Wiring & Ground Locations
- Throttle Body Connector (X84) — Directly on the electronic throttle body at the engine's air intake.. This is the primary connection point for all sensor signals and motor control. Loose pins, corrosion, or broken wires within 1-4 inches of this connector are a common cause of intermittent P2135 codes. Pinout for 3.5L/3.9L engines is typically: Pin A (Low Reference), Pin B (TP Sensor 2 Signal), Pin C (5V Reference), Pin D (TP Sensor 1 Signal), Pin E (TAC Motor +), Pin F (TAC Motor -).
- G105 (Ground) — On the left rear side of the engine compartment, on an engine or transmission stud, often below the upper coolant hose.. This is a primary engine ground point. Corrosion or a loose connection here can create a poor ground reference for the entire engine harness, including the throttle body sensors. This voltage difference between the engine sensors and the chassis-grounded PCM can trigger a correlation fault.
- G103 (Ground) — On the left side of the engine compartment, often on the top of the strut tower or on the cowl above the brake booster.. This ground serves the Body Control Module (BCM) and can affect communication on the data bus. While less direct, a poor ground here can contribute to widespread electrical issues that may manifest as a P2135 code.
- BCM (Body Control Module) — Located under the center console, often integrated with or near the interior fuse box on the passenger side.. The BCM is a central hub for vehicle electronics. While not the primary cause, checking the connectors here is a valid step if other wiring checks do not resolve the issue, as all vehicle data flows through it.
Real Owner Repair Stories
- YouTube video / Forum discussions (2007 Pontiac G6 3.5L) — No start, various transmission and engine codes including P2135.
❌ Tried (didn't work) Initial diagnosis pointed to multiple failed modules.
✅ What actually fixed it The final cause was a bad ground connection at the G105 stud on the transmission. The wire had broken inside the crimped ring terminal. Wiggling the harness near the ground stud would cause the car to start intermittently. The fix was to cut off the old terminal, clean the wire, and crimp on a new ring terminal to re-secure the ground. - CorvetteForum user discussion (Various GM V8 vehicles, applicable to G6) — Intermittent 'Reduced Engine Power' message and P2135 code, often after the engine is warm and has been shut down for a short period.
❌ Tried (didn't work) Clearing the code would temporarily fix the issue.
✅ What actually fixed it A GM technical information bulletin (PIP3089B) pointed to broken wires inside the insulation, within 1-4 inches of the throttle body connector. The outer insulation looked fine, but the internal copper strands were broken. A 'wiggle test' of the harness near the connector would often trigger the fault. The fix is to repair the specific broken wire(s), not necessarily replace the entire pigtail.
Model Year Variations Within This Range
- 2006-2009: The Pontiac G6 was available with multiple engines (2.4L I4, 3.5L V6, 3.6L V6, 3.9L V6). The physical throttle body part number and design can differ between the 4-cylinder Ecotec engines and the V6 engines. When diagnosing or ordering parts, it is critical to specify the engine, as the TSB regarding the sensor cover replacement may apply to specific V6 engines (LZ4, LZE) and not others.
Helpful Videos

Used OEM Parts in Stock
New Aftermarket Parts Available


The information in this article is provided for general reference and educational purposes only. Vehicle specifications, procedures, and part compatibility can vary by production date, trim level, and region. Always consult your vehicle's factory service manual and verify part numbers before purchasing or performing repairs. Safety-critical components such as airbags, seat belts, and braking systems should be installed by a qualified professional.
- Pontiac G6:
- 🧭 Diagnostic Flowchart
- 🎬 Helpful Videos
- 🛍️ Shop This Part
- What's Unique About the 2006-2009 Pontiac G6
- Symptoms You May Notice
- Most Likely Causes
- Rare But Worth Checking
- Diagnosis Steps
- Parts You'll Likely Need
- Related Codes That Often Appear With This One
- Technical Service Bulletins (TSBs) & Recalls
- Platform-Specific Known Issues
- Mechanic-Grade Diagnostic Values
- Scan Tool Commands That Help
- Wiring & Ground Locations
- Real Owner Repair Stories
- Model Year Variations Within This Range
- 🎟️ Get 5% Off