
P2138 on 2005-2009 GMC Savana: Causes and Fixes for Reduced Engine Power
On a 2005-2009 GMC Savana, code P2138 is almost always caused by a poor electrical connection at the accelerator pedal position (APP) sensor or in the related wiring harness. This triggers the 'Reduced Engine Power' message. The most common fix is repairing the connector, often at the IP-to-body harness connection point, or, if the sensor itself has failed, replacing the entire accelerator pedal assembly.
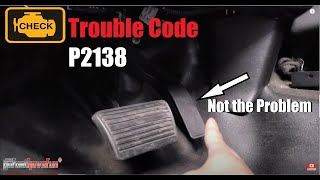
- P2138 on a 2005-2009 Savana almost always means a problem with the accelerator pedal or its wiring, not the throttle body.
- Before buying any parts, inspect and test the electrical connector at the accelerator pedal, as a poor connection is the most common culprit.
- Applying dielectric grease to the connector pins is a cheap and often effective first step.
- If the connector is good, the next most likely fix is replacing the entire accelerator pedal assembly, which is a straightforward DIY job.
- Be aware of potential water leaks into the driver's side footwell, as this is a known cause of corrosion in a key harness connector for this circuit.
What's Unique About the 2005-2009 Gmc SAVANA
On this generation of GM trucks and vans, including the Savana, the P2138 code is notoriously linked to a faulty electrical connector. GM has issued multiple Technical Service Bulletins (TSBs) acknowledging that intermittent signal loss from the accelerator pedal position (APP) sensor is a common problem. The issue is often traced to a poor connection in the instrument panel-to-body harness connector (located in the driver's side kick panel), which can be caused by fretting corrosion or even water intrusion into the cabin. Some owners report the issue appears more frequently in wet or snowy weather, supporting the water intrusion theory.
Diagnostic Flowchart
Tap your situation to follow the diagnostic path that matches what you're seeing on this vehicle.
Symptoms You May Notice
- "Reduced Engine Power" message on the instrument cluster
- Check Engine Light (Malfunction Indicator Lamp) is on
- Poor, limited, or no acceleration
- Vehicle may stall when coming to a stop
- Unresponsive or erratic throttle response
- Unstable or high idle
- Hesitation during acceleration.
- Replacing the throttle body first. On GM vehicles, P2138 is overwhelmingly related to the accelerator pedal assembly or its wiring, not the throttle body. While other codes like P1516 or P2135 point to the throttle body, P2138 is pedal-focused.
- Replacing the accelerator pedal assembly without checking the IP-to-body harness connector first. Many owners replace the pedal only to have the problem return because the root cause was the corroded connector in the kick panel.
Most Likely Causes
- Poor connection at the Instrument Panel (IP) to Body Harness Connector 🔴 High Probability As documented in GM TSB #07-06-04-019F, this connector, often located in the driver's side kick panel, is susceptible to water intrusion from leaking A-pillar seals, windshield seals, or sunroof drains. This moisture causes corrosion and fretting on the terminals carrying the APP sensor signals, leading to intermittent signal loss.
How to confirm: With the key on, engine off, have a scan tool graphing APP Sensor 1 and 2 voltages. Access the IP-to-body harness connector in the driver's kick panel area. Wiggle the connector and its wiring. If the voltage readings on the scan tool become erratic or drop out, you have found the source of the problem. Visually inspect the connector for blue or green corrosion after disconnecting it.
Typical fix: Disconnect the battery. Unplug the connector and inspect for corrosion. Clean the terminals using a specialized terminal cleaning tool and contact cleaner. Allow to dry completely, then apply a small amount of dielectric grease to the terminals before reconnecting. If terminals are severely damaged, they may need to be replaced. Repair the source of the water leak.
Est. part cost: $10-$25 (for cleaner and grease) - Faulty Accelerator Pedal Position (APP) Sensor Assembly 🟡 Medium Probability → Shop Accelerator Pedal Assembly The internal resistive tracks of the sensors can wear out over time, especially on high-mileage vehicles, causing their signals to drift and no longer correlate properly. This is a common failure part on many drive-by-wire vehicles.
How to confirm: If the wiring and connectors are confirmed to be good, but scan tool data shows erratic or non-correlating signals from the two APP sensors when the pedal is slowly and smoothly depressed, the sensor assembly itself has failed. Often, one sensor's voltage will drop out or jump erratically while the other responds smoothly.
Typical fix: Replace the entire accelerator pedal assembly. It is typically held on by two or three 10mm bolts and is a straightforward replacement.
Est. part cost: $50-$150 - Poor connection at the Accelerator Pedal Position (APP) sensor connector ⚪ Low Probability → Shop Accelerator Pedal Assembly While less common than the body harness connector issue, the connector directly at the pedal can also suffer from poor pin tension or damage, leading to intermittent signals.
How to confirm: With the key on, engine off, gently wiggle the wiring harness connector at the accelerator pedal itself while a scan tool monitors the APP sensor 1 and 2 voltage readings. If the voltage drops out or becomes erratic, the connector is the likely fault.
Typical fix: Disconnect the connector, inspect for pushed-out pins or corrosion. Apply a small amount of dielectric grease to the terminals to improve the connection and seal out moisture. If terminals are damaged, replace the connector pigtail.
Est. part cost: $10-$40
Rare But Worth Checking
- Faulty Throttle Body: → Shop Fuel Injection Throttle Body While P2138 on GM vehicles almost always points to the pedal side, a failing throttle position sensor (TPS) on the throttle body can sometimes cause correlation issues. This is less common for this specific code but more likely if codes like P1516 or P2135 are also present.
- Faulty Powertrain Control Module (PCM): → Shop Engine Control Module (ECM) This is extremely rare. The PCM should only be considered after all other possibilities, including all wiring, connectors, and sensors, have been exhaustively tested and ruled out.
Diagnosis Steps
- Read the trouble codes with an OBD-II scanner. Confirm P2138 is present and note any other codes.
- Use the scanner's live data function to view the voltage or percentage for APP Sensor 1 and APP Sensor 2.
- With the key on and engine off, slowly press and release the accelerator pedal. The two sensor readings should change smoothly and have a consistent correlation (e.g., one may be double the other). Note any jumps, dropouts, or flat spots.
- If readings are erratic, locate the IP-to-body harness connector in the driver's side kick panel area. While watching the live data, wiggle the connector and wiring harness. If the signal changes or corrects itself, you've found the problem area.
- Perform a wiggle test on the connector at the accelerator pedal itself. If the signal is affected, the issue is at the pedal connector.
- Disconnect the battery. Disconnect and visually inspect the suspect connector(s) for green or white corrosion, pushed-out pins, or other damage.
- If corrosion is found, clean the terminals with a dedicated electronic cleaner and a small brush. Apply dielectric grease before reconnecting. Repair any water leaks found in the area (e.g., windshield seal, A-pillar).
- If the wiring and connectors are confirmed good but the sensor signals are still faulty when depressing the pedal, the accelerator pedal position sensor assembly is the most likely cause and should be replaced.
- After repair, clear the codes and perform a test drive to ensure the problem is resolved.
Parts You'll Likely Need
- Accelerator Pedal Position (APP) Sensor Assembly
(OEM #22742315)— This is the most common part to fail internally after all wiring and connector issues have been ruled out. The entire pedal assembly is replaced as a single unit.
Trusted brands: ACDelco, Dorman, Standard Motor Products
OEM price range: $100-$150
Aftermarket price range: $50-$100 - APP Sensor Connector Pigtail
(OEM #ACDelco PT2628 (Verify pin count))— If the connector itself at the pedal or throttle body is damaged or corroded, replacing it with a new pigtail is the proper repair instead of replacing the entire harness. Note: This part number is for the 8-pin throttle body connector but is often associated with these repairs; verify the pedal connector before purchase.
Trusted brands: ACDelco, Dorman, Michigan Motorsports
OEM price range: $25-$45
Aftermarket price range: $15-$30
Related Codes That Often Appear With This One
- P1125
- P2135
- P1516
Technical Service Bulletins (TSBs) & Recalls
- Bulletin #07-06-04-019F: Addresses intermittent MIL, Reduced Engine Power, and DTC P2138. Recommends inspecting and repairing the instrument panel to body harness connector for water intrusion and corrosion before replacing any parts.
- Bulletin #07-06-04-019E: An earlier revision of the same TSB, also pointing to the IP-to-body harness connector as the primary cause.
Platform-Specific Known Issues
- A well-documented issue, outlined in TSB #07-06-04-019F, involves a poor connection at the instrument panel-to-body harness connector, which can become corroded due to water intrusion. This causes an intermittent loss of signal from the accelerator pedal, triggering P2138 and the 'Reduced Engine Power' mode. The TSB explicitly warns technicians *not* to replace the accelerator pedal assembly before inspecting this connector.
- Water leaks causing this issue often originate from poorly sealed windshields, A-pillar seals, or clogged sunroof drains, channeling water directly onto the connectors in the driver's side footwell.
Mechanic-Grade Diagnostic Values
- APP Sensor 1 Signal Voltage — expected: Approximately 0.88V at idle (pedal released) to 4.5V at wide-open throttle (pedal fully depressed). Another source suggests ~1.0V at idle to ~2.1V at WOT. The key is a smooth, linear change.. Failure: Voltage is erratic, jumps, or does not change smoothly as the pedal is depressed. A reading of 0V or 5V indicates a circuit fault.
- APP Sensor 2 Signal Voltage — expected: Approximately 0.45V at idle (pedal released) to 2.5V at wide-open throttle. On many GM vehicles, APP Sensor 2's voltage is designed to be approximately half of APP Sensor 1's voltage.. Failure: The voltage does not maintain its proportional relationship with Sensor 1, or it shows spikes, dropouts, or no change.
- 5-Volt Reference at APP Connector — expected: Approximately 5.0 Volts DC with the key on, engine off.. Failure: Voltage significantly lower than 5V (e.g., 1-2V) suggests a short on the reference circuit. No voltage indicates an open wire or PCM fault.
- Low Reference (Ground) at APP Connector — expected: Less than 100mV (0.1V) when back-probing with the sensor connected and key on.. Failure: Higher voltage indicates a poor ground connection, which can cause sensor readings to be skewed.
Scan Tool Commands That Help
- Tech2/GDS2 (GM Professional Scan Tool): Idle Relearn Procedure — After replacing the throttle body or disconnecting the battery, the idle position may be lost. If the idle is unstable after repairs, this procedure may be required. Some vehicles relearn on their own after a drive cycle.
- Professional Scan Tool with Live Data: Graphing APP Sensor 1 vs. APP Sensor 2 — This is the primary diagnostic method. By graphing both sensor voltages simultaneously while operating the pedal, any non-correlation, spike, or dropout becomes immediately obvious, pointing to the failing component or circuit.
Wiring & Ground Locations
- ECM Connector J1 (or X1) — The large, multi-pin connector at the Engine Control Module (ECM) in the engine bay.. The APP sensor wires terminate here. Specifically, on some GMT900 platforms, APP Sensor 1 signal is at Pin 29 and APP Sensor 2 signal is at Pin 32. A wiggle test at this connector can reveal intermittent connections causing P2138.
- IP-to-Body Harness Connector (e.g., X202, X205, C205) — Located in the driver's side kick panel area, connecting the main body harness to the instrument panel harness.. This is the most common failure point cited in TSB #07-06-04-019F. The APP sensor signals pass through this connector, and it is highly susceptible to corrosion from water leaks originating from the A-pillar or windshield.
- G103 — Located at the left rear of the engine compartment on the cowl, above the brake booster.. This is a major ground point for multiple interior modules, including the Body Control Module (BCM) and the Data Link Connector (DLC). While not a direct ground for the APP sensor itself, a poor connection here can cause widespread electrical issues and communication errors that could potentially mimic sensor problems.
Real Owner Repair Stories
- CorvetteForum user (2009 Chevrolet Corvette C6) — Goes into limp mode with "Reduced Engine Power" and "Service Traction" messages. Codes P2138 and P2122 (APP Sensor 1 Circuit Low Voltage) were present.
❌ Tried (didn't work) Initial troubleshooting fixed the problem temporarily, but it returned.
✅ What actually fixed it The user performed detailed voltage and continuity checks. They measured APP Sensor 1 voltage (0.88V to 4.5V) and APP Sensor 2 voltage (0.45V to 2.5V) directly at the sensor. They also checked continuity for the signal wires back to the ECU plugs. While the story was ongoing, the detailed diagnostic values provided are extremely valuable for confirming correct sensor operation. - YouTube video by 'Pinpointing a P2138' (GMT900 Full-size truck (Silverado/Sierra platform)) — P2138 code active, scan tool shows APP sensor data disagreeing.
❌ Tried (didn't work) Wiggling wires at the pedal connector and inside the dash at connector C205 did not change the faulty data.
✅ What actually fixed it The problem was isolated by wiggling the J1 connector at the E38 ECM in the engine bay. When the harness at the ECM was moved, the sensor data on the scan tool corrected itself, indicating a poor connection or fretting at the ECM connector pins was the root cause.
OEM Part Supersession History
Unknown→22742315— Standard part lifecycle and potential design revisions.
Heads up: Part number 22742315 is the specified GM Original Equipment replacement for many vehicles in this range, including the Savana. Always verify fitment with a VIN before purchasing.
Helpful Videos


The information in this article is provided for general reference and educational purposes only. Vehicle specifications, procedures, and part compatibility can vary by production date, trim level, and region. Always consult your vehicle's factory service manual and verify part numbers before purchasing or performing repairs. Safety-critical components such as airbags, seat belts, and braking systems should be installed by a qualified professional.
- Gmc SAVANA:
- 🧭 Diagnostic Flowchart
- 🎬 Helpful Videos
- What's Unique About the 2005-2009 Gmc SAVANA
- Symptoms You May Notice
- Most Likely Causes
- Rare But Worth Checking
- Diagnosis Steps
- Parts You'll Likely Need
- Related Codes That Often Appear With This One
- Technical Service Bulletins (TSBs) & Recalls
- Platform-Specific Known Issues
- Mechanic-Grade Diagnostic Values
- Scan Tool Commands That Help
- Wiring & Ground Locations
- Real Owner Repair Stories
- OEM Part Supersession History
- 🎟️ Get 5% Off