
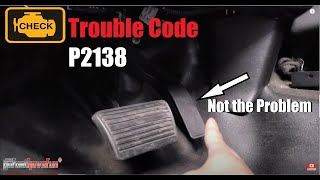
P2138 on 2005-2009 GMC Sierra: Reduced Engine Power Causes and Fixes
On a 2005-2009 GMC Sierra, code P2138 almost always triggers "Reduced Engine Power" mode and is caused by a faulty accelerator pedal assembly or, very commonly, a wiring issue at the IP-to-body harness connector. Before replacing the pedal (~$70-$150), inspect the large X205 connector in the driver's kick panel for green or white corrosion from water leaks, as noted in GM TSB #07-06-04-019E. This wiring check is critical to avoid a misdiagnosis.
- P2138 on a 2005-2009 Sierra will put the truck in 'Reduced Engine Power' mode.
- Before buying any parts, inspect the large wiring connector in the driver's kick panel for water damage or corrosion, as this is a very common cause outlined in a GM service bulletin.
- If the wiring is clean, the most likely fix is replacing the entire accelerator pedal assembly.
- Do not replace the throttle body; this code points specifically to the accelerator pedal circuits.
- Using dielectric grease on the connector after inspection can prevent the problem from recurring.
What's Unique About the 2005-2009 Gmc SIERRA
For this generation of GMC Sierra, the P2138 code is notoriously linked to specific, well-documented wiring problems. GM issued Technical Service Bulletin (TSB) #07-06-04-019E, which warns that water intrusion into the main Instrument Panel (IP)-to-body harness connector (often identified as connector X205) 🎬 Watch: How to find and clean the X205 connector is a primary cause. This large, often black, lever-lock connector is located in the driver's side kick panel area near the emergency brake pedal and is highly susceptible to corrosion from water leaks originating from A-pillar seals, sunroof drains, or the windshield cowl. This makes a thorough wiring inspection just as, if not more, important than checking the pedal sensor itself.
🎬 See a detailed walkthrough of the P2138 diagnostic processDiagnostic Flowchart
Tap your situation to follow the diagnostic path that matches what you're seeing on this vehicle.
Generation note: This year range covers the end of the GMT800 generation (2005-2007 Classic) and the beginning of the GMT900 generation (2007.5-2009). The causes, particularly the wiring issues at the IP-to-body connector described in TSBs, are common to both generations within this period and affect the entire GM truck and SUV lineup.
Symptoms You May Notice
- "Reduced Engine Power" message on the instrument cluster
- Check Engine Light is on
- Severely limited acceleration (truck may not go over 5-15 mph)
- Vehicle may stall or have an erratic idle
- Unresponsive or delayed throttle response
- Unstable or rough idle
- Replacing the Throttle Body. P2138 specifically relates to the correlation between the two sensors in the *accelerator pedal*, not the Throttle Position Sensor (TPS) on the throttle body. While throttle body codes (like P2135) can also cause Reduced Power, P2138 points to the pedal or its wiring.
- Replacing the Accelerator Pedal without checking wiring. Many owners and shops replace the pedal assembly, only for the code to return because the root cause was corrosion in the IP-to-body harness connector (X205).
Most Likely Causes
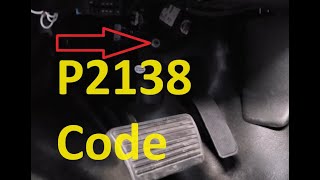
- Wiring/Connector Issue at IP-to-Body Harness (Connector X205) 🔴 High Probability GM TSB #07-06-04-019E specifically identifies this as a common failure point. The location in the driver's kick panel makes it vulnerable to water leaks from the A-pillar, windshield, or sunroof drains, leading to corrosion on the APP sensor circuit pins passing through it.
How to confirm: Pull back the driver's side carpet and remove the kick panel trim. Locate the large, multi-wire connector (X205) near the parking brake mechanism. Disconnect it and inspect both male and female sides for any signs of moisture, green or white corrosion, or backed-out pins.
Typical fix: If corrosion is minor, clean the connector terminals meticulously with electrical contact cleaner and a nylon brush. If corrosion is severe or pins are damaged, the affected terminals must be replaced, which may require a special terminal repair kit or splicing in a new connector pigtail. Applying dielectric grease (like Nyogel 760G) during reassembly is crucial to prevent future moisture intrusion. The source of the water leak must also be found and repaired.
Est. part cost: $10-$60 - Faulty Accelerator Pedal Position (APP) Sensor 🔴 High Probability → Shop Accelerator Pedal Assembly The APP sensor is integrated into the accelerator pedal assembly. As a high-use electronic component with moving parts, it can wear out over time, causing the internal resistive tracks to fail and send conflicting signals.
How to confirm: Using a scan tool with live data, monitor the two APP sensor voltages (APP1 and APP2) while slowly pressing and releasing the pedal. APP1 voltage should sweep smoothly up (e.g., ~0.7V to ~4.0V) while APP2 sweeps smoothly down (e.g., ~4.0V to ~0.7V). Any jumps, drops, flat spots, or non-inverse movement indicates a failing sensor. A 'wiggle test' on the harness near the pedal can also reveal intermittent connections.
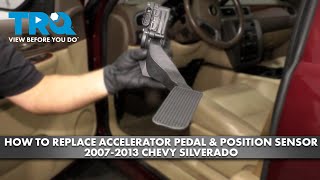
Typical fix: Replace the entire accelerator pedal assembly. It is a non-serviceable unit typically held in by two or three 10mm nuts.
Est. part cost: $70-$180 - Poor Terminal Tension at APP Sensor Connector 🟡 Medium Probability TSB #PIP3783D mentions that poor terminal tension in the connector right at the pedal can cause intermittent signal loss, triggering the code. The female terminals can spread apart over time from vibration or repeated connections.
How to confirm: With the key off, disconnect the connector at the accelerator pedal. Visually inspect the female terminals to ensure they are not spread open. They should provide a tight fit on the male pins of the sensor. A 'wiggle test' of this connector while watching live data can confirm an issue.
Typical fix: Carefully use a terminal pick tool to slightly bend the female terminals to increase tension. If terminals are damaged or too spread to be repaired, replace the connector pigtail.
Est. part cost: $15-$40
Rare But Worth Checking
- Faulty Engine Control Module (ECM): → Shop Engine Control Module (ECM) This is very rare. The ECM should only be considered after all other possibilities, including all wiring (pedal to X205, X205 to ECM) and the APP sensor itself, have been definitively ruled out with continuity and load tests.
- Aftermarket Accessories: Improperly installed aftermarket electronics, such as remote start systems, aftermarket tuners, or cruise control units tapped into the pedal sensor wiring, can interfere with the 5-volt reference signal and cause this code.
Diagnosis Steps
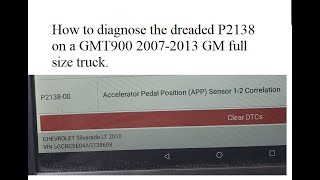
- Read the trouble codes with an OBD-II scanner and confirm P2138 is present. Note any other APP-related codes (P2120-P2128).
- Visually inspect the driver's side footwell and A-pillar for signs of water intrusion (damp carpet, rust on brackets, water stains on headliner).
- Following GM TSB #07-06-04-019E, locate and inspect the IP-to-body harness connector (X205) in the driver's side kick panel area. Disconnect and check thoroughly for signs of water intrusion and corrosion.
- If the X205 connector is corroded, clean it and apply dielectric grease. Clear the codes and test drive. If the code returns, the corrosion may have permanently damaged the wiring or terminals, requiring pin replacement.
- If the connector is clean, inspect the connector at the accelerator pedal for spread terminals or damage.
- Use a scan tool to view live data for APP Sensor 1 and APP Sensor 2. Press the pedal slowly and watch for smooth, inverse voltage changes. Any erratic behavior points to a bad pedal sensor. Perform a 'wiggle test' on the harnesses at the pedal, X205 connector, and ECM while watching the data to find intermittent opens or shorts.
- If live data shows a faulty pedal sensor and all wiring has been verified as good, replace the accelerator pedal assembly.
- After any repair, clear the codes and perform a test drive to ensure the issue is resolved.
Parts You'll Likely Need
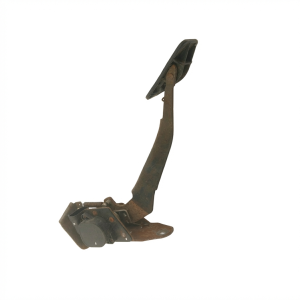
- Accelerator Pedal Assembly with Sensor
(OEM #25832864 (may be superseded by other numbers like 23476569))— This is the most common part replaced to fix P2138 when wiring is confirmed to be good. The sensors are integrated and not sold separately.
Trusted brands: ACDelco (OEM), Standard Motor Products (SMP), Dorman (e.g., 699-105)
OEM price range: $120-$180
Aftermarket price range: $70-$110 - APP Sensor Connector Pigtail — Needed if the connector at the pedal itself has damaged/spread terminals or heat damage that cannot be repaired by simply tightening the pins.
Trusted brands: ACDelco, Dorman
OEM price range: $25-$45
Aftermarket price range: $15-$30 - Dielectric Grease — Essential for protecting the IP-to-body harness connector (X205) and pedal connector from future moisture and corrosion after inspection or cleaning.
Trusted brands: Permatex, ACDelco, Nyogel 760G
OEM price range: $5-$15
Aftermarket price range: $5-$10
Related Codes That Often Appear With This One
- P2122 — Indicates a low voltage input for APP Sensor 1, which can be caused by the same wiring or sensor faults.
- P2123 — Indicates a high voltage input for APP Sensor 1, pointing to a circuit issue.
- P2127 — Indicates a low voltage input for APP Sensor 2, often appearing with P2138.
- P2128 — Indicates a high voltage input for APP Sensor 2, pointing to the same potential root causes.
Technical Service Bulletins (TSBs) & Recalls
- 07-06-04-019E: Intermittent MIL, DTC P2138 with Reduced Engine Power (Repair Instrument Panel (IP) to Body Harness Connector).
- PIP3783D: Reduced Engine Power message with various APP codes including P2138 (Inspect Accelerator Pedal Position circuits for poor terminal tension).
Platform-Specific Known Issues
- TSB #07-06-04-019E explicitly warns technicians NOT to replace the accelerator pedal assembly without first inspecting the IP-to-body harness connector for water intrusion, as this is a very common root cause. The bulletin details checking for leaks from the A-pillar, sunroof, or cowl.
- TSB #PIP3783D points to poor terminal tension at the APP sensor connector itself as another potential cause for this code and related APP sensor codes, reinforcing the importance of checking all connection points, not just the large X205 connector.
Mechanic-Grade Diagnostic Values
- APP Sensor 5V Reference Voltage — expected: > 4.8V (typically 5.0V). Failure: Voltage below 4.8V indicates a problem with the 5V reference circuit from the ECM or a short in another sensor on the same circuit.
- APP Sensor Low Reference Circuit Resistance — expected: < 5.0 Ω to a known good ground. Failure: Resistance over 5.0 Ω indicates a poor ground connection, often due to corrosion or a loose terminal at a ground point like G101.
- APP Sensor 1 (APP1) Signal Voltage — expected: Smoothly sweeps from ~0.7V (pedal up) to ~4.0V (pedal down). Failure: Voltage is erratic, jumps, has dead spots, or does not sweep smoothly.
- APP Sensor 2 (APP2) Signal Voltage — expected: Smoothly sweeps inversely to APP1, from ~4.0V (pedal up) to ~0.7V (pedal down). Failure: Voltage does not move inversely to APP1, is erratic, or has dead spots.
- Scan Tool Pedal Position % at Full Throttle — expected: 99%. Failure: This is a note for technicians that seeing 99% instead of 100% at full throttle is normal for these trucks and not an indication of a fault.
Scan Tool Commands That Help
- Professional Scan Tool (e.g., Tech 2, GDS2): Live Data Graphing / Agree-Disagree Status — Some scan tools offer a specific 'Agree or Disagree' status for the two APP sensors. This provides an immediate confirmation of the correlation fault reported by the ECM. Graphing the two APP sensor PIDs while pressing the pedal is essential to visually identify glitches, dropouts, or non-inverse operation that confirms a faulty pedal sensor.
Wiring & Ground Locations
- ECM Connector X1 (GMT900) — On the Engine Control Module (E38 ECM) in the engine bay. The APP sensor wires are located in this connector, often with a blue or black face.. This is the final destination for all six APP sensor wires. A poor pin connection, corrosion, or wire damage near the ECM can cause the P2138 code. The specific pins for a 2008 5.3L are: Pin 29 (APP1 Signal), Pin 32 (APP2 Signal), Pin 57 (APP2 5V Ref), Pin 58 (APP1 Low Ref), Pin 70 (APP1 5V Ref), and Pin 71 (APP2 Low Ref).
- X205 Connector — Large, lever-lock connector in the driver's side kick panel area, connecting the instrument panel harness to the body harness.. This is the most notorious failure point for P2138 on these trucks. It is highly susceptible to water intrusion, and the APP sensor circuits pass through it. Corrosion on these specific pins is the cause identified in TSB #07-06-04-019E.
- G101 / G106 — G101 is on the lower front of the engine block. G106 is on the front center of the frame cross-member, under the crank pulley. They are often jumpered together.. G101 is a primary ground for the Engine Control Module (ECM). A poor connection here can cause a host of issues, including erratic sensor readings and reference voltage problems that could lead to a P2138 code.
- G103 (GMT800) / G104 (GMT900) — On GMT800s, G103 is on the cowl above the brake booster. On GMT900s, G104 is on the left rear corner of the engine, mounted to the cylinder head.. These are major body and engine ground points. While not directly for the APP sensor's low reference, a poor main ground can create floating voltages and unstable sensor readings across the entire system.
Real Owner Repair Stories
- Tahoe Yukon Forum user (2011 Yukon XL 2500 (6.0L) - GMT900 Platform) — P2138 code, 'Reduced Engine Power' message, known water leak on driver's side.
❌ Tried (didn't work) Replaced all 6 wires to the accelerator pedal., Replaced the accelerator pedal assembly., Replaced the entire throttle body assembly., Cleaned sunroof drains and sealed GPS antenna to stop water leaks.
✅ What actually fixed it The final problem was a faulty Engine Control Module (ECM). After replacing all common parts, resistance tests through the ECM's internal low-reference circuits still measured higher than the 5-ohm maximum, indicating an internal failure within the ECM itself. Replacing the ECM resolved the code.
"I Checked Everything" — The Actual Cause
- This is an electrical code, so a smoke test is not applicable. However, a common pattern is for all standard electrical checks and part swaps to fail to resolve the issue. In one documented case, a technician replaced the pedal, the throttle body, and repaired wiring to no avail. The actual cause was an internal failure in the Engine Control Module (ECM). The fault was finally proven by measuring the resistance of the low-reference circuits through the ECM itself, which read high, condemning the module. This demonstrates that even after checking all external wiring and sensors, the ECM can be the root cause, albeit rarely.
OEM Part Supersession History
15101848, 15847349→25832864— Part consolidation and potential design update by GM.
Heads up: Part number 25832864 is correct for the GMT900 trucks in this range. A critical incompatibility exists with pedals from much newer GM trucks (~2016+). While they may physically fit, the internal sensor logic is reversed, which will cause an immediate P2138 code. Always verify the part number is correct for the specific model year.
Model Year Variations Within This Range
- 2005-2007 'Classic' (GMT800) vs. 2007.5-2009 (GMT900): The GMT800 is generally considered a simpler platform with fewer electronics, while the GMT900 introduced a more refined interior, a 6-speed transmission option, and Active Fuel Management (AFM) on many 5.3L engines. While the P2138 fault is common to both and often shares the same root causes (X205 connector, pedal failure), specific part numbers for components like the pedal assembly and the exact locations of grounds and connectors may differ slightly between the two generations.
Helpful Videos


We Have This Part in Stock

The information in this article is provided for general reference and educational purposes only. Vehicle specifications, procedures, and part compatibility can vary by production date, trim level, and region. Always consult your vehicle's factory service manual and verify part numbers before purchasing or performing repairs. Safety-critical components such as airbags, seat belts, and braking systems should be installed by a qualified professional.
- Gmc SIERRA:
- 🧭 Diagnostic Flowchart
- 🎬 Helpful Videos
- 🛍️ Shop This Part
- What's Unique About the 2005-2009 Gmc SIERRA
- Symptoms You May Notice
- Most Likely Causes
- Rare But Worth Checking
- Diagnosis Steps
- Parts You'll Likely Need
- Related Codes That Often Appear With This One
- Technical Service Bulletins (TSBs) & Recalls
- Platform-Specific Known Issues
- Mechanic-Grade Diagnostic Values
- Scan Tool Commands That Help
- Wiring & Ground Locations
- Real Owner Repair Stories
- "I Checked Everything" — The Actual Cause
- OEM Part Supersession History
- Model Year Variations Within This Range
- 🎟️ Get 5% Off