
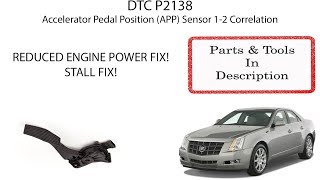
P2138 on 2005-2009 Hummer H2: Causes and Fixes for Reduced Engine Power
On a 2005-2009 Hummer H2, code P2138 is most often caused by a poor connection or water intrusion at the instrument panel-to-body harness connector, as documented in GM Technical Service Bulletin #07-06-04-019F. Before replacing the accelerator pedal (GM Part #25832864), inspect and repair this connector, which is located in the driver's side kick panel area.
- P2138 on a Hummer H2 will cause the vehicle to enter 'Reduced Engine Power' mode as a safety precaution.
- The most likely cause is NOT the accelerator pedal itself, but a corroded wiring connector in the driver's kick panel, as per GM TSB #07-06-04-019F.
- Always inspect and clean the IP-to-body harness connector before spending money on a new accelerator pedal assembly.
- The repair is DIY-friendly for those comfortable with basic tools and accessing connectors in the footwell.
- Driving in 'Reduced Engine Power' mode is unsafe due to poor acceleration; the issue should be fixed promptly.
What's Unique About the 2005-2009 Hummer H2
For this generation of GM trucks and SUVs, including the Hummer H2, the P2138 code is very frequently a wiring issue rather than a failed pedal sensor. General Motors released specific Technical Service Bulletins (TSBs) acknowledging that water can leak into the main instrument panel-to-body harness connector. This connector, located in the driver's kick panel, is vulnerable to leaks from the A-pillar seals, windshield cowl, or clogged sunroof drains. Corrosion on the terminals for the APP sensor circuits causes the voltage mismatch, triggering the code. Owners and even dealerships often mistakenly replace the pedal assembly first, only to have the problem return because the root cause is the corroded connector.
Diagnostic Flowchart
Tap your situation to follow the diagnostic path that matches what you're seeing on this vehicle.
Symptoms You May Notice
- "Reduced Engine Power" message displayed on the instrument cluster.
- Check Engine Light (Malfunction Indicator Lamp or MIL) is on.
- Severely limited acceleration and poor throttle response.
- Vehicle may hesitate, stall, or have a jerky throttle response.
- Sudden loss of power while driving at cruising speeds.
- Replacing the accelerator pedal assembly without first inspecting the IP-to-body harness connector. The TSB explicitly warns against this, as the problem will likely persist if the connector is corroded.
Most Likely Causes
- Water Intrusion / Corrosion at IP-to-Body Harness Connector 🔴 High Probability → Shop Body Wiring Harness As documented in GM TSB #07-06-04-019F, these vehicles are prone to water leaks from the A-pillar, windshield, or sunroof drains that drip directly onto this critical connector in the driver's kick panel area.
How to confirm: Visually inspect the large harness connector (sometimes referred to as X209 or C1) in the driver's side kick panel for signs of moisture, green or white corrosion, or backed-out pins. Evidence of water staining on the kick panel plastic or nearby carpet is a strong indicator.
Typical fix: Disconnect the battery, then unplug the connector. Clean any corrosion using an electrical contact cleaner and a small brush. Apply dielectric grease to the terminals before reconnecting to prevent future moisture intrusion. In severe cases, the corroded terminals or the connector pigtail may need to be replaced. The source of the water leak must also be found and repaired.
Est. part cost: $5-$50 - Failed Accelerator Pedal Position (APP) Sensor 🟡 Medium Probability → Shop Accelerator Pedal Assembly The sensors inside the pedal assembly can wear out over time, causing their signals to drift or fail intermittently. However, this should be suspected only after the IP-to-body connector is confirmed to be clean and dry.
How to confirm: Use a scan tool with live data capability to monitor the voltages of APP Sensor 1 and APP Sensor 2 while slowly pressing and releasing the pedal. The voltages should change smoothly and correlate with each other (e.g., one rises from 0.5V to 4.5V while the other tracks it). Any jumps, dropouts, or flat lines indicate a faulty sensor.
Typical fix: Replace the entire accelerator pedal assembly. The sensors are integrated into the pedal and are not serviced separately. The GM OEM part number is often cited as 25832864.
Est. part cost: $70-$180 - Wiring Issue at the APP Sensor Connector ⚪ Low Probability The wiring harness leading to the pedal can become stretched or damaged, or the terminals in the connector can lose tension over time, a condition known as 'fretting corrosion'. TSB PIP3783D points to checking for poor terminal tension at the APP sensor connector.
How to confirm: With the scan tool monitoring live data, wiggle the wiring harness at the accelerator pedal connector. If the voltage readings fluctuate wildly, there is a wiring or connection issue. A user on TahoeYukonForums detailed checking resistance on the low reference wires, finding them over the 5Ω spec, which indicated a wiring fault.
Typical fix: Repair the damaged wire or replace the APP sensor connector pigtail. In some cases, owners have run new wires directly from the pedal to the ECM to bypass problematic connectors entirely.
Est. part cost: $15-$30
Rare But Worth Checking
- Faulty Throttle Body: → Shop Fuel Injection Throttle Body While P2138 is specific to the pedal sensors, a failing Throttle Position Sensor (TPS) on the throttle body can sometimes cause related drivability issues or set other codes like P2135.
- Faulty Engine Control Module (ECM): → Shop Engine Control Module (ECM) This is extremely rare. The ECM should only be considered after all other possibilities, including all wiring and sensor diagnostics, have been exhausted.
- Shared 5-Volt Reference Circuit Issue: The APP sensor operates on a 5-volt reference circuit from the ECM. If another sensor on the same circuit (e.g., fuel tank pressure sensor) shorts out, it can pull the voltage down for all sensors on that circuit, potentially triggering a P2138 code. This can be diagnosed by checking for 5V at the reference wire on the APP connector.
Diagnosis Steps
- Read the trouble codes with an OBD-II scanner to confirm P2138 is present and note any other codes.
- CRITICAL STEP: Locate the Instrument Panel (IP) to Body harness connector in the driver's side footwell/kick panel area.
- Disconnect the negative battery terminal.
- Unplug the connector and thoroughly inspect both sides for any signs of moisture, green or white powder (corrosion), or damaged/backed-out pins. Pay close attention to the area, looking for signs of water trails from the A-pillar or dash.
- If corrosion is found, clean the terminals with electrical contact cleaner and a small brush. Allow it to dry completely, then apply a thin layer of dielectric grease to the terminals before reconnecting. If the terminals are severely damaged, the connector may need to be repinned or replaced. Find and fix the source of the water leak (e.g., clear sunroof drains, seal windshield).
- If the connector is clean and dry, proceed to inspect the accelerator pedal. Reconnect the battery.
- Using a scan tool that can display live data, monitor the voltage readings for 'APP Sensor 1' and 'APP Sensor 2'.
- Slowly press and release the accelerator pedal. The two voltage readings should change smoothly and track each other without any spikes or dropouts.
- If a sensor's reading is erratic or doesn't change, the accelerator pedal assembly needs to be replaced.
- If the readings seem normal, try wiggling the wiring harness at the pedal and at the IP-to-body connector while watching the live data to check for intermittent connection problems.
- Check for proper voltage (5V) on the reference circuits and low resistance (<5Ω) on the ground circuits at the APP sensor connector, as detailed by owners who have performed deep diagnostics.
- After any repair, clear the codes and perform a test drive to ensure the problem is resolved. Some GM vehicles may require a throttle relearn procedure after replacing components.
Parts You'll Likely Need
- Accelerator Pedal Position (APP) Sensor Assembly
(OEM #25832864)— This is the second most common cause after the wiring connector issue. The entire pedal assembly is replaced as a unit because the internal sensors are not sold separately.
Trusted brands: ACDelco, Dorman, NGK/NTK, Standard Motor Products
OEM price range: $120-$180
Aftermarket price range: $70-$120 - Electrical Contact Cleaner and Dielectric Grease — Needed for the most common fix: cleaning corrosion from the IP-to-body harness connector.
Trusted brands: CRC, Permatex
OEM price range: $15-$25
Aftermarket price range: $15-$25
Related Codes That Often Appear With This One
- P2135 — This code indicates a voltage correlation error with the Throttle Position Sensors (TPS) on the throttle body. The systems are related, and a major electrical issue could potentially affect both.
- P0120 — This is a more general code for a malfunction in the Throttle/Pedal Position Sensor 'A' Circuit.
- P0220 — This is a more general code for a malfunction in the Throttle/Pedal Position Sensor 'B' Circuit.
Technical Service Bulletins (TSBs) & Recalls
- 07-06-04-019F: Intermittent Malfunction Indicator Lamp (MIL) Illuminated, DTC P2138 with Reduced Engine Power (Repair Instrument Panel (IP) to Body Harness Connector).
- 07-06-04-019E: The previous version of the TSB, now superseded by version 'F'. [Bulletin #07-06-04-019E]
- PIP3783D: Advises inspection of APP circuits for poor terminal tension when DTCs like P2138 are present.
Platform-Specific Known Issues
- GM Technical Service Bulletin #07-06-04-019F directly addresses this code. It states the cause may be 'water intrusion into the instrument panel (IP) to body harness connector, which carries the APP sensor signals to the ECM/PCM.' This results in a voltage difference that sets P2138.
- A user on TahoeYukonForums.com with a 2011 Yukon XL (a platform mate) documented a detailed troubleshooting process for P2138. After replacing the pedal and throttle bod
Mechanic-Grade Diagnostic Values
- APP Sensor 1 vs. APP Sensor 2 Voltage Correlation — expected: The two sensors have different operating ranges. For example, APP Sensor 1 may sweep from ~0.3V to ~4.8V, while APP Sensor 2 sweeps from ~0.15V to ~2.4V. Both should change smoothly and proportionally as the pedal is pressed.. Failure: A voltage divergence between the two sensor signals that is greater than a threshold (e.g., >0.5V) for more than a few seconds will trigger the code. A scan tool showing one sensor's voltage jumping, dropping out, or staying flat while the other moves correctly indicates a failure.
- APP Sensor 5-Volt Reference Voltage — expected: Approximately 5.0 volts with the key on, engine off.. Failure: Significantly lower or no voltage indicates a problem with the ECM or a short on the 5V reference circuit, which may be shared by other sensors.
- APP Sensor Low Reference (Ground) Circuit Resistance — expected: Less than 5.0 ohms of resistance between the APP sensor connector's low reference pin and a known good chassis ground.. Failure: High resistance indicates a poor ground connection, which can cause floating voltages and trigger correlation codes.
Wiring & Ground Locations
- IP-to-Body Harness Connector — Located in the driver's side footwell, in or behind the kick panel.. This is the single most common failure point for P2138 on this platform, as documented in TSB #07-06-04-019F. The APP sensor signals pass through this connector, and it is highly susceptible to water intrusion from A-pillar, sunroof, or windshield leaks, leading to corrosion and signal correlation errors.
- G103 and G104 — G103 is located at the top right rear of the engine; G104 is at the top left rear of the engine.. These are primary engine harness ground points for the PCM/ECM. A loose or corroded connection at these grounds can cause numerous sensor-related issues, including erratic APP sensor readings.
- Under-dash Ground Posts — A vertical row of ground posts located up under the dash, against the left side chassis, accessible after removing the driver's side lower dash/kick panel.. These grounds serve various interior and body modules. They have been known to come loose over time and can cause a wide range of unexplained electrical problems, potentially affecting circuits related to the Body Control Module (BCM) which communicates with the ECM.
- ECM Connector (J1/X1 on E38) — On the Engine Control Module (E38) itself, for 2008-2009 models. The E38 ECM is located in the engine bay.. This is the final destination for the APP sensor signals before they are processed. For deep diagnostics, technicians can back-probe the specific pins for APP Sensor 1 and 2 signals at this connector to verify if the signal is clean all the way from the pedal.
OEM Part Supersession History
15101848, 15847349→25832864— Standard part revision and consolidation by the manufacturer.
Model Year Variations Within This Range
- 2008-2009: In 2008, the Hummer H2 underwent a major update, moving from the GMT820 platform to the GMT913 platform. This included a new 6.2L L92 V8 engine, a 6L80 6-speed automatic transmission, and a new dashboard/interior. Critically for diagnostics, the Engine Control Module was updated to the E38 ECM. Therefore, wiring diagrams, connector pinouts at the ECM, and diagnostic procedures for 2008-2009 models differ from the 2005-2007 models.
Helpful Videos


We Have This Part in Stock

The information in this article is provided for general reference and educational purposes only. Vehicle specifications, procedures, and part compatibility can vary by production date, trim level, and region. Always consult your vehicle's factory service manual and verify part numbers before purchasing or performing repairs. Safety-critical components such as airbags, seat belts, and braking systems should be installed by a qualified professional.
- Hummer H2:
- 🧭 Diagnostic Flowchart
- 🎬 Helpful Videos
- 🛍️ Shop This Part
- What's Unique About the 2005-2009 Hummer H2
- Symptoms You May Notice
- Most Likely Causes
- Rare But Worth Checking
- Diagnosis Steps
- Parts You'll Likely Need
- Related Codes That Often Appear With This One
- Technical Service Bulletins (TSBs) & Recalls
- Platform-Specific Known Issues
- Mechanic-Grade Diagnostic Values
- Wiring & Ground Locations
- OEM Part Supersession History
- Model Year Variations Within This Range
- 🎟️ Get 5% Off