
P2152 on 2012-2014 Chevrolet Impala: Fuel Injector Group 'C' Circuit Fault Guide
On a 2012-2014 Impala with the 3.6L V6, code P2152 is almost always caused by a chafed or damaged fuel injector wiring harness. This is a well-documented issue in GM Technical Service Bulletin #PIP4924D. The most common failure point is where the harness wraps around the driver's side of the engine near the intake manifold. The fix is often a simple wire repair, costing under $50 in materials for a DIYer.
- P2152 on a 2012-2014 Impala almost always points to a damaged fuel injector wiring harness, not a bad part.
- Before buying any parts, perform a thorough visual and physical inspection of the wiring harness, focusing on the known problem areas mentioned in TSB #PIP4924D.
- The most common fix is a simple wire repair, which is inexpensive if you can locate the damage.
- Do not replace fuel injectors or the ECM unless the wiring harness has been definitively ruled out as the cause.
- This issue is specific to the 3.6L LFX V6 engine found in the Impala and many other GM vehicles from this era.
What's Unique About the 2012-2014 Chevrolet IMPALA
The 9th generation Impala with the 3.6L LFX V6 engine is known for a specific wiring harness vulnerability. General Motors issued Technical Service Bulletin #PIP4924D which directly addresses P2152 and points to the fuel injector wiring harness rubbing against engine components. The most frequently cited chafe point is on the driver's side of the engine, where the harness can be pulled tight and rub against the intake plenum, valve cover bolts, or the edge of the cylinder head. This design flaw makes a wiring inspection the absolute first diagnostic step, as it is a much higher probability than a random component failure like a fuel injector.
Diagnostic Flowchart
Tap your situation to follow the diagnostic path that matches what you're seeing on this vehicle.
Generation note: The 2012-2013 models belong to the ninth generation. In 2014, the tenth generation was introduced, but the ninth generation continued to be sold as the 'Impala Limited'. This guide applies to the ninth generation Impala and Impala Limited with the 3.6L LFX V6 engine. Another TSB, #PI0631F, also notes wiring harness chafing issues on 2012-2013 Impalas where the harness can rub on the transmission.
Symptoms You May Notice
- Check Engine Light is on
- Engine running rough, shaking, or vibrating
- Noticeable loss of engine power and poor acceleration
- Engine misfires, often felt under load between 1500-3000 RPM
- Vehicle may enter 'limp mode' or 'Reduced Engine Power' mode
- Engine may stall at low speeds or idle
- Replacing one or more fuel injectors without first thoroughly inspecting the entire fuel injector wiring harness. The wiring is the most probable cause on this specific vehicle, as documented by GM.
Most Likely Causes
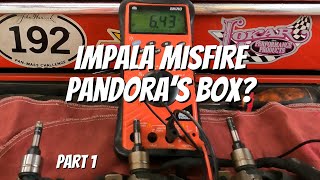
- Chafed or Damaged Fuel Injector Wiring Harness 🔴 High Probability → Shop Engine Wiring Harness As documented in GM TSB #PIP4924D, the harness routing on the 3.6L V6 is susceptible to damage. Engine movement causes the harness to rub against the intake plenum, valve cover bolts, fuel lines, or the side of the cylinder head, wearing through the wire insulation. Forum users have repeatedly identified the chafe point at the rear driver's side of the engine where the harness wraps around the intake manifold. 🎬 See a real-world example of finding and fixing harness chafing.
How to confirm: Visually and physically inspect the entire fuel injector wiring harness, focusing on the known problem areas mentioned in the TSB. Look for shiny spots, exposed copper, or broken wires. A common point of failure is the shared Pink/Black power wire. Wiggle the harness with the engine running to see if the misfire changes.
Typical fix: Repair the damaged section of wire(s) using solder or quality butt connectors and heat shrink tubing. Protect the repaired area with convoluted tubing or re-route it slightly to prevent future contact. Some owners use a zip tie to hold the harness away from the sharp edge.
Est. part cost: $10-$50 - Failed Fuel Injector 🟡 Medium Probability → Shop Fuel Injector The direct injection (GDI) injectors on the LFX engine operate under very high pressure and can fail electrically or become clogged over time, though this is less common than the wiring issue for this specific code.
How to confirm: After confirming the wiring is intact, test the resistance of the fuel injectors in the affected group with a multimeter. For the 3.6L LFX engine, the resistance should be between 1.2 and 2.3 ohms. A reading of infinity (open) or near zero (short) indicates a failed injector.
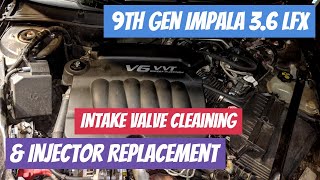
Typical fix: Replace the faulty fuel injector. This is an involved job on the LFX engine that requires removing the upper intake manifold. 🎬 Watch: Step-by-step guide to removing the intake and replacing injectors.
Est. part cost: $60-$180 - Loose or Corroded Connector ⚪ Low Probability Moisture from the environment or engine washing can cause corrosion in the electrical connectors for the fuel injectors, increasing resistance and triggering a voltage fault. This can also occur at the main ECM connectors.
How to confirm: Unplug the connectors for the affected injector group and the main harness connector at the ECM. Inspect the pins for any green or white corrosion, or signs of moisture.
Typical fix: Clean the connector pins with an electrical contact cleaner and a small brush. Apply a small amount of dielectric grease before reconnecting to prevent future corrosion.
Est. part cost: $5-$15
Rare But Worth Checking
- Faulty Engine Control Module (ECM): → Shop Engine Control Module (ECM) This is very rare. The internal driver circuit for the injector group can fail. This should only be considered after all wiring and component tests have been exhaustively performed and ruled out.
Diagnosis Steps
- Read all stored fault codes with an OBD-II scanner.
- Perform a thorough visual inspection of the fuel injector wiring harness. Pay extremely close attention to the chafe points identified in TSB #PIP4924D: against the intake plenum, at valve cover bolts, against fuel lines, and on the side of the cylinder head, especially on the driver's side.
- If the engine runs, gently wiggle the harness in various spots to see if the engine's idle changes or stumbles, which would indicate an intermittent open or short.
- If no visible damage is found, disconnect the battery. Unplug the harness connectors at the fuel injectors and the ECM.
- Use a multimeter to check for continuity on the power supply wire (often Pink/Black) for the affected injector group from the ECM connector to the injector connector. An 'OL' or infinite reading indicates a broken wire.
- Check the same wire for a short to ground by testing for continuity between the wire and a good chassis ground. Any reading other than 'OL' indicates a short.
- If wiring tests are good, measure the resistance of each fuel injector in the group. The spec for the 3.6L LFX is approximately 1.2-2.3 Ohms. Replace any injector that is out of spec.
- If all wiring and injectors test good, the fault may lie within the ECM, which requires professional diagnosis.
Parts You'll Likely Need
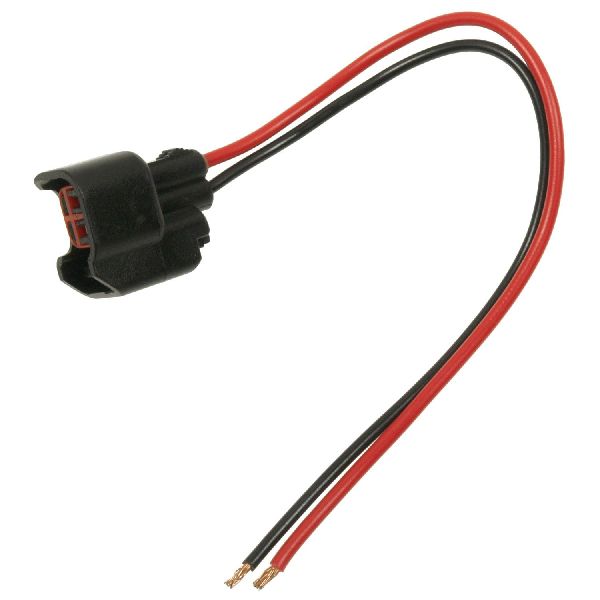
- Fuel Injector Wiring Harness Repair Supplies — This is the most common fix. You will need wire, butt connectors or solder, heat shrink tubing, and electrical tape/conduit to repair the chafed section.
Aftermarket price range: $10-$30 - Fuel Injector
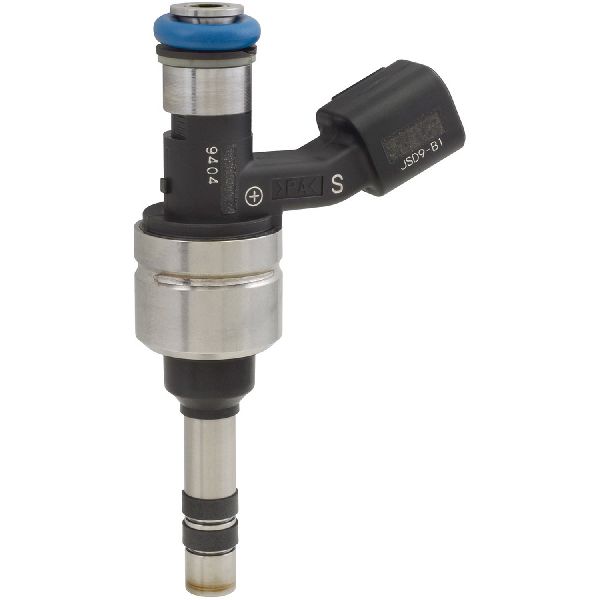
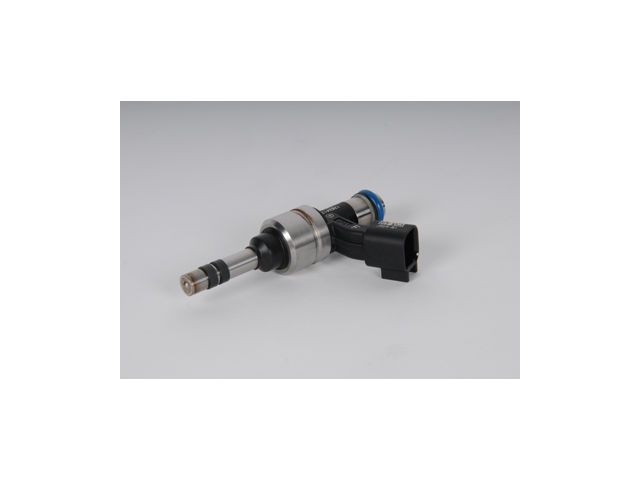
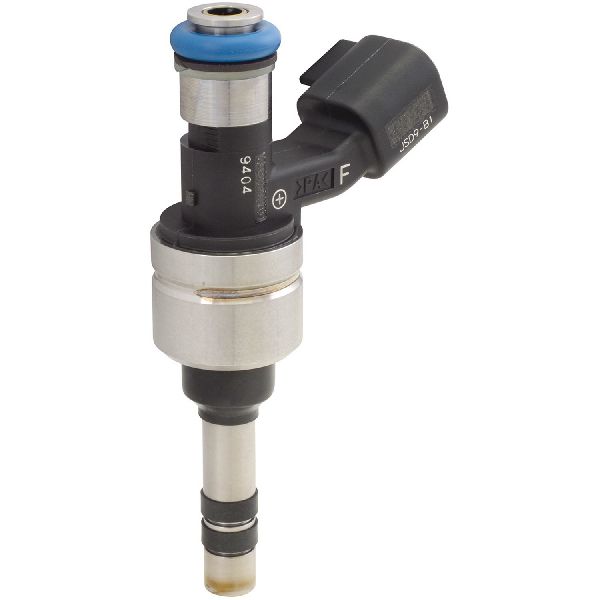
(OEM #12669384)— If a fuel injector has failed its resistance test, it will need to be replaced. This part number is a common replacement for the 3.6L LFX engine and supersedes older numbers like 12638530 and 12632255.
Trusted brands: ACDelco, Bosch, Hitachi
OEM price range: $120-$180
Aftermarket price range: $60-$110 - Fuel Injector Wiring Harness
(OEM #92271595)— If the harness is damaged in multiple places, replacing the entire harness assembly may be more reliable than performing several repairs. Note: The part number 92271595 appears incorrect for this application. Verifying the correct harness part number with a dealer using the vehicle's VIN is critical before ordering.
Trusted brands: ACDelco
OEM price range: $110-$175
Aftermarket price range: $80-$150
Related Codes That Often Appear With This One
- P2146 — This is the code for Fuel Injector Group 'A'. If the wiring harness is damaged, it often affects the wires for multiple injector groups simultaneously, strongly pointing to a wiring issue.
- P2149 — This is the code for Fuel Injector Group 'B'. Like P2146, its appearance with P2152 strongly suggests a wiring harness issue affecting multiple circuits.
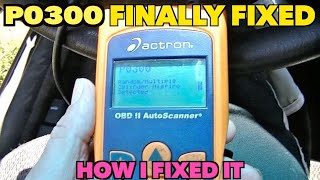
- P0300 — This is a code for 'Random/Multiple Cylinder Misfire'. It will be set because disabling an entire group of injectors 🎬 Watch: Simple steps to diagnose and clear a P0300 misfire code. causes multiple cylinders to misfire.
- P0201-P0206 — These are individual injector circuit codes (e.g., P0206 for cylinder 6). A specific wire break for one injector can occur alongside the group circuit fault.
Technical Service Bulletins (TSBs) & Recalls
- PIP4924D: Instructs technicians to inspect the fuel injector wiring harness for rubbing through or internal wire opens for a list of codes including P2152. It notes common chafe points against the intake plenum, at valve cover bolts, against the fuel line, and on the side of the cylinder head. This TSB applies to a wide range of GM vehicles with the 3.0L and 3.6L V6 engines.
- PI0631F: While not specific to P2152, this bulletin addresses various electrical issues on 2012-2013 Impalas caused by the engine wiring harness rubbing on the front right side of the transmission, highlighting another potential area for harness damage on this platform.
Platform-Specific Known Issues
- A widespread and well-documented issue exists concerning the fuel injector wiring harness rubbing through its insulation, causing shorts or open circuits. This is covered by GM TSB #PIP4924D.
- A real-world example can be found on impalaforums.com in a thread titled '2012 Impala LTZ - P2149, P2152, P0300', where a user provides detailed photos of the chafed wires at the back of the engine on the driver's side, leading to a successful repair.
Mechanic-Grade Diagnostic Values
- Fuel Injector Coil Resistance — expected: 1.2 - 2.3 Ohms at ~68°F (20°C). Failure: A reading of infinity (OL), near-zero, or significantly outside the specified range indicates a failed injector.
- Injector Circuit Voltage Drop Test — expected: Less than 0.5 Volts. Failure: A voltage drop greater than 0.5V between the ECM supply terminal and the injector connector indicates high resistance in the wiring.
- Injector High Voltage Supply to High Voltage Control Circuit Resistance — expected: 2-3 Ohms. Failure: A reading outside this range when testing between the two pins on the injector itself can indicate an internal injector fault.
- Injector High Voltage Supply — expected: Up to 250 Volts and 20 Amps (during activation). Failure: This is not a direct measurement but a system description. The ECM uses internal boost capacitors to generate this high voltage to activate the piezo injectors.
Scan Tool Commands That Help
- GDS2 (GM Professional Scan Tool): Active Fuel Injector Test (AFIT) / Fuel Injector Balance Test — This is the definitive test after a wiring inspection. It individually fires each injector and measures the corresponding fuel rail pressure drop to precisely identify a clogged, leaking, or electrically malfunctioning injector.
- GDS2 (or high-end aftermarket): Cylinder Power Balance — Used to quickly identify which cylinder(s) are not contributing power. The tool disables one cylinder at a time and measures the RPM drop. A cylinder that causes little or no RPM drop when disabled is the one with the problem.
- GDS2 (or high-end aftermarket): Injector Control Circuit Status (Data Display) — When viewing live data, this parameter for each injector should read 'OK' or 'Not Run'. If it displays 'Malfunction', it confirms the ECM has detected an electrical fault on that specific circuit.
Wiring & Ground Locations
- G111 — Located on the engine block, above the starter motor.. This is a critical engine ground. A poor connection here can cause unstable voltage and erratic behavior in the ECM and its driver circuits, potentially leading to false injector codes. A TSB for the 2014 Impala specifically calls for inspecting and tightening this ground to resolve other electrical issues.
- G102 / G105 / G106 — Primary engine and chassis grounds located near the battery, on the engine block, or on the front frame cross rail.. These are major ground points for the entire engine management system. A loose or corroded connection can cause a wide range of difficult-to-trace electrical faults, including injector circuit voltage codes.
- ECM Connectors X1, X2, X3 — The Engine Control Module (ECM) is located in the engine bay, often inside or near the air cleaner assembly.. These multi-pin connectors are the main interface to the ECM. All fuel injector control and supply voltage circuits run through these connectors, making them the primary location for performing definitive continuity and short-to-ground tests to isolate a fault between the ECM and the harness.
- Injector Circuit Numbers (Odd Bank) — Within the engine wiring harness.. TSB PI0631F, which addresses harness chafing on the Impala, lists specific circuit number ranges. The odd injector bank circuits are identified as 'INL-INJ ODD 4801, 4901, 4803, 4903, 4805, 4905' and 'INJ 1, 3, & 5 51, 5291, 2121, 2129, 2123, 2125'. This helps a technician identify the correct wires on a schematic.
OEM Part Supersession History
12632255, 12638530, 12633784→12669384— GM updated the fuel injector part over time. The newest number is the correct service replacement.
Model Year Variations Within This Range
- 2012-2014: The 2012-2014 Chevrolet Impala (including the 2014 'Impala Limited' model) consistently used the 3.6L LFX V6 engine. This means there are no significant variations in engine hardware, injector type, or harness routing within this specific model range that would alter the diagnostic approach for code P2152.
Helpful Videos

We Have This Part in Stock


The information in this article is provided for general reference and educational purposes only. Vehicle specifications, procedures, and part compatibility can vary by production date, trim level, and region. Always consult your vehicle's factory service manual and verify part numbers before purchasing or performing repairs. Safety-critical components such as airbags, seat belts, and braking systems should be installed by a qualified professional.
- Chevrolet IMPALA:
- 🧭 Diagnostic Flowchart
- 🎬 Helpful Videos
- 🛍️ Shop This Part
- What's Unique About the 2012-2014 Chevrolet IMPALA
- Symptoms You May Notice
- Most Likely Causes
- Rare But Worth Checking
- Diagnosis Steps
- Parts You'll Likely Need
- Related Codes That Often Appear With This One
- Technical Service Bulletins (TSBs) & Recalls
- Platform-Specific Known Issues
- Mechanic-Grade Diagnostic Values
- Scan Tool Commands That Help
- Wiring & Ground Locations
- OEM Part Supersession History
- Model Year Variations Within This Range
- 🎟️ Get 5% Off