
P2152 on 2009-2010 Saturn VUE: Fuel Injector Circuit Fault Causes and Fixes
On a 2009-2010 Saturn VUE, code P2152 almost always indicates a damaged fuel injector wiring harness. A known issue, documented in GM Technical Service Bulletin #PIP4924D, involves the harness rubbing through and causing an open circuit. The fix is to inspect the harness for damage, specifically where it passes over the engine, and repair or replace it.
- P2152 on a 2009-2010 Saturn VUE is almost certainly a wiring problem, not a faulty injector.
- Your first and most important step is to thoroughly inspect the fuel injector wiring harness for damage, as outlined in GM TSB #PIP4924D.
- Common chafe points are where the harness touches the intake manifold, engine brackets, or valve covers.
- A 'wiggle test' on the harness while the engine is running is a quick and effective way to confirm an intermittent wiring fault.
- Do not replace the ECM or fuel injectors unless you have definitively ruled out a wiring fault through visual inspection and electrical testing.
- Repairing a damaged wire is an inexpensive fix, but it must be done correctly with sealed connectors to prevent a repeat failure.
What's Unique About the 2009-2010 Saturn VUE
The 2009-2010 Saturn VUE, along with a vast number of other GM vehicles from this era sharing the same engines (2.4L, 3.5L, 3.6L), is highly susceptible to a specific wiring failure. The fuel injector wiring harness is routed in a way that makes it prone to rubbing against engine components. This problem is so well-documented that General Motors issued Technical Service Bulletin #PIP4924D to direct technicians to inspect the harness for this exact issue when P2152 and related codes appear. Common chafe points are against the intake plenum, at valve cover bolts, against a fuel line, or on the side of the cylinder head under the plenum.
Diagnostic Flowchart
Tap your situation to follow the diagnostic path that matches what you're seeing on this vehicle.
Symptoms You May Notice
- Check Engine Light is on
- Engine running rough or vibrating
- Engine misfires, which may feel like a shudder
- Reduced engine power and poor acceleration
- Dashboard message indicating 'Reduced Engine Power'
- Potential for the engine to stall at idle or low speeds.
- Decreased fuel economy.
- Replacing the fuel injectors. This code indicates a problem with the *supply voltage circuit* for a group of injectors, not a failure of an individual injector. Replacing injectors will not fix a wiring problem and is a common unnecessary expense.
- Replacing the Engine Control Module (ECM). An open or shorted wire can mimic the symptoms of a failed ECM. The wiring harness must be proven to be 100% intact before condemning the ECM.
Most Likely Causes
- Chafed or Damaged Fuel Injector Wiring Harness 🔴 High Probability → Shop Engine Wiring Harness As documented in TSB #PIP4924D, the harness routing on this platform makes it vulnerable to rubbing against engine components like the intake manifold, valve cover bolts, or fuel lines, causing wires to break or short. This is the most common cause by a wide margin.
How to confirm: Perform a thorough visual inspection of the fuel injector wiring harness, paying close attention to any points of contact with the engine, especially under the intake plenum. Look for shiny spots, melted plastic loom, or exposed copper wires. A "wiggle test" can be effective: with the engine idling, gently move the harness in suspected areas. If the engine stumble changes or worsens, it confirms a wiring fault.
Typical fix: Repair the broken wire(s) using solder and heat-shrink tubing or a quality butt connector. Protect the repaired area and the rest of the harness with a new plastic wire loom or by re-routing it to prevent future rubbing. If damage is 🎬 See this guide on how to repair a wiring harness. extensive, the harness section may need to be replaced.
Est. part cost: $5-$20 for repair materials, $80-$200 for a new harness section. - Blown Fuse 🟡 Medium Probability A short circuit in the chafed wiring harness can cause the associated fuse to blow as a protective measure.
How to confirm: Locate the underhood fuse block and identify the fuse(s) that supply power to the fuel injectors (often labeled INJ, F/INJ, or similar). Visually inspect the fuse and test it with a multimeter 🎬 Watch: How to locate and replace the fuel injector fuse. for continuity.
Typical fix: Replace the blown fuse. If the new fuse blows immediately, it confirms a persistent short circuit in the wiring that must be found and repaired before proceeding.
Est. part cost: $1-$5 - Faulty Engine Control Module (ECM) ⚪ Low Probability → Shop Engine Control Module (ECM)
How to confirm: This should only be considered after all wiring and fuses have been meticulously tested and confirmed to be in good condition. Diagnosis requires advanced tools to verify the ECM's internal injector driver circuit has failed. This is a rare failure and an unlikely cause.
Typical fix: Replace the ECM. The new unit will require programming to the vehicle's VIN.
Est. part cost: $200-$600
Rare But Worth Checking
- Corrosion in Harness Connector:
Diagnosis Steps
- Read all stored fault codes with an OBD-II scanner. Note any other injector (P02xx, P2149) or misfire (P03xx) codes.
- Carefully inspect the entire fuel injector wiring harness as recommended by TSB #PIP4924D. Look for signs of rubbing, melting, or chafing against the intake plenum, valve cover bolts, fuel lines, and the side of the cylinder head.
- Perform a 'wiggle test' by gently moving the harness with the engine running to see if the idle quality changes, which would pinpoint the fault location.
- Check the fuse for the fuel injector circuits in the underhood fuse block.
- If no visible damage is found, use a multimeter to check for battery voltage at the power supply wire for the affected injector group. A significant voltage drop (more than 0.5V) indicates a problem.
- Use a 'noid' light to test for a pulse signal at the injector connectors of the affected group while cranking the engine. 🎬 Watch: Troubleshooting no-start issues and testing power to injectors. A flashing light indicates the ECM is trying to fire the injector.
- Perform continuity tests on the supply circuit wires from the ECM connector to the injector connectors to find any open circuits.
- If all wiring and fuses are confirmed to be good, the final step is to suspect a faulty ECM injector driver circuit.
Parts You'll Likely Need
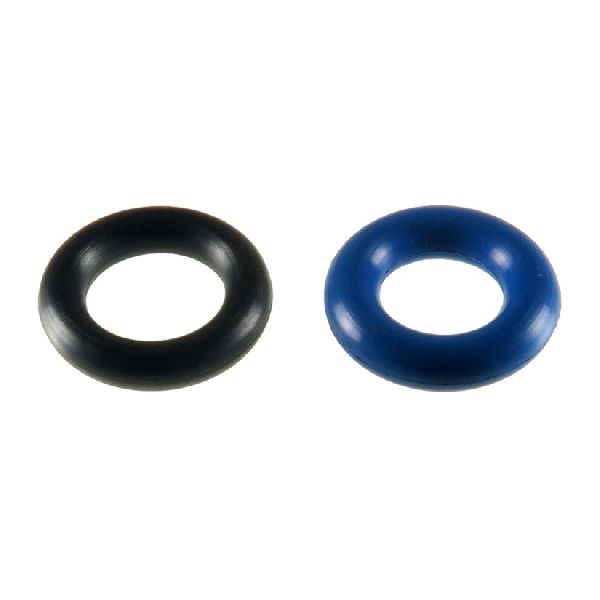
- Fuel Injector Wiring Harness Repair Materials — For repairing the most common cause: a chafed or broken wire in the existing harness.
Trusted brands: 3M, Dorman
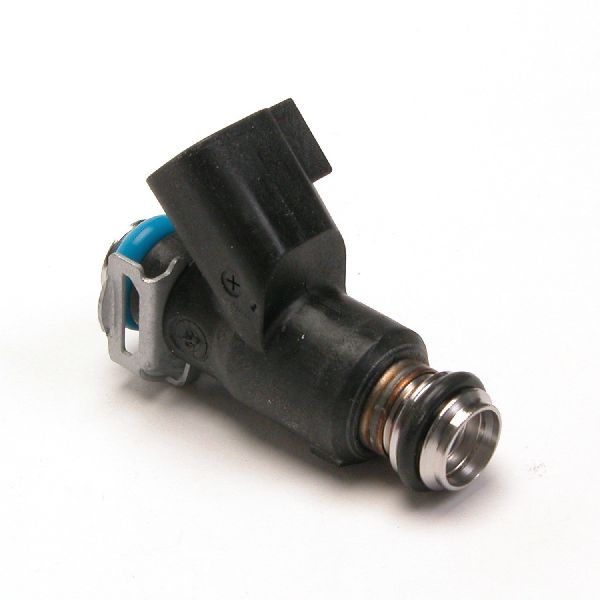
Aftermarket price range: $5-$20 - Fuel Injector Wiring Harness
(OEM #12633784 (for 2.4L engine), 12621096 (for 3.6L V6, Bank 1))— Required if the harness damage is too extensive to repair. Part number is specific to the engine (2.4L, 3.5L, or 3.6L). Always verify with VIN.
Trusted brands: ACDelco, Standard Motor Products
OEM price range: $120-$200
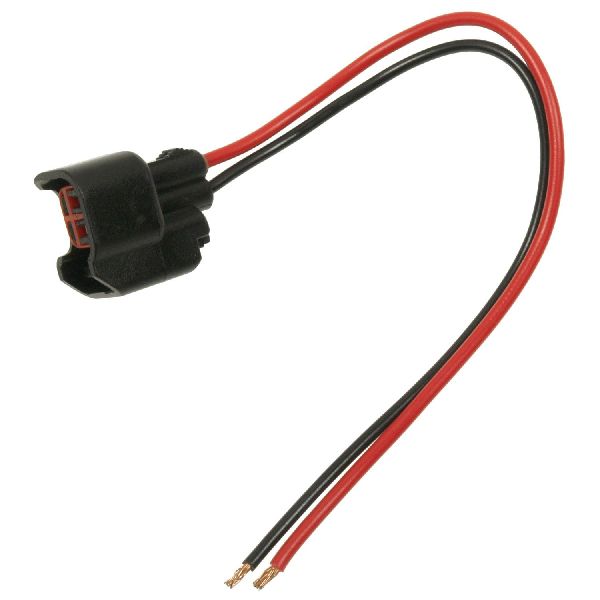
Aftermarket price range: $80-$150 - Fuel Injector Connector Pigtail — If the damage is localized to the connector itself, a pigtail can be spliced in without replacing the whole harness.
Trusted brands: ACDelco, Duralast, GM Genuine Parts
OEM price range: $25-$50
Aftermarket price range: $15-$30
Related Codes That Often Appear With This One
- P2149 — This is the code for the other injector group ('A'). If the harness is damaged, it's common for the wiring for both groups to be affected, triggering both codes simultaneously. This strongly points to a harness issue.
- P0201, P0202, P0203, P0204, P0205, P0206 — These codes correspond to circuit malfunctions for individual injectors. They often appear with P2152, helping to confirm which cylinders are affected by the group voltage supply issue.
- P0300-P0306 — These are cylinder misfire codes (P0300 is random, P0301-P0306 are cylinder-specific). When an injector group loses power, the corresponding cylinders will misfire, triggering these codes.
Technical Service Bulletins (TSBs) & Recalls
- PIP4924D: Instructs technicians to inspect the fuel injector wiring harness for rub-through or internal opens when encountering codes P2146, P2149, P2152, P2155, and various P02xx codes. It lists common chafe points as 'against the intake plenum, at valve cover bolts, against the fuel line and on the side of the head under the plenum'.
Platform-Specific Known Issues
- A Technical Service Bulletin (TSB #PIP4924D) was issued by GM for this vehicle and code. It explicitly states that technicians should inspect the fuel injector wiring harness for rubbing through or internal wire opens before performing other diagnostics.
- A user on DuramaxDiesels.com (discussing a similar GM system) found that a previous improper repair of the injector harness with non-sealed butt connectors led to corrosion and a repeat failure, highlighting the need for quality repair techniques.
Mechanic-Grade Diagnostic Values
- Fuel Injector Resistance — expected: 11-14 Ohms (for high-impedance injectors common on these engines). Failure: A reading significantly outside this range, or OL (Open Line), indicates a failed injector coil. All injectors should have similar resistance values.
- Voltage Drop on Supply Circuit — expected: < 0.5 Volts. Failure: A voltage drop greater than 0.5V between the ECM and the injector connector points to high resistance in the wiring, likely from a chafed wire or corroded connection.
- Low Reference (Ground) Circuit to Chassis Ground — expected: < 5 Ohms. Failure: A reading higher than 5 Ohms indicates a poor ground connection, which can cause erratic behavior in the injector circuits.
Scan Tool Commands That Help
- GM Tech 2 / GDS2: Injector Test / Fuel Injector Balance — This bidirectional control allows a technician to command each fuel injector to fire individually or disable them. For P2152, if the wiring is confirmed good, a technician can use this to see if the injectors in the affected group respond to commands. It can help differentiate between a wiring fault and a driver issue in the ECM.
- GM Tech 2 / GDS2: Output Control > All Injectors Off — This function safely disables all fuel injectors, allowing a technician to check for voltage and continuity on the injector circuits without the engine starting. This is a critical safety and diagnostic step for testing the supply voltage at the injector connectors.
Wiring & Ground Locations
- ECM (Engine Control Module) — For 2.4L engines, it is located on the left rear of the engine compartment. For V6 engines (3.5L, 3.6L), it is in the left front of the engine compartment.. This is the source of the injector control signals and where the fault code originates. All circuit testing ultimately traces back to the ECM connectors (often labeled X1 and X2).
- G106 — On the engine, at the left front top corner.. This is a primary engine and ECM ground. A loose or corroded connection here can cause unstable sensor readings and erratic behavior from the entire engine management system, potentially leading to false codes or contributing to voltage issues.
- G107 — At the rear of the engine.. Another critical engine-to-chassis ground. Given that the injector harness often chafes near the rear of the engine, checking the integrity of this ground is a crucial step if wiring issues are suspected.
- ECM Connectors X1 & X2 — Plugged into the Engine Control Module.. These are the main connectors where the injector circuits originate. A technician would back-probe pins at these connectors to test for voltage and continuity directly from the ECM, confirming if the signal is leaving the module correctly.
Real Owner Repair Stories
- DuramaxDiesels.com user 'N2BRK' (GM Truck (similar injector group design)) — Check Engine Light with code P2152 immediately after washing the engine.
❌ Tried (didn't work) Initially, the problem was intermittent. Replacing the injector connector pigtail did not immediately solve the issue.
✅ What actually fixed it The user disconnected the main multi-pin harness connector, tested continuity (which was good), and then reconnected it. After plugging everything back together, the fault disappeared. The likely cause was water intrusion into one of the main connectors that was resolved by disconnecting and reconnecting it, displacing the moisture.
Model Year Variations Within This Range
- 2009-2010: The location of the Engine Control Module (ECM) differs by engine. On the 2.4L I4 engine, the ECM is at the left rear of the engine compartment. On the 3.5L and 3.6L V6 engines, the ECM is at the left front of the engine compartment.
Helpful Videos

We Have This Part in Stock


The information in this article is provided for general reference and educational purposes only. Vehicle specifications, procedures, and part compatibility can vary by production date, trim level, and region. Always consult your vehicle's factory service manual and verify part numbers before purchasing or performing repairs. Safety-critical components such as airbags, seat belts, and braking systems should be installed by a qualified professional.
- Saturn VUE:
- 🧭 Diagnostic Flowchart
- 🎬 Helpful Videos
- 🛍️ Shop This Part
- What's Unique About the 2009-2010 Saturn VUE
- Symptoms You May Notice
- Most Likely Causes
- Rare But Worth Checking
- Diagnosis Steps
- Parts You'll Likely Need
- Related Codes That Often Appear With This One
- Technical Service Bulletins (TSBs) & Recalls
- Platform-Specific Known Issues
- Mechanic-Grade Diagnostic Values
- Scan Tool Commands That Help
- Wiring & Ground Locations
- Real Owner Repair Stories
- Model Year Variations Within This Range
- 🎟️ Get 5% Off