
P2196 on 2008-2013 Toyota Highlander 3.5L: Causes for Stuck Rich Signal
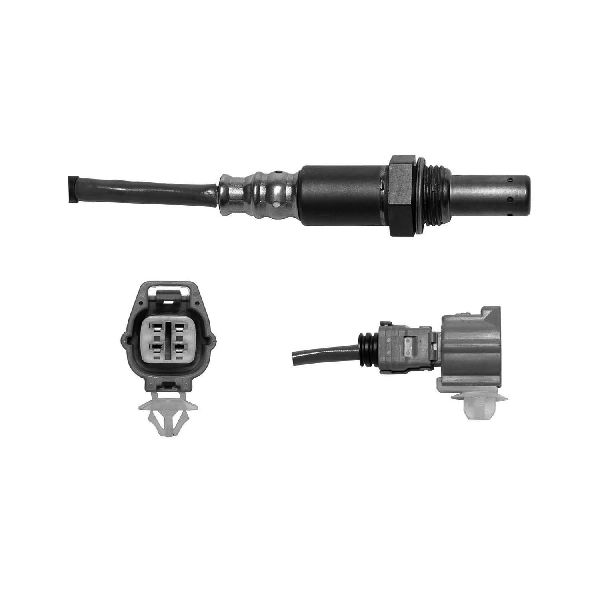
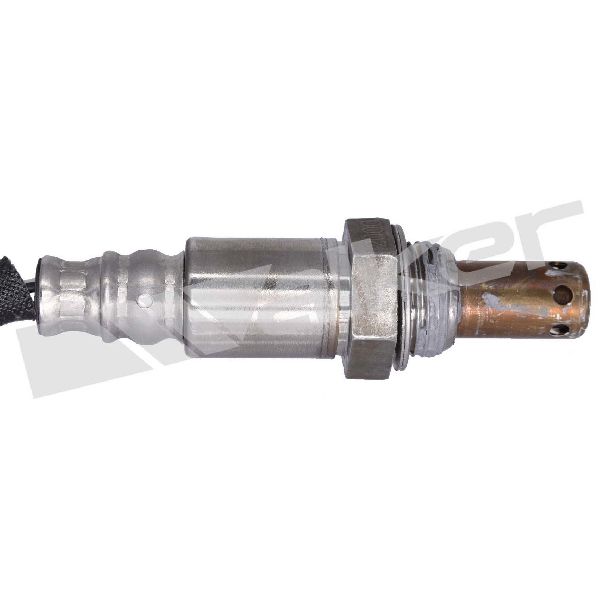
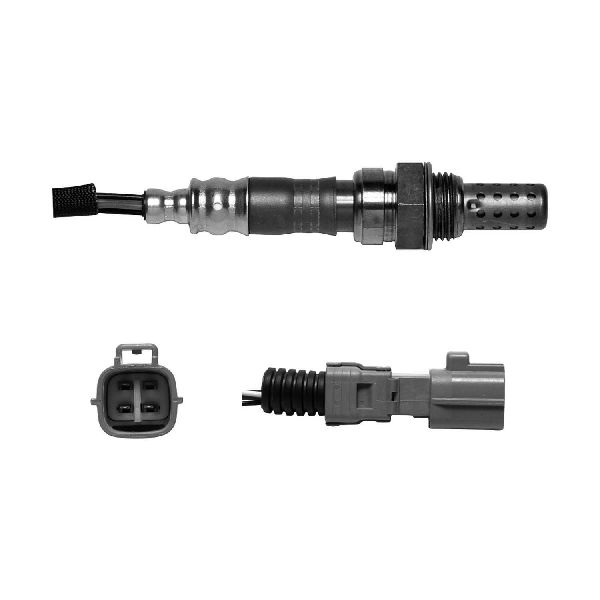
Code P2196 on a 2008-2013 Highlander 3.5L usually means the Bank 1, Sensor 1 Air/Fuel Ratio sensor has failed and is stuck reporting a rich condition. Replacing this sensor, located on the firewall side of the engine, is the most common fix. Expect to pay $100-$200 for an OEM Denso sensor (Part No. 234-9041). Before replacing, rule out less common causes like vacuum leaks or fuel system issues.
- P2196 means the Bank 1 (firewall side) upstream Air/Fuel Ratio sensor is stuck reporting a rich fuel mixture.
- The most common fix is to replace the Bank 1, Sensor 1 A/F sensor. Using an OEM brand like Denso (Part No. 234-9041) is highly recommended.
- Before replacing the sensor, it's wise to rule out other causes like a stuck-open EVAP purge valve, exhaust leaks near the manifold, or fuel pressure issues, though these are less common.
- Accessing this sensor is tight; it may require removing the engine air filter box for better reach.
- Ignoring this code will lead to poor fuel economy and can cause expensive damage to the catalytic converter over time.
- Owners of this vehicle should be aware of other major platform issues, especially the rupturing VVT-i oil line on earlier models, which can cause sudden engine failure.
What's Unique About the 2008-2013 Toyota Highlander
The 2GR-FE engine in the Highlander uses a wideband Air/Fuel Ratio (A/F) sensor for the upstream sensor (Sensor 1), which provides more precise data than a conventional O2 sensor. While the code definition is standard, the diagnosis can sometimes be complicated by the location of Bank 1 against the firewall, making access to the sensor and its wiring more difficult than for Bank 2, which is at the front of the vehicle.
Symptoms You May Notice
- Check Engine Light is on
- Reduced fuel economy, often by 2-5 MPG
- Rough or uneven idle, sometimes described as a 'chuggy' sound
- Engine hesitation or loss of power
- Excessive black smoke from the exhaust
- A smell of gasoline from the exhaust
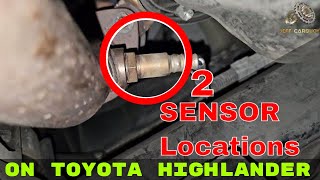
- Replacing the wrong sensor (e.g., the downstream Sensor 2, or the sensor on Bank 2 instead of Bank 1). 🎬 Watch this video to locate all four O2 sensors on your Highlander.
- Replacing the Mass Airflow (MAF) sensor without evidence it is faulty. While a dirty MAF can cause issues, it usually affects both banks and may set other codes.
Most Likely Causes
- Failed Air/Fuel Ratio Sensor (Bank 1, Sensor 1) 🔴 High Probability → Shop Oxygen Sensor A/F sensors are wear items that degrade over time and with mileage. Their constant exposure to extreme exhaust temperatures eventually causes them to fail.
How to confirm: Use an OBD-II scanner to monitor the live data for the Bank 1, Sensor 1 voltage or current. A healthy sensor's reading will fluctuate rapidly. If the voltage is stuck high (typically above 0.8V for a traditional O2 sensor, or showing a constant rich reading for an A/F sensor), it confirms the sensor is biased rich.
Typical fix: Replace the Bank 1, Sensor 1 Air/Fuel Ratio sensor. On the 3.5L V6, Bank 1 is the rear bank, near the firewall. 🎬 Watch this step-by-step Bank 1 Sensor 1 replacement guide. The OEM part is made by Denso.
Est. part cost: $100-$200 - Leaking Fuel Injector(s) on Bank 1 🟡 Medium Probability → Shop Fuel Injector
How to confirm: This is more complex. A mechanic can perform a fuel pressure leak-down test or use specialized equipment to test the injectors. A DIY method is to pull the spark plugs on Bank 1 (cylinders 1, 3, 5) and check for black, sooty deposits, which indicate a rich condition in that specific cylinder. A Blackstone oil analysis may also show elevated fuel levels in the oil.
Typical fix: Replace the faulty fuel injector(s). It is often recommended to replace all three on that bank as a set.
Est. part cost: $50-$150 per injector - Stuck Open EVAP Purge Valve ⚪ Low Probability → Shop Vapor Canister While very common on some other brands like Ford, a stuck-open purge valve can still occur on Toyotas, allowing unmetered fuel vapors from the charcoal canister to enter the intake manifold, creating a rich condition.
How to confirm: With the engine off, disconnect the vapor line from the purge valve solenoid. Attempt to blow through the valve; if air passes through, the valve is stuck open and must be replaced. It should be normally closed.
Typical fix: Replace the EVAP purge valve solenoid.
Est. part cost: $30-$80 - High Fuel Pressure ⚪ Low Probability
How to confirm: Connect a fuel pressure gauge to the fuel rail and check the pressure against the manufacturer's specifications. If the pressure is too high, the regulator is likely at fault.
Typical fix: Replace the fuel pressure regulator.
Est. part cost: $40-$100 - Exhaust Leak Before the A/F Sensor ⚪ Low Probability
How to confirm: Visually inspect the exhaust manifold on Bank 1 for cracks or loose bolts. Listen for ticking or puffing sounds from the engine bay, especially when the engine is cold. An exhaust leak before the sensor can sometimes draw in oxygen and paradoxically cause the ECU to over-enrich the mixture, although it more commonly causes a lean code.
Typical fix: Repair the exhaust leak. This may involve replacing a gasket or the exhaust manifold itself.
Est. part cost: $20-$500+
Rare But Worth Checking
- Faulty Engine Control Module (ECM): → Shop Engine Control Module (ECM) This is extremely rare. All other possibilities, including wiring issues, should be exhausted before considering ECM replacement. An internal failure in the PCM's analog-to-digital converter could theoretically cause a false rich reading.
- Wiring Harness Issue: A short or open in the wiring between the A/F sensor and the ECM can mimic a failed sensor. Inspect the harness for damage, especially where it might be exposed to heat or chafing near the exhaust or engine block. Pay close attention to the connector for corrosion or loose pins.
Diagnosis Steps
- Connect an OBD-II scanner and confirm P2196 is the active code. Check for any other codes, as they can provide critical clues (e.g., misfire or MAF codes).
- Review freeze frame data to see the engine conditions when the code was set.
- Monitor live data for the Bank 1 Sensor 1 (A/F Sensor). A healthy sensor's reading should fluctuate. If it's stuck on a rich reading, the sensor is likely faulty or there is a true rich condition.
- If the sensor appears stuck, the next step is to determine if it's a bad sensor or a real rich condition.
- Inspect the spark plugs on Bank 1 (rear bank, cylinders 1, 3, 5). Black, sooty plugs are a strong indicator of a true rich condition, possibly from a leaking injector.
- Test the EVAP purge valve to ensure it is not stuck open, allowing excess fuel vapors into the intake.
- Inspect the Bank 1 exhaust manifold (firewall side) for any signs of an exhaust leak before the sensor.
- Check for vacuum leaks, although this typically causes a lean code, a large unmetered air leak can sometimes confuse the system.
- If no leaks are found, test the fuel pressure to ensure it is within specification.
- If fuel pressure is normal and spark plugs do not indicate a severe rich condition, the most likely cause is a faulty A/F sensor.
- If replacing the sensor does not fix the issue, further diagnosis of the fuel injectors and wiring harness is required. 🎬 See these quick DIY methods to diagnose and fix a P2196 code.
Parts You'll Likely Need
- Air/Fuel Ratio Sensor (Bank 1, Sensor 1)
(OEM #89467-0E010)— This is the sensor that reports the rich condition. It is a common wear item and the most frequent cause of the P2196 code.
Trusted brands: Denso (OEM Manufacturer, Part No. 234-9041)
OEM price range: $150-$220
Aftermarket price range: $100-$180
Related Codes That Often Appear With This One
- P0172 — System Too Rich (Bank 1). This is a more general code indicating a rich condition on Bank 1, which P2196 specifically attributes to the sensor signal itself being stuck.
- P0301, P0303, P0305 — Cylinder Misfire Detected on Bank 1 cylinders. A leaking fuel injector can cause both a rich condition and misfires on the affected cylinders.
Technical Service Bulletins (TSBs) & Recalls
- T-SB-0034-13: Addresses a clunking or popping noise from the steering system by replacing the intermediate steering shaft.
- Warranty Enhancement Program ZE6: An expired program that addressed melting and sticky dashboards due to heat and humidity.
- LSC 90K: An expired Limited Service Campaign to replace the original rubber-and-metal VVT-i oil line with an all-metal version to prevent catastrophic oil leaks.
Platform-Specific Known Issues
- Long-Term Diagnostic Challenge: An owner on Reddit detailed a persistent P2196 issue where clearing the code would result in the fuel trims slowly creeping back to their limits over time. Despite checking for vacuum leaks and confirming fuel pressure was within spec (550-600 psi at idle), the issue remained, with an oil analysis showing slightly elevated fuel content. This highlights that subtle issues, potentially with injectors or even piston ring sealing, can cause this code and be difficult to pinpoint.
Mechanic-Grade Diagnostic Values
- A/F Sensor Heater Resistance — expected: 1.8 to 3.4 Ω at 20°C (68°F). Failure: Resistance outside this range indicates a faulty heater element in the sensor.
- A/F Sensor Isolation Resistance — expected: 10 kΩ or higher. Failure: Resistance lower than 10 kΩ indicates a short within the sensor.
- A/F Sensor Live Data Voltage (at 2,500 RPM) — expected: Centers around 3.3V (Stoichiometric). Failure: Voltage stuck significantly lower than 3.3V (e.g., <2.8V) indicates a persistent rich reading.
- A/F Sensor Voltage (Dynamic Response) — expected: Voltage drops below 2.8V on hard acceleration (enrichment) and rises above 4.0V on deceleration fuel-cut (lean).. Failure: Failure to respond dynamically to changing engine loads suggests a lazy or failed sensor.
- Harness-Side KOEO Voltage Check (Sensor Unplugged) — expected: 3.0V on the AF1- wire and 3.3V on the AF1+ wire.. Failure: Absence of these voltages points to a problem in the wiring harness or the ECM itself, not the sensor.
- Techstream Short-Term A/F Trim (AF FT B1 S1) — expected: Centered around 1.000. Failure: A value consistently greater than 1.000 indicates the system is seeing a rich condition.
Hidden / Shadow Codes Worth Checking
- Mode 6 Data: Mode 6 provides access to non-continuous monitor test results. While specific Test IDs ($) and Component IDs ($) for P2196 are not detailed in the search results, a technician can use a capable scanner to view the raw data for the A/F sensor monitors to see if they are passing or failing their internal tests, which can provide clues before a DTC is set. (see via Advanced OBD-II scanner or Toyota Techstream with Mode 6 functionality.)
Scan Tool Commands That Help
- Toyota Techstream: Active Test: A/F Control — Use this to manually command a richer (+25%) or leaner (-12.5%) fuel mixture. Observing the A/F sensor's voltage response on the live data screen can definitively prove if the sensor is responsive or truly stuck. If the voltage changes as commanded, the sensor is likely good and the issue is a real fuel control problem.
- Toyota Techstream: Data List Monitoring — Monitor PIDs 'A/FS B1 S1' (voltage), 'AF FT B1 S1' (equivalence ratio), and 'AFS B1 S1' (current in mA). This allows for a comprehensive view of what the sensor is reporting to the ECM in real-time.
- Toyota Techstream: Registration (VIN Registration) — This function is required after replacing the Engine Control Module (ECM) to program the vehicle's VIN into the new module.
Wiring & Ground Locations
- ECM Connector C55 (Bank 1 Sensor 1 Pins) — At the Engine Control Module (ECM).. These specific pins are the direct connection between the ECM and the Bank 1 A/F sensor. Testing for continuity, shorts, and correct voltage at these pins is the final step in diagnosing a wiring harness or ECM fault after the sensor itself has been ruled out.
- Pin 86 (HA1A) - Heater Control — ECM Connector C55. This is the control circuit for the sensor's internal heater.
- Pin 93 (+B) - Heater Power — ECM Connector C55. This pin supplies power to the sensor's heater element.
- Pin 94 (A1A+) - Sensor Signal — ECM Connector C55. This is one of the two primary signal wires from the A/F sensor.
- Pin 116 (A1A-) - Sensor Signal — ECM Connector C55. This is the second of the two primary signal wires from the A/F sensor.
Diagnostic Flowchart
Other Known Issues on This Vehicle
Issues unrelated to this code that are worth knowing about as an owner of this generation:
- Rupturing VVT-i Oil Line (Rubber Section) 🔴 High — Common on 2GR-FE engines from approx. 2005-2010. The original rubber/metal hybrid line degrades and can burst, causing rapid, catastrophic oil loss and engine seizure. Owners should verify the updated all-metal line (Part No. 15772-31030) has been installed. (Ref: Toyota issued a Limited Service Campaign (LSC 90K) which has since expired.)
- Timing Cover Oil Leak 🟠 Medium — A well-documented issue where the Formed-in-Place Gasket (FIPG) sealant at the timing cover seams degrades, causing a persistent oil seep. The leak is typically slow but the repair is very labor-intensive and expensive.
- Melting / Sticky Dashboard 🟡 Low — Common in regions with high heat and humidity. The dashboard material can degrade, becoming sticky, shiny, and prone to cracking, which can cause a distracting glare on the windshield. (Ref: Toyota issued a Warranty Enhancement Program (ZE6) to cover replacements, though availability of parts was an issue.)
- Intermediate Steering Shaft Clunk/Noise 🟡 Low — A clunking or popping noise may be heard when turning the steering wheel. It is caused by a fault in the intermediate steering shaft. (Ref: T-SB-0034-13 details the diagnosis and replacement with an updated part (45220-48171).)
Used vs. New Parts: Buying Guide for This Vehicle
When a used part is the smart pick: For this repair, a used part is generally not recommended for the Air/Fuel sensor itself, as it is a critical wear item. A used wiring harness pigtail or a tested fuel pressure regulator from a low-mileage donor vehicle could be a cost-effective option if those parts are identified as the fault.
Donor-vehicle mileage cap: roughly under 80000 miles for the part to have meaningful remaining life.
What to inspect on the donor part:
- For any used electronic part, inspect connectors for corrosion, bent pins, or brittle plastic.
- Check wiring harnesses for signs of cracking insulation, previous repairs (tape, butt connectors), or heat damage.
- Avoid parts from vehicles with signs of flood or fire damage.
OEM-only on this vehicle (don't cheap out):
- Air/Fuel Ratio Sensor: While not strictly 'OEM-only', using the OEM manufacturer (Denso) is strongly advised. The ECM is calibrated for the specific performance characteristics of the Denso sensor, and aftermarket versions can cause persistent fuel trim issues even if they don't set a code.
Aftermarket brands forum-validated for this vehicle:
- Denso (OEM manufacturer)
- NTK
Brands owners have reported issues with on this vehicle:
- Unbranded, 'white-box' sensors from online marketplaces. These often lack the precise calibration and durability required by the Toyota A/F system, leading to a repeat failure.
Real Owner Stories
Aggregated from forums and TSBs cited above. Mileages and costs reflect what owners reported in those sources.
2008-2013 Toyota Highlander 3.5L V6
Symptoms: The owner experienced a persistent P2196 code where fuel trims would slowly creep back to their limits over time after being cleared. An oil analysis showed slightly elevated fuel content in the oil.
What fixed it: The issue was noted as a long-term diagnostic challenge involving potential subtle injector issues or piston ring sealing, as vacuum leaks and fuel pressure (550-600 psi) were within spec.
Source hint: https://www.reddit.com/r/MechanicAdvice/comments/1d7x0b0/airfuel_mixture_slowly_becomes_rich_again_after/
Related OBD-II Codes
Frequently Asked Questions
Where is the Bank 1 Sensor 1 located on my 3.5L V6 Highlander?
Does TSB-0034-13 relate to my P2196 rich condition code?
Is there a specific brand of Air/Fuel Ratio sensor recommended for the Highlander?
Can a faulty VVT-i oil line cause a P2196 code?
How can I tell if my P2196 is a bad sensor or a leaking fuel injector without a shop scanner?
Could my Highlander's sticky dashboard be related to this engine code?
Helpful Videos

![How to Fix P2196 Engine Code in 5 Minutes [4 DIY Methods / Only $8.78]](https://img.youtube.com/vi/W3ae9oujFXA/mqdefault.jpg)
We Have This Part in Stock


The information in this article is provided for general reference and educational purposes only. Vehicle specifications, procedures, and part compatibility can vary by production date, trim level, and region. Always consult your vehicle's factory service manual and verify part numbers before purchasing or performing repairs. Safety-critical components such as airbags, seat belts, and braking systems should be installed by a qualified professional.
- Toyota Highlander:
- 🧭 Diagnostic Flowchart
- 🎬 Helpful Videos
- 🛍️ Shop This Part
- What's Unique About the 2008-2013 Toyota Highlander
- Symptoms You May Notice
- Most Likely Causes
- Rare But Worth Checking
- Diagnosis Steps
- Parts You'll Likely Need
- Related Codes That Often Appear With This One
- Technical Service Bulletins (TSBs) & Recalls
- Platform-Specific Known Issues
- Mechanic-Grade Diagnostic Values
- Hidden / Shadow Codes Worth Checking
- Scan Tool Commands That Help
- Wiring & Ground Locations
- Other Known Issues on This Vehicle
- Used vs. New Parts: Buying Guide for This Vehicle
- Real Owner Stories
- 2008-2013 Toyota Highlander 3.5L V6
- Related OBD-II Codes
- Frequently Asked Questions
- 🎟️ Get 5% Off