
P2406 on 2010-2015 Jaguar XJ: EVAP Pump Circuit High Causes and Fixes
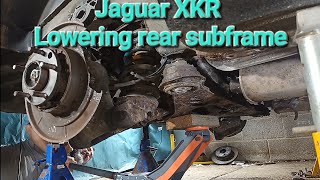
Code P2406 on a 2010-2015 Jaguar XJ is almost always caused by water or ice getting into the evaporative system's leak detection pump or its wiring, a known issue covered by manufacturer TSB JTB00436NAS2. The official fix involves replacing the pump/canister assembly, the fuel tank filler pipe, and installing a protective foam shield to prevent recurrence. It is a very labor-intensive job with dealer costs reported around $2,650 due to the need to drop the rear sub-frame for access.
- P2406 on a 2010-2015 Jaguar XJ is almost certainly caused by water intrusion into the EVAP system's DMTL pump, as detailed in TSB JTB00436NAS2.
- The Check Engine Light will be on, and the vehicle will not pass an emissions test until this is fixed.
- The correct fix is not just replacing the pump, but also installing a protective shield as specified by Jaguar to prevent the problem from recurring.
- Due to the location of the components, the repair is labor-intensive and can be expensive, often requiring the rear sub-frame to be lowered for access.
What's Unique About the 2010-2015 Jaguar XJ
The 2010-2015 Jaguar XJ (X351 generation) is uniquely susceptible to this code due to a specific design vulnerability. Jaguar identified that water and ice from road spray can become trapped in the DMTL pump's filter, leading to corrosion and electrical faults. This is not a generic component failure but a platform-specific issue that prompted Jaguar to issue a Technical Service Bulletin (TSB). The TSB outlines a dedicated fix involving new parts, including a redesigned fuel filler pipe to prevent collapse under vacuum, and added protection.
Diagnostic Flowchart
Tap your situation to follow the diagnostic path that matches what you're seeing on this vehicle.
Symptoms You May Notice
- Check Engine Light is illuminated.
- Difficulty refueling where the fuel dispenser nozzle clicks off repeatedly.
- A faint fuel smell may be noticeable in rare instances.
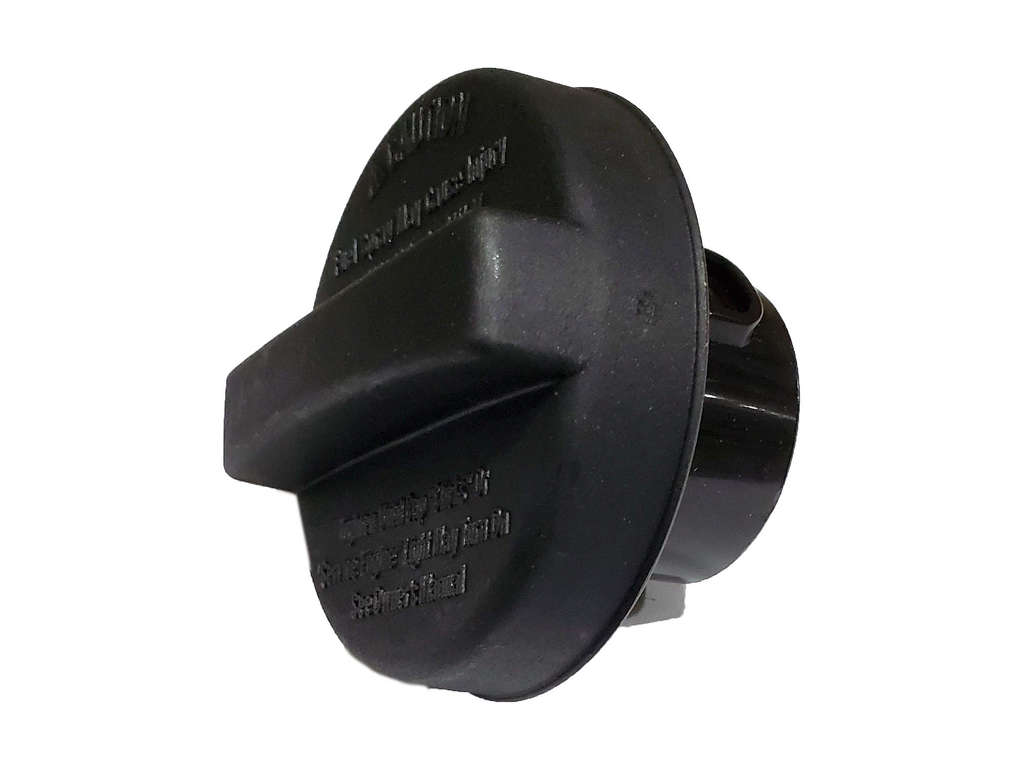
- Replacing the gas cap. A loose or faulty gas cap typically causes a large leak code (like P0455), not a circuit-specific code like P2406.
Most Likely Causes
- Water/Ice Intrusion in DMTL Pump Filter 🔴 High Probability → Shop Evaporative Emissions System Leak Detection Pump As documented in Jaguar TSB JTB00436NAS2, the DMTL pump assembly is located in an area where it is exposed to water spray from the tires, leading to water or ice getting trapped in the filter, causing corrosion and circuit faults.
How to confirm: Visually inspect the DMTL pump and its electrical connector, located near the charcoal canister in the rear of the vehicle, for signs of water damage, corrosion, or ice. This requires lifting the vehicle and is difficult due to the component's location above the sub-frame.
Typical fix: Follow the procedure in TSB JTB00436NAS2, which involves replacing the evaporative emission canister (with integrated pump), the fuel tank filler pipe, and installing a new protective foam shield to prevent future water ingress. Skipping the foam shield can lead to a repeat failure.
Est. part cost: $650-$800 for the canister assembly and related parts. - Failed Leak Detection Pump (DMTL) 🟡 Medium Probability → Shop Evaporative Emissions System Leak Detection Pump The pump can fail internally from the aforementioned water damage or simply due to age and wear. The internal sensor can short, sending a constant high voltage signal.
How to confirm: After confirming the wiring is intact and free of corrosion, test the pump's circuit with a multimeter. If the circuit is good, the pump itself is likely faulty. However, due to the extreme difficulty in accessing the pump, it is almost always replaced along with the canister as per the TSB.
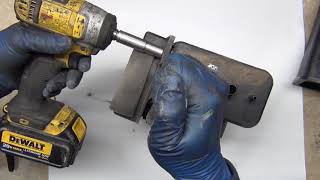
Typical fix: Replace the DMTL pump. On the X351 XJ, the pump is integrated with the charcoal canister and sold as a single assembly (C2D40532). 🎬 Watch: A helpful walkthrough of the evap canister replacement process.
Est. part cost: $160-$690 depending on whether the pump is available separately or as part of the canister assembly. - Damaged Wiring or Connector ⚪ Low Probability The wiring harness is exposed to the elements underneath the car, but a wiring failure is less common than the pump failure from direct water ingress.
How to confirm: Perform a visual inspection of the wiring harness leading to the DMTL pump for any signs of chafing, breaks, or corrosion. Test for continuity and proper voltage at the connector using a multimeter. Some owners of related JLR vehicles have fixed similar codes by simply cleaning the connector and applying dielectric grease.
Typical fix: Repair the damaged section of the wiring harness or replace the corroded electrical connector.
Est. part cost: $10-$50 for wiring repair supplies.
Rare But Worth Checking
- Faulty Powertrain Control Module (PCM): This is extremely rare. The PCM should only be considered after all other possibilities, including the pump, wiring, and TSB-related issues, have been thoroughly ruled out.
Diagnosis Steps
- Scan the vehicle for all stored DTCs to see if other related EVAP codes are present, such as P2402 or P240C.
- Review TSB JTB00436NAS2 to understand the specific issue related to water ingress and the required parts.
- Raise and safely support the vehicle on a lift.
- Locate the DMTL pump and charcoal canister assembly. It is mounted above the rear sub-frame, making access extremely difficult.
- If access is possible, visually inspect the pump, its filter, and the electrical connector for any signs of water, ice, or corrosion.
- If water damage is evident, the components will need to be replaced as per the TSB. This is the most common scenario.
- If no water damage is visible, inspect the wiring harness for chafing, breaks, or loose pins. Test for correct voltage and ground at the DMTL pump connector according to the vehicle's service manual.
- Given the high labor cost, the standard professional procedure is to assume the TSB applies and replace the canister/pump, filler pipe, and add the foam shield if codes like P2406 are present.
- After the repair, clear the DTCs using a compatible scan tool like the Jaguar SDD system.
Parts You'll Likely Need
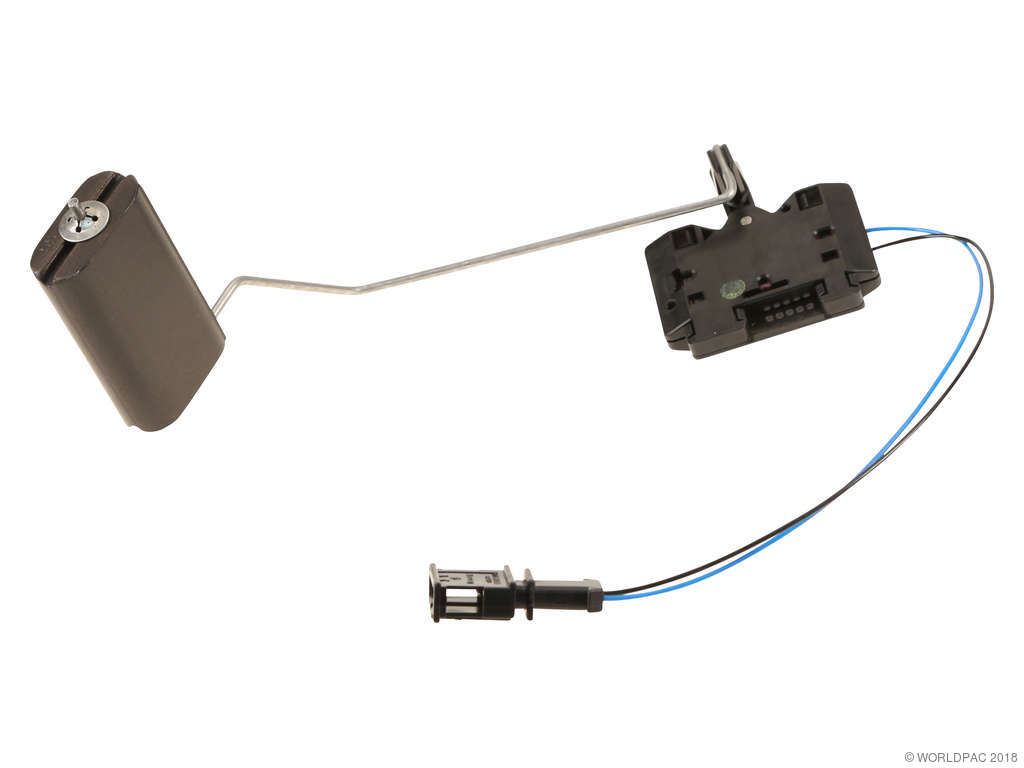
- Evaporative Emission Canister / Leak Detection Pump Assembly
(OEM #C2D40532)— This is the primary part identified in the TSB to fix the water intrusion issue. The pump is integrated with the canister and must be replaced as a unit. This part supersedes C2C26576, C2C35068, and C2C39518.
Trusted brands: Bosch, Jaguar (OEM)
OEM price range: $610-$691
Aftermarket price range: $160-$400 - Protective Foam
(OEM #C2D49253)— This is a required part for the TSB repair to shield the new canister assembly from future water spray. Omitting this part can lead to a repeat failure.
Trusted brands: Jaguar (OEM)
OEM price range: $20-$40 - Fuel Tank Filler Pipe
(OEM #C2D30506)— Also required by TSB JTB00436NAS2. The original pipe may be prone to collapsing under vacuum created by the EVAP system, which can contribute to refueling issues.
Trusted brands: Jaguar (OEM)
OEM price range: $50-$80
Related Codes That Often Appear With This One
- P043E — These codes are part of the same family of EVAP system faults listed in TSB JTB00436NAS2, all pointing to the water intrusion issue.
- P2402 — These codes are part of the same family of EVAP system faults listed in TSB JTB00436NAS2, all pointing to the water intrusion issue.
- P240C — These codes are part of the same family of EVAP system faults listed in TSB JTB00436NAS2, all pointing to the water intrusion issue.
Technical Service Bulletins (TSBs) & Recalls
- JTB00436NAS2: States that multiple EVAP codes, including P2406, may be caused by water/ice from road tires becoming trapped in the DMTL pump filter. The fix involves replacing the canister/pump, fuel filler pipe, and adding a protective foam shield.
Platform-Specific Known Issues
- A known design flaw allows water and debris from the road tires to enter the DMTL pump filter, causing corrosion and electrical faults. This was addressed by Jaguar in Technical Service Bulletin JTB00436NAS2.
- Repairing this issue is very labor-intensive, as dealers and independent shops must drop the entire rear sub-frame to gain access, leading to high labor costs often exceeding $2,000.
- A forum user reported a repeat failure of the DMTL pump because the dealership that performed the initial repair failed to install the inexpensive protective foam shield (C2D49253), underscoring the importance of completing the full TSB procedure.
Mechanic-Grade Diagnostic Values
- DMTL Major Leak Check Conditions — expected: The automatic test runs only when all conditions are met: Fuel tank level between 15-85%, ambient temperature between 0-40°C (32-104°F), battery voltage between 10-15V, and engine off for more than 180 minutes, among others.. Failure: If these conditions are not met, the system will not perform its self-test. A technician can use JLR SDD to force the test.
Hidden / Shadow Codes Worth Checking
- P240C-85: This is an example of a sub-code listed in the TSB. While the specific meaning of '-85' is not documented in public sources, Jaguar uses these suffixes to denote specific fault types (e.g., signal implausible, component internal failure). A code ending in '-00' indicates no additional fault data is available. (see via Jaguar SDD or a compatible advanced diagnostic scanner.)
Scan Tool Commands That Help
- Jaguar SDD (Symptom Driven Diagnostics): EVAP System Leak Test / Manual Pump Actuation — This function is used to manually command the DMTL pump to operate, allowing a technician to test the circuit and system integrity without having to wait for the vehicle's automatic test cycle conditions to be met. It is essential for verifying a repair has been successful.
Wiring & Ground Locations
- DMTL Pump Connector & Grounds — The DMTL pump is located above the rear sub-frame. Detailed connector pinouts, harness routing, and ground point locations (e.g., G-prefix points) for the XJ are available in the official Electrical Wiring Diagrams and Connector Reference Guides.. Technicians can find official diagrams and ground locations on sites like JagRepair.com or by accessing JLR's official service literature (TOPIx). This is critical for tracing the 'Circuit High' fault, which could be a short to power or a bad ground connection in the harness.
Real Owner Repair Stories
- JaguarForums.com user (2011 Jaguar XJL 5.0 V8 RWD) — Persistent P2406 code.
❌ Tried (didn't work) Replaced only the leak detection pump and its corroded connector; code returned., A repair shop diagnosed and replaced the canister purge valve with an OEM part; code returned.
✅ What actually fixed it The owner was still in the process of diagnosing but the next step was to replace the entire charcoal canister assembly with the integrated pump, as recommended by the TSB. This story highlights that piecemeal replacement of related components is often ineffective, and the comprehensive TSB procedure is usually required.
OEM Part Supersession History
Various→C2D40532— The canister/pump assembly has been updated by Jaguar. C2D40532 is the latest known part number, superseding C2C26576, C2C35068, and C2C39518.
Heads up: The commonly available aftermarket Bosch pump 0261222019, while visually similar, is primarily listed for Volvo vehicles (cross-referencing Volvo PN 30774518). It is not a confirmed direct replacement for the Jaguar assembly and may not be compatible.
Model Year Variations Within This Range
- 2013-2015: All models from 2013 onwards received an 8-speed automatic transmission, replacing the previous 6-speed. This does not affect the P2406 fault.
- 2014-2015: Minor exterior styling tweaks and the addition of an engine start/stop function occurred in 2014, with a more significant facelift for 2015 models (new lights, updated infotainment). These changes are not known to have altered the EVAP system design or the root cause of code P2406.
Helpful Videos
We Have This Part in Stock


The information in this article is provided for general reference and educational purposes only. Vehicle specifications, procedures, and part compatibility can vary by production date, trim level, and region. Always consult your vehicle's factory service manual and verify part numbers before purchasing or performing repairs. Safety-critical components such as airbags, seat belts, and braking systems should be installed by a qualified professional.
- Jaguar XJ:
- 🧭 Diagnostic Flowchart
- 🎬 Helpful Videos
- 🛍️ Shop This Part
- What's Unique About the 2010-2015 Jaguar XJ
- Symptoms You May Notice
- Most Likely Causes
- Rare But Worth Checking
- Diagnosis Steps
- Parts You'll Likely Need
- Related Codes That Often Appear With This One
- Technical Service Bulletins (TSBs) & Recalls
- Platform-Specific Known Issues
- Mechanic-Grade Diagnostic Values
- Hidden / Shadow Codes Worth Checking
- Scan Tool Commands That Help
- Wiring & Ground Locations
- Real Owner Repair Stories
- OEM Part Supersession History
- Model Year Variations Within This Range
- 🎟️ Get 5% Off