
OBD-II Code P2504: Charging System Voltage High
What P2504 means, why it triggers, and how to fix it
- Check for Technical Service Bulletins (TSBs) first; a simple PCM software update fixes P2504 on most 2014+ Ram and 2023+ Jeep models.
- Do not drive with a P2504 code; sustained voltage above 15.0V boils battery acid and destroys control modules, turning a $200 repair into a $2,000 disaster.
- If software is up-to-date, a failing internal voltage regulator inside the alternator is the primary hardware culprit.
- Ignore secondary high-voltage codes for O2 sensors or other components until you fix the P2504 overcharging condition.
- Never replace the battery without testing the alternator; an overcharging alternator destroys a brand-new battery within days.
What Does P2504 Mean?
Your car's Powertrain Control Module (PCM) detects the charging system is producing excessive voltage. The charging system normally operates between 13.5 and 14.8 volts. When voltage exceeds 15 volts for a set period, the PCM stores the P2504 code.
Technical definition: The SAE/ISO definition for P2504 is "Charging System Voltage High." The PCM detects alternator output voltage above the specified limit. On some vehicles, this triggers when generator output exceeds 18.4V or battery voltage exceeds 15.9V.
Can I Drive With P2504?
No — Do Not Drive. Do not drive. High voltage boils the battery's electrolyte and causes irreversible damage to the alternator and sensitive electronics like the Powertrain Control Module (PCM). Continuing to drive turns a single component failure into a multi-thousand-dollar repair. Stalling also occurs, creating a major safety hazard in traffic.
Common Causes
- Outdated Powertrain Control Module (PCM) Software (Very Common) — The PCM's software logic for monitoring voltage is often too sensitive or flawed, especially on Stellantis brands (Ram, Jeep, Dodge). Manufacturers frequently release software updates (TSBs) to correct these false triggers.
- Failing Alternator / Voltage Regulator (Very Common) — The internal voltage regulator is the most common hardware failure. When it breaks, it loses control of the alternator's output, causing excessive voltage.
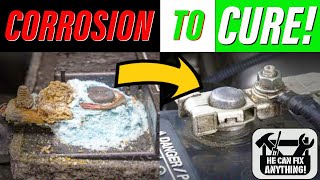
- Corroded or Loose Battery Terminals and Cables (Common) — Corrosion or loose connections create high resistance. This causes the PCM to read an artificially low voltage, prompting it to command a higher charging rate that triggers the code.
- Faulty or Failing Battery (Common) — A battery with an internal short or high internal resistance confuses the charging system. The alternator spikes voltage trying to compensate for the bad battery, especially in dual-battery systems.
- Failing Intelligent Battery Sensor (IBS) (Less Common) — The IBS monitors the battery's state of charge and temperature. If it provides incorrect data, the PCM commands an inappropriately high charging voltage.
- PCM Voltage-Monitoring Logic Failure (Less Common) — The PCM's internal circuit that reads charging system voltage fails due to solder joint fatigue or moisture. The PCM interprets a normal 14.2V reading as excessive, triggering a false P2504 code.
- Wiring Issues (Rare) — A broken, chafed, or shorted wire in the charging circuit interrupts communication between the alternator and the PCM, causing incorrect voltage readings.
- Improperly Installed Aftermarket Accessories (Rare) — High-draw electrical accessories wired directly to the battery interfere with the charging system's normal operation and trigger a P2504 code.
Symptoms
- Check Engine Light is On — The primary indicator that the PCM has stored a trouble code.
- Battery Warning Light is On — A red battery icon illuminates or flashes on the dashboard.
- Electrical System Malfunctions — You will notice dimming or flickering headlights, a fluctuating voltage gauge, or the radio turning off.
- Smell of Burning Plastic or Overheating Battery — A sulfur smell (like rotten eggs) or burning plastic indicates the battery is overheating and boiling its internal acid.
- Engine Stalling or Hard Starting — Erratic voltage causes the engine to stall at idle or makes it difficult to start.
- Unpredictable Shifting (Automatic Transmission) — Transmission control modules require stable voltage. Over-voltage causes harsh or erratic shifting.
Diagnostic Flowchart
Tap your situation to follow the diagnostic path that matches what you're seeing on this code.
Common Fixes & Costs
- Reprogramming the Powertrain Control Module (PCM) — Parts: $0, Labor: $150-$250, ~1.0 hr book time (Professional)
- Replacing the Alternator
— Parts: $250-$800, Labor: $150-$350, ~2.0 hr book time
(Intermediate)
Ram 1500 (2021-2023): OEM Mopar #68422277AC (non-eTorque), #68623194AC (eTorque MGU) (Alt: Bosch #AL6494X (Reman), Denso, TYC)
Jeep Wrangler (2023-2024): OEM Mopar (Part numbers vary by engine) (Alt: Limited availability for newest models.)
Ram 2500/3500 (2014): OEM Mopar #04801769AD (Alt: Denso, Remy, Bosch) - Cleaning or Replacing Battery Terminals/Cables — Parts: $10-$80, Labor: $50-$150, ~0.8 hr book time (DIY)
- Replacing the Battery — Parts: $200-$450, Labor: $50-$100, ~0.5 hr book time (DIY)
- Replacing Intelligent Battery Sensor (IBS)
— Parts: $80-$200, Labor: $50-$100, ~0.6 hr book time
(DIY)
Ram / Jeep (General): OEM Mopar #4692269AI (Alt: Limited, OEM is recommended.) - Repairing Wiring or Ground Straps — Parts: $5-$50, Labor: $100-$300, ~1.5 hr book time (Intermediate)
DIY vs Professional
- Reprogramming the Powertrain Control Module (PCM) — Beginner:
- Replacing the Alternator — Beginner:
- Cleaning or Replacing Battery Terminals/Cables — Beginner:
- Replacing the Battery — Beginner:
- Replacing Intelligent Battery Sensor (IBS) — Beginner:
- Repairing Wiring or Ground Straps — Beginner:
Used vs. New Parts: Buying Guide
When a used part is worth it: A used alternator from a reputable salvage yard is a cost-effective option for an older, high-mileage vehicle where the owner has a tight budget. It makes sense if the cost of a new part is more than 25% of the vehicle's value.
Donor-vehicle mileage cap: roughly under 100000 miles for the part to have meaningful remaining life.
Donor quality checklist:
- Verify the part comes with a warranty (30-90 days is common for used parts).
- Visually inspect the alternator for signs of excessive corrosion, damage to the casing, or a bent pulley.
- Ensure the part number is an exact match for your vehicle, as different sub-models have different amperage requirements.
Decision logic:
- If Vehicle is less than 7 years old or has under 100k miles → Buy a new or remanufactured alternator for better reliability and a longer warranty.
- If Vehicle is older, budget is the primary concern, and you accept the risk of a shorter lifespan → A used alternator is a reasonable choice, provided it has a short-term warranty.
- If The vehicle has high-draw aftermarket accessories (e.g., large stereo system, extra lights) → Favor a new, high-output alternator to ensure it handles the electrical load.
Warranty tradeoff: Used parts typically offer a 30-90 day warranty covering the part only, not the labor. New and quality remanufactured alternators come with a 1-year to limited lifetime warranty.
Worst-case if a used part fails: $300-600 if a used alternator fails shortly after installation, requiring payment for a second replacement part and repeated labor costs.
What Happens If You Wait — Timeline
- 0-1 month: Code is set and MIL is on. The battery begins to overcharge, causing electrolyte to boil and vent as gas. You notice flickering lights or a faint sulfur smell near the battery. (MPG impact: 0-2%% · Added cost: $0)
- 1-3 months: The battery is permanently damaged from sustained overcharging; it begins to swell or bulge. The lifespan of headlight bulbs is significantly reduced. Intermittent stalling occurs. (MPG impact: 2-5%% · Added cost: $200-$450 for a new battery.)
- 3-6 months: Sustained high voltage damages other sensitive electronic modules. The radio, instrument cluster, or body control module fails, requiring expensive replacement. (MPG impact: 5-10%% · Added cost: $500-$2000 for replacement of damaged modules.)
- 6+ months: Catastrophic failure of the Powertrain Control Module (PCM) occurs. The vehicle does not start. This turns an initial alternator issue into a multi-thousand dollar repair. (MPG impact: 10-15%% · Added cost: $1200-$2500+ for PCM replacement and programming.)
Cost of Not Fixing It
- 0-1 month: The battery overcharges, leading to electrolyte boiling off and reduced battery lifespan. Intermittent stalling or issues with electronics occur. (Added cost: $200-$450 for a new battery.)
- 1-6 months: Severe and irreversible damage to the battery. The high voltage damages other sensitive electronics, including the radio, instrument cluster, and various control modules. (Added cost: $500-$2000+ for replacement of damaged modules.)
- 6+ months: Catastrophic failure of multiple electronic systems. The Powertrain Control Module (PCM) is destroyed by sustained over-voltage, leading to a no-start condition. (Added cost: $1500-$4000+ for PCM replacement and potential replacement of multiple other electronic components.)
Diagnosis Steps
- Check for Software Updates (TSBs)
Before touching any tools, check with a dealership or a qualified shop to see if there are any Technical Service Bulletins (TSBs) for your vehicle's VIN related to code P2504. This is the definitive fix for many Ram and Jeep models.
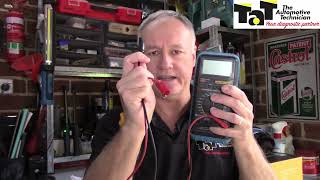
Tools: Phone, VIN, access to dealership or professional shop (Beginner) - Test Charging System Voltage at the Battery
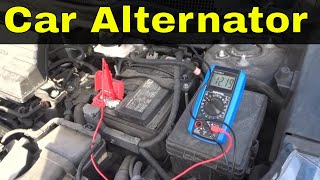
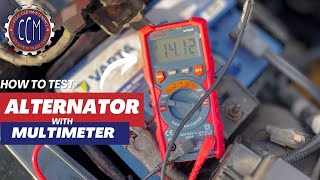
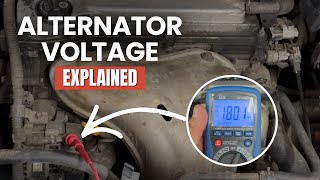
With the engine running, use a multimeter set to DC volts to measure across the positive and negative battery terminals. A normal reading is between 13.5 and 14.8 volts. A reading consistently above 15.0 volts confirms an overcharging condition.
Tools: Multimeter (Beginner) - Visually Inspect Battery and Cables
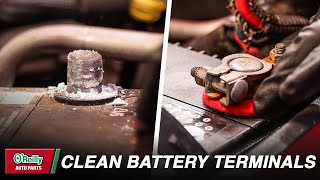
Look at the battery terminals for corrosion (white or greenish powder). Ensure the battery cables are tight and do not move. On vehicles with an Intelligent Battery Sensor (IBS), ensure its connector is secure.
Tools: Eyes, gloves, wire brush (Beginner) - Test the Battery
A weak battery causes charging system problems. Perform a load test to check the battery's health under pressure. For dual-battery systems, disconnect and test each battery individually.
Tools: Battery load tester (or visit an auto parts store) (Beginner) - Test the Alternator
If the voltage is confirmed high, software is up-to-date, and connections are good, the alternator is the primary suspect. Remove it and test it on a bench at an auto parts store to confirm internal regulator failure.
Tools: Basic hand tools (sockets, wrenches) (Intermediate) - [PRO TIP] Compare PCM Voltage Reading to Multimeter
Using an advanced scan tool, view the live data for 'Battery Voltage' as seen by the PCM. Compare this to the voltage measured directly at the battery. A discrepancy greater than 0.3 volts suggests a wiring issue or a faulty PCM voltage monitoring circuit.
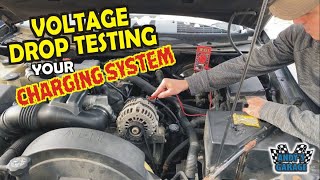
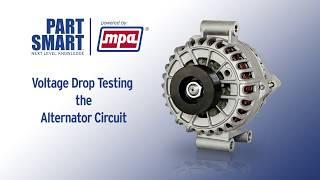
Tools: Advanced OBD-II Scan Tool, Multimeter (Intermediate) - [PRO TIP] Perform a Voltage Drop Test on Power and Ground Cables
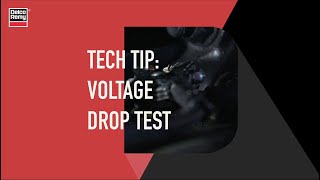
Measure the voltage between the B+ post on the alternator and the positive battery terminal while the engine runs under load (headlights, A/C on). A reading above 0.4 volts indicates a bad main power wire. Repeat between the alternator case and the negative battery terminal; a reading above 0.2 volts indicates a bad ground.
Tools: Multimeter (Intermediate) - Inspect Alternator Communication Circuit
Visually inspect the wiring harness and connector at the alternator for damage, corrosion, or loose pins. A communication breakdown causes the alternator to default to a high-charge state.
Tools: Flashlight, Multimeter (Intermediate) - [ADVANCED] Analyze Scan Tool Live Data
Monitor 'Generator Field Duty Cycle'. A high duty cycle (>80%) paired with high voltage (>15V) suggests the voltage regulator is unresponsive. 'Target Charging Voltage' vs. 'Battery Voltage' should align closely; a large gap points to a communication fault.
Tools: Professional OBD-II Scan Tool (Advanced) - [ADVANCED] Test Alternator Field Terminal Resistance
Disconnect the alternator connector. Measure the resistance between the two field terminals on the alternator. Expected resistance is 0.5 to 15 Ohms. A reading outside this range indicates a faulty internal field coil.
Tools: Multimeter (Advanced)
When This Code Triggers (Freeze-Frame Conditions)
- Engine Coolant Temp: 180-210°F (Engine at full operating temperature.)
- RPM: 1200-2500 (Above idle, during steady cruise or light acceleration.)
- Calculated Engine Load: 25-50% (Vehicle under a moderate load, not during heavy acceleration or deceleration.)
- Battery Voltage: >15.5V (The primary trigger; voltage has exceeded the PCM's calibrated threshold.)
Related Codes
- P2503 — Means 'Charging System Voltage Low.' If P2504 and P2503 appear together, it indicates an erratic charging system with both voltage spikes and drops, pointing to a failing alternator/regulator or severe wiring issues.
- P0562 — Another code for 'System Voltage Low.' Seeing P0562 with P2504 suggests extreme voltage instability caused by a faulty alternator or a battery with an internal short.
- P0563 — Means 'System Voltage High' and is a more generic version of P2504. They often appear together. TSB #18-044-24 for the 2024 Jeep Gladiator resolves both codes with the same PCM software update.
- P2509 — Means 'PCM Power Input Signal Intermittent.' A faulty alternator or bad battery causes both a high voltage event (P2504) and an intermittent loss of power to the computer (P2509).
- P0152 / P0158 — Codes for 'O2 Sensor Circuit High Voltage' are symptoms, not causes. An overcharging condition sends excess voltage to sensors. Fix the charging system first; the O2 sensor codes will resolve themselves.
Climate & Environmental Factors
- High Humidity / Road Salt: Regions with high humidity or road salt accelerate corrosion on battery terminals, cable ends, and ground strap connection points. This added resistance interferes with voltage sensing and triggers a P2504 code.
- Extreme Cold: In very cold weather, a battery's internal resistance increases. The PCM commands a higher charging voltage to compensate. If a battery temperature sensor is faulty, the PCM commands excessive voltage, leading to a P2504 code.
How to Talk to a Mechanic About This Code
Say this: "I have a P2504 code, which indicates a charging system high voltage. I'd like to schedule a diagnostic. Can you please check for any available TSBs or software updates for my VIN before testing components? I'd also like you to verify the charging voltage at the battery with a multimeter."
This signals you know the common causes (especially software) and prevents a shop from immediately selling you an alternator. Asking for a specific, simple test (multimeter reading) establishes a baseline for the diagnosis.
Avoid saying:
- 'My battery light is on, can you fix it?'
- 'I think I need a new alternator.'
- 'Just do whatever it takes to fix the check engine light.'
Questions to ask before authorizing the repair:
- Was there a software update available, and was it performed?
- What was the exact voltage reading at the battery terminals while the engine was running?
- Did you perform a voltage drop test on the main power and ground cables? What were the readings?
- Can you show me the old part if you are replacing something?
- What is the warranty on the recommended parts and labor?
Where to Take It: Dealer vs Independent vs Chain
- Dealer:
Highly Recommended, especially as the first step for Ram and Jeep owners to check for software updates (TSBs), which is a dealer-exclusive repair.
Best for: Vehicles known for software issues (Ram, Jeep), Vehicles still under warranty, Complex electrical issues involving module communication
Downsides: Higher labor rates, typically 1.5-2x more than independent shops., Defaults to replacing entire assemblies instead of repairing wiring. (Typical cost: +50% vs. baseline) - Independent Shop:
Good choice for hardware-related fixes like an alternator or cable replacement, but only after confirming with a dealer that no software updates are needed.
Best for: Out-of-warranty vehicles where the cause is likely hardware (alternator, battery, cables)., Straightforward component replacement after a clear diagnosis.
Downsides: Cannot perform manufacturer-specific PCM software updates., Diagnostic capabilities for complex electrical issues vary widely. (Typical cost: +0% vs. baseline) - Chain Shop:
Use with caution. Acceptable for a free battery test, but AVOID for the primary diagnosis of a P2504 code due to the high likelihood of software being the cause.
Best for: Free battery and alternator testing (be cautious of the upsell).
Downsides: High pressure to sell parts, often leading to misdiagnosis (e.g., selling a battery or alternator when a software update is the real fix)., Technician skill varies dramatically; lacks the expertise for proper electrical diagnosis beyond simple component swaps. (Typical cost: -10% vs. baseline)
When to Walk Away From the Repair
If the estimated repair cost exceeds 50% of the car's private-party value, you should seriously consider selling or trading it in.
- Car worth $5000, fix is $2800: Walk away. The repair cost is over 50% of the car's value.
- Car worth $15000, fix is $1200: Fix it. The repair is well below the 50% threshold and protects other expensive electronics.
- Car worth $3000, fix is $1600: Walk away. A major repair on a low-value car is rarely a good investment.
What Scan Tool You Need for This Code
Minimum: A scanner that reads and clears codes and displays live data for battery/system voltage.
A basic $20 code reader only shows the P2504 code. It cannot show real-time voltage, which is essential to confirm if the system is actually overcharging. Without live data, you are diagnosing blind.
Budget: BlueDriver Pro (~$100) — Connects to your phone via Bluetooth and displays live data, including system voltage. This is enough to see if the voltage is spiking above 15V, confirming the overcharge condition before you go to a shop.
Mid-range: Foxwell NT510 Elite (~$180) — Offers in-depth live data graphing and accesses manufacturer-specific codes. Its bi-directional controls help test specific components in the charging circuit, providing a more advanced level of diagnosis.
Professional: Autel MaxiCOM MK808 / MK906BT (~$500-1200) — Provides OE-level diagnostics. It checks for TSBs directly, accesses detailed manufacturer-specific data PIDs related to the charging system, and performs advanced functions required to diagnose communication issues between the PCM and the alternator.
Rent vs buy: For a one-time check of the live voltage, auto parts stores like AutoZone use their scanner to check for free. If you plan to do future DIY repairs, buying a budget pick like the BlueDriver is a worthwhile investment.
How to Clear the Code After You Fix It
- Ensure all connections are secure.
- Use a standard OBD-II scan tool to select the 'Clear/Erase Codes' function.
- Perform a drive cycle to allow the system's readiness monitors to run.
Drive cycle (~20 minutes): Start the engine and let it idle for 2-3 minutes. Drive in mixed city/highway conditions, including steady cruising and some stop-and-go traffic, for about 15-20 minutes. The goal is to allow the engine to reach and maintain normal operating temperature.
Readiness monitors affected: Comprehensive Component Monitor, Misfire Monitor
Before emissions retest: drive at least 50 miles to fully set monitors.
Watch out for:
- Simply disconnecting the battery clears the code, but it also resets all readiness monitors, causing an immediate emissions test failure.
- The code returns quickly if the underlying electrical fault has not been properly repaired.
Will This Fail Emissions / State Inspection?
Yes — this code typically fails an OBD-II emissions inspection.
- California: An illuminated Check Engine Light results in an automatic failure of the smog check. The P2504 code must be repaired and cleared, and all OBD-II readiness monitors must be set to 'Ready' before the vehicle is re-tested.
- New York: The New York Vehicle Inspection Program (NYVIP2) includes an OBD-II scan. A P2504 trouble code causes the vehicle to fail the emissions inspection.
- Texas: In counties where emissions testing is required, a vehicle with an active P2504 code and the Check Engine Light on will not pass the state inspection.
Most Commonly Affected Vehicles
- Ram 1500 (2021-2023) — Highly prone to this code due to PCM software issues. TSB #S2308000022 addresses a no-start condition with P2504. On eTorque models, the issue is often the Motor-Generator Unit (MGU).
- Jeep Wrangler (2023-2024) — eTorque engine models are susceptible to software glitches. TSBs #18-003-26, #18-050-24 REV. A, and #08-142-24 point to a PCM reprogram as the primary fix.
- Ram 2500/3500 (2014) — Trucks with the 6.7L Cummins engine are known for software-related false P2504 codes. TSBs #18-096-16, #18-042-15, and #1800414 address this.
- Jeep Gladiator (2024) — TSB #18-044-24 addresses a MIL illumination with P2504 via a PCM software update for vehicles built on or before February 1, 2024.
- Dodge Ram 1500 (2008) — The code sets when the alternator's B+ voltage sense circuit reading exceeds the direct Battery B+ sense circuit reading, often due to high resistance in the main power cable.
- Nissan Qashqai (2019) — Intermittent P2504 codes relate to the complex logic of the smart charging alternator and its interaction with the stop/start system.
- Mazda 3 (2010-2013) — P2504 has a manufacturer-specific trigger condition where the PCM stores the code if generator output voltage is 18.5V or more, or battery voltage is 16.0V or more.
- Ford F-150 (2011-2014) — Triggered by a faulty Battery Management System (BMS) sensor or if the BMS was not reset after a battery replacement.
- Subaru General (2010-2018) — P2504 has a manufacturer-specific definition: "Driver's MPCS Unit Lost Communication with Gauge Control Module ILLUMI Message," pointing to a CAN bus communication error rather than a high voltage condition.
Manufacturer-Specific Notes
- Ram / Dodge / Jeep (Stellantis): This family of vehicles sets a P2504 code due to software issues. The first diagnostic step is always checking for available PCM software updates (TSBs) before replacing hardware. Specific TSBs include S2308000022 (2023 Ram 1500) and 18-044-24 (2024 Jeep Gladiator).
- Subaru: For many Subaru models, P2504 is not a charging system code. It indicates a communication failure between the gauge cluster and the body control module ('Driver's MPCS Unit Lost Communication'). Diagnosis focuses on the CAN bus network.
- Mazda: Mazda has specific voltage thresholds for setting this code: a generator output of 18.5V or more, or a battery voltage of 16.0V or more.
- Ford: On Fords equipped with a Battery Management System (BMS), failing to reset the BMS with a scan tool after a battery replacement leads to improper charging strategies and triggers a P2504 code.
Real Owner Stories
2010 Jeep Wrangler with 110K miles
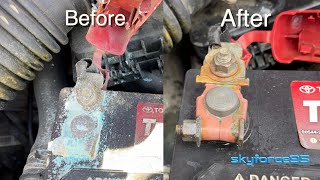
The battery light came on a few miles from home. A code scan revealed P2504. The owner noticed the positive battery terminal clamp bolt was loose.
What they tried:
- Disconnected both battery terminals.
- Cleaned the terminals and clamps.
- Tightened everything securely.
Outcome: The Jeep started without issue, the battery light was off, and a multimeter reading showed a healthy 13.8V at idle. Cleaning and tightening the connection resolved the code.
Lesson: Always start with the simplest and cheapest fix. A visual inspection and cleaning of battery connections solves complex-sounding electrical codes before you spend money on parts.
2014 Ram 2500 6.7L Cummins
An intermittent P2504 code and battery light appeared, with the voltage gauge reading high.
What they tried:
- Initial diagnosis pointed towards a failing alternator or a software issue, which are common on these trucks.
Outcome: The actual cause was a heavily corroded main ground connection on the passenger side frame rail. The corrosion was hidden under the bolt head. After cleaning the connection to bare metal, the code cleared and did not return.
Lesson: Don't underestimate the impact of hidden corrosion on ground connections. A voltage drop test is crucial for finding high resistance that a simple visual inspection misses.
2010 Jeep Wrangler with 160K miles
The P2504 code appeared intermittently for months. After installing a new high-amp alternator and a new battery, the code returned and an inline circuit breaker tripped.
What they tried:
- Replaced the alternator with a high-output aftermarket unit.
- Replaced the battery with a new Optima Yellow Top.
- Checked all ground connections, which appeared good.
Outcome: The problem persisted even with new parts, indicating the root cause was not the alternator or battery. The issue was in the wiring, the PCM's voltage sensing circuit, or a compatibility problem with the aftermarket high-amp alternator.
Lesson: Throwing new parts at a problem without a precise diagnosis is a costly mistake. If the code persists after replacing the most likely components, a deeper dive into wiring, connections, and PCM function is necessary.
2008 Jeep Wrangler JK
The battery light came on, and a P2504 code was stored. The battery tested good, but the vehicle eventually lost all electrical power while driving and had to be towed to a dealer.
What they tried:
- Tested the battery, which passed.
- Visually inspected cables.
Outcome: The dealership determined the voltage regulator, which is internal to the Powertrain Control Module (PCM) on this model, failed. The fix required a complete PCM replacement.
Lesson: On some vehicles, the voltage regulator is not part of the alternator. If the alternator and battery test good, investigate whether the voltage regulator is located within the PCM.
How to Prevent This Code From Triggering
- Clean Battery Terminals and Connections (Every 12 months) — Corrosion on battery terminals creates resistance, which tricks the PCM into commanding a higher charge rate. Regular cleaning with a wire brush ensures an accurate voltage reading.
- Check for PCM Software Updates During Service (Annually or during routine maintenance) — Manufacturers frequently release software updates to fix overly sensitive voltage monitoring logic. Keeping your PCM firmware up-to-date prevents false P2504 codes, especially on Stellantis vehicles.
- Inspect Serpentine Belt Condition and Tension (Every oil change) — A worn or loose belt slips, causing the alternator to work inefficiently and leading to erratic voltage output. Proper tension prevents undue stress on the alternator's bearings.
- Minimize Electrical Load on a Weak Battery (As needed) — A weak battery places a heavy strain on the alternator. Avoid running numerous high-draw accessories if you suspect battery issues to prevent overheating the alternator.
- Perform an Annual Battery Load Test (Every 12 months) — A professional load test identifies a weakening battery before it fails. A failing battery causes the alternator to work harder and leads to voltage spikes.
Frequently Asked Questions
What is the most common mistake when diagnosing P2504?
The most expensive mistake is replacing the alternator without checking for software updates (TSBs). Software glitches are the leading cause on Ram and Jeep vehicles. Always verify PCM firmware before buying parts.
Can I just replace the battery to fix a P2504 code?
No, replacing the battery rarely fixes the root cause. If the alternator is overcharging, it will quickly destroy the new battery. You must diagnose the charging system first.
What is a TSB and why is it important for this code?
A Technical Service Bulletin (TSB) is a manufacturer notice detailing a known problem and its fix. For P2504, TSBs often prescribe a simple software update, saving you from buying an expensive, unnecessary alternator.
My car also has O2 sensor codes, should I replace them?
No. High voltage codes for O2 sensors are symptoms of the P2504 overcharging condition. Fix the charging system first, and the secondary codes will clear.
Can a bad ground cause a P2504 code?
Yes. A poor ground connection creates high resistance. The charging system compensates for this perceived voltage drop by increasing alternator output, causing an actual over-voltage condition.
What is a 'smart alternator' and how does it relate to P2504?
Modern 'smart alternators' are controlled by the PCM based on battery charge, temperature, and electrical load. This means a P2504 code often stems from a faulty sensor or software logic, not just the alternator itself.
How much does it cost to fix a P2504 code?
Costs range from $150-$250 for a software update to $400-$1,150 for an alternator replacement. On eTorque Jeeps or Rams, replacing the Belt Starter Generator (BSG) costs between $1,000 and $1,600.
Will the P2504 code clear itself?
It clears itself if the fault is intermittent, but you must not ignore it. The underlying problem worsens over time and causes expensive electrical damage. Diagnose and repair the root cause immediately.
Key Takeaways
- Check for Technical Service Bulletins (TSBs) first; a simple PCM software update fixes P2504 on most 2014+ Ram and 2023+ Jeep models.
- Do not drive with a P2504 code; sustained voltage above 15.0V boils battery acid and destroys control modules, turning a $200 repair into a $2,000 disaster.
- If software is up-to-date, a failing internal voltage regulator inside the alternator is the primary hardware culprit.
- Ignore secondary high-voltage codes for O2 sensors or other components until you fix the P2504 overcharging condition.
- Never replace the battery without testing the alternator; an overcharging alternator destroys a brand-new battery within days.
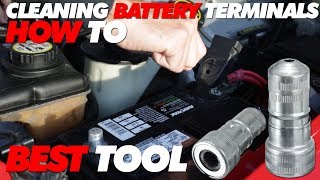
Helpful Videos

Shop the Parts Behind P2504
Below are the parts most often responsible for code P2504, ranked by how frequently each one is the actual culprit (per the diagnosis above). Tap any to see what we have for your vehicle.


The information in this article is provided for general reference and educational purposes only. Vehicle specifications, procedures, and part compatibility can vary by production date, trim level, and region. Always consult your vehicle's factory service manual and verify part numbers before purchasing or performing repairs. Safety-critical components such as airbags, seat belts, and braking systems should be installed by a qualified professional.
- 🧭 Diagnostic Flowchart
- 🎬 Helpful Videos
- 🛍️ Shop This Part
- What Does P2504 Mean?
- Can I Drive With P2504?
- Common Causes
- Symptoms
- Common Fixes & Costs
- DIY vs Professional
- Used vs. New Parts: Buying Guide
- What Happens If You Wait — Timeline
- Cost of Not Fixing It
- Diagnosis Steps
- When This Code Triggers (Freeze-Frame Conditions)
- Related Codes
- Climate & Environmental Factors
- How to Talk to a Mechanic About This Code
- Where to Take It: Dealer vs Independent vs Chain
- When to Walk Away From the Repair
- What Scan Tool You Need for This Code
- How to Clear the Code After You Fix It
- Will This Fail Emissions / State Inspection?
- Most Commonly Affected Vehicles
- Manufacturer-Specific Notes
- Real Owner Stories
- 2010 Jeep Wrangler with 110K miles
- 2014 Ram 2500 6.7L Cummins
- 2010 Jeep Wrangler with 160K miles
- 2008 Jeep Wrangler JK
- How to Prevent This Code From Triggering
- Frequently Asked Questions
- What is the most common mistake when diagnosing P2504?
- Can I just replace the battery to fix a P2504 code?
- What is a TSB and why is it important for this code?
- My car also has O2 sensor codes, should I replace them?
- Can a bad ground cause a P2504 code?
- What is a 'smart alternator' and how does it relate to P2504?
- How much does it cost to fix a P2504 code?
- Will the P2504 code clear itself?
- Key Takeaways
- 🎟️ Get 5% Off