
OBD-II Code P2535: Ignition Switch Run/Start Position Circuit High
What P2535 means, why it triggers, and how to fix it
- Code P2535 triggers when the Powertrain Control Module (PCM) detects ignition switch circuit voltage exceeding the normal 12-volt range, often spiking above 15 volts.
- A failing alternator overcharging the system above 15 volts is a primary trigger for P2535, so always test battery voltage with the engine running before replacing the ignition switch.
- Driving with an active P2535 code risks sudden engine stalling at highway speeds or a severe parasitic draw that permanently damages a $800+ Body Control Module (BCM).
- On 2007-2019 GM trucks and SUVs, inspect the tilt-steering column wiring harness for chafing and the underhood fuse block for corrosion before assuming the ignition switch is bad.
- Swapping the ignition relay with an identical non-critical relay (like the horn) takes 5 minutes and instantly rules out a stuck relay as the cause of the high-voltage short.
What Does P2535 Mean?

Your car's main computer, the Powertrain Control Module (PCM), detects a voltage from the ignition switch that is too high. The ignition switch signals the computer when the key is in the 'Run' or 'Start' position. When the voltage on this circuit exceeds the normal 12-volt operational range (often spiking over 15 volts), the computer becomes confused about the driver's intent, causing starting, running, and electrical failures.
Technical definition: The SAE/OBD-II definition is "Ignition Switch Run/Start Position Circuit High." The Powertrain Control Module (PCM) or Body Control Module (BCM) has detected voltage on the ignition switch's run/start circuit above the maximum expected threshold. This manifests as a voltage reading over 15 volts while running, or the presence of 12-volt battery power when the key is in the OFF position.
Can I Drive With P2535?
No — Do Not Drive. Driving with code P2535 is dangerous. The fault causes the engine to stall unexpectedly at any speed, creating a major safety risk in traffic. Ignoring the code also leads to a no-start condition or causes expensive damage to sensitive electronics like the Powertrain Control Module (PCM), with replacement costs exceeding $1,000.
Common Causes

- Faulty Ignition Switch (Very Common) — The internal electrical contacts inside 🎬 Watch: A simple guide on how to test your ignition switch. the switch wear out, corrode, or short together over time, sending incorrect high-voltage signals to the computer.
- Shorted or Damaged Wiring (Common) — Wires leading from the ignition switch, especially within the steering column, fray, pinch, or melt. If the signal wire contacts a power wire, it creates a short circuit resulting in a high voltage reading.
- Faulty Alternator (Common) — If the alternator's internal voltage regulator fails, it overcharges the entire electrical system with excessive voltage (over 15 volts). This high system voltage floods the ignition circuit, setting a P2535 code.
- Corroded or Loose Electrical Connectors (Common) — Plastic connectors for the ignition switch accumulate moisture and corrode, or metal pins become loose. This poor connection causes a short to power.
- Faulty Body Control Module (BCM) (Uncommon) — An internal BCM failure causes the ignition relay driver to remain energized. This keeps power on the circuit, triggers P2535, and sometimes prevents the engine from shutting off.
- Faulty or Sticking Ignition Relay (Less Common) — An ignition relay stuck in the 'closed' position continuously supplies power to the run/start circuit when it should be off, sending a constant high-voltage signal to the PCM.
- Improperly Installed Aftermarket Accessories (Less Common) — Poorly wired remote starters, alarms, or stereos tapped into the ignition wiring backfeed voltage into the ignition circuit.
- Water Intrusion into Electrical Components (Uncommon) — Water leaking into underhood or interior fuse blocks causes corrosion and unexpected shorts between circuits. This is a known issue in humid climates or after heavy rain.
- Compromised Ground Connection (Uncommon) — A poor or corroded ground connection for the ignition circuit causes the reference voltage to float upwards, making the computer interpret a normal signal as too high.
Symptoms

- Engine Stalls While Driving — The vehicle shuts off unexpectedly because the computer loses a valid 'run' signal from the faulty ignition circuit, creating a significant safety hazard.
- Engine is Hard to Start or Won't Crank — The engine cranks but fails to start, 🎬 Watch: Learn how to test the starting system and ignition switch. or turning the key does nothing. The PCM disables the starter relay due to the voltage anomaly.
- Engine Won't Turn Off — The engine continues to run even after turning the key to the off position and removing it. A stuck relay or faulty BCM keeps the ignition circuit energized.
- Dead Battery — The high voltage fault causes a parasitic draw by keeping control modules awake when the vehicle is off, draining the battery overnight.
- Widespread Electrical Issues — The radio and dashboard lights flicker, power accessories fail, or warning messages like 'Service 4WD' appear.
- Check Engine Light is On (also visible on scanner) — The Malfunction Indicator Lamp (MIL) illuminates on your dashboard. The security or anti-theft light also turns on.
Diagnostic Flowchart
Tap your situation to follow the diagnostic path that matches what you're seeing on this code.
Common Fixes & Costs
- Replace Ignition Switch — Parts: $50-$150, Labor: $100-$200, ~1.5 hr book time (Intermediate)
- Repair Damaged Wiring or Connectors — Parts: $10-$50, Labor: $150-$300, ~3 hr book time (Intermediate)
- Replace Alternator — Parts: $250-$500, Labor: $120-$250, ~1.5 hr book time (Intermediate)
- Replace Ignition Relay — Parts: $15-$50, Labor: $20-$50, ~0.1 hr book time (Beginner)
- Replace Body Control Module (BCM) / TIPM — Parts: $400-$800, Labor: $150-$300, ~2 hr book time (Professional)
DIY vs Professional
- Replace Ignition Relay 🟢 Beginner
Tools: Fuse puller or pliers - Replace Alternator 🟢 Beginner
Tools: Socket set, serpentine belt tool, multimeter - Replace Ignition Switch 🟢 Beginner
Tools: Screwdrivers (Phillips, Torx), trim removal tools, socket set, multimeter - Repair Damaged Wiring or Connectors 🟢 Beginner
Tools: Multimeter, wire strippers, wire cutters, soldering iron or quality crimp tools, heat shrink tubing, wiring diagrams - Replace Body Control Module (BCM) / TIPM 🟢 Beginner
Tools: Socket set, trim removal tools, advanced OBD-II scanner with programming capabilities
Used vs. New Parts: Buying Guide
When a used part is worth it: For an ignition switch, buying used is almost never recommended. The part is a known wear item, is critical for vehicle operation, and the cost savings are minimal compared to the risk of being stranded by a premature failure.
Donor-vehicle mileage cap: roughly under 20000 miles for the part to have meaningful remaining life.
Donor quality checklist:
- Match the part number exactly, including any superseded numbers.
- Avoid parts from vehicles with flood or fire damage.
- Verify the donor vehicle did not have other electrical issues.
Decision logic:
- If The part is an electronic ignition switch. → Buy a new OEM or high-quality aftermarket part. The risk of a used part failing is not worth the small savings.
- If The vehicle has a push-button start system. → Buy new OEM to ensure compatibility with the vehicle's security and computer systems. Programming is required.
- If Budget is the absolute primary concern and the vehicle is very old. → A used part is a gamble, but consider it if it comes from a low-mileage, accident-damaged vehicle and has a functional warranty.
Warranty tradeoff: Used parts typically offer a 30-90 day warranty covering only the part itself, not the labor to install it. New aftermarket parts usually have a 1-year to limited lifetime warranty. New OEM parts carry a manufacturer's warranty, typically 1 year.
Worst-case if a used part fails: $200-$400 if a used switch fails soon after installation, requiring repeat labor costs plus the price of another switch.
What Happens If You Wait — Timeline
- 0-1 month: Check Engine Light is on. Vehicle experiences intermittent hard starting or occasional, brief electrical glitches (e.g., radio flickers). The fault is not yet consistent. (MPG impact: 0%% · Added cost: $0)
- 1-3 months: Symptoms become frequent. The vehicle fails to start multiple times a week, or stalls unexpectedly at low speeds. A parasitic drain begins, causing a weak battery. (MPG impact: 0-2%% · Added cost: $75-$200 (Towing))
- 3-6 months: The high voltage condition is persistent. The parasitic draw ruins the battery, requiring replacement. The risk of stalling at highway speeds increases significantly. (MPG impact: 0-5%% · Added cost: $150-$300 (New Battery) + Towing)
- 6+ months: Sustained high voltage cooks sensitive electronics. The Body Control Module (BCM) or Powertrain Control Module (PCM) suffers permanent internal damage. The vehicle is undrivable. (MPG impact: N/A (Vehicle likely undrivable)% · Added cost: $800-$1,500+ (BCM/PCM replacement and programming) + Battery + Towing.)
Cost of Not Fixing It
- Immediate: Engine stalls while driving, creating a severe safety hazard. Vehicle fails to start, leaving you stranded and requiring a tow. (Added cost: $75-$200 (Towing))
- 1-3 months: Persistent high voltage causes a parasitic drain that destroys the battery, requiring premature replacement. (Added cost: $150-$300 (New Battery))
- 3+ months: Sustained over-voltage permanently damages sensitive and expensive electronics, such as the Powertrain Control Module (PCM) or Body Control Module (BCM). (Added cost: $800-$1,500+ (Module Replacement and Programming))
Diagnosis Steps

- Read Codes and Review Freeze Frame Data
Use an OBD-II scanner to confirm P2535 is active and look for related codes (e.g., U-codes, B-codes). Review the freeze frame data to see the battery voltage when the code was set. A reading above 15V strongly points towards an overcharging alternator.
Tools: OBD-II Scanner (Beginner) - Test the Battery and Charging System
With the engine running, use a multimeter to check the voltage at the battery terminals. A healthy charging system reads between 13.2 and 14.8 volts. A reading consistently above 15 volts indicates a faulty alternator is overcharging the system and causing the code.
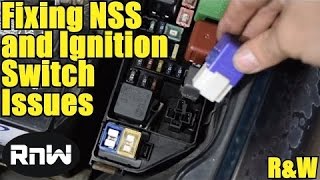
Tools: Multimeter (Beginner) - Check Fuses and Swap the Ignition Relay
Locate the fuse box using your owner's manual and find the relays related to the ignition circuit (often labeled 'IGN' or 'RUN/CRANK'). Swap the ignition relay with an identical one from a non-critical circuit (like the horn) to quickly test if a stuck relay is the cause.
Tools: Owner's Manual, Fuse Puller (Beginner) - Perform a Thorough Visual Inspection
Inspect the wiring harness around the steering column, under the driver's side dashboard, and at the fuse blocks. Look for melted plastic, green corrosion on connectors, or poorly installed aftermarket wire taps. Check that connectors are fully seated.
Tools: Flashlight, Inspection Mirror (Beginner) - Monitor Live Ignition Voltage Data
Use an advanced scan tool to view the live data PID for "Ignition 1 Voltage" from the PCM or BCM. The voltage should be near battery voltage (9V-12.5V) in the 'Run' and 'Start' positions and 0V in the 'Off' position. If the voltage reads high (15V+) or is present when the key is off, it confirms the fault condition.
Tools: Advanced OBD-II Scanner (Intermediate) - Perform a 'Wiggle Test'
While monitoring the live ignition voltage on your scan tool or with a multimeter, gently wiggle the key in the ignition. Then, move the wiring harness connected to the ignition switch and along the steering column. If the voltage spikes erratically, it indicates an intermittent short in the wiring or a faulty ignition switch.
Tools: Advanced OBD-II Scanner or Multimeter (Intermediate) - Test the Ignition Switch Circuit Voltage
Using a vehicle-specific wiring diagram, identify the run/start signal wire at the ignition switch connector. With the key in the 'Run' position, carefully back-probe this wire with a multimeter set to DC volts. The reading should be close to battery voltage (12.0-12.6V). If it's significantly higher (above 15V) or if voltage is present with the key off, a fault exists in the circuit or switch.
Tools: Multimeter, Vehicle-specific Wiring Diagram (Advanced) - Isolate the Faulty Component
If the voltage test in step 7 showed high voltage, disconnect the ignition switch connector. Test the wire coming from the main harness again. If the high voltage is gone, the ignition switch itself is faulty and feeding back voltage. If the high voltage remains on the harness wire, the short to power is located further upstream in the wiring, or a relay or module is back-feeding the circuit.
Tools: Multimeter, Wiring Diagram (Advanced) - Advanced: Test Circuit Ground Resistance
Using a wiring diagram, locate the primary ground point for the ignition circuit or the BCM. Measure the resistance between this ground point and the negative terminal of the battery. A high-quality ground connection has a resistance of 0.1 ohms or less. A reading higher than this indicates a compromised ground, causing floating voltages.
Tools: Multimeter, Wiring Diagram (Advanced)
When This Code Triggers (Freeze-Frame Conditions)
- Ignition 1 Voltage: 15.5V (Key in 'Run' position, engine off)
- Engine RPM: 0 RPM (Fault detected prior to engine start)
- Vehicle Speed: 0 mph (Vehicle was stationary when the fault was logged)
- Control Module Voltage: 15.6V (System-wide over-voltage condition, possibly from a faulty alternator)
Related Codes
- P2534 — This is the direct opposite of P2535, meaning 'Ignition Switch Run/Start Position Circuit LOW.' P2534 points to an open circuit, a short to ground, or a faulty switch failing to provide power, whereas P2535 points specifically to a short to power or excess voltage.
- U0140 — 'Lost Communication With Body Control Module.' This code often appears alongside P2535, especially in GM vehicles. The high voltage from the P2535 fault disrupts the communication network, causing the BCM to go offline.
- B1325 — 'Device Power Circuit Voltage Below/Above Threshold.' This is a body control code that frequently accompanies P2535. It indicates a general power supply problem detected by the BCM, reinforcing the diagnosis of a circuit short or overcharging alternator.
- P0513 — 'Invalid Immobilizer Key.' The high voltage condition of P2535 interferes with the anti-theft or immobilizer system's ability to correctly read the key. The BCM interprets the voltage spike as a tampering attempt and sets this code.
Climate & Environmental Factors
- High Humidity / Coastal Regions: Salt-laden air in coastal areas acts as an electrolyte, dramatically accelerating corrosion on electrical connectors, fuse block terminals, and wiring. This corrosion creates unintended electrical paths (shorts) that cause the high voltage condition.
- Cold Climates / Road Salt: In regions where road salt is used heavily in winter, the salty slush and spray coat the undercarriage and work into engine bay connectors and fuse blocks. This leads to severe corrosion over time.
- Water Leaks: Physical water leaks from a bad windshield seal, clogged sunroof drains, or compromised headlight assemblies drip onto interior fuse blocks or the BCM, causing direct water damage and shorts.
How to Talk to a Mechanic About This Code
Say this: "I have a P2535 code with symptoms like intermittent no-start and a dead battery. I'd like to book a diagnostic appointment. Please start by checking for TSBs, testing the charging system for over-voltage, and verifying the ignition circuit voltage before recommending any part replacements."
This signals that you understand P2535 is a complex electrical code and that a systematic diagnosis is required. It steers the technician away from immediately replacing the ignition switch (a common misdiagnosis) and toward checking more likely causes like a faulty alternator, BCM, or wiring issue, saving you money on unnecessary parts.
Avoid saying:
- 'My car won't start, I think it's the battery.'
- 'Just replace the ignition switch.'
- 'My check engine light is on, can you just fix it?'
Questions to ask before authorizing the repair:
- Did you test the charging system voltage with the engine running? What was the reading?
- Did you find any Technical Service Bulletins (TSBs) for this code on my vehicle?
- What was the voltage reading on the ignition run/start circuit with the key on and off?
- If you're recommending a BCM or other module, does the new part require programming and is that included in the quote?
Where to Take It: Dealer vs Independent vs Chain
- Dealer:
Recommended for newer GM vehicles where a faulty BCM is a known issue requiring programming, or if a specific TSB applies that an independent shop is not equipped to handle.
Best for: Vehicles still under warranty, Newer vehicles (2020+) with known TSBs related to P2535, especially GM models., Repairs that require BCM/PCM replacement and programming.
Downsides: Highest labor rates, May be quick to replace an expensive module when a wiring repair or TSB-specified fix (like installing a diode) is the real solution. (Typical cost: +50% vs. baseline) - Independent Shop:
Best fit for most out-of-warranty vehicles, provided the shop has a good reputation for electrical troubleshooting. Ask if they are comfortable diagnosing intermittent electrical faults and have access to wiring diagrams.
Best for: Out-of-warranty vehicles where the cause is likely a wiring short, faulty ignition switch, or bad alternator., Owners who have a trusted relationship with a shop that has strong electrical diagnostic skills.
Downsides: Quality and expertise in complex electrical diagnosis vary greatly., May not have access to the latest TSBs or factory-level programming software for module replacement. (Typical cost: +0% vs. baseline) - Chain Shop:
AVOID for diagnosing a P2535 code. The risk of them replacing the wrong parts (like the battery or starter) without solving the underlying electrical issue is very high.
Best for: Simple, clear-cut part replacements like a battery or alternator, but only *after* a proper diagnosis has been made elsewhere.
Downsides: Technician skill varies dramatically; generally not equipped for in-depth electrical diagnosis., High pressure to replace parts rather than diagnose complex circuit faults, leading to expensive misdiagnoses. (Typical cost: -10% vs. baseline)
When to Walk Away From the Repair
If the estimated repair cost exceeds 40-50% of the car's private-party value, you should pause and evaluate whether to fix it, sell it as-is, or trade it in.
- Car worth $4000, fix is $1800: Walk away. A BCM replacement costing $1,800 is 45% of the car's value. It's not financially sound to proceed.
- Car worth $12000, fix is $450: Fix it. An alternator replacement for $450 is well below the threshold and restores a valuable asset.
- Car worth $2500, fix is $350: Borderline. A $350 ignition switch replacement is a significant percentage of the value. If the car is otherwise in good shape, it's likely worth it. If it has other pending issues, it may be time to sell.
What Scan Tool You Need for This Code
Minimum: A scanner that can read live data, specifically the 'Ignition 1 Voltage' PID (Parameter ID). A basic code reader that only shows the P2535 code is not sufficient for diagnosis.
A basic $20 code reader only tells you the code is present. It cannot show you the live voltage on the circuit, which is essential to confirm the 'circuit high' condition and see if it's intermittent. Without live data, you are completely guessing at the cause.
Budget: BlueDriver Pro (~$100) — Connects to your smartphone and allows you to view live data streams, including ignition voltage. It reads freeze-frame data to see what the voltage was when the code was set, and reads enhanced codes (like BCM codes) on many models.
Mid-range: Innova 5610 / Foxwell NT630 (~$350) — These handheld units offer live data graphing, which is excellent for spotting intermittent voltage spikes during a 'wiggle test'. The Innova 5610 is a bidirectional tool, allowing you to command relays on or off to test them, a significant diagnostic advantage.
Professional: Autel MaxiCOM MK808 / Launch X431 series (~$500-1200) — Provides full bidirectional control to test individual components and circuits. These tools access manufacturer-specific PIDs and perform the necessary programming/relearning procedures required when replacing a BCM, making them essential for the most complex P2535 repairs.
Rent vs buy: For a one-time diagnosis, many auto parts stores like AutoZone rent scanners for free with a deposit. However, their rental tools may be basic code readers. For P2535, you need live data, so buying a capable scanner like the BlueDriver Pro is a better investment for effective DIY diagnosis.
How to Clear the Code After You Fix It
- Reconnect battery if disconnected for repair
- Use an OBD-II scan tool to select the 'Clear/Erase Codes' function
- Perform a complete OBD-II drive cycle to allow readiness monitors to run
Drive cycle (~30 minutes): Start with a cold engine. Idle for 2-3 minutes with A/C on. Accelerate to 55 mph and hold a steady speed for 3-5 minutes. Decelerate without using the brake. Accelerate again to 55-60 mph and hold for 5 minutes. Decelerate and idle for 30 seconds before shutting off the engine.
Readiness monitors affected: Comprehensive Component Monitor, Misfire Monitor
Before emissions retest: drive at least 100 miles to fully set monitors.
Watch out for:
- Just clearing the code with a scanner does not fix the problem; the code returns if the underlying fault is still present.
- Disconnecting the battery clears the code but also resets all emissions readiness monitors to 'Not Ready', causing an automatic emissions test failure.
Will This Fail Emissions / State Inspection?
Yes — this code typically fails an OBD-II emissions inspection.
- California: An illuminated Check Engine Light is an automatic failure. After repair, a full drive cycle must be completed to set readiness monitors. For 2000+ model year vehicles, only one non-continuous monitor may be incomplete (but not the catalyst monitor).
- New York: The NYS DMV inspection includes an OBD-II scan. An active P2535 code causes an automatic failure. The Check Engine Light must be off and readiness monitors must be set.
- Texas: In counties requiring emissions testing (like Harris, Dallas, Tarrant), an illuminated Check Engine Light is an automatic failure. You cannot pass until the vehicle is repaired and the code is cleared.
Most Commonly Affected Vehicles
- Chevrolet / GMC Silverado, Sierra, Tahoe, Yukon, Suburban, Avalanche (2007-2019) — Extremely common on these trucks and SUVs. Often caused by broken or chafed wires in the tilt-steering column or terminal issues at the underhood fuse block. Several TSBs (PIT5391E) point to these wiring issues as well as faulty BCMs.
- Ford F-150, Explorer, Fusion (2008-2019) — Often caused by a failure of the ignition switch assembly itself. On F-150 models from 2011-2014, this is a particularly well-documented failure point.
- Dodge / Ram / Jeep Ram 1500/2500/3500, Grand Cherokee, Charger (2006-2022) — On many of these models, the P2535 code is a symptom of a failing Totally Integrated Power Module (TIPM), which contains the relays and logic for many electrical functions. TIPM failure is especially common on 2006-2012 Ram trucks.
- Chevrolet Trailblazer, Impala, Traverse, Malibu (2005-2018) — Like their truck counterparts, these GM vehicles suffer from high failure rates of the ignition switch and associated wiring, leading to P2535. The 2006-2013 Impala was part of a major ignition switch safety recall.
- Buick Enclave, LaCrosse (2008-2017) — Shares the same problematic ignition system architecture as other GM vehicles, making it susceptible to this fault from either the switch, wiring, or BCM. The 2005-2009 LaCrosse was included in recall 14V355.
- Cadillac Escalade, CTS (2007-2019) — As a sibling platform to Chevy/GMC SUVs, the Escalade is highly prone to P2535 due to the same wiring and BCM issues.
- Toyota Camry, Corolla, RAV4 (Push-button start models) (2012-2020) — On models with push-button start, faults within the ignition circuit or a failing Body Control Module trigger a P2535 code.
- Nissan Altima, Maxima, Titan (2007-2018) — Issues with the ignition switch and related relays are a known cause for this code in various Nissan models.
- Honda Accord, Civic, CR-V (2008-2017) — While less common than on domestic brands, a failing ignition switch or a short in the harness causes P2535 on these models.
Manufacturer-Specific Notes
- General Motors (GM): GM TSB PIT5391E directly addresses P2535 on 2007-2019 trucks and SUVs. The primary causes are broken or chafed wires in the harness that flexes with the tilt-steering column, or corroded terminals in the underhood fuse block (X50A). A faulty BCM that keeps ignition relays energized is another common cause (per TSB PIT5817A), which prevents the engine from shutting off.
- Dodge / Ram / Jeep (Stellantis): On many 2006-2012 models, P2535 is a secondary code pointing to a failing Totally Integrated Power Module (TIPM). The TIPM houses relays that fail internally, causing a variety of electrical issues, including back-feeding voltage to the ignition circuit.
- Ford: On many F-150 and Explorer models, the electrical portion of the ignition switch is a high-failure item. It fails internally, creating a short that sends continuous power to the run/start circuit. Unlike GM's wiring issues, the fault on Fords is more commonly located within the switch component itself.
- Push-Button Start Vehicles (All Makes): For vehicles with push-button start, the 'ignition switch' is a combination of the button, various sensors, and the BCM. A P2535 code is triggered by a fault in any of these components, including the brake pedal switch. Diagnosis requires a scan tool capable of reading BCM and security module data streams.
Real Owner Stories
2021 Chevrolet Silverado with P2535 and no-start
Truck would not start and displayed a P2535 code. The owner spent a day checking modules and power supplies before finding the real issue.
What they tried:
- Checked power supply modules and other electronics.
- Inspected engine grounds as suggested by Technical Service Bulletins (TSBs).
- Found a wiring harness that had rubbed through on an engine bracket, causing a short to ground.
Outcome: The owner repaired the damaged wire by soldering in a new section, protected it with a rubber hose, and secured it away from the bracket. This cleared the P2535 code and resolved the no-start condition.
Lesson: On modern GM trucks, always perform a thorough visual inspection of wiring harnesses for chafing against engine or frame components before replacing expensive modules.
2016 Chevrolet Camaro SS with a severe parasitic battery drain
The battery died within a few hours, and the car stored codes P2535 and P069E. The owner had already replaced the battery three times.
What they tried:
- Replaced the battery multiple times and the key fob battery.
- Used a clamp meter and pulled fuses one by one to isolate the draw.
- Traced the draw to the F16 display fuse and noticed the infotainment screen backlight stayed on when the car was off.
Outcome: The investigation pointed towards a fault in the infotainment system or related wiring, causing a parasitic draw and triggering the P2535 code.
Lesson: P2535 is often a symptom of a parasitic draw caused by another system staying powered on. Use a systematic fuse-pulling method to isolate the circuit causing the draw.
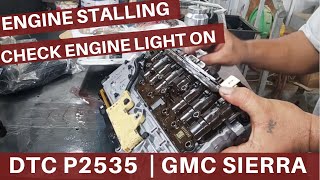
2018 GMC Sierra with P2535 and other electrical issues
The truck experienced multiple electrical problems and set the P2535 code.
What they tried:
- Suspected a wiring issue and sought advice.
- Swapped the ignition relay in the underhood fuse box with an identical relay from the horn circuit.
Outcome: Swapping the relay immediately resolved the high-voltage condition, proving the original relay was stuck closed.
Lesson: When faced with P2535, perform the simplest tests first. Swapping a relay is a quick, no-cost diagnostic step that instantly confirms or rules out a faulty relay.
How to Prevent This Code From Triggering
- Lighten your keychain (Daily habit) — Excessive weight from heavy keychains puts constant strain on the internal components of the ignition lock cylinder and the electrical switch behind it, accelerating wear and tear.
- Apply dielectric grease to electrical connectors (During any electrical repair or inspection) — Dielectric grease is a non-conductive sealant that protects electrical connectors from moisture, dirt, and salt. Applying it to connector seals prevents corrosion, a primary cause of electrical shorts.
- Perform regular visual inspections of wiring (Annually or during oil changes) — Periodically check wiring harnesses in the engine bay and under the dash for signs of chafing, melting, or rodent damage. Catching a worn wire before it shorts prevents a P2535 code.
- Ensure battery terminals and ground connections are clean and tight (Annually) — Corrosion on battery terminals or a loose main ground strap causes unstable voltage and high resistance. This forces the alternator to work harder, causing voltage spikes.
Frequently Asked Questions
What is the most common mistake when diagnosing P2535?
The biggest mistake is immediately replacing the ignition switch without performing electrical tests. The actual cause is often a wiring short, a stuck relay, or an overcharging alternator. Always test the charging system and wiring before buying parts.
My engine won't shut off and I have a P2535 code. What should I do?
This dangerous condition occurs when unwanted voltage keeps the main ignition relay stuck on. To shut the engine off in an emergency, pull the 'IGN' or 'Fuel Pump' relay from the fuse box. You must then repair the root cause, such as a faulty BCM or shorted wire.
Can a blown fuse cause a high voltage code like P2535?
Yes, in specific circuit designs. If a fuse on the ground side of a component blows, the control module's monitoring circuit sees 'reflected' battery voltage instead of the expected ground signal. The computer interprets this as a high voltage condition.
How much does it cost to diagnose a P2535 code?
Most repair shops charge a diagnostic fee ranging from $125 to $185 to accurately identify the cause. This fee is typically applied as a credit toward the final repair cost.
Will a new ignition switch need to be programmed?
On most vehicles made before 2010 with a traditional key, a new switch does not require programming. However, on newer vehicles with push-button start or advanced anti-theft systems, the new switch or related module requires programming to the vehicle's computer.
Is P2535 caused by a bad battery?
No, P2535 is a 'circuit high' code, not a low voltage code. However, a failing alternator overcharging the system above 15 volts to compensate for a bad battery triggers the high voltage condition.
What's the difference between an ignition switch and an ignition lock cylinder?
The ignition lock cylinder is the mechanical part you put your key into. The ignition switch is the electronic component connected to the back of the cylinder that sends electrical signals to the car's computers. P2535 is caused by the electronic switch, not the mechanical cylinder.
Can I just clear the code and keep driving?
No. Clearing the code only turns the check engine light off temporarily until the PCM detects the high voltage again. This ignores the root problem and leaves you at risk of sudden engine stalling or a no-start condition.
Key Takeaways
- Code P2535 triggers when the Powertrain Control Module (PCM) detects ignition switch circuit voltage exceeding the normal 12-volt range, often spiking above 15 volts.
- A failing alternator overcharging the system above 15 volts is a primary trigger for P2535, so always test battery voltage with the engine running before replacing the ignition switch.
- Driving with an active P2535 code risks sudden engine stalling at highway speeds or a severe parasitic draw that permanently damages a $800+ Body Control Module (BCM).
- On 2007-2019 GM trucks and SUVs, inspect the tilt-steering column wiring harness for chafing and the underhood fuse block for corrosion before assuming the ignition switch is bad.
- Swapping the ignition relay with an identical non-critical relay (like the horn) takes 5 minutes and instantly rules out a stuck relay as the cause of the high-voltage short.
Helpful Videos
Shop the Parts Behind P2535
Below are the parts most often responsible for code P2535, ranked by how frequently each one is the actual culprit (per the diagnosis above). Tap any to see what we have for your vehicle.


The information in this article is provided for general reference and educational purposes only. Vehicle specifications, procedures, and part compatibility can vary by production date, trim level, and region. Always consult your vehicle's factory service manual and verify part numbers before purchasing or performing repairs. Safety-critical components such as airbags, seat belts, and braking systems should be installed by a qualified professional.
- 🧭 Diagnostic Flowchart
- 🎬 Helpful Videos
- 🛍️ Shop This Part
- What Does P2535 Mean?
- Can I Drive With P2535?
- Common Causes
- Symptoms
- Common Fixes & Costs
- DIY vs Professional
- Used vs. New Parts: Buying Guide
- What Happens If You Wait — Timeline
- Cost of Not Fixing It
- Diagnosis Steps
- When This Code Triggers (Freeze-Frame Conditions)
- Related Codes
- Climate & Environmental Factors
- How to Talk to a Mechanic About This Code
- Where to Take It: Dealer vs Independent vs Chain
- When to Walk Away From the Repair
- What Scan Tool You Need for This Code
- How to Clear the Code After You Fix It
- Will This Fail Emissions / State Inspection?
- Most Commonly Affected Vehicles
- Manufacturer-Specific Notes
- Real Owner Stories
- 2021 Chevrolet Silverado with P2535 and no-start
- 2016 Chevrolet Camaro SS with a severe parasitic battery drain
- 2018 GMC Sierra with P2535 and other electrical issues
- How to Prevent This Code From Triggering
- Frequently Asked Questions
- What is the most common mistake when diagnosing P2535?
- My engine won't shut off and I have a P2535 code. What should I do?
- Can a blown fuse cause a high voltage code like P2535?
- How much does it cost to diagnose a P2535 code?
- Will a new ignition switch need to be programmed?
- Is P2535 caused by a bad battery?
- What's the difference between an ignition switch and an ignition lock cylinder?
- Can I just clear the code and keep driving?
- Key Takeaways
- 🎟️ Get 5% Off