
OBD-II Code P2548: Torque Management Request Input Signal 'B'
What P2548 means, why it triggers, and how to fix it
What Does P2548 Mean?
P2548 means the Engine Control Module (ECM) detects a communication failure with the Transmission Control Module (TCM). To protect the transmission during gear shifts, the TCM requests a temporary reduction in engine torque. This code indicates the 'B' signal for this request is missing or incorrect, causing rough gear changes and drivability problems.
Technical definition: The SAE/OBD-II definition for P2548 is "Torque Management Request Input Signal 'B'". This indicates the Powertrain Control Module (PCM) detects a fault or out-of-range performance in the input circuit receiving torque reduction requests from the Transmission Control Module (TCM). The 'B' denotes a specific redundant signal line used as a fail-safe.
Can I Drive With P2548?
Yes, But With Caution. You can drive, but expect harsh shifting, reduced engine power, and possible stalling. Driving for an extended period causes excessive wear on transmission clutches. Continuing for hundreds of miles leads to catastrophic transmission failure, turning a minor wiring repair into a multi-thousand dollar replacement.
Common Causes
- Damaged or Corroded Wiring/Connectors (Very Common) — The communication wire between the TCM and ECM is susceptible to damage from engine heat, vibration, or moisture. Chafed insulation, broken wires, or corroded pins at the module connectors cause a lost or scrambled signal.
- Poor Electrical Grounds or Power Supply Issues (Common) — Control modules require a stable voltage and a solid ground connection. A weak battery, failing alternator, or a loose ground strap causes intermittent voltage drops, leading the TCM to malfunction and trigger a P2548 code.
- Outdated or Corrupt Control Module Software (Common) — If the TCM or ECM has outdated or corrupted calibration files, they fail to communicate properly. This is a known issue on many vehicles, and a software reflash is often the first recommended step.
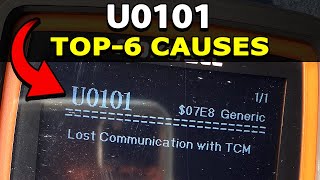
- Faulty Transmission Control Module (TCM) (Common) — Internal failure of the TCM's circuitry prevents it from sending the torque request signal correctly. This stems from cracked solder joints, component failure, 🎬 See the top 6 causes of TCM communication failure or internal corrosion from moisture intrusion.
- Internal Transmission Issues (Less Common) — On higher mileage vehicles, internal wear of clutches or the valve body causes erratic hydraulic pressure. This leads the TCM to make invalid torque requests as it struggles to manage shifts, indirectly causing communication faults.
- Aftermarket Accessory Interference (Less Common) — Improperly installed aftermarket electronics, such as remote starters or high-powered audio systems, introduce electrical noise into the CAN bus network. This interference corrupts the signal between the TCM and ECM.
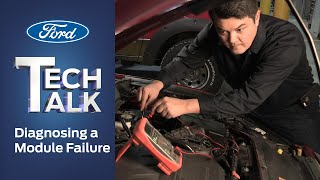
- Faulty Engine Control Module (ECM/PCM) (Rare) — The ECM itself is rarely the source of the problem. If its internal circuits responsible for receiving the torque management signal fail, 🎬 Watch: Professional tips for diagnosing a control module failure it sets the code even if the TCM and wiring are fine.
- Faulty Positive Crankcase Ventilation (PCV) Valve (Rare) — A stuck PCV valve causes incorrect crankcase pressure, affecting engine load calculations. This leads the TCM to receive unexpected data and make invalid torque requests. TSBs for specific manufacturers link PCV issues to this code.
Symptoms
- Harsh or Abrupt Gear Shifting — Without torque reduction, the transmission slams into the next gear under full engine power, causing a noticeable bang or jolt.
- Check Engine Light Illuminated — The Malfunction Indicator Lamp (MIL) lights up on the dashboard to alert you of the fault.
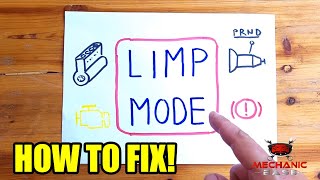
- Reduced Engine Power or 'Limp Mode' — The vehicle's computer intentionally limits engine power and RPMs to protect the transmission from further damage. A 'Service Transmission' message often appears. 🎬 Watch: Understanding limp mode and how to fix it
- Delayed or Sluggish Acceleration — The vehicle hesitates or feels unresponsive when pressing the gas pedal as the control modules struggle to coordinate.
- ABS or Traction Control Lights On — On vehicles with advanced stability control systems, this communication error triggers warning lights for the ABS and traction systems, as they also rely on torque management.
Common Fixes & Costs
- Repairing Damaged Wiring or Connectors — Parts: $10-$50, Labor: $150-$300, ~1.5 hr book time (Intermediate)
- Cleaning or Repairing Ground Connections — Parts: $5-$20, Labor: $75-$150, ~0.8 hr book time (Beginner)
- Reprogramming the TCM or ECM — Parts: $0, Labor: $150-$300, ~1.0 hr book time (Professional)
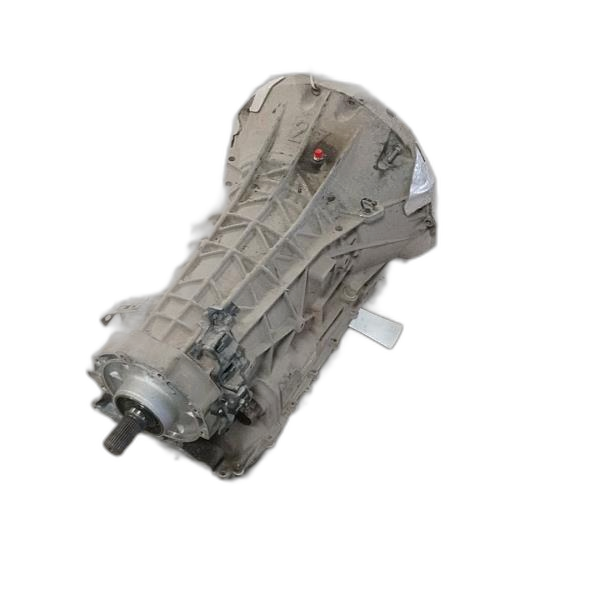
- Replacing the Transmission Control Module (TCM)
— Parts: $500-$1000, Labor: $300-$500, ~2.0 hr book time
(Professional)
Chevrolet Silverado (2010-2014): OEM 24252363, 25978353 (Alt: Dorman (e.g., 609-200), Cardone)
Ford F-150 (2011-2017): OEM BL3Z-7Z369-B, HL3Z-7A100-B (Alt: Dorman (e.g., 609-024, 609-035))
Chevrolet Corvette C6 (2010-2013): OEM Contact dealer with VIN (Alt: ACDelco (GM Original Equipment)) - Replacing the Engine Control Module (ECM/PCM)
— Parts: $600-$1200, Labor: $300-$500, ~1.5 hr book time
(Professional)
Chevrolet Silverado (2010-2014): OEM 12704477 (Alt: ACDelco, Cardone)
Ford F-150 (2011-2017): OEM FR3Z-12A650-CLBNP, HL3Z-12A650-AYANP (Alt: Motorcraft, Cardone)
Chevrolet Corvette C6 (2010-2013): OEM Contact dealer with VIN (Alt: ACDelco (GM Original Equipment))
Used vs. New Parts: Buying Guide
When a used part is worth it: For a complex electronic part like a TCM or ECM, buying used is risky but is a budget-friendly option for an older, lower-value vehicle. It only makes sense if you find a part with an exact part number match from a reputable seller offering a warranty and return policy.
Donor-vehicle mileage cap: roughly under 80000 miles for the part to have meaningful remaining life.
Donor quality checklist:
- Verify the exact part number matches; 'close' is not good enough.
- Ensure the seller offers a functional warranty (30-90 days is standard).
- Ask about the donor vehicle's history; avoid parts from flood-damaged or collision-totaled cars.
Decision logic:
- If The part is a TCM or ECM that requires VIN programming. → Strongly favor a new part or a professional remanufacturing service. The cost of programming and the risk of a used part failing outweighs the initial savings.
- If Vehicle is over 10 years old and budget is the primary concern. → A used part is a viable option, but factor in the potential cost of diagnostic time and labor if the used part is faulty.
- If The part is known for software glitches fixed by updates. → Buy new or have your existing module professionally updated. A used part likely has the same outdated software.
Warranty tradeoff: Used parts typically have a 30-90 day parts-only warranty, leaving you to pay for labor again if it fails. New OEM or quality aftermarket parts often come with a 1-year or longer warranty.
Worst-case if a used part fails: $800 (covers repeat labor and diagnostics)
Cost of Not Fixing It
- 0-1 month: Annoying and potentially jarring harsh shifts. Reduced fuel economy (5-10%) due to inefficient shifting and limp mode. Increased stress on drivetrain components. (Added cost: Negligible, other than fuel costs.)
- 1-6 months: Accelerated wear on transmission clutch packs, bands, and solenoids due to repeated, unprotected shifts under full engine torque. This causes slipping between gears. (Added cost: $1,000-$2,000 for potential clutch pack replacement if damage occurs.)
- 6+ months: Catastrophic internal transmission failure. The cumulative damage from harsh shifting destroys hard parts like drums and planetary gear sets, requiring a complete transmission rebuild or replacement. (Added cost: $2,500-$5,000+ for a full transmission replacement or rebuild.)
Diagnosis Steps
- Read and Document the Codes
Use an OBD-II scanner to confirm P2548 is present. Check for related codes (e.g., P2544, P0700, U-codes) and record the freeze frame data. A P0700 code specifically points to the TCM as the source of the fault request.
Tools: OBD-II Scanner (Beginner) - Check Battery Voltage and Ground Connections
Use a multimeter to ensure battery voltage is stable (above 12.4V with engine off, 13.5-14.5V at idle). Inspect the main engine, transmission, and module ground straps for tightness and corrosion. Check resistance between the negative battery terminal and the module's ground pin; it must be less than 0.1 ohms.
Tools: Multimeter, Socket Set, Wire Brush (Beginner) - Perform a Thorough Visual Inspection
Carefully inspect the wiring harness between the TCM and ECM. Look for chafing, melting, or corrosion. Pay close attention to areas where the harness rubs against the engine or chassis.
Tools: Flashlight (Beginner) - Inspect Module Connectors
Disconnect the negative battery terminal. Unplug the electrical connectors from the TCM and ECM. Examine the pins for corrosion, moisture, or bent pins. Use electronic contact cleaner to clean the pins before securely reconnecting them.
Tools: Socket Set, Electronic Contact Cleaner (Intermediate) - Perform a 'Wiggle Test'
While monitoring the signal voltage with a multimeter or scan tool, gently wiggle the wiring harness and connectors between the TCM and ECM. If the voltage reading fluctuates or drops out, it confirms an intermittent connection or a broken wire inside the insulation.
Tools: Multimeter or Advanced Scan Tool (Intermediate) - Test the Signal Circuit with a Multimeter
Using a vehicle-specific wiring diagram, identify the 'Torque Management Request Signal B' wire. With the key on, engine off, back-probe the signal wire at the ECM connector and check for voltage. A reading of 0V or 5V often indicates a short to ground or power. Check for continuity on the signal wire between the TCM and ECM connectors; resistance must be less than 2 ohms.
Tools: Multimeter, Vehicle-Specific Wiring Diagram, Back-probe Kit (Advanced) - Check for Software Updates
Check with a dealership or a qualified repair shop for any available Technical Service Bulletins (TSBs) or software updates for the TCM or ECM. A reflash of the module's software often resolves communication bugs and must be done before replacing modules.
Tools: Access to TSB Database, Professional Scan/Reprogramming Tool (Professional) - Analyze Live Data for Torque Request PIDs
Using an advanced scan tool, monitor the live data Parameter IDs (PIDs) for 'Torque Management Request Signal B'. Normal values are typically represented as a voltage (0.5-4.5V) or a percentage that changes with throttle input. A value that is stuck, erratic, or reads 0 indicates a circuit fault.
Tools: Advanced Scan Tool (Advanced) - Analyze the Signal with an Oscilloscope
Connect an oscilloscope to the signal wire to observe the communication pattern. A healthy signal is a clean square wave or a stable analog voltage that changes smoothly with torque demand. Glitches, excessive noise, or signal dropouts point directly to a wiring or module problem.
Tools: Oscilloscope, Wiring Diagram (Professional)
When This Code Triggers (Freeze-Frame Conditions)
- Engine Coolant Temp: 180-210°F (The fault typically occurs when the engine is at full operating temperature.)
- RPM: 1500-3000 (The code often sets during acceleration or while holding a steady speed when a gear shift is commanded by the TCM.)
- Engine Load: 30-70% (Moderate engine load, such as during normal acceleration or climbing a slight incline, where torque management is critical for a smooth shift.)
- Vehicle Speed: 25-60 mph (The fault is most likely to be logged at city and highway speeds where the transmission is actively shifting gears.)
How to Clear the Code After You Fix It
- Reconnect the battery if it was disconnected for the repair.
- Use a quality OBD-II scan tool to erase the diagnostic trouble codes.
- Perform a complete OBD-II drive cycle to allow the readiness monitors to run.
Drive cycle (~30 minutes): Start with a cold engine (off for 8+ hours). Idle for 2-3 minutes with loads on (A/C, rear defrost). Drive for 15 minutes in stop-and-go city traffic with several idle periods. Drive for 15 minutes at a steady highway speed (55-60 mph). Allow the vehicle to cool down completely.
Readiness monitors affected: Comprehensive Component Monitor, Misfire Monitor, Catalyst Monitor, Oxygen Sensor Monitor
Before emissions retest: drive at least 100 miles to fully set monitors.
Watch out for:
- Disconnecting the battery does not guarantee codes are cleared or that readiness monitors will be set; a drive cycle is required.
- Taking the vehicle for an emissions test immediately after clearing the code results in a 'Not Ready' failure.
- The code returns quickly if the underlying electrical or mechanical fault has not been properly repaired.
Will This Fail Emissions / State Inspection?
Yes — this code typically fails an OBD-II emissions inspection.
- California: An illuminated Check Engine Light is an automatic failure. CARB requires all OBD readiness monitors to be set. Expect to drive 50-100 miles after repair before a retest is possible.
- New York: The NYVIP3 inspection includes an OBD-II scan. An active P2548 code causes an automatic failure. For 2001+ vehicles, having more than one readiness monitor 'Not Ready' also causes a failure.
- Texas: In the 17 counties requiring emissions testing, an illuminated Check Engine Light is an automatic fail. The system's readiness monitors must also be set to 'Ready' to pass the OBD-II test.
Helpful Videos


Shop the Parts Behind P2548
Below are the parts most often responsible for code P2548, ranked by how frequently each one is the actual culprit (per the diagnosis above). Tap any to see what we have for your vehicle.


The information in this article is provided for general reference and educational purposes only. Vehicle specifications, procedures, and part compatibility can vary by production date, trim level, and region. Always consult your vehicle's factory service manual and verify part numbers before purchasing or performing repairs. Safety-critical components such as airbags, seat belts, and braking systems should be installed by a qualified professional.
- 🎬 Helpful Videos
- 🛍️ Shop This Part
- What Does P2548 Mean?
- Can I Drive With P2548?
- Common Causes
- Symptoms
- Common Fixes & Costs
- Used vs. New Parts: Buying Guide
- Cost of Not Fixing It
- Diagnosis Steps
- When This Code Triggers (Freeze-Frame Conditions)
- How to Clear the Code After You Fix It
- Will This Fail Emissions / State Inspection?
- 🎟️ Get 5% Off