
P2560 on 2019 Ram 2500 6.7L Cummins: Engine Coolant Level Low Causes and Fixes
This code means your truck's computer detects the engine coolant is low. The most common cause is a faulty coolant level sensor (P/N: 68489744AA) at the bottom of the reservoir, which sends a false signal. Other causes include an actual coolant leak (radiator, hoses, EGR cooler) or a faulty coolant reservoir (P/N: 68370066AC) where the internal float gets stuck. A new sensor is about $30-$50, while leak repairs can vary widely.
- P2560 means your truck thinks the coolant is low. Your first step is to physically check the coolant level in the reservoir when the engine is cold.
- If the coolant level is full, the most likely culprit is a bad coolant level sensor, which is a relatively inexpensive and accessible part to replace.
- If the coolant level is actually low, you have a leak. Common spots include the radiator, hoses, and water pump. A pressure test can help find it.
- In some cases, replacing just the sensor isn't enough; the entire reservoir tank must be replaced due to a faulty internal float or sludge buildup.
- Do not ignore this code. Driving with low coolant can quickly lead to severe engine overheating and costly damage.
What's Unique About the 2019-2019 Ram 2500
On the 5th generation Ram HD trucks with the 6.7L Cummins engine, the P2560 code is frequently a two-sided issue. It can be a simple, inexpensive sensor failure, but it can also be the first sign of a coolant leak from system-specific weak points like the EGR cooler. Owners often face a choice: replace the easy-to-access sensor first or perform a thorough leak inspection, as the code itself doesn't distinguish between a false signal and genuine fluid loss. Forum discussions reveal a common dilemma where even after replacing the sensor, the light remains, pointing to a faulty float inside the reservoir itself, necessitating a full tank replacement.
Diagnostic Flowchart
Tap your situation to follow the diagnostic path that matches what you're seeing on this vehicle.
Symptoms You May Notice
- "Low Coolant" message or warning light on the instrument cluster.
- Check Engine Light (CEL) is illuminated.
- Engine temperature gauge reading higher than normal or fluctuating.
- Reduced heater performance inside the cabin.
- Visible coolant puddles (pink/purple OAT coolant) under the truck.
- A sweet smell of coolant from the engine bay, especially when hot.
- Unexplained coolant loss requiring frequent top-offs.
- White smoke or steam from the exhaust, particularly if the EGR cooler is leaking internally.
- Replacing the thermostat. A thermostat typically causes overheating or under-heating issues (P0128), not a low coolant level code.
- Adding the wrong type of coolant. Topping off with a universal coolant instead of the specified Mopar OAT coolant can cause chemical reactions and deposits, but it won't directly trigger a P2560 code, though it may contribute to future problems like sludge that can impede the reservoir float.
Most Likely Causes
- Faulty Coolant Level Sensor 🔴 High Probability The sensor is a very common failure point. Over time, the internal components can fail, sending an incorrect low-level signal to the PCM even when the coolant tank is full. The sensor is a magnetic type that reads a float, and it can become faulty without ever touching coolant.
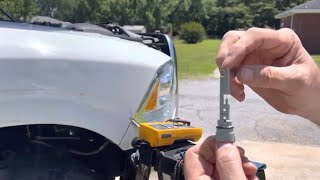
How to confirm: First, visually confirm the coolant reservoir is full when the engine is cold. If the level is correct but the code and warning light persist, the sensor is the primary suspect. 🎬 Watch this diagnostic guide to confirm a faulty sensor. The sensor can be tested with a multimeter set to Ohms. It is a simple reed switch; it should show continuity (a low resistance value, e.g., 0.2 ohms) when a magnet is held near it, and an open circuit (OL) when the magnet is removed. A failed sensor will often read as an open circuit regardless of the magnet's presence.
Typical fix: Replace the coolant level sensor (Mopar P/N 68489744AA). It is located at the bottom of the coolant expansion tank. Access is gained by removing the passenger-side front wheel and inner fender liner, which is held by several 8mm screws. The sensor can be very tight; owners often report needing to use pliers to pull the old one out and gently tapping the new one into place.
Est. part cost: $30-$50 - Faulty Coolant Reservoir / Expansion Tank 🟡 Medium Probability → Shop Engine Coolant Reservoir In many cases, the float mechanism inside the reservoir that the sensor reads can become stuck, saturated, or waterlogged. Additionally, deposits and sludge can build up inside the tank, interfering with the sensor's magnetic reading. Many owners on forums report that only replacing the entire tank assembly (Mopar P/N 68370066AC) permanently solved the false 'low coolant' warning after a new sensor failed to do so.
How to confirm: This is often diagnosed after a new sensor fails to resolve the issue. If the sensor and wiring are confirmed good, but the code remains, the tank itself is the likely culprit.
Typical fix: Replace the entire coolant reservoir. Many new reservoirs come with a new sensor pre-installed, which is 🎬 See how to replace the entire reservoir and float assembly. a common reason owners choose this path.
Est. part cost: $120-$250 - Coolant Leak 🟡 Medium Probability These trucks can develop leaks from several common areas, including the radiator, water pump, and various hose connections. A known weak point on the 6.7L Cummins is the heater hose quick-disconnect fitting, which uses an O-ring that can fail. Radiators can also develop leaks from the core or end tanks.
How to confirm: Visually inspect the engine bay for signs of pink, crusty residue or wetness around hoses, the radiator, water pump, and thermostat housing. A cooling system pressure tester is the most effective tool; pressurize the system (typically to 15-18 PSI) when cold and watch for a pressure drop, which confirms a leak.
Typical fix: Identify the source of the leak and replace the failed component. This could be a radiator, water pump, or a specific hose.
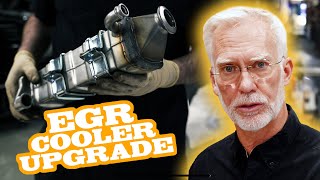
Est. part cost: $50-$800+ - Leaking EGR Cooler ⚪ Low Probability The Exhaust Gas Recirculation (EGR) cooler uses engine coolant to lower the temperature of exhaust gases. These coolers can develop internal cracks, causing coolant to be burned in the combustion process and exit through the exhaust. This results in gradual coolant loss without any visible external drips, making it a mysterious issue for many owners.
How to confirm: Key symptoms include unexplained coolant loss with no external leaks, white smoke/steam from the exhaust with a sweet smell, and sometimes white, crusty deposits in the EGR system. A cooling system pressure test that shows a steady pressure drop with no visible external leak is a strong indicator of an internal leak, such as the EGR cooler or a head gasket.
Typical fix: Replace the EGR cooler assembly. This is a labor-intensive repair often requiring professional service. 🎬 Watch a pro diagnose and replace a leaking EGR cooler.
Est. part cost: $500-$1200
Rare But Worth Checking
- Wiring Harness or Connector Issue: The wiring to the coolant level sensor can become damaged or corroded, leading to an open or shorted circuit. This is especially true for the harness sections near the wheel wells, which are exposed to road debris and moisture. A simple diagnostic trick is to jump the two terminals in the sensor's electrical connector with a paperclip or fused jumper wire; if the 'Low Coolant' light goes out, it confirms the problem is in the sensor and not the truck's wiring. Always perform a visual inspection of the connector and harness for any obvious damage before replacing parts.
- Powertrain Control Module (PCM) Fault: → Shop Engine Control Module (ECM) In very rare instances, the PCM itself can be the source of the problem, misinterpreting a correct signal from the sensor. This should only be considered after all other possibilities (sensor, wiring, leaks, reservoir) have been definitively ruled out. TSBs like 18-102-22 REV A involve software updates to the PCM to address a list of DTCs including P2560, suggesting software glitches can be a factor.
Diagnosis Steps
- Check the coolant level in the expansion tank when the engine is completely cold. The level should be between the 'MIN' and 'MAX' lines.
- If the level is low, top it off with the correct Mopar 10 Year/150,000 Mile OAT 50/50 pre-diluted coolant. Check for obvious signs of leaks under the truck and around the engine bay (hoses, radiator, water pump).
- If the coolant level is correct but the P2560 code and warning light are present, the issue is likely electrical or a faulty float.
- Access the coolant level sensor at the bottom of the reservoir. This requires removing the passenger side front wheel and the inner fender liner, which is held on by multiple 8mm screws.
- Inspect the sensor's electrical connector for corrosion, damage, or loose wires. Ensure it is securely plugged in.
- If the visual inspection checks out, the most common next step is to replace the coolant level sensor. Be prepared for the old sensor to be stuck; use pliers to wiggle and pull it out.
- If a new sensor does not fix the problem, the next logical step is to replace the entire coolant reservoir, as the internal float mechanism is likely faulty.
- If you are experiencing gradual coolant loss with no visible leaks, perform a cooling system pressure test to identify hidden leaks. If the system loses pressure with no external drips, pay close attention to the EGR cooler system as a potential source.
Parts You'll Likely Need
- Engine Coolant Level Sensor
(OEM #68489744AA)— This is the most frequent cause of a false 'low coolant' warning when the fluid level is actually full. It is a common failure item.
Trusted brands: Mopar
OEM price range: $30-$50
Aftermarket price range: $20-$40 - Coolant Expansion Tank / Reservoir
(OEM #68370066AC)— Often replaced if a new sensor doesn't solve the problem, as the internal float can fail or sludge can interfere with the sensor's operation. Many replacement reservoirs include a new sensor.
Trusted brands: Mopar
OEM price range: $110-$150
Aftermarket price range: $80-$120
Related Codes That Often Appear With This One
- P24A5 — This code for 'EGR Cooler Bypass Bank 1 Control Stuck' was listed alongside P2560 in manufacturer TSBs 18-066-23 and 18-052-19 REV. A. Their appearance together strongly suggests a problem with the EGR system, which could include a coolant leak from the EGR cooler.
Technical Service Bulletins (TSBs) & Recalls
- 18-066-23 (NHTSA ID: 10240001): Addresses P2560 among a list of DTCs that can be resolved with a PCM software update.
- 18-101-22 REV. A (NHTSA ID: 10222976): Also lists P2560 as one of several DTCs that may be set, indicating a known software or electronic issue.
- 18-052-19 REV. A (NHTSA ID: 10167383): Superseded by later bulletins, but was one of the first to list P2560 along with other EGR and aftertreatment codes.
Platform-Specific Known Issues
- The NHTSA Technical Service Bulletins #1806623, #1810122REVA, and #18-052-19 REV. A all list P2560 as a potential code that may be stored in the PCM, often alongside other emissions-related codes.
Mechanic-Grade Diagnostic Values
- Coolant Level Sensor Resistance (switch-type) — expected: Continuity (e.g., ~0.2 Ohms) when float/magnet is present (coolant full). Open circuit / OL when float/magnet is absent (coolant low).. Failure: The sensor reads Open Circuit / OL at all times, even with a magnet held next to it.
- Coolant Level Sensor Signal Voltage (at PCM) — expected: A voltage below ~1.0V typically indicates a low-level reading to the PCM.. Failure: A persistently low voltage reading even when the tank is full and the sensor is supposed to be indicating a 'full' state.
Scan Tool Commands That Help
- wiTECH: Reprogram Powertrain Control Module — As per TSB 18-102-22 REV A, a PCM software update may be required to fix a list of DTCs that includes P2560. This should be considered if the sensor, wiring, and coolant level are all confirmed to be good.
Wiring & Ground Locations
- Coolant Level Sensor 1 Connector — At the bottom of the coolant expansion tank, accessible from the passenger side wheel well.. This is the primary connection point to test. It is a 2-wire connector. The wires are for the signal and return circuits to the ECM.
- ECM Connector (CM2350) — On the engine block, driver's side.. A wiring diagram for the ISB6.7 CM2350 shows the Coolant Level Sensor 1 Signal wire at pin 35 and the Return at pin 34 of the OEM connector. This is the endpoint for continuity checks from the sensor connector.
Real Owner Repair Stories
- YouTube channel 'Diesel Legiance' (2016 Ram 2500 6.7L Cummins) — Intermittent 'Low Coolant' light on the dash. Coolant level was slightly low, but topping it off did not permanently fix the light. The reservoir tank also looked dirty and stained.
❌ Tried (didn't work) Topping off coolant.
✅ What actually fixed it The owner decided to replace multiple components at once to ensure a permanent fix. The final repair that resolved the light was replacing the coolant reservoir (which came with a new sensor), the lower return hose, and performing a full coolant flush with new Mopar OAT coolant. - RamForum.com user (2018 Ram 6.7L Cummins with 56k miles) — Constant 'Low Coolant' warning light even though the tank was full.
❌ Tried (didn't work) Replacing only the coolant level sensor.
✅ What actually fixed it The user noted that even after replacing the sensor, the light remained. They referenced another mechanic on the forum who stated the entire tank needed to be replaced due to deposits on the tank walls interfering with the sensor's magnetic reading, implying this was the necessary next step.
OEM Part Supersession History
Unknown→68489744AA— Standard part lifecycle update for the coolant level sensor.
Heads up: This sensor is specific to the 2019+ 5th Gen Ram trucks and is not backward compatible with 4th Gen sensors.Unknown→68370066AC— Standard part lifecycle update for the coolant reservoir.
Heads up: This reservoir is for 2019+ Ram trucks with the 6.7L Cummins engine.
Helpful Videos


The information in this article is provided for general reference and educational purposes only. Vehicle specifications, procedures, and part compatibility can vary by production date, trim level, and region. Always consult your vehicle's factory service manual and verify part numbers before purchasing or performing repairs. Safety-critical components such as airbags, seat belts, and braking systems should be installed by a qualified professional.
- Ram 2500:
- 🧭 Diagnostic Flowchart
- 🎬 Helpful Videos
- What's Unique About the 2019-2019 Ram 2500
- Symptoms You May Notice
- Most Likely Causes
- Rare But Worth Checking
- Diagnosis Steps
- Parts You'll Likely Need
- Related Codes That Often Appear With This One
- Technical Service Bulletins (TSBs) & Recalls
- Platform-Specific Known Issues
- Mechanic-Grade Diagnostic Values
- Scan Tool Commands That Help
- Wiring & Ground Locations
- Real Owner Repair Stories
- OEM Part Supersession History
- 🎟️ Get 5% Off