
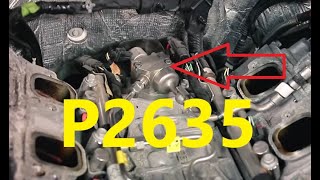
P2635 on 2013-2017 Cadillac XTS: Fuel Pump Performance, Causes, and Fixes
On a 2013-2017 Cadillac XTS, code P2635 is most often triggered by a fuel delivery issue that worsens in high ambient temperatures, causing hesitation or stalling. A GM Technical Service Bulletin points to vapor buildup in the fuel line, and the most common fix is replacing the in-tank fuel pump module with an updated part designed by GM to resolve the issue.
- P2635 on a Cadillac XTS indicates a fuel flow problem, not just a sensor fault.
- Symptoms like hesitation and stalling are much more likely to occur in hot weather (above 100°F/37.7°C), as documented by GM.
- The most probable cause is a failing in-tank fuel pump module that is sensitive to heat, and the fix is an updated GM part.
- Code P018B is a very common companion code, and specific TSBs exist to diagnose the pair.
- This is not an isolated issue; it affects a wide range of GM vehicles from the 2013-2017 model years.
What's Unique About the 2013-2017 Cadillac XTS
The Cadillac XTS, along with many other GM vehicles from this era built on the Epsilon II platform and others, is specifically known to set code P2635 🎬 Watch: Understanding the causes and fixes for the P2635 code. due to high ambient temperatures. A series of Technical Service Bulletins (TSBs) directly addresses this, noting that temperatures over 100°F (37.7°C) can cause fuel vapor to build up in the fuel feed line, leading to a drop in fuel flow, engine hesitation, and stalling. This indicates a specific sensitivity in the original fuel system design rather than just a random component failure, which GM later addressed with an updated fuel pump module.
Diagnostic Flowchart
Tap your situation to follow the diagnostic path that matches what you're seeing on this vehicle.
Symptoms You May Notice
- Engine hesitation or surging, especially during acceleration or in hot weather.
- Engine stalling, which may occur unexpectedly, often after 10-15 minutes of driving in high heat.
- Check Engine Light is on.
- Reduced engine power and poor acceleration.
- Extended cranking time before the engine starts.
- Engine refuses to start.
- Replacing only the fuel pressure sensor without confirming the fuel pump's actual performance. While the sensor can fail, the pump module is the more common culprit for this specific heat-related issue, per GM TSBs.
- Replacing the high-pressure fuel pump (HPFP) located on the engine. P2635 refers to the low-pressure fuel pump ('Pump A') located in the fuel tank, not the HPFP used in direct injection systems.
Most Likely Causes
- Failing In-Tank Fuel Pump Module (Heat-Related) 🔴 High Probability → Shop Fuel Pump As identified in GM TSBs #PIP5507B, #PIP5411F, and #17-NA-335, the original fuel pump module can struggle in ambient temperatures over 100°F, leading to vapor buildup in the fuel line and insufficient flow. This is a widely documented design flaw for this era of GM vehicles. GM later released updated pump designs to correct this specific issue.
How to confirm: Use a scan tool to monitor low-side fuel pressure. Compare desired vs. actual readings, especially under load or when the vehicle is hot. If actual pressure drops significantly when symptoms occur, the pump is failing. A technician can also perform a manual fuel pressure and volume test. TSB #PIP5286B provides a specific test for when P018B is also present: with a cold engine, use a scan tool to depressurize the fuel system. A good sensor will drop to zero PSI as the engine stalls; a faulty one may get stuck reading 30-40 PSI.
Typical fix: Replace the entire in-tank fuel pump module assembly with a new, updated OEM part. TSB #17-NA-335 explicitly states this is the correction. Ensure the replacement is the revised design meant to mitigate the vapor buildup issue. The new design features a one-way bulb breather that the old design lacked.
Est. part cost: $250-$500 - Faulty Fuel Pump Control Module (FPCM) 🟡 Medium Probability → Shop Fuel Pump The FPCM, also known as the fuel pump driver module, regulates the voltage and speed of the fuel pump. Like any electronic module, it can fail from heat, age, or moisture, causing it to improperly command the fuel pump or lose communication. On the XTS, it is located in the trunk, but on other GM vehicles it is on the frame rail where it is more exposed. Forum users have reported this as a potential cause, sometimes in conjunction with code P069E.
How to confirm: Use a scan tool to check for communication with the FPCM and check for any U-codes. Inspect the module and its connector (located in the trunk, behind the trim panel in the right rear quarter panel) for corrosion or damage. A technician can command the pump to run at various speeds to test the module's output.
Typical fix: Replace the Fuel Pump Control Module. It is often a plug-and-play part but may require programming to the vehicle in some cases.
Est. part cost: $100-$250 - Clogged Fuel Filter ⚪ Low Probability → Shop Fuel Filter The fuel filter is integrated into the fuel pump module assembly on the XTS and is not serviced separately. While not an independent failure point, a prematurely clogged filter (due to fuel contamination or age) will restrict flow, causing the same symptoms as a weak pump and triggering P2635.
How to confirm: A fuel pressure and volume test will show low output, but it's impossible to distinguish from a pump failure without disassembling the unit. A visual inspection of the filter sock during pump replacement often shows significant dirt and debris.
Typical fix: Replace the entire fuel pump module assembly, as the filter is a non-serviceable part of the unit.
Est. part cost: $250-$500
Rare But Worth Checking
- Faulty Fuel Pressure Sensor: → Shop Fuel Pressure Sensor This sensor reports fuel pressure to the FPCM. If it sends incorrect low-pressure readings, it can trick the system into setting a P2635 code even if the pump is working correctly. This is often accompanied by code P018B. TSB #PIP5286B outlines a diagnostic procedure to isolate a faulty sensor. A common failure mode is the sensor reading getting stuck at a specific value, like 48.7 PSI.
- Damaged Wiring or Connectors: Corrosion or damage to the wiring for the FPCM or the fuel pump itself, particularly the ground wire, can cause a loss of power or signal, leading to low fuel flow. A known issue on some GM models is a melted electrical connector on top of the fuel pump module due to high resistance, which can cause an intermittent connection. Check connectors for corrosion, especially on the FPCM which is mounted in the trunk on the XTS.
Diagnosis Steps
- Connect an OBD-II scanner and confirm P2635 is present. Note any other codes, especially P018B and P069E.
- Review the freeze frame data to see the conditions (ambient temperature, engine load) when the code was set. Note if the ambient temperature was high.
- Use a scan tool with live data capability to monitor the low-side fuel pressure sensor. Compare the desired pressure commanded by the FPCM to the actual pressure reading. A healthy sensor should show pressure fluctuating between 30-60 PSI; a reading stuck at a specific value (e.g., 48.7 PSI) indicates a likely sensor fault.
- If P018B is also present and the engine is cold, perform the test outlined in TSB #PIP5286B: use a GDS2 scan tool to command 'Fuel System Depressurize' and watch the sensor reading. If it doesn't drop to zero as the engine stalls, the sensor is likely faulty.
- Visually inspect the Fuel Pump Control Module (FPCM) and its electrical connector for corrosion, moisture, or damage. On the XTS, it is located in the trunk, behind the trim panel in the right rear quarter panel.
- If scan tool data is inconclusive, perform a manual fuel pressure and volume test using a mechanical gauge to verify the pump's output. Expected pressure is 30-45 PSI at idle and 55-65 PSI under load. This is the most definitive test of pump performance.
- If fuel pressure and volume are low, especially when symptoms are present (e.g., in hot weather), the fuel pump module is the primary suspect and should be replaced with the updated part per TSBs.
- If fuel pressure is good but the code persists, investigate the fuel pressure sensor, FPCM, and wiring more closely.
Parts You'll Likely Need
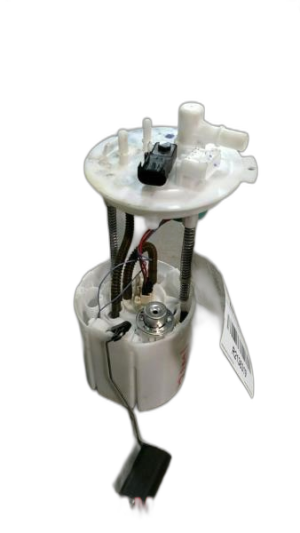
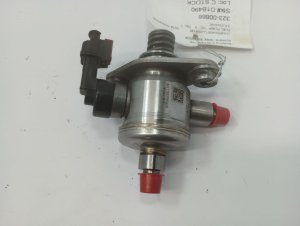
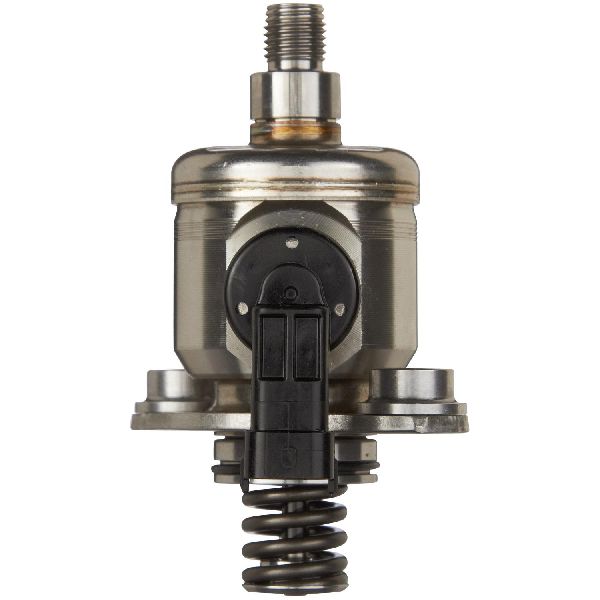
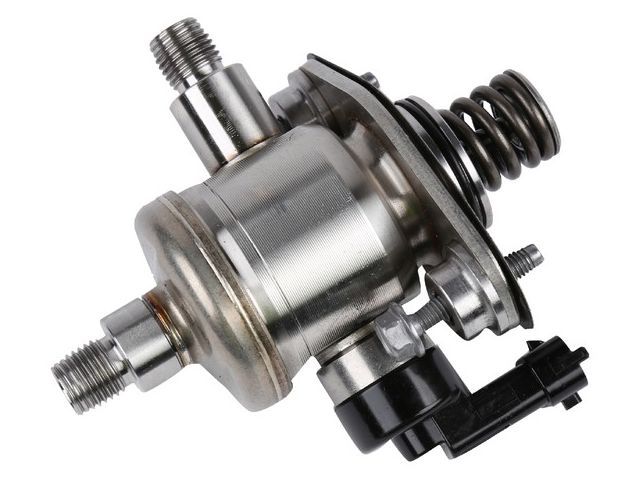
- Fuel Pump Module Assembly
(OEM #Varies by specific model/year, but an example is ACDelco M100231 (GM 84174267). Always verify with VIN.)— This is the most common cause of failure, especially related to the heat-soak issue described in GM service bulletins. The assembly includes the pump, sending unit, and integrated fuel filter. An updated design from GM is required for a permanent fix.
Trusted brands: ACDelco (GM Genuine), Delphi
OEM price range: $350-$500
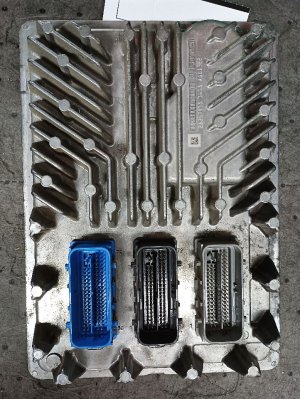
Aftermarket price range: $200-$350 - Fuel Pump Control Module (FPCM)
(OEM #22874299 (2013-14), 84082493 (2015-19). Verify with VIN.)— This module controls the fuel pump and can fail from heat or corrosion, leading to a P2635 code. It's a less common but significant possibility, especially if code P069E is also present.
Trusted brands: ACDelco, Dorman
OEM price range: $150-$250
Aftermarket price range: $80-$150
Related Codes That Often Appear With This One
- P018B — This code for 'Fuel Pressure Sensor 'B' Circuit Range/Performance' is frequently set alongside P2635, as noted in GM's TSBs #PIP5507B and #17-NA-335. The issue causing low fuel flow often affects the pressure sensor's readings simultaneously.
- P069E — This code for 'Fuel Pump Control Module Requested MIL Illumination' can appear with P2635. It indicates the FPCM has detected a fault in the fuel system and has asked the main engine computer to turn on the Check Engine Light. It is often seen in forum discussions about this issue and can be a strong indicator that the FPCM itself has logged a more specific internal fault.
Technical Service Bulletins (TSBs) & Recalls
- PIP5507B: Communicates that in ambient temperatures of 100°F (37.7°C) or higher, DTCs P2635 and/or P018B may set, potentially causing hesitation or stalling. Early versions suggested mitigation strategies.
- 17-NA-335 / PIP5411F: Superseding earlier bulletins, these explicitly identify the cause as vapor buildup and instruct technicians to replace the in-tank fuel pump module with a new, updated design as the official correction.
- PIP5286B: Provides a specific diagnostic procedure for vehicles setting both P2635 and P018B, helping to isolate a faulty fuel pressure sensor that is not reading the low end of its range correctly.
Platform-Specific Known Issues
- A known issue, documented in TSBs #PIP5507B and #17-NA-335, causes this code along with hesitation and stalling in ambient temperatures of 100°F (37.7°C) or higher due to vapor buildup in the fuel line.
- The official fix, per later GM bulletins, is to replace the original in-tank fuel pump module with a redesigned part that mitigates this heat-soak vaporization problem.
- Unlike many GM trucks and SUVs with this same issue, the Fuel Pump Control Module (FPCM) on the Cadillac XTS is located in the trunk behind the right-side trim, not on the exterior frame rail.
Mechanic-Grade Diagnostic Values
- Low-Side Fuel Pressure (Scan Tool PID) — expected: Fluctuates between 30-60 PSI with engine running.. Failure: Reading is stuck at a specific value (e.g., 48.7 PSI) and does not change with engine load or RPM.
- Low-Side Fuel Pressure (Mechanical Gauge) — expected: 30-45 PSI at idle, increases to 55-65 PSI under load.. Failure: Pressure is below 30 PSI at idle or fails to increase under load.
- FPCM Command Signal Voltage (at FPCM connector) — expected: 12 Volts at the Dark Green/White wire (Pin 13) with the key in the run position.. Failure: No voltage or significantly less than 12V, indicating a wiring issue or a fault with the Engine Control Module (ECM).
- Fuel Pump/FPCM Wiring Harness Resistance — expected: Close to 0.0 Ω on any given wire.. Failure: Resistance reading above 0.2 Ω indicates a poor connection, corrosion, or wire damage.
Hidden / Shadow Codes Worth Checking
- P069E: This code, 'Fuel Pump Control Module Requested MIL Illumination', is not a shadow code but functions similarly. It is set by the Engine Control Module (ECM) when the Fuel Pump Control Module (FPCM) detects an internal fault and requests the Check Engine Light be turned on. Its presence strongly suggests the need to scan the FPCM for more specific codes. (see via A standard OBD-II scanner will see this in the ECM, but a more advanced scanner (like GM's GDS2) is needed to communicate with the FPCM to retrieve the underlying code.)
Scan Tool Commands That Help
- GDS2 / Tech2: Fuel System Depressurize — This is a specific test from TSB #PIP5286B used when P2635 and P018B are present. On a cold engine, this command is run at idle. The engine should stall and the fuel pressure sensor reading should drop to 0 PSI. If the reading gets stuck (e.g., at 30-40 PSI), the fuel pressure sensor is faulty.
- GDS2 / Advanced Scan Tool: Fuel Pump Enable — With the engine off, this command manually activates the fuel pump. It is used to verify the pump runs and to check if the fuel pressure sensor reading changes accordingly, helping to isolate a dead pump from a sensor or module issue.
- GDS2 / Advanced Scan Tool: Fuel Pump Driver Control Module Configuration — This function may be required after replacing the Fuel Pump Control Module (FPCM) to ensure it is properly programmed and configured for the specific vehicle.
Wiring & Ground Locations
- Fuel Pump Control Module (FPCM) — In the trunk area, located behind the trim panel in the right rear quarter panel.. This is the specific location for the Cadillac XTS. Unlike many GM trucks and SUVs that have this module on the exterior frame rail (making it prone to corrosion), the XTS location is more protected but requires removing interior trim for access.
- FPCM Connector Pin 13 — At the main connector for the Fuel Pump Control Module.. This pin carries the Dark Green/White wire, which is the command signal from the main Engine Control Module (ECM). Testing for 12V here with the key on confirms the FPCM is receiving the signal to activate. A lack of voltage points to a wiring break or an ECM issue.
- FPCM Connector Pins 1 & 32 — At the main connector for the Fuel Pump Control Module.. Pin 32 (Red/White) is the main battery power feed to the module, and Pin 1 (Black) is the ground. Verifying power and ground at these pins is a fundamental step before condemning the module.
Real Owner Repair Stories
- YouTube video from a technician diagnosing a 2017 Chevy Silverado (2017 Chevrolet Silverado 4.3L V6) — Codes P2635 and P018B were present. The live data on the scan tool showed the fuel pressure sensor reading was stuck at 48.7 PSI and not fluctuating as it should.
❌ Tried (didn't work) The technician noted that many online sources immediately suggest replacing the fuel pump, but he advised testing the sensor first based on the TSB.
✅ What actually fixed it Replacing the low-pressure fuel pressure sensor located on the vehicle's frame rail. After replacement, the scan tool showed the fuel pressure reading correctly fluctuating between 30 and 60 PSI, resolving the issue.
OEM Part Supersession History
Various (original factory-installed fuel pump module)→Updated design part referenced in TSB 17-NA-335— The original design was susceptible to vapor buildup in the fuel feed line in high ambient temperatures. The new design incorporates a one-way bulb breather to mitigate this issue.
Heads up: Using an old-design pump will not permanently fix the heat-related stalling issue.22874299 / 22874300 (FPCM)→84082493 (FPCM)— Model year update and potential internal revisions.
Heads up: Part #22874299 is listed for 2013-2014 XTS models, while #84082493 is listed for 2015-2019. Use of the wrong module may result in communication or programming issues.
Model Year Variations Within This Range
- 2013-2014 vs. 2015-2017: The part number for the Fuel Pump Control Module (FPCM) changes. 2013-2014 models typically use part #22874299, while 2015-2017 models use a different part number, such as #84082493. It is critical to verify the correct part number by VIN.
Helpful Videos


Used OEM Parts in Stock
New Aftermarket Parts Available


The information in this article is provided for general reference and educational purposes only. Vehicle specifications, procedures, and part compatibility can vary by production date, trim level, and region. Always consult your vehicle's factory service manual and verify part numbers before purchasing or performing repairs. Safety-critical components such as airbags, seat belts, and braking systems should be installed by a qualified professional.
- Cadillac XTS:
- 🧭 Diagnostic Flowchart
- 🎬 Helpful Videos
- 🛍️ Shop This Part
- What's Unique About the 2013-2017 Cadillac XTS
- Symptoms You May Notice
- Most Likely Causes
- Rare But Worth Checking
- Diagnosis Steps
- Parts You'll Likely Need
- Related Codes That Often Appear With This One
- Technical Service Bulletins (TSBs) & Recalls
- Platform-Specific Known Issues
- Mechanic-Grade Diagnostic Values
- Hidden / Shadow Codes Worth Checking
- Scan Tool Commands That Help
- Wiring & Ground Locations
- Real Owner Repair Stories
- OEM Part Supersession History
- Model Year Variations Within This Range
- 🎟️ Get 5% Off