
OBD-II Code U0020: Low-Speed CAN Communication Bus Performance
What U0020 means, why it triggers, and how to fix it
- Code U0020 indicates a network-wide communication failure, causing simultaneous outages in the radio, HVAC, and power windows.
- Always test the battery first; voltage drops below 9.6V during cranking are the leading cause of false communication codes.
- On 2017-2020 GM trucks and SUVs, inspect the Serial Data Gateway Module (SDGM) connectors first, as outlined in TSB 20-NA-212.
- Never replace a $600+ Body Control Module without performing a 60-ohm bus resistance test and verifying ground connections.
What Does U0020 Mean?
The Low-Speed CAN bus is a computer network managing comfort systems like the radio, power windows, and climate control. Code U0020 means this network is failing. The modules controlling these features cannot communicate, triggering electrical glitches and cascading communication codes.
Technical definition: SAE/ISO defines U0020 as 'Low Speed CAN Communication Bus Performance.' A module detected a data transmission failure, such as corrupted messages, signal interference, or complete communication loss. Automakers also call this MS-CAN (Ford) or Low-Speed GMLAN (GM).
Can I Drive With U0020?
Yes, But With Caution. You can drive with a U0020 code, but extended trips are risky. The primary risk is unpredictability. Sudden loss of interior electronics causes major distractions. If the fault affects startup or gear selection modules, you risk a no-start condition or a 'Shift to Park' message while driving. A short trip to a repair shop is acceptable; a long journey risks stranding you.
Common Causes
- Wiring or Connector Issues at a Gateway Module (Very Common) — On 2017-2020 GM trucks and SUVs, a poor connection at the Serial Data Gateway Module (SDGM) is the primary cause. Loose, bent, or corroded terminals in the X1 and X2 connectors disrupt the entire network (GM TSB 20-NA-212).
- Poor Power or Ground Connections (Common) — A weak battery, failing alternator, or bad ground connection introduces electrical noise and voltage drops, triggering communication faults. GM TSB PIT5405C identifies the G218 ground on the driver's A-pillar as a frequent culprit on trucks and SUVs.
- Water Intrusion into Connectors or Modules (Common) — Cabin water leaks from clogged sunroof drains or failing seals corrode low-lying connectors, splice packs, and modules, shorting the network.
- Software Glitches or Corrupted Data (Common) — Software errors cause modules to stop communicating or send invalid data, requiring a dealer update. Failed over-the-air (OTA) updates also corrupt module calibrations.
- A Single Failing Control Module (Less Common) — An internal failure in a single module (like the radio or HVAC) floods the bus with bad data or halts communication entirely. Unplugging modules sequentially isolates the culprit.
- Aftermarket Device Interference (Less Common) — Improperly spliced remote starters, alarms, or audio equipment introduce electrical noise and voltage draws that crash the low-speed data bus.
- Faulty Termination Resistor (Less Common) — Two-wire CAN networks require a 120-ohm resistor at each end. A failed resistor or damaged wiring alters total network resistance (120 ohms instead of 60), halting communication. Note: GM's single-wire low-speed bus does not use this scheme.
- Damaged Wiring Harness (Rare) — Harness chafing, pinch points from previous repairs, or rodent damage creates open or short circuits in the CAN bus wires.
Symptoms
- Intermittent or Inoperative Interior Electronics — The radio screen goes blank, climate controls freeze, and power windows or locks stop working.
- Instrument Cluster Malfunctions — Gauges drop to zero, and turn signals lose their audible clicking sound despite exterior lights functioning.
- Check Engine Light and Multiple Warning Messages — The Check Engine Light illuminates alongside messages like 'Service Airbag' or 'Service Stabilitrak'.
- No-Start or Start-and-Stall Condition — If the network failure affects the anti-theft system, the vehicle fails to crank or stalls immediately after starting.
- Unpredictable Gear Shift Behavior or 'Shift to Park' Message — Modules lose gear selector data, triggering a 'Shift to Park' warning or preventing shifting out of Park.
Diagnostic Flowchart
Tap your situation to follow the diagnostic path that matches what you're seeing on this code.
Common Fixes & Costs
- Repair Wiring/Connectors at Gateway Module — Parts: $10-$50, Labor: $250-$900, ~2.5 hr book time (Professional)
- Repair/Clean Major Body Ground Connections (e.g., G218) — Parts: $0-$10, Labor: $100-$300, ~1 hr book time (Intermediate)
- Reprogram a Control Module (BCM or SDGM) — Parts: $0, Labor: $150-$350, ~1.5 hr book time (Professional)
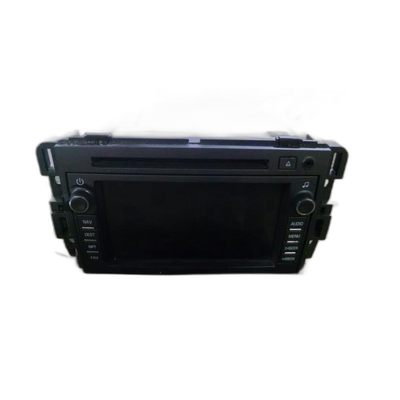
- Replace a Failing Module on the Network (e.g., Radio, HVAC) — Parts: $300-$1200, Labor: $100-$300, ~1.5 hr book time (Intermediate)
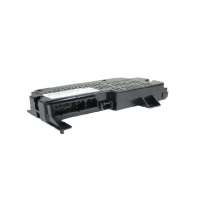
- Replace the Body Control Module (BCM) or Gateway Module (SDGM) — Parts: $400-$800, Labor: $200-$450, ~3 hr book time (Professional)
Used vs. New Parts: Buying Guide
When a used part is worth it: Used BCMs or SDGMs make sense on older vehicles to save money, provided you secure a shop willing to program a salvaged module.
Donor-vehicle mileage cap: roughly under 100000 miles for the part to have meaningful remaining life.
Donor quality checklist:
- Match the part number exactly. Superseded parts fail to communicate.
- Verify the donor vehicle's history to avoid flood-damaged parts.
- Obtain the donor vehicle's VIN, as it is required for programming.
- Inspect the part for physical damage or corrosion on the pins.
Decision logic:
- If The vehicle is less than 8 years old or has under 100k miles → Buy a new or remanufactured module. The reliability and warranty justify the cost.
- If The part requires programming to the vehicle's VIN → Confirm a local shop will program a used module before purchasing it.
- If The vehicle is older and the part is 'plug and play' → A used part is a reasonable choice, but carries a higher risk of premature failure.
Warranty tradeoff: Salvage yard parts offer a 30-90 day warranty covering only the part. New OEM parts include a 1-year warranty covering part and labor.
Worst-case if a used part fails: $400-$800. If the used module is faulty, you lose the part cost and pay diagnostic/installation labor twice.
What Happens If You Wait — Timeline
- 0-4 weeks: Intermittent glitches appear. The radio freezes once, or a warning light flashes briefly. U0020 stores as a history code. (MPG impact: 0%% · Added cost: $0)
- 1-3 months: Glitches become frequent. The Check Engine Light stays on. Multiple interior electronics fail simultaneously but return to normal after restarting. (MPG impact: 0%% · Added cost: $0-$50)
- 3-6 months: The vehicle intermittently fails to start or stalls. The underlying issue (water leak, chafing wire) causes consistent corrosion. (MPG impact: 0-2%% · Added cost: $100-$300)
- 6+ months: Permanent damage occurs. A loose pin becomes a corroded connector; a chafed wire shorts and destroys a module. Repair costs escalate. (MPG impact: 0-5%% · Added cost: $500-$2000+)
Cost of Not Fixing It
- Immediate: Intermittent loss of comfort features like radio and climate control causes major distractions. (Added cost: Negligible)
- Weeks to Months: Risk of stranding. Network failures prevent starting or cause stalling, requiring a tow. (Added cost: $100-$300 (for a tow))
- 6+ Months: Initial faults (water leaks, chafed wires) worsen, permanently damaging expensive modules and escalating repair costs. (Added cost: $500-$2000+)
Diagnosis Steps
- Check Battery and Perform a Load Test
Verify battery voltage exceeds 12.4V (engine off) and stays above 9.6V during cranking. Perform a load test to confirm health, as weak batteries trigger communication codes even with acceptable resting voltage. Clean and tighten terminals.
Tools: Digital Multimeter, Battery Load Tester (Beginner) - Perform a Full Vehicle DTC Scan
Use an all-module OBD-II scanner to pull codes from every computer. Note which modules report U0020 and which are completely offline to map the failure.
Tools: OBD-II Scanner (with all-module capability) (Beginner) - Inspect Gateway Module Connectors (Especially on GM)
Locate the BCM or Serial Data Gateway Module. Disconnect the main connectors and inspect for bent, loose, or corroded pins. This is the definitive fix for 2017-2020 GM vehicles (TSB 20-NA-212).
Tools: Trim Removal Tools, Socket Set, Flashlight, Magnifying Glass (Intermediate) - Inspect for Aftermarket Devices
Locate non-factory electronics like remote starters or audio equipment. If they splice into the low-speed CAN wires, disconnect them completely to test if the fault clears.
Tools: Basic Hand Tools (Intermediate) - Perform a Ground Voltage Drop Test (Pro Tip)
Set a multimeter to DC Volts with the ignition on. Place the black lead on the negative battery post and the red lead on the suspect module's ground point. A reading above 100mV (0.1V) indicates a poor ground requiring cleaning and tightening.
Tools: Digital Multimeter (Advanced) - Isolate the Fault by Disconnecting Modules Sequentially (Pro Tip)
Disconnect modules on the low-speed bus one by one. After unplugging each, clear codes and re-scan. If communication restores, the unplugged module is the culprit. A wiring diagram is required.
Tools: OBD-II Scanner, Trim Removal Tools, Wiring Diagram (Advanced) - Measure Bus Resistance (Two-Wire Systems)
Disconnect the battery and measure resistance between the two CAN bus wires. A healthy two-wire bus reads 60 ohms. A 120-ohm reading indicates an open wire or missing resistor; 0 ohms indicates a short. Skip this on GM single-wire systems.
Tools: Digital Multimeter, Vehicle-Specific Wiring Diagram (Advanced) - Check Bus Voltage with an Oscilloscope
Analyze the bus waveform. Two-wire CAN High toggles between 2.5V and 3.5V; CAN Low mirrors it (2.5V to 1.5V). GM's single-wire bus toggles between 0V and 5V. Noise or distorted voltage levels confirm a physical layer fault.
Tools: Automotive Oscilloscope (Professional)
When This Code Triggers (Freeze-Frame Conditions)
- Vehicle State: Key-On, Engine-Off or Engine Running (The code sets during the initial power-up sequence when modules first attempt to communicate.)
- Battery Voltage: 11.5-12.5V (pre-start) or 13.5-14.5V (running) (Triggered by voltage drops during startup or an unstable charging system.)
- Vehicle Speed: 0-70 mph (Occurs at any speed. Vibrations from driving exacerbate loose connections.)
- Ambient Temperature: Any (Extreme cold weakens batteries, while high heat and humidity worsen corrosion.)
Related Codes
- U0140 — Means 'Lost Communication with Body Control Module'. If alone, suspect the BCM. If paired with U0020, suspect a network-wide failure preventing BCM communication.
- U0155 — Means 'Lost Communication with Instrument Panel Cluster'. If paired with U0020, the entire low-speed bus is down, taking the cluster offline.
- U0100 — Means 'Lost Communication with ECM/PCM'. Seeing this high-speed code alongside U0020 strongly points to a faulty Gateway Module failing to translate messages between networks.
- U0073 — Means 'Control Module Communication Bus A Off'. Reinforces a fundamental network failure, such as a dead gateway module or a major wiring short.
Climate & Environmental Factors
- High Humidity / Coastal Regions: High humidity and salt air accelerate corrosion on electrical connectors, module pins, and ground points, disrupting CAN bus signals.
- Cold Weather: Extreme cold causes failing batteries to drop voltage, triggering communication codes. Plastics and wiring insulation become brittle, and vibrations loosen marginal pins.
- Road Salt (Winter Climates): Corrosive salt-water slurry destroys underbody wiring and connectors, creating open or shorted CAN bus circuits.
How to Talk to a Mechanic About This Code
Say this: "I have a U0020 code causing interior electronics to fail. I authorize one hour of diagnostic time to check TSBs, test the battery and grounds, and inspect gateway module connectors before quoting part replacements."
This signals you understand U0020 is a complex network issue. It directs the technician toward a logical diagnostic process and prevents them from immediately quoting an expensive module replacement.
Avoid saying:
- 'My check engine light is on, can you just fix it?'
- 'My radio is broken, please replace it.'
- 'Just do whatever it takes to get it running right.'
Questions to ask before authorizing the repair:
- What specific tests did you perform to isolate the fault?
- Did you find a bad wire, loose pin, or a poor ground connection?
- If recommending a module replacement, how did you confirm its wiring and power/ground are good?
- Is there a Technical Service Bulletin (TSB) for this issue on my vehicle?
- Can you show me the damaged part or the reading on your meter?
Where to Take It: Dealer vs Independent vs Chain
- Dealer:
A strong choice if your vehicle has a known TSB for this issue, as they are most familiar with the specific fix.
Best for: Vehicles under warranty, Very new models (2-3 years old), Known, complex manufacturer-specific issues covered by TSBs (like the GM SDGM fault)
Downsides: Highest labor rates, May replace an entire module assembly rather than perform a detailed pin repair (Typical cost: +50% vs. baseline) - Independent Shop:
Excellent fit, but only if it's a top-tier shop with a strong reputation for electrical work.
Best for: Out-of-warranty vehicles where cost is a major factor, Shops specializing in electrical diagnostics
Downsides: Quality varies widely. General mechanics lack specific tools for network diagnosis., May lack immediate access to OEM software for programming new modules. (Typical cost: +0% vs. baseline) - Chain Shop:
AVOID for diagnosing U0020. They are not equipped for electrical troubleshooting.
Best for: Simple jobs like battery replacement
Downsides: Technicians lack advanced training and equipment for complex network diagnostics., High risk of expensive misdiagnosis. (Typical cost: -10% vs. baseline)
When to Walk Away From the Repair
If the repair estimate exceeds 40% of the vehicle's private-party value, consider selling or trading it in.
- Car worth $5000, fix is $350: Fix it. This is a low-cost repair for a wiring or ground issue.
- Car worth $8000, fix is $1200: Fix it. The repair is for a major module, but the cost is well below the threshold.
- Car worth $3500, fix is $1800: Walk away. The repair cost is over 50% of the car's value. It's not financially sound to invest this much into an older vehicle for an electrical issue.
What Scan Tool You Need for This Code
Minimum: A scanner that performs an 'All-System Scan' to see which modules are online and which are not communicating.
Basic $20 code readers only check the engine computer. Code U0020 is a network problem involving body modules that cheap readers cannot see.
Budget: BlueDriver Pro (~$90) — Performs a full vehicle scan to show which modules are communicating. Reads and clears U0020 from all modules.
Mid-range: Foxwell NT510 Elite (~$180) — Offers full scanning plus manufacturer-specific bidirectional controls to command specific modules, isolating faulty components.
Professional: Autel MaxiCOM MK808 / MK906BT (~$500-1200) — Provides full bidirectional control, network topology mapping, and module programming required after replacing a BCM.
Rent vs buy: Rent a scanner for the initial code pull, but ensure it performs an all-system scan. Buying a capable scanner like the BlueDriver is a wise investment for DIY diagnosis.
How to Clear the Code After You Fix It
- Reconnect the battery if it was disconnected for the repair.
- Use a professional OBD-II scan tool to clear the U0020 code from all modules.
- Perform at least one complete drive cycle to confirm the fix.
Drive cycle (~20 minutes): Start the engine cold and idle for 3 minutes. Drive 15 minutes in mixed conditions while operating the radio, HVAC, and windows. Idle for 3 minutes before shutting off.
Readiness monitors affected: Not directly applicable to U-codes, Clearing the code resets all emissions readiness monitors.
Before emissions retest: drive at least 50 miles to fully set monitors.
Watch out for:
- Disconnecting the battery does not clear the code from all modules.
- The code returns immediately if the physical or software fault remains.
Will This Fail Emissions / State Inspection?
Yes — this code typically fails an OBD-II emissions inspection.
- California: An illuminated Check Engine Light results in an automatic smog check failure. A full drive cycle is required post-repair.
- New York: The NYS DMV inspection includes an OBD-II scan. A U-code illuminating the Check Engine Light causes immediate failure.
- Texas: In the 17 counties requiring emissions testing, an active U0020 code and illuminated MIL fails the OBD inspection.
Most Commonly Affected Vehicles
- Chevrolet Silverado, Tahoe, Suburban (2017-2020) — Extremely prone to poor connections at the Serial Data Gateway Module (SDGM) connectors. Refer to GM TSBs #20-NA-212 and #PIT5405C.
- GMC Sierra, Yukon (2017-2020) — Shares the K2XX platform SDGM issues. Symptoms include inoperative HVAC, blank radio, and no turn signal audio (TSB #20-NA-212).
- Ford F-150, Explorer (2015-2020) — Experiences U0020 due to wiring harness chafing behind the dash or water intrusion into the BCM affecting the MS-CAN network.
- Chrysler / Dodge 300, Charger, Grand Caravan (2011-2018) — Issues trace to the Totally Integrated Power Module (TIPM) acting as a gateway or failures in the CAN B / CAN IHS bus wiring.
- Jeep Grand Cherokee (2014-2019) — Suffers from wiring issues near the gear shifter or internal failures within the Uconnect radio module.
- Hyundai Elantra, Sonata (2013-2020) — Communication failures stem from wiring issues near the instrument cluster or internal cluster faults, causing a dead tachometer.
- Nissan Rogue, Altima (2013-2022) — Failures in the Transmission Control Module (TCM) or related wiring disrupt the CAN bus, triggering U0020 alongside transmission codes.
- Honda Accord, Odyssey (2008-2017) — Sets a related U0029 code for F-CAN bus issues caused by faulty wiring, bad grounds, or poor connections at the main fuse box.
Manufacturer-Specific Notes
- General Motors (GM): On 2017-2020 trucks/SUVs, the cause is almost always a poor connection at the Serial Data Gateway Module (SDGM). Refer to TSBs 20-NA-212 and PIT5405C.
- Ford: Uses a two-wire Medium-Speed CAN (MS-CAN) network. Faults often stem from harness chafing or water intrusion into the BCM. Diagnosis requires a 60-ohm resistance check.
- Chrysler/Dodge/Jeep: The low-speed network is called CAN B or CAN IHS. Problems often trace to water intrusion in the Totally Integrated Power Module (TIPM), which acts as the gateway.
- Hyundai/Kia: A faulty instrument panel cluster can crash the low-speed network. Poor pin tension in the Data Link Connector (DLC) also causes intermittent U0020 codes.
Real Owner Stories
2017 GMC Yukon with 85K miles
The radio screen went blank, A/C controls stopped working, and the turn signals made no clicking sound. Warning messages flooded the dash.
What they tried:
- The owner suspected a bad radio.
- A local mechanic suggested replacing the Body Control Module (BCM).
Outcome: A dealer technician followed TSB 20-NA-212 and inspected the Serial Data Gateway Module (SDGM) connectors. They found loose pins in the X1 connector, repaired them, and cleared the codes. Total cost was 2.8 hours of labor.
Lesson: On late-model GM SUVs, sudden failure of interior electronics is almost always the SDGM connection issue, not expensive module failures. Insist a shop checks TSBs first.
2018 Ford F-150 with 60K miles
Intermittent issues with power windows, door locks, and the radio freezing. Code U0020 was present with multiple 'lost communication' codes.
What they tried:
- The owner checked the battery, which tested good.
- They disconnected a hardwired dash cam, but the problem persisted.
Outcome: A technician performed a CAN bus resistance test and found 120 ohms, indicating a break in the network. Tracing the MS-CAN wiring revealed a chafed harness behind the dashboard rubbing against a metal bracket. Repairing the wires resolved the issue.
Lesson: A bus resistance test is critical for two-wire CAN systems. A 120-ohm reading clearly indicates an open circuit, guiding diagnosis toward a wiring fault.
2015 Chevrolet Silverado with 110K miles
The truck wouldn't start, and the instrument panel displayed multiple error messages immediately after an aftermarket stereo installation.
What they tried:
- The owner replaced the battery, assuming it was the original problem.
Outcome: The installer tapped into the low-speed GMLAN wire for power, corrupting the entire network. This prevented the BCM from communicating, triggering the anti-theft system. Removing the stereo and restoring factory wiring fixed the problem.
Lesson: Never splice into CAN bus wires. If a problem starts immediately after installing an aftermarket device, the new device is the primary suspect.
How to Prevent This Code From Triggering
- Perform regular battery terminal cleaning and maintenance (Every 6-12 months) — Corrosion creates high resistance, leading to voltage drops that disrupt module communication.
- Apply dielectric grease to critical electrical connectors (During any related repair or inspection) — Dielectric grease protects connectors from moisture and salt, preventing corrosion that causes network faults.
- Periodically inspect and clean major chassis ground points (Every 2-3 years) — Rust at ground points introduces electrical noise and voltage fluctuations, crashing the CAN bus.
- Avoid using electronics with the engine off for extended periods (Daily habit) — Draining the battery leads to weak starts and low voltage conditions, triggering communication fault codes.
- Address water leaks into the cabin promptly (As needed) — Leaks allow water to pool and corrode low-lying wiring harnesses and control modules.
Frequently Asked Questions
Can a bad battery cause code U0020?
Yes. A weak battery causes low voltage, preventing electronic modules from booting up and communicating. It is the most common root cause for U-codes.
My mechanic wants to replace the radio immediately. Is this correct?
This is a common misdiagnosis. A faulty radio is usually a symptom of the network failure, not the cause. Test the entire network's wiring and grounds before replacing expensive components.
What is the difference between the low-speed and high-speed CAN bus?
The high-speed CAN bus connects critical powertrain modules (ECM, TCM) requiring instant communication. The low-speed CAN bus connects convenience modules (radio, climate control) where millisecond speed is less vital.
Why does a 'Shift to Park' message appear with code U0020?
Gear shift position data travels over the network. If the bus fails, the instrument cluster loses this data and displays a warning because it cannot verify the vehicle is in Park.
Will clearing the code fix the problem?
No. U0020 indicates a physical or software network failure. The code will always return until the underlying wiring, ground, or module issue is repaired.
Is this an expensive repair?
Costs vary widely based on the root cause. Simple wiring repairs or software updates cost $150-$400 in labor. Replacing a major control module like the BCM costs $600-$1,250.
Can I diagnose U0020 myself?
Basic checks like battery load-testing and inspecting for loose connections are DIY-friendly. However, pinpointing a network fault requires a professional scan tool, an oscilloscope, and wiring diagrams. Stop DIY and consult a shop if basic power and ground checks pass.
Key Takeaways
- Code U0020 indicates a network-wide communication failure, causing simultaneous outages in the radio, HVAC, and power windows.
- Always test the battery first; voltage drops below 9.6V during cranking are the leading cause of false communication codes.
- On 2017-2020 GM trucks and SUVs, inspect the Serial Data Gateway Module (SDGM) connectors first, as outlined in TSB 20-NA-212.
- Never replace a $600+ Body Control Module without performing a 60-ohm bus resistance test and verifying ground connections.
Shop the Parts Behind U0020
Below are the parts most often responsible for code U0020, ranked by how frequently each one is the actual culprit (per the diagnosis above). Tap any to see what we have for your vehicle.


The information in this article is provided for general reference and educational purposes only. Vehicle specifications, procedures, and part compatibility can vary by production date, trim level, and region. Always consult your vehicle's factory service manual and verify part numbers before purchasing or performing repairs. Safety-critical components such as airbags, seat belts, and braking systems should be installed by a qualified professional.
- 🧭 Diagnostic Flowchart
- 🛍️ Shop This Part
- What Does U0020 Mean?
- Can I Drive With U0020?
- Common Causes
- Symptoms
- Common Fixes & Costs
- Used vs. New Parts: Buying Guide
- What Happens If You Wait — Timeline
- Cost of Not Fixing It
- Diagnosis Steps
- When This Code Triggers (Freeze-Frame Conditions)
- Related Codes
- Climate & Environmental Factors
- How to Talk to a Mechanic About This Code
- Where to Take It: Dealer vs Independent vs Chain
- When to Walk Away From the Repair
- What Scan Tool You Need for This Code
- How to Clear the Code After You Fix It
- Will This Fail Emissions / State Inspection?
- Most Commonly Affected Vehicles
- Manufacturer-Specific Notes
- Real Owner Stories
- 2017 GMC Yukon with 85K miles
- 2018 Ford F-150 with 60K miles
- 2015 Chevrolet Silverado with 110K miles
- How to Prevent This Code From Triggering
- Frequently Asked Questions
- Can a bad battery cause code U0020?
- My mechanic wants to replace the radio immediately. Is this correct?
- What is the difference between the low-speed and high-speed CAN bus?
- Why does a 'Shift to Park' message appear with code U0020?
- Will clearing the code fix the problem?
- Is this an expensive repair?
- Can I diagnose U0020 myself?
- Key Takeaways
- 🎟️ Get 5% Off