
U0077 on 2014-2019 Chevy Silverado 1500: Chassis Bus Communication Failure Causes and Fixes
Code U0077 on a 2014-2019 Silverado almost always indicates a wiring problem on the Chassis Expansion CAN Bus. The most common cause is a pinched or chafed wire harness under the driver's side dash near the parking brake pedal, under the sill plates, or above the spare tire. This is a DIY-possible but complex fix, involving locating and repairing the damaged wire.
- U0077 on your Silverado is a critical network failure, not a simple sensor issue.
- The cause is very likely a pinched or broken wire in a few known locations (under dash, under sill plates).
- Do not drive the vehicle. A loss of power steering or ABS functionality can occur at any time.
- Before replacing any expensive modules, a thorough inspection of the wiring harnesses in the locations identified by GM's TSBs is mandatory.
- This repair can be inexpensive if it's just a broken wire, but finding it can be labor-intensive.
What's Unique About the 2014-2019 Chevrolet SILVERADO 1500

The 2014-2019 Silverado (K2XX platform) is known for setting this code due to specific wire harness routing issues. General Motors has issued several Technical Service Bulletins (TSBs) that point technicians directly to common chafe points. TSB PIT5288H identifies a pinch point where the dash harness gets trapped against the I/P mounting bracket near the parking brake pedal. TSB PIT5457D points to issues under the driver and passenger sill plates. These are predictable failure points caused by harness routing and assembly processes at the factory, making them a common issue across the entire K2XX platform, including the GMC Sierra, Tahoe, and Suburban.
Diagnostic Flowchart

Tap your situation to follow the diagnostic path that matches what you're seeing on this vehicle.
Generation note: This guide primarily covers the third-generation (K2XX) Silverado from 2014-2018. The 2019 model year was a split, offering both the K2XX platform (sold as the Silverado 1500 LD) and the new fourth-generation (T1XX) platform. The cited TSBs and common issues are specific to the K2XX platform, which also includes the GMC Sierra, Tahoe/Yukon, and Suburban.
Symptoms You May Notice

- "Service Power Steering" message on the dash
- "Service StabiliTrak" or "Service Suspension System" message
- Sudden loss of power steering assist
- ABS and Traction Control warning lights are on
- Inoperative gauges or instrument cluster issues
- Dead battery due to modules not going to 'sleep'
- "Service Trailer Brake System" message
- Backup camera guidelines may be missing or inoperative
- Replacing the Power Steering Rack or Pump
- Replacing the Battery (without diagnosing)
- Replacing the Body Control Module (BCM)
Most Likely Causes

- Pinched or Chafed Wiring Harness at Left Instrument Panel 🔴 High Probability TSB #PIT5288H specifically calls out this location. The dash harness can be pinched between the left I/P dash mounting bracket and the body, directly adjacent to the parking brake pedal assembly. The pressure and vibration eventually wear through the wire insulation, causing a short or open circuit on the CAN bus.
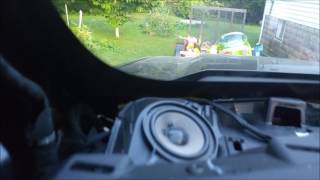
How to confirm: Visually inspect the wiring harness under the dash, to the side of and above the park brake pedal. 🎬 Watch: Finding and fixing common wiring harness chafing issues. TSB #PIT5288H includes images showing the exact pinch points on the upper and lower portions of the metal I/P bracket. You may need to loosen the bracket bolts to pull the harness free and inspect for crushed or broken wires.
Typical fix: Repair the damaged section of the wire. This involves cutting out the bad section, splicing in a new piece of wire using butt connectors or solder, and protecting the repair with heat shrink tubing. The TSB advises re-routing the harness to prevent it from being pinched again.
Est. part cost: $5-$25 for wire, connectors, and tape. - Damaged Wiring Under Sill Plates 🟡 Medium Probability TSB #PIT5457D and its revisions point to wiring issues under the driver's and passenger's front sill plates. The harness can be damaged by moisture intrusion, corrosion, or chafing. A specific splice, J365, under the passenger sill plate is noted as a potential point of failure.
How to confirm: Remove the plastic sill plates and peel back the carpet to inspect the wiring harnesses that run along the floor. Look for any signs of pinched, rubbed, or broken wires, and pay close attention to any splices for signs of corrosion.
Typical fix: Repair the corroded or broken wire sections. Clean any corroded splices, re-secure them, and protect with heat shrink. Ensure the harness is properly secured and protected from moisture before reinstalling the trim.
Est. part cost: $10-$30 - Corroded or Damaged Wiring Above Spare Tire 🟡 Medium Probability The wiring harness routed in the rear frame area is exposed to water, salt, and road debris, leading to corrosion over time. A Reddit user on r/Chevrolet specifically recommended this as a starting point for diagnosis.
How to confirm: Lower the spare tire to get clear access. Inspect the wiring harnesses that run along the frame rails, especially the section that passes over the rear crossmember. Check for swollen wire loom, green corrosion on connectors, or brittle/broken wires.
Typical fix: Repair the corroded wire sections as described above. Clean any corroded connectors with a terminal cleaning tool and apply dielectric grease before reconnecting. Protecting the repaired harness with high-quality tape or loom is critical.
Est. part cost: $10-$30 - Faulty Control Module ⚪ Low Probability While less common than wiring issues, any module on the Chassis Expansion Bus (e.g., EBCM, PSCM) can fail internally and bring down the entire network by shorting the bus or having a failed terminating resistor.
How to confirm: This requires a process of elimination. After confirming the wiring is intact (showing ~60 ohms resistance), a technician will use a scan tool to disconnect modules from the bus one by one. If disconnecting a specific module restores the 60-ohm reading and allows other modules to communicate, that module is the culprit.
Typical fix: Replace the faulty module. The new module will require programming by a dealership or a qualified shop with GM-specific software (SPS).
Est. part cost: $400-$1200 depending on the module.
Rare But Worth Checking
- Open/High Resistance in Communication Enable Circuit (5986): TSB #PIT5457D describes a scenario where various communication DTCs, including U0077, can be caused by an issue in Circuit 5986. This is a low-amperage 'wake-up' signal from the BCM. A break in this wire can prevent modules on the chassis bus from activating, leading to a loss of communication. Diagnosis involves load testing the circuit with a small bulb (like a 194) and a voltmeter.
- Faulty OnStar Module (VCIM): → Shop Telematics Interface Module An owner complaint filed with the NHTSA (ODI #11518731) mentioned that a dealer representative confirmed a faulty OnStar module could cause communication errors, including U0077. While not a primary cause, it's a possibility if all other wiring checks out.
- Poor Ground Connection: A loose or corroded ground strap can cause unpredictable electrical issues, including module communication failures. Checking the main battery, body, and frame grounds 🎬 See how to clean the G218 ground to fix electrical glitches. is a quick and worthwhile step.
Diagnosis Steps
- Scan for all DTCs in all modules to confirm which systems are reporting communication loss. Note all U-codes.
- Check for and review TSBs #PIT5288H, #PIT5457D, and #PIT5076E for specific guidance.
- Disconnect the battery.
- Perform a detailed visual inspection of the wire harness at the left side of the instrument panel, near the park brake pedal, as per TSB #PIT5288H. Look for chafing against the metal I/P bracket.
- Remove the driver and passenger sill plates and inspect the wiring harnesses running along the floor, as per TSB #PIT5457D.
- Lower the spare tire and inspect the harnesses running along the frame for corrosion or damage, a common spot for issues.
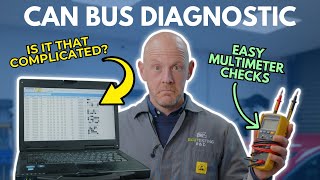
- If no visible damage is found, use a multimeter to check the CAN bus resistance at the OBD-II port. On this platform, the Chassis Expansion Bus is on pins 12 and 13. A healthy bus should read approximately 60 ohms. A reading of 120 ohms indicates a break in the wiring or that one of the two terminating resistors (in the EBCM or Airbag Module) is offline. A reading near 0 ohms indicates a short between the two CAN wires. 🎬 Watch: A professional guide to troubleshooting CAN bus network faults.
- If wiring is confirmed to be good (solid 60-ohm reading), the issue is likely a faulty module. This requires advanced diagnostics, often by unplugging modules one by one until the bus communication is restored, to isolate the specific module that is bringing the network down.
Parts You'll Likely Need
- Wiring Repair Supplies — The most common fix is repairing a broken or chafed wire in one of the known problem areas.
Trusted brands: 3M, ACDelco
OEM price range: $15-$30
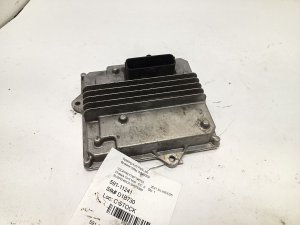
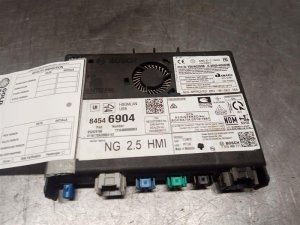
Aftermarket price range: $5-$20 - Electronic Brake Control Module (EBCM)
(OEM #84778358 (example for 2015 1500, check VIN))— If a module has failed, the EBCM is one of the possibilities on the Chassis Expansion Bus and contains a terminating resistor.
Trusted brands: ACDelco
OEM price range: $450-$750
Aftermarket price range: $250-$500 - Power Steering Control Module (PSCM) — The PSCM is another critical module on the Chassis Expansion Bus that can cause the network to go down if it fails.
Trusted brands: ACDelco
OEM price range: $300-$600
Aftermarket price range: $200-$450
Related Codes That Often Appear With This One
- U0121 — Lost Communication With Electronic Brake Control Module (EBCM)
- U0126 — Lost Communication With Steering Angle Sensor Module
- U0131 — Lost Communication With Power Steering Control Module (PSCM)
- U0415 — Invalid Data Received From Electronic Brake Control Module
Technical Service Bulletins (TSBs) & Recalls
- PIT5288H: Addresses multiple DTCs including U0077 caused by a pinched wire harness in the left instrument panel.
- PIT5457D: Points to loss of communication codes, including U0077, caused by wiring issues (specifically Circuit 5986) under the driver and passenger sill plates.
- PIT5076E: Instructs technicians to diagnose the Chassis bus when U0077 is present.
Platform-Specific Known Issues
- TSB #PIT5288H points to a pinched wire harness at the left instrument panel, showing photos of the harness chafing on the I/P mounting bracket.
- TSB #PIT5457D identifies potential wire harness issues under the driver and passenger sill plates, specifically mentioning high resistance in the Communication Enable circuit (5986).
- TSB #PIT5076E confirms that U0077 requires diagnosis of the Chassis bus.
- A known chafe point also exists above the spare tire where the harness is exposed to the elements.
Mechanic-Grade Diagnostic Values
- Chassis Expansion CAN Bus resistance at DLC pins 12 & 13 — expected: 60 Ohms (± a few ohms). Failure: A reading of ~120 Ohms indicates an open circuit or one of the terminating modules is offline. A reading near 0 Ohms indicates a short between the CAN High and CAN Low wires.
- Communication Enable Circuit (5986) voltage — expected: ~12 Volts. Failure: Low or no voltage indicates an open, short, or high resistance in the circuit from the BCM, preventing modules from 'waking up'.
- Module ground resistance — expected: < 5 mΩ (milliohms). Failure: A higher reading indicates a poor ground connection, which can cause intermittent communication failures.
- Module power pin voltage (Key On) — expected: 12.0 - 12.8 Volts. Failure: Low voltage can cause modules to drop off the network.
Scan Tool Commands That Help
- GDS2 (GM Diagnostic Software): Module Communication Status / Talk-back Test — After confirming a bus fault (e.g., U0077 is set), use this function to see which specific modules are not communicating. A technician can command a module to send a response; if it fails to do so while others respond, that module or its wiring is suspect.
- GDS2 (GM Diagnostic Software): Module Programming (SPS) — This is required after replacing a control module (like the EBCM or PSCM) to load the correct vehicle-specific software and VIN, allowing it to communicate with other modules on the network.
Wiring & Ground Locations
- DLC Pins 12 & 13 — Data Link Connector (OBD-II port) under the driver's side dashboard.. These are the specific pins for the Chassis Expansion Bus. All resistance and voltage tests for the bus itself begin here. Pin 12 is CAN Low, Pin 13 is CAN High.
- Terminating Resistors — One is internal to the Electronic Brake Control Module (EBCM). The second is internal to the Inflatable Restraint Sensing and Diagnostic Module (SDM / Airbag Module).. These two 120-ohm resistors are what create the expected 60-ohm bus resistance. Knowing their location is critical for diagnosing an open circuit (120-ohm reading) by unplugging one module to see if the resistance remains.
- G218 — Under the driver's side dashboard, behind the kick panel, often near the A-pillar speaker.. This is a notoriously problematic body ground point on the K2XX platform. A poor connection here causes a wide range of electrical faults, including symptoms directly associated with U0077 like 'Service StabiliTrak' messages.
- Connector X411 — Under the rear of the vehicle, located behind and to the left of the fuel tank.. This large connector is exposed to the elements and is a known point of corrosion. TSB PIT5427A identifies corrosion here as a cause for U0077 and many other communication codes.
- Splice J365 — In the wiring harness located under the passenger's front sill plate.. TSB PIT5457B points to this splice as a potential point of high resistance or an open in the Communication Enable Circuit (5986), which can prevent modules on the chassis bus from waking up.
Real Owner Repair Stories
- Commenter on Garcia Garage YouTube video (2014-2018 Chevrolet Silverado) — Flickering dash lights, truck suddenly shutting down at idle, slipping transmission sensation, voltage reading under 14V, nav/radio shutting down.
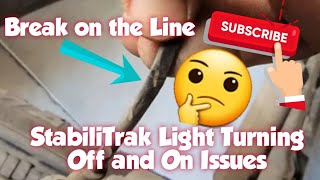
✅ What actually fixed it The problem was a bad ground connection that had become rusted and dirty over time. The fix was to remove the ground screw, thoroughly clean the contact points on the terminal and the body, and re-secure it. The video specifically shows passenger side ground locations. - Reddit user Dean-Brotherton and others in r/Silverado (2015 Silverado 1500, 30k miles) — 'Service StabiliTrak' message flashes on the dash, sometimes accompanied by radio/dash screen flashes. Seemed to happen primarily when it was raining and when turning right.
❌ Tried (didn't work) Initial diagnosis was inconclusive.
✅ What actually fixed it Another user strongly suggested the fix was the 'G218 ground'. This is a well-documented poor ground connection located under the dash beside the driver's side audio speaker. The user confirmed this is a very common cause for these exact symptoms.
"I Checked Everything" — The Actual Cause
- In a diagnostic video for a 2019 Tahoe with U0077, a standard resistance check showed 120 ohms instead of 60, indicating an open circuit. Instead of just visually hunting for a broken wire, the technician used advanced diagnostics. He unplugged the EBCM (one of the terminating modules) and the 120-ohm reading remained, proving the break was in the wiring going toward the EBCM, not the other end of the bus. Further testing with a multimeter between the DLC and the EBCM connector proved the open was on the CAN High wire (Pin 13). This is a case where a simple visual or 'wiggle test' might find nothing, but methodical electrical testing pinpoints the exact failed circuit.
Helpful Videos

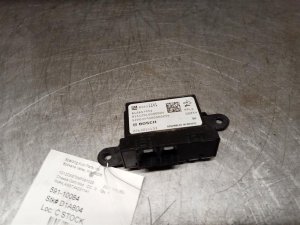
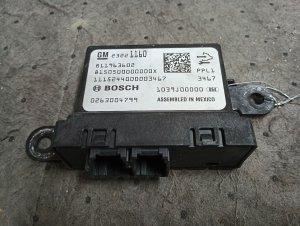
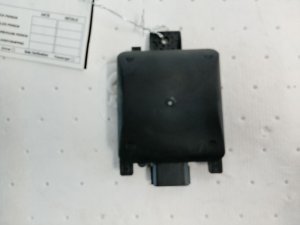
We Have This Part in Stock


The information in this article is provided for general reference and educational purposes only. Vehicle specifications, procedures, and part compatibility can vary by production date, trim level, and region. Always consult your vehicle's factory service manual and verify part numbers before purchasing or performing repairs. Safety-critical components such as airbags, seat belts, and braking systems should be installed by a qualified professional.
- Chevrolet SILVERADO 1500:
- 🧭 Diagnostic Flowchart
- 🎬 Helpful Videos
- 🛍️ Shop This Part
- What's Unique About the 2014-2019 Chevrolet SILVERADO 1500
- Symptoms You May Notice
- Most Likely Causes
- Rare But Worth Checking
- Diagnosis Steps
- Parts You'll Likely Need
- Related Codes That Often Appear With This One
- Technical Service Bulletins (TSBs) & Recalls
- Platform-Specific Known Issues
- Mechanic-Grade Diagnostic Values
- Scan Tool Commands That Help
- Wiring & Ground Locations
- Real Owner Repair Stories
- "I Checked Everything" — The Actual Cause
- 🎟️ Get 5% Off