
U0100 on 2009 Cadillac SRX: Lost Communication With ECM Causes and Fixes
On a 2009 Cadillac SRX, code U0100 is most often caused by wiring issues or poor connections, not a failed Engine Control Module (ECM). Check the transmission harness connector (X1) on the driver's side of the transmission and specific ECM power/data wiring circuits mentioned in GM service bulletins before replacing any expensive parts.
- U0100 on a 2009 SRX is a serious network code that makes the vehicle unsafe to drive.
- Do not immediately assume the ECM has failed. The most common causes are wiring and connector problems identified in GM's own service bulletins.
- Diagnosis should start with a full-system scan and a physical inspection of the transmission X1 connector and ECM wiring harness.
- This is not a simple DIY fix. Professional diagnosis is highly recommended to avoid expensive misdiagnoses.
What's Unique About the 2009-2009 Cadillac SRX
For the first-generation Cadillac SRX, this U0100 code is specifically addressed in manufacturer bulletins that point to known wiring vulnerabilities. GM has identified that terminals in the main transmission connector (X1) can become loose (TSB #PIC4740E) and that specific power and data circuits for the ECM can be compromised (TSB #PIC5460B). This makes inspecting these known problem areas a critical first step before assuming the expensive ECM has failed. The first-generation SRX shares its platform and some of these issues with vehicles like the Cadillac STS and CTS.
Diagnostic Flowchart
Tap your situation to follow the diagnostic path that matches what you're seeing on this vehicle.
Symptoms You May Notice
- Check Engine Light is on
- Vehicle will not start (no crank). 🎬 Watch: Troubleshooting a Cadillac SRX that won't start or crank.
- Engine stalls intermittently
- Transmission may not shift correctly or may be stuck in one gear
- Other warning lights, such as for ABS or StabiliTrak, may illuminate.
- "Service Stabilitrak" or "Service Traction Control" message on the dash.
- Unable to remove key from ignition.
- Dash lights may flicker, especially when electrical accessories are turned on.
- Replacing the Engine Control Module (ECM) without first exhaustively checking all related wiring, connectors, and grounds.
- Replacing the Transmission Control Module (TCM) or other modules because they are setting codes, when the root cause is that they cannot communicate with the ECM.
Most Likely Causes
- Poor Connection at Transmission X1 Connector 🔴 High Probability → Shop Transmission Assembly TSB #PIC4740E specifically calls out loose, corroded, or poor-fitting terminals in this 16-pin connector as a cause for communication codes, including U0100. The connector's location on the driver's side of the transmission case exposes it to vibration and moisture.
How to confirm: Locate and disconnect the X1 connector on the driver's side of the transmission. Visually inspect for corrosion (green/white powder), moisture, or any terminals that have backed out. Gently tug on each individual wire to ensure the terminal is securely seated and 'clicks' into place.
Typical fix: Clean the connector with electrical contact cleaner, repair or re-pin any loose terminals, and apply dielectric grease to the seal before reassembly. If the connector is heavily damaged, it may need to be replaced with a pigtail (e.g., ACDelco PT2623, verify by VIN).
Est. part cost: $0-$70 - Wiring Issue in ECM Power or Data Circuits 🔴 High Probability TSB #PIC5460B identifies potential opens or shorts in the Ignition 1 Power Feed (circuit 5290) or the Class 2 data line (circuit 1807) as a cause for U0100, often accompanied by a no-crank condition.
How to confirm: Using a multimeter and wiring diagram, check for battery voltage at the ECM fuse in the underhood fuse block. Verify voltage on circuit 5290 at the ECM connector. Check for continuity and shorts on the Class 2 data line (circuit 1807) between the ECM and the Data Link Connector (DLC).
Typical fix: Repair the damaged section of the wiring harness. This could involve fixing a chafe point, repairing a corroded wire, or fixing an open circuit. A faulty main or powertrain relay could also be the cause.
Est. part cost: $5-$100 - Weak or Failing Battery/Alternator 🟡 Medium Probability → Shop Alternator Low system voltage can cause unpredictable behavior in electronic modules, leading to communication dropouts. A failing alternator can cause voltage to drop significantly under load (e.g., when A/C is on), triggering communication faults.
How to confirm: Test the battery with the engine off (should be ~12.6V). Test the alternator output with the engine running (should be ~13.7-14.7V). A Reddit user with a similar SRX confirmed their U0100 was caused by the alternator; voltage dropped to 12.7V with accessories on, and replacing it solved the issue.
Typical fix: Replace the battery or alternator if they fail the tests.
Est. part cost: $150-$600 - Faulty Engine Control Module (ECM) ⚪ Low Probability → Shop Engine Control Module (ECM) While possible, module failure is less common than wiring or connection issues. The ECM is often replaced unnecessarily. It should be the last item to suspect.
How to confirm: This is a process of elimination. If all wiring, connectors, power, and grounds to the ECM have been tested and confirmed to be good, the module itself becomes the primary suspect. A shop may attempt to reflash the software before condemning the module.
Typical fix: Replace and program the Engine Control Module. This requires a new or remanufactured unit and specialized programming tools.
Est. part cost: $400-$1000
Rare But Worth Checking
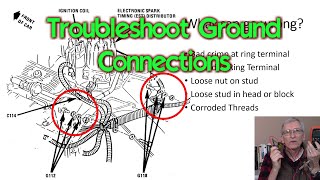
- Poor ECM/Engine Ground Connection:
Diagnosis Steps
- Check the battery and charging system. Ensure voltage is stable and above 12.4V with the engine off and 13.7-14.7V when running.
- Use a professional scan tool capable of reading all modules (ECM, TCM, BCM, ABS, etc.). Check which modules are reporting 'no communication'.
- Note all stored DTCs in all modules. The pattern of codes can help pinpoint the break in the network.
- Thoroughly inspect the 16-pin transmission X1 connector on the driver's side of the transmission for corrosion, moisture, and loose or backed-out pins, as per TSB #PIC4740E. Gently tug each wire.
- Inspect the wiring harness for the ECM, paying close attention to the Ignition 1 Power Feed (circuit 5290) and the Class 2 data line (circuit 1807) for any signs of chafing, corrosion, or damage, as per TSB #PIC5460B.
- Check main engine and chassis ground points (like G102) for corrosion and tightness.
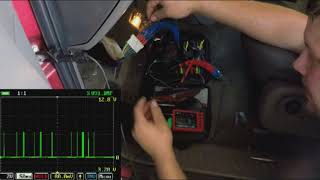
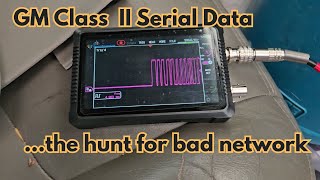
- Using a multimeter, verify power and ground at the ECM connector. If available, use an oscilloscope to check for a valid data signal on the Class 2 circuit (pin 2 of the DLC). A healthy GM Class 2 network toggles a 0-7 volt square wave signal.
- If all wiring, connectors, powers, and grounds are confirmed good, the ECM is likely faulty.
Parts You'll Likely Need
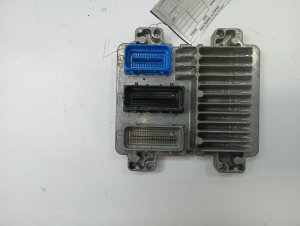
- Engine Control Module (ECM)
(OEM #12619582 (Hardware #12614423))— This is the part to replace ONLY after all wiring and connection issues have been ruled out. It is the 'brain' of the engine, and if it fails internally, it cannot communicate.
Trusted brands: ACDelco
OEM price range: $600-$1000
Aftermarket price range: $300-$700 - Wiring Harness Connector/Pigtail
(OEM #ACDelco PT2623 (Verify by VIN))— If the transmission X1 connector or the ECM connector itself is damaged or corroded beyond repair, a new connector pigtail will be needed to restore a solid connection.
Trusted brands: ACDelco, Dorman
OEM price range: $40-$100
Aftermarket price range: $20-$60
Related Codes That Often Appear With This One
- U1000 — This is a general Class 2 communication failure code. It often appears alongside more specific codes like U0100, indicating a widespread network problem.
- P0700 — This code means the Transmission Control Module (TCM) has stored a fault and requested the Check Engine Light. It's often set with U0100 because the TCM has lost communication with the ECM.
- C0561 — This is a StabiliTrak/ABS system code. The ABS module needs engine data to function; when it loses communication via U0100, it may set this code and disable the system.
- U2100, U2105, U2106 — These are additional communication codes that may be stored in various modules, indicating a loss of communication with the ECM or other key modules on the network, as noted in TSB #PIC4740E.
Technical Service Bulletins (TSBs) & Recalls
- PIC5460B: Addresses no-crank/no-key-removal issues and communication codes (including U0100) related to ECM power (CKT 5290) or Class 2 data line (CKT 1807) wiring.
- PIC4740E: Addresses multiple communication codes (including U0100) caused by poor terminal fit in the transmission X1 connector. This TSB was later superseded by PIC4740F but remains relevant.
Platform-Specific Known Issues
- TSB #PIC5460B highlights that a no-crank condition with code U0100 can be caused by wiring issues related to the Ignition 1 Power Feed (circuit 5290) or the Class 2 data line (circuit 1807) leading to the ECM.
- TSB #PIC4740E points to loose or poor-fitting terminals in the transmission X1 connector as a direct cause for a group of communication codes, including U0100, which can lead to a no-communication state with the ECM or TCM.
Mechanic-Grade Diagnostic Values
- GM Class 2 Serial Data Line Voltage (Circuit 1807) — expected: A toggling square wave between 0V (inactive/recessive) and ~7.0V (active/dominant).. Failure: A line stuck high (at 7V or battery voltage) or low (at 0V) indicates a short or an open circuit/faulty module.
- High-Speed GMLAN Bus Resistance (at DLC) — expected: Approximately 60 Ω (with battery disconnected, measured between Pin 6 and Pin 14).. Failure: A reading of ~120 Ω indicates an open in the circuit or a missing terminating resistor in a module (like the ECM). A reading near 0 Ω indicates a short between the two CAN wires.
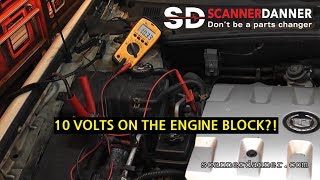
- ECM Ground Circuit Resistance — expected: < 0.1 Ω (measured between the ECM ground pin at the connector and the negative battery terminal).. Failure: Higher resistance indicates a poor ground connection, which can cause module communication errors.
- Alternator Output Voltage (Under Load) — expected: ~13.7V - 14.7V with engine running.. Failure: Voltage dropping to battery level (~12.7V or less) when electrical accessories (A/C, headlights) are turned on indicates a failing alternator unable to support the modules.
Scan Tool Commands That Help
- GM Tech 2: F0: Diagnostics -> (Vehicle Info) -> Module -> Diagnostic Trouble Codes (DTC) — To check which specific modules are logging 'U' codes, which helps identify the scope of the communication failure. A module that is not communicating will not be accessible.
- GM Tech 2: Snapshot (Vehicle Data Stream Capture) — To capture vehicle data at the moment a fault occurs. This is useful for intermittent communication dropouts, as the captured data can be reviewed later to analyze module status and network activity leading up to the failure.
- Oscilloscope: Monitor Class 2 Data Line (DLC Pin 2) — To visually inspect the integrity of the network signal. This allows a technician to see if the 0-7V square wave is present, if it's being shorted to ground or voltage, or if it's being corrupted by a 'noisy' module.
Wiring & Ground Locations
- G102 — On the right rear of the engine, on the cylinder head (for the 3.6L V6).. This is a primary ground point for the Engine Control Module (ECM). A poor connection here can cause the ECM to lose power or have an unstable ground reference, leading to network communication failure.
- G101 — Located at the lower front of the engine block.. This ground serves both the ECM and the Transmission Control Module (TCM). Corrosion or looseness here can disrupt communication for both critical modules.
- ECM (Engine Control Module) — On the right side of the engine (for the 3.6L V6).. This is the module that is offline. Knowing its location is critical for testing its power, ground, and data line connections directly at the connectors.
- BCM (Body Control Module) — On the lower left side of the dashboard, near the steering column.. The BCM acts as a gateway module between different data networks on the vehicle. A fault with the BCM or its connections can interrupt communication to or from the ECM.
- Underhood Fuse Block — Right front of the engine compartment.. This block contains the fuses and relays that supply power to the ECM. A loose main connector on the underside of this fuse block can cause intermittent power loss to the ECM.
Real Owner Repair Stories
- Reddit user on r/MechanicAdvice (2010 Cadillac SRX 3.0L (similar platform)) — Sudden loss of power, Stabilitrak and Check Engine lights on, dash lights flickering, code U0100 stored.
❌ Tried (didn't work) Checking fuses and relays.
✅ What actually fixed it The alternator was failing. With accessories turned on, system voltage would drop to 12.7V, causing modules to lose communication. Replacing the alternator resolved all symptoms and the U0100 code. - CadillacForums.com user report (2006 Cadillac STS V8 (platform mate)) — Intermittent no-start condition, multiple communication codes including U0100, flickering dash lights.
❌ Tried (didn't work) Checking the transmission connector (X1) mentioned in the TSB, which appeared fine., Replacing the battery., Checking all related fuses.
✅ What actually fixed it The main engine-to-chassis ground strap, located under the driver's side of the engine, was found to be corroded and making a poor connection. Cleaning the contact points and tightening the strap resolved all issues.
When the Usual Fixes Don't Work
- In one documented case on a similar platform, an owner with a U0100 code performed the check recommended by TSB #PIC4740E on the transmission X1 connector and found no issues. The problem persisted after checking fuses and replacing the battery. The actual root cause was a corroded main engine-to-chassis ground strap, a more fundamental electrical issue that was causing the communication failure. This highlights the importance of checking primary power and ground circuits before focusing exclusively on TSB-documented connector issues.
OEM Part Supersession History
12619582→N/A— This is the primary OEM part number for the 2009 SRX 3.6L ECM.
Heads up: This module is associated with hardware #12614423 and may also be referenced by GM EPC part number 12623327. The unit must be programmed with the vehicle's VIN to ensure compatibility.
Helpful Videos


We Have This Part in Stock

The information in this article is provided for general reference and educational purposes only. Vehicle specifications, procedures, and part compatibility can vary by production date, trim level, and region. Always consult your vehicle's factory service manual and verify part numbers before purchasing or performing repairs. Safety-critical components such as airbags, seat belts, and braking systems should be installed by a qualified professional.
- Cadillac SRX:
- 🧭 Diagnostic Flowchart
- 🎬 Helpful Videos
- 🛍️ Shop This Part
- What's Unique About the 2009-2009 Cadillac SRX
- Symptoms You May Notice
- Most Likely Causes
- Rare But Worth Checking
- Diagnosis Steps
- Parts You'll Likely Need
- Related Codes That Often Appear With This One
- Technical Service Bulletins (TSBs) & Recalls
- Platform-Specific Known Issues
- Mechanic-Grade Diagnostic Values
- Scan Tool Commands That Help
- Wiring & Ground Locations
- Real Owner Repair Stories
- When the Usual Fixes Don't Work
- OEM Part Supersession History
- 🎟️ Get 5% Off