
U0100 on 2007-2012 Chevrolet Avalanche: Lost Communication with ECM/PCM Fixes
On a 2007-2012 Avalanche, code U0100 most often points to a wiring or ground issue, not a failed Engine Control Module (ECM). The most common culprits are poor ground connections on the engine block (G102, G103, G108), chafed wiring harnesses near the driver's side valve cover, or corroded terminals in the 16-pin transmission connector, as detailed in GM TSB #08-07-30-021H.
- U0100 on a 2007-2012 Avalanche is most often a wiring or ground problem, not a bad ECM.
- Before replacing any parts, thoroughly inspect engine grounds, the main transmission connector, and the engine harness for chafing, as detailed in TSB #08-07-30-021H.
- Symptoms are often severe, including no-start, stalling, and erratic gauge behavior, making the vehicle unsafe to drive.
- Diagnosis can be complex and is best left to a professional or an experienced DIYer with a good multimeter and knowledge of vehicle electrical systems.
What's Unique About the 2007-2012 Chevrolet AVALANCHE
The 2007-2012 Avalanche is part of the GMT900 truck platform, which is known for specific electrical vulnerabilities that can trigger a U0100 code. GM issued a detailed Technical Service Bulletin (TSB #08-07-30-021H) that points to common failure points like poor engine grounds, chafed wiring harnesses (especially near the driver's side valve cover, ECM/TCM bracket, and transmission), and corroded or backed-out terminals in the main 16-pin transmission connector. These issues are far more frequent than an actual ECM failure on this platform, a fact corroborated by numerous owner experiences in online forums.
Diagnostic Flowchart
Tap your situation to follow the diagnostic path that matches what you're seeing on this vehicle.
Symptoms You May Notice
- Check Engine Light is on
- Engine may not crank or start intermittently
- Engine may stall while driving, sometimes when hitting a bump or during a shift
- Transmission may not shift correctly or may be stuck in one gear (limp mode)
- Instrument panel gauges fluctuate erratically or go dead
- Various warning lights illuminated (ABS, StabiliTrak, Traction Control).
- Message on Driver Information Center (DIC) like 'Service StabiliTrak' or 'Service Traction Control'.
- Door locks cycling intermittently.
- Audible chimes operating without reason.
- Loss of power or reduced engine performance
- Replacing the ECM without first checking grounds, wiring harnesses, and connectors. This is an expensive and often incorrect first step.
- Replacing the battery without testing the alternator and checking for parasitic draws, which might be the actual cause of low system voltage.
- Replacing the TCM when the issue is in the connector or harness between the TCM and ECM.
Most Likely Causes
- Poor or Broken Ground Connections 🔴 High Probability The GMT900 platform has known issues with specific ground points becoming corroded or the wires breaking inside the crimped terminal lug. Key locations include grounds on the engine block (G102, G103), front of the cylinder heads, and the main ground strap from the firewall to the engine block (G108). Vibration and heat can cause these connections to fail intermittently, disrupting the circuit for the ECM and other modules.
How to confirm: Perform a visual inspection of the main ground straps and wires on the engine block and frame. A common failure, documented by owners, is a ground wire breaking *inside* the ring terminal insulation, appearing visually intact but failing under load. Perform a voltage drop test from the negative battery terminal to the ECM case and engine block; a reading above 0.1-0.2 volts indicates a bad ground. Wiggling the ground wires while monitoring for symptoms can also help identify an intermittent connection.
Typical fix: Remove, clean all mating surfaces to bare metal, and securely re-fasten the ground connections. If a wire is broken within the terminal, a new copper ring terminal must be properly crimped onto the harness.
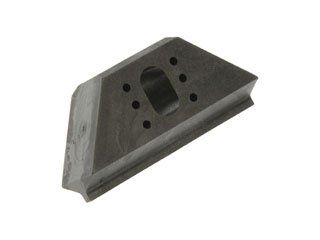
Est. part cost: $5-$20 - Chafed or Damaged Wiring Harness 🔴 High Probability TSB #08-07-30-021H and a separate TSB specifically mention that the engine wiring harness can chafe against engine or chassis components. Common rub-through spots are against the ECM/TCM bracket, the driver's side upper control arm, and a shock tower bolt. This can short or break the CAN bus wires (a twisted pair, typically Tan and Tan/Black).
How to confirm: Visually inspect the entire engine wiring harness for signs of rubbing, melting, or damage. Pay close attention to the areas mentioned above. Check the CAN bus wires for continuity and for being shorted to ground or power using a multimeter. This should be done with the battery disconnected.
Typical fix: Repair the damaged wires by soldering and sealing with heat shrink tubing. Reroute or re-secure the harness using sleeves and zip ties to prevent future damage, as outlined in GM service procedures.
Est. part cost: $10-$50 - Corroded or Backed-Out Terminals in Transmission Connector 🟡 Medium Probability → Shop Transmission Assembly TSB #08-07-30-021H highlights that terminals for the high-speed GMLAN data bus can back out of the 16-way electrical connector at the transmission, causing an intermittent loss of communication between the ECM and TCM. Water intrusion can also cause corrosion on these critical pins.
How to confirm: Disconnect the large 16-pin connector at the transmission. Inspect for any green or white corrosion, moisture, or pins that are not fully seated. Gently tug on the Tan and Tan/Black wires to ensure the terminals are secure in the connector body.
Typical fix: Clean any corrosion from the connector and pins using an electrical contact cleaner and a small brush. Reseat any backed-out terminals and ensure the connector's terminal position assurance (TPA) lock is fully engaged. If corrosion is severe, the affected terminals or the connector pigtail may need to be replaced.
Est. part cost: $20-$100 - Low Battery Voltage or Faulty Alternator ⚪ Low Probability → Shop Alternator All modern control modules require a stable voltage (typically above 12.0V) to operate correctly. A weak battery, corroded terminals, or a failing alternator can cause voltage drops that lead to random communication errors across the network, often triggering a U0100 code first.
How to confirm: Test the battery voltage with the engine off; it should be at least 12.4 volts. With the engine running, check the alternator output at the battery terminals; it should be between 13.7 and 14.7 volts. Load test the battery to confirm its health, as a battery can show good voltage but fail under load.
Typical fix: Recharge or replace the battery. If the alternator output is low, it will need to be replaced.
Est. part cost: $150-$400
Rare But Worth Checking
- Failed Engine Control Module (ECM): → Shop Engine Control Module (ECM) While this is what the code directly points to, actual ECM failure is less common than wiring or ground issues. All other possibilities must be exhausted before condemning the ECM. A no-start condition combined with a lack of 5-volt reference at sensors (like the MAP sensor) points more strongly toward a failed ECM.
- Faulty Terminating Resistor: The high-speed CAN bus has two 120-ohm terminating resistors. On this platform, one is typically internal to the ECM, and the other is in a different module like the Electronic Brake Control Module (EBCM/ABS module). If one fails or the module containing it loses power/ground, the total bus resistance will change from 60 ohms to 120 ohms, disrupting communication.
- Faulty Body Control Module (BCM) or other module: → Shop Body Control Module A different module on the CAN bus can fail in a way that it 'screams' on the network (broadcasts garbage data), preventing other modules, including the ECM, from communicating. Another common issue is a poor ground for the BCM itself (G218 on some platform mates), which can cause it to malfunction and disrupt the network. Diagnosing this requires a scan tool that can see which modules are online.
Diagnosis Steps
- Check the battery and charging system. Ensure voltage is stable and above 12.4V with the engine off and 13.7-14.7V when running.
- Scan for all DTCs in all modules. Note which modules are not communicating. If only the ECM is offline, the problem is specific to it. If multiple modules are offline, suspect a network-wide wiring issue.
- Inspect all fuses related to the ECM, PCM, and TCM in the underhood fuse block. Check for power at the ECM/PCM fuses with the key on.
- Locate and inspect the primary engine and chassis grounds as specified in TSB #08-07-30-021H, specifically G102, G103, and G108 on/near the engine block. Disassemble, clean all contact surfaces until they are shiny, and re-secure them tightly. Check for wires broken inside the terminal lug.
- Inspect the 16-way transmission pass-through connector for corrosion, moisture, or backed-out pins.
- With the battery disconnected, measure the resistance between Pin 6 and Pin 14 of the Data Link Connector (DLC). A healthy reading is approximately 60 ohms. A reading of 120 ohms indicates an open circuit or a missing terminating resistor. A reading near 0 ohms indicates the CAN wires are shorted together.
- With the key on, measure the voltage on Pin 6 (CAN High) and Pin 14 (CAN Low) of the DLC separately, referencing a good chassis ground. Both should be around 2.5V. On CAN High, the voltage should fluctuate slightly above 2.5V (e.g., 2.6V average), and on CAN Low, it should fluctuate slightly below 2.5V (e.g., 2.4V average).
- If resistance and voltage tests are abnormal, begin inspecting the harness for chafe points, especially near the ECM bracket, transmission, and along the frame rail.
Parts You'll Likely Need
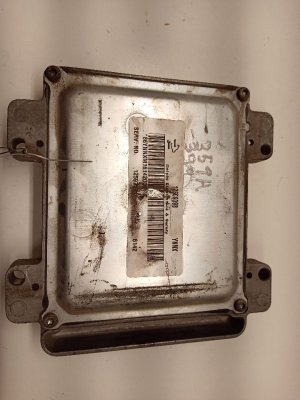
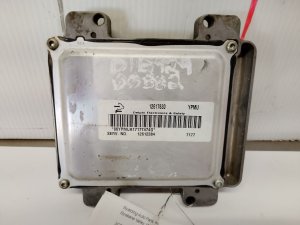
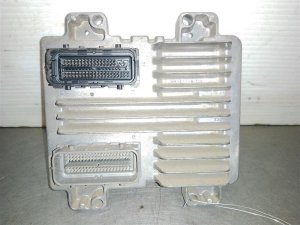
- Engine Control Module (ECM) — This is the last resort after all wiring, ground, and other module issues have been ruled out. The ECM is the 'brain' and if it fails internally, it must be replaced.
Trusted brands: ACDelco
OEM price range: $400-$800
Aftermarket price range: $250-$500 - Engine Wiring Harness — If chafing or corrosion is severe and cannot be reliably repaired, replacing a section or the entire harness may be necessary.
Trusted brands: ACDelco, Standard Motor Products
OEM price range: $500-$1000
Aftermarket price range: $300-$700 - Battery — A weak or failing battery is a simple but common cause of various communication codes due to low system voltage.
Trusted brands: ACDelco, DieHard, Optima
OEM price range: $200-$300
Aftermarket price range: $150-$250
Related Codes That Often Appear With This One
- U0101 — Lost Communication with Transmission Control Module (TCM). The ECM and TCM work very closely and often lose communication at the same time due to a shared wiring (transmission connector), power, or ground issue.
- U0073 — Control Module Communication Bus 'A' Off. This is a general code indicating a fault with the high-speed GMLAN bus itself, often caused by a wiring short, open circuit, or missing terminating resistor.
- U0121 — Lost Communication With Anti-Lock Brake System (ABS) Control Module. This indicates the network-wide communication problem is affecting other key safety systems and may point to an issue with the terminating resistor located in the ABS module.
- U0140 — Lost Communication With Body Control Module (BCM). This often appears with U0100 as the BCM is a central hub for many vehicle functions and is on the same network. A faulty BCM or its ground can sometimes be the source of the entire network failure.
Technical Service Bulletins (TSBs) & Recalls
- 08-07-30-021H: Loss of High Speed GMLAN Communications, Intermittent No Crank, IP Gage Fluctuation, Various Warning Lamps Illuminated, Transmission May Not Shift, Communication DTCs U0073, U0100, U0101, etc. Set.
Platform-Specific Known Issues
- Real-World Repair: Broken Ground Wire Inside Crimp: A well-documented case on a GMT900 platform vehicle (Tahoe) involved a sudden stall with U0100 and U0101 codes. After initial inspection showed nothing, a deeper look revealed the main engine harness ground wire had broken *inside* the crimped ring lug where it attaches to the engine block. The connection looked secure but would intermittently open when the engine torqued, cutting power to the modules. The fix was to cut off the old lug, strip the wire, and install a new, high-quality ring terminal, which permanently resolved the issue. This highlights the importance of physically testing ground connections, not just visually inspecting them.
Mechanic-Grade Diagnostic Values
- CAN Bus Network Resistance — expected: Approximately 60 ohms (+/- 5 ohms).. Failure: A reading of ~120 ohms indicates an open in the bus or a faulty terminating resistor. A reading near 0 ohms indicates the CAN High and CAN Low wires are shorted together.
- CAN Bus Voltage (Key On, Engine Off) — expected: CAN High (Pin 6 to ground) should be ~2.5V, fluctuating slightly higher (e.g., 2.6V). CAN Low (Pin 14 to ground) should be ~2.5V, fluctuating slightly lower (e.g., 2.4V).. Failure: Voltages shorted to ground will read 0V. Voltages shorted to power will read battery voltage. Both wires reading the same voltage could indicate they are shorted together.
- ECM 5-Volt Reference — expected: 5 Volts at reference wire on various engine sensors (e.g., MAP, TPS) with key on.. Failure: A reading of 0V or significantly less than 5V when the ECM should be powered on can indicate an internal failure of the ECM's power supply.
Scan Tool Commands That Help
- Tech2 / GDS2: Module Status / Poll Modules — Use this function at the start of diagnosis to see a list of all control modules on the network and identify which ones are not communicating. If multiple modules are offline, it points to a network-wide issue rather than a single failed module.
- Tech2 / GDS2: Service Programming System (SPS) — This is used to update or reprogram a module's software. It should only be used *after* all physical layer faults (wiring, grounds, connectors, resistance checks) have been ruled out. SPS will not fix a U0100 code caused by a physical problem.
Wiring & Ground Locations
- G102 — On the driver's side of the engine block, below the cylinder head.. Provides a ground path for the ignition coils. A poor connection can cause electrical noise or voltage issues that may affect the ECM.
- G103 — On the front of the passenger side cylinder head.. This is a critical ground point for the Engine Control Module (ECM) and Transmission Control Module (TCM) on some GMT900 configurations.
- G104 — On the left rear corner of the engine, where a ground strap from the firewall attaches to the cylinder head.. This is a primary engine-to-body ground. An intermittent connection here can cause the ECM to lose its ground reference when the engine torques, leading to stalling and communication loss.
- G108 — On the firewall, where the main engine-to-body ground strap (from G104) attaches.. Completes the main engine-to-body ground circuit. Corrosion or looseness here can cause the same issues as a bad G104.
- G218 — Under the driver's side dashboard, behind the plastic kick panel near the A-pillar or hood release lever.. This is a primary ground for the Body Control Module (BCM). A poor connection here (often due to trapped insulation from the factory per TSB #PIT5405A) can cause the BCM to malfunction and disrupt the entire CAN bus network.
- Underhood Fuse Block (UBEC) — Driver's side of the engine bay.. The UBEC is a major junction for power and data lines. It can suffer from internal corrosion on its multi-layered circuit board, causing intermittent power to the ECM and triggering communication codes.
- Data Link Connector (DLC) — Under the driver's side dashboard, to the left of the steering column.. This is the primary diagnostic access point. Pins 6 (CAN High) and 14 (CAN Low) are used for all high-speed network diagnostics.
Real Owner Repair Stories
- YouTube user, based on TSB #08-07-30-021H (2007-2014 GM Truck (Tahoe shown)) — Stalling when shifting into reverse, intermittent no-start, communication codes U0100/U0101.
❌ Tried (didn't work) Initially cleaning the ground connection and re-tightening it.
✅ What actually fixed it The ground wire for the ECM/TCM (at G104 on the back of the engine block) had broken *inside* the crimped ring terminal. It looked visually intact and would sometimes make a connection, but would separate when the engine torqued in reverse, causing the stall. The fix was to cut off the old terminal, strip the wire, and crimp on a new ring terminal.
"I Checked Everything" — The Actual Cause
- A common scenario reported by mechanics is where all visible checks are clean, but the U0100 code persists intermittently, especially when the engine moves or torques. The root cause was found to be a main engine ground wire that had broken internally, right at the crimped ring terminal. A visual inspection shows a secure bolt, and a simple multimeter test might show continuity at rest. However, the connection separates under load (engine torque), causing the ECM to lose power and drop off the network. This hidden failure can only be found by performing a voltage drop test while the engine is running and under load, or by physically tugging hard on the ground wires at the terminal to see if they pull out.
OEM Part Supersession History
12597121 (Service Number)→This is a common service number for the E38 ECM used in 2007. It is directly compatible with and replaces part numbers 12589297, 12603892, 12608676, 12612290, 12612738, and 19210738, among others.— Standard production updates and hardware revisions.
Heads up: When replacing the ECM, it MUST be programmed with the vehicle's specific VIN and software calibration. A used module from another vehicle will cause a no-start condition until it is reprogrammed by a dealer or a properly equipped shop using a tool like Tech2/GDS2 with an SPS subscription.
Model Year Variations Within This Range
- 2007-2012: While many diagnostic principles are the same for the GMT900 platform, the specific ECM hardware could vary. Many early models use the ACDelco E38 ECM, while some later models within this range or on adjacent platforms may use different hardware (like the E78). This can affect connector pinouts and specific software. Always verify the part number on the original module before ordering a replacement.
Helpful Videos

Used OEM Parts in Stock

New Aftermarket Parts Available


The information in this article is provided for general reference and educational purposes only. Vehicle specifications, procedures, and part compatibility can vary by production date, trim level, and region. Always consult your vehicle's factory service manual and verify part numbers before purchasing or performing repairs. Safety-critical components such as airbags, seat belts, and braking systems should be installed by a qualified professional.
- Chevrolet AVALANCHE:
- 🧭 Diagnostic Flowchart
- 🎬 Helpful Videos
- 🛍️ Shop This Part
- What's Unique About the 2007-2012 Chevrolet AVALANCHE
- Symptoms You May Notice
- Most Likely Causes
- Rare But Worth Checking
- Diagnosis Steps
- Parts You'll Likely Need
- Related Codes That Often Appear With This One
- Technical Service Bulletins (TSBs) & Recalls
- Platform-Specific Known Issues
- Mechanic-Grade Diagnostic Values
- Scan Tool Commands That Help
- Wiring & Ground Locations
- Real Owner Repair Stories
- "I Checked Everything" — The Actual Cause
- OEM Part Supersession History
- Model Year Variations Within This Range
- 🎟️ Get 5% Off