
U0140 on 2007-2012 Chevrolet Avalanche: Causes and Fixes for Lost BCM Communication
On a 2007-2012 Avalanche, code U0140 almost always points to a wiring or connector issue, not a failed Body Control Module (BCM). A GM Technical Service Bulletin (TSB) highlights this known problem. The fix involves inspecting and repairing harness connectors, particularly under the driver's side of the vehicle and at the transmission.
- U0140 on a 2007-2012 Avalanche indicates a loss of communication with the Body Control Module (BCM).
- Symptoms are severe and can make the vehicle undrivable, including transmission shifting failures and no-start conditions.
- The most probable cause is a wiring or connector issue, specifically at the transmission harness connector, as detailed in GM TSB #08-07-30-021H.
- Do not replace the BCM until all wiring, connectors, and grounds have been thoroughly inspected and confirmed to be in good condition.
- Due to the complexity of network diagnostics, professional help with the right scan tools is strongly recommended.
What's Unique About the 2007-2012 Chevrolet AVALANCHE
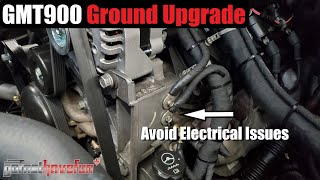
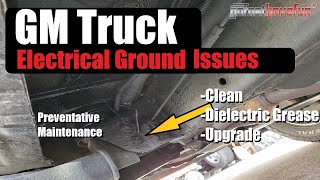
The 2007-2012 Avalanche is part of GM's GMT900 truck platform. These vehicles are specifically called out in GM Technical Service Bulletin #08-07-30-021H for having issues with intermittent network failures. The bulletin notes that code U0140 is often caused by poor connections or chafed wiring in the main vehicle harnesses, particularly at major connectors like the one for the transmission, rather than an actual failure of the BCM itself. Another common point of failure on this platform is the BCM ground G218, located behind the driver's side kick panel, where sound-deadening material can get trapped from the factory, causing a poor connection.
Diagnostic Flowchart
Tap your situation to follow the diagnostic path that matches what you're seeing on this vehicle.
Symptoms You May Notice
- Transmission may not shift or may be stuck in one gear (often 2nd).
- Multiple warning lights on the instrument panel, such as for ABS or Stabilitrak.
- Instrument cluster gauges may fluctuate or freeze.
- Door locks may cycle on their own.
- Intermittent no-crank or no-start condition.
- Power windows, locks, or mirrors stop working.
- Wipers operate continuously or not at all.
- Service Hybrid System, Service Brake System, or other DIC messages may appear.
- Engine may stall.
- Replacing the BCM without first thoroughly inspecting all related wiring and connectors. TSB #08-07-30-021H and #PIT4730B specifically warn against this, as wiring is the more frequent cause of the fault.
Most Likely Causes
- Wiring Harness or Connector Fault 🔴 High Probability As documented in TSB #08-07-30-021H, these vehicles are prone to issues with wiring, particularly corrosion in the 16-way transmission harness connector and chafing in harnesses under the driver's side. Water intrusion from clogged sunroof drains can also drip on the BCM and its connectors. The harness above the transfer case is another known chafe point.
How to confirm: Visually inspect the transmission connector for backed-out pins or corrosion. Inspect wiring harnesses routed along the frame and under the driver's side carpet for signs of damage, chafing, or water intrusion. Check connectors X150 and X109 for poor terminal fit or not being fully seated.
Typical fix: Repairing the damaged section of the wiring harness or cleaning/replacing the affected connector terminals. Dielectric grease should be applied to prevent future moisture intrusion.
Est. part cost: $10-$50 - Poor Ground Connection 🔴 High Probability GM vehicles of this era are sensitive to ground issues. TSB PIT5405C specifically notes that ground G218 (the primary BCM ground) often has dash insulation trapped under the terminal from the factory. This ground is located behind the driver's side kick panel, attached to the A-pillar. 🎬 Watch: How to find and clean common GM ground locations. Other grounds like G102 and G300 can also cause issues.
How to confirm: Locate ground G218 behind the driver's side kick panel. Disassemble, clean all contact surfaces to bare metal, ensure no insulation is trapped, and re-secure it tightly. Use a multimeter to check for less than 0.1 Ω of resistance between the BCM ground pin and a clean chassis point. A voltage drop test on the ground pin should show ≤100–200 mV.
Typical fix: Clean and secure the ground connection. Remove any foreign material from under the ring terminal.
Est. part cost: $0-$5 - Faulty Body Control Module (BCM) 🟡 Medium Probability → Shop Body Control Module While less common than wiring issues, the BCM can fail internally due to electrical faults or moisture intrusion. TSB #PIT4730B notes that the BCM can appear offline intermittently after a brief network short, leading to misdiagnosis. The BCM will not communicate again until the ignition is cycled and the module fully powers down, which can take up to 20 minutes.
How to confirm: After confirming all wiring, grounds, and power feeds to the BCM are good, use a professional scan tool to attempt to communicate directly with the BCM. If it will not communicate despite having good power and ground, the module is likely faulty.
Typical fix: Replace the Body Control Module. The new BCM will require programming to the vehicle's VIN using specialized software like GM's Techline Connect (SPS). After programming, a 'Setup SDM Primary Key' procedure is mandatory to sync with the airbag module and allow the engine to start. 🎬 See a professional walkthrough of BCM diagnosis and programming.
Est. part cost: $250-$450 - Failed CAN Bus Termination Resistor ⚪ Low Probability The GMLAN network relies on two 120-ohm termination resistors to function. TSB #08-07-30-021H mentions that an open or shorted data link resistor can cause the network to go down. On these trucks, one resistor is typically in the Electronic Brake Control Module (EBCM/ABS module) and the other is in the Instrument Panel Cluster (IPC) or another module at the opposite end of the bus.
How to confirm: With the battery disconnected, measure the resistance between Pin 6 (CAN High) and Pin 14 (CAN Low) at the Data Link Connector (DLC). A healthy network should read approximately 60 ohms. A reading of 120 ohms indicates one of the resistors or the wiring to it has failed. A reading significantly different from 60 or 120 ohms suggests a wiring short.
Typical fix: If a termination resistor is confirmed to be faulty, the module containing it (e.g., the EBCM) must be replaced. These resistors are internal to the modules.
Est. part cost: $200-$600 - Low Battery Voltage ⚪ Low Probability → Shop Vehicle Battery
How to confirm: Test the battery voltage with a multimeter. A healthy battery should read approximately 12.4-12.6 volts with the engine off. Have the battery load-tested at an auto parts store, as a weak battery can cause communication issues under load even if voltage seems okay.
Typical fix: Charge or replace the vehicle's battery.
Est. part cost: $150-$250
Diagnosis Steps
- Check and charge the battery. Ensure voltage is above 12.4V and have it load tested.
- Use a scan tool to check for codes in ALL modules. Note all U-codes present, as they point to a network-wide issue.
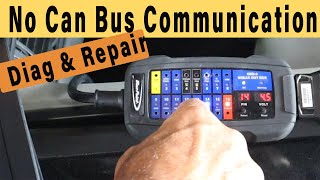
- Disconnect the battery. Measure resistance between Pin 6 (CAN-H) and Pin 14 (CAN-L) on the DLC. The reading should be ~60 Ohms. If it's 120 Ohms, a termination resistor is bad. If it's near zero, the CAN wires are shorted together. 🎬 Watch: Step-by-step guide to resolving CAN bus network errors.
- Locate and inspect ground G218 behind the driver's side kick panel. Remove the bolt, clean the terminal and body surface to bare metal, ensure no insulation is caught, and re-secure tightly.
- Carefully inspect the 16-way electrical connector at the transmission for corrosion, moisture, or backed-out pins, as detailed in TSB #08-07-30-021H.
- Inspect the wiring harnesses under the driver's side dash, along the frame rail, and above the transfer case for any signs of chafing, pinching, or other damage.
- If wiring and grounds are good, reconnect the battery. Using a multimeter, check for battery voltage and good ground at the BCM connector pins. Refer to a wiring diagram for specific pin numbers.
- If all wiring, power, and grounds are good, attempt to communicate directly with the BCM using a capable scan tool. If it is unresponsive, the BCM is the likely point of failure.
Parts You'll Likely Need
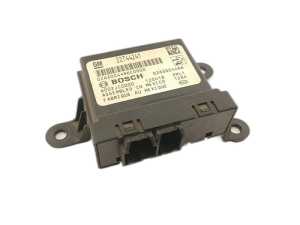
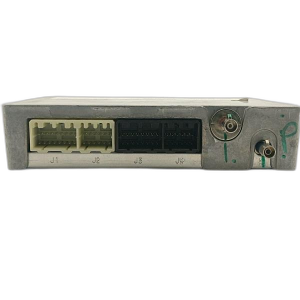
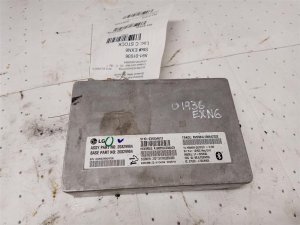
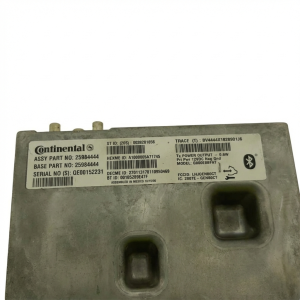
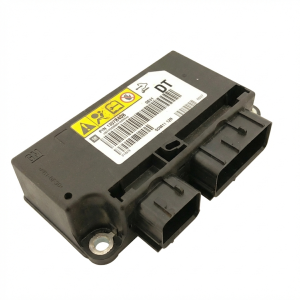
- Body Control Module (BCM)
(OEM #15284816 (example for 2007-2011, check VIN for exact match))— This is the module that has lost communication. It is replaced only after all wiring and connection issues have been ruled out. Requires programming.
Trusted brands: ACDelco (GM Genuine), Dorman (Remanufactured)
OEM price range: $300-$450
Aftermarket price range: $200-$350 - Wiring Harness Connector Pigtail — If corrosion is found in the transmission connector or another harness connector, the connector body and terminals may need to be replaced.
Trusted brands: ACDelco, Dorman
OEM price range: $40-$80
Aftermarket price range: $20-$50
Related Codes That Often Appear With This One
- U0073 — Control Module Communication Bus 'A' Off. This is a general network failure code often set alongside U0140.
- U0100 — Lost Communication with ECM/PCM. This indicates the network disruption is affecting communication with the engine computer.
- U0101 — Lost Communication with TCM. This often points to the transmission harness connector, a known issue on these trucks.
- U0121 — Lost Communication with ABS Control Module. This indicates the network problem is also affecting the anti-lock brake system.
Technical Service Bulletins (TSBs) & Recalls
- Bulletin #08-07-30-021H: Addresses loss of high-speed GMLAN communications, which can set code U0140 and cause symptoms like the transmission not shifting and various warning lamps illuminating.
- Bulletin #PIT4730B: Warns against unnecessarily replacing the BCM, explaining how it can appear offline intermittently due to temporary network faults.
- Bulletin #07-08-47-004D: Informs technicians that removing a BCM ground while the module is powered can cause internal damage, stressing the importance of disconnecting the negative battery cable first.
Platform-Specific Known Issues
- TSB #08-07-30-021H: This bulletin is the most critical document for this issue. It describes a condition of losing high-speed GMLAN communications, leading to symptoms like a no-start condition, illuminated warning lamps, and the transmission not shifting. It specifically points to wiring and connector issues rather than module failure as the primary cause.
Mechanic-Grade Diagnostic Values
- CAN Bus Network Resistance — expected: ~60 Ω (Ohms). Failure: 120 Ω indicates an open circuit or a failed termination resistor. Near 0 Ω indicates a short between the high and low CAN lines.
- CAN Bus Idle Voltage — expected: CAN-H: ~2.5 V, CAN-L: ~2.5 V. Failure: Significant deviation from 2.5V on either line at idle (key on, engine off) indicates a bus fault.
- CAN Bus Dominant State Voltage — expected: CAN-H: ~3.5 V, CAN-L: ~1.5 V. Failure: Inability for the lines to switch to these voltages during communication indicates a fault.
- BCM Ground Voltage Drop — expected: ≤100–200 mV (0.1-0.2 V). Failure: A reading higher than 200mV indicates excessive resistance in the ground circuit, a common problem with G218.
- BCM Power and Ground Pins (2008 Example) — expected: Pins 2 & 3 (RD/WH wires) on connector X3 should have battery voltage. Pin 1 (BK/WH wire) on connector X3 is the ground.. Failure: Lack of voltage on power pins or high resistance on the ground pin confirms a circuit issue before the BCM.
Hidden / Shadow Codes Worth Checking
- B1001: Configuration Error / SDM Mismatch. This code sets in the BCM after it has been replaced and programmed, but before it has been electronically 'handshaken' with the Sensing and Diagnostic Module (airbag controller). (see via A professional scan tool like the GM GDS2/Tech2 or a high-end Autel/Snap-on scanner will see this code. The vehicle may not start and the airbag light will be on until this is resolved.)
Scan Tool Commands That Help
- GDS2 / Tech2: BCM Programming / SPS — This is not a diagnostic command, but a mandatory procedure when a new BCM is installed. It flashes the module with the correct VIN-specific software and vehicle options.
- GDS2 / Tech2 / Capable High-End Scan Tool: Setup SDM Primary Key in BCM — This is a critical, mandatory step immediately after programming a new BCM. It synchronizes the security information between the new BCM and the existing airbag module (SDM). The vehicle will not start until this procedure is successfully completed.
- GDS2 / Tech2: Brake Pedal Position Sensor Learn — This may be required after BCM replacement on some models to recalibrate the brake pedal position sensor, which is an input to the BCM.
Wiring & Ground Locations
- BCM (Body Control Module) — Under the driver's side dashboard, typically to the left of the steering column.. This is the module that has lost communication. All power, ground, and data line connections at its multi-pin connectors (X1, X2, X3, etc.) are primary inspection points.
- G218 — Behind the driver's side kick panel, bolted to the A-pillar body structure.. This is the primary ground for the BCM. It is a well-documented failure point where dash insulation gets trapped under the terminal from the factory, causing an intermittent connection and triggering U0140.
- Splice Pack JX221 / SP205 — Located in the instrument panel wiring harness, behind the left side of the dashboard.. The GMLAN network wires from multiple modules join at this splice pack. Corrosion or a poor connection inside the pack can disrupt the entire network and cause communication codes for various modules.
- Connector X109 — A large inline harness connector located in the engine compartment on the driver's side, below the underhood fuse block.. This is a major pass-through connector for many circuits. Poor seating, corrosion, or pin damage here can cause network-wide communication failures.
Real Owner Repair Stories
- Consensus from silveradosierra.com and chevytrucks.org forums (2007-2012 Chevrolet Silverado / GMC Sierra (GMT900 Platform)) — Sudden onset of flickering dash lights, radio and HVAC cutting out, door locks cycling, multiple 'Service' messages (Stabilitrak, Trailer Brake), and codes U0140 and U0073.
❌ Tried (didn't work) Replacing the battery, Replacing the alternator, Checking all visible fuses
✅ What actually fixed it The definitive fix in the vast majority of documented cases was cleaning the BCM ground G218, located behind the driver's side kick panel. The bolt was removed, the contact surfaces were sanded to bare metal, and the terminal was re-secured. - Reddit user UsAndTheDogs in r/ChevyAvalanche (2007 Chevrolet Avalanche) — Vehicle's main battery died, and after replacement, the BCM was 'fried'. The truck would not start.
❌ Tried (didn't work) Installing a junkyard BCM allowed the truck to start and run, but the brake lights and radio would not work, and other system warnings were present.
✅ What actually fixed it Having the junkyard BCM professionally programmed ('flashed') to the vehicle's VIN. The total cost was $40 for the part and $175 for the mobile programming service.
"I Checked Everything" — The Actual Cause
- In the context of network codes, the equivalent of a 'smoke test clean' is when the CAN bus resistance measures a perfect 60 ohms, yet the fault persists. In these cases, the root cause is often an intermittent failure that doesn't show up during a static test. The most common culprit is the G218 ground connection, which may have just enough contact to pass a resistance test but fails under electrical load or vibration. Another cause can be a different faulty module (like the ABS or radio) that intermittently floods the network with bad data, crashing the bus. The diagnostic step is to disconnect modules from the network one by one until communication with the BCM is restored.
OEM Part Supersession History
15284816→N/A— This part number appears to be stable for the specified years, but many other BCM part numbers exist for the same GMT900 platform depending on exact year and RPO codes (vehicle options).
Heads up: It is critical to match the replacement BCM by the original part number on the module itself and then program it to the vehicle's VIN. A BCM from another truck (e.g., an Escalade with part #25934763) may physically fit but will not have the correct hardware or internal configuration, causing programming to fail or features to be inoperative.
Model Year Variations Within This Range
- 2007-2012: The fundamental causes (G218 ground, harness chafing) are consistent across the entire generation. However, later models in the range may require additional scan tool relearn procedures after BCM replacement, such as for the Brake Pedal Position (BPP) sensor and Passenger Presence System (PPS), in addition to the mandatory SDM key setup.
Helpful Videos


We Have This Part in Stock

The information in this article is provided for general reference and educational purposes only. Vehicle specifications, procedures, and part compatibility can vary by production date, trim level, and region. Always consult your vehicle's factory service manual and verify part numbers before purchasing or performing repairs. Safety-critical components such as airbags, seat belts, and braking systems should be installed by a qualified professional.
- Chevrolet AVALANCHE:
- 🧭 Diagnostic Flowchart
- 🎬 Helpful Videos
- 🛍️ Shop This Part
- What's Unique About the 2007-2012 Chevrolet AVALANCHE
- Symptoms You May Notice
- Most Likely Causes
- Diagnosis Steps
- Parts You'll Likely Need
- Related Codes That Often Appear With This One
- Technical Service Bulletins (TSBs) & Recalls
- Platform-Specific Known Issues
- Mechanic-Grade Diagnostic Values
- Hidden / Shadow Codes Worth Checking
- Scan Tool Commands That Help
- Wiring & Ground Locations
- Real Owner Repair Stories
- "I Checked Everything" — The Actual Cause
- OEM Part Supersession History
- Model Year Variations Within This Range
- 🎟️ Get 5% Off